Free Plans to Build a Dining Chair (#2)
Another Easy to Build Dining Chair
Hey there! I’ve got some exciting news for you. I just released the plans for the second chair in our dining chair series, and it’s absolutely free! If you remember, I shared the plans for Dining Chair #1 earlier. Well, this new chair follows a similar construction method, but with a few cool changes. It’s a bit taller and has a unique back design. So, if you’re interested in building your own dining chair, this is definitely worth checking out!
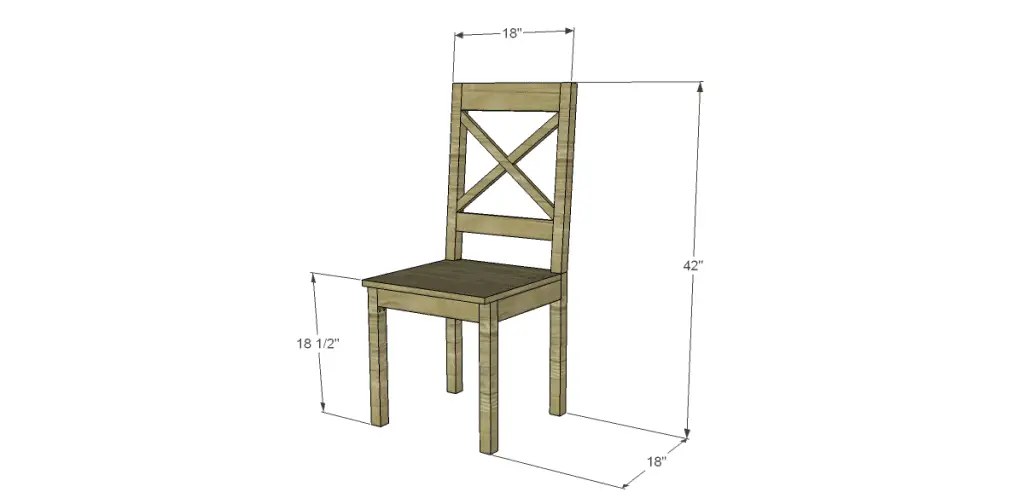
Materials:
- 1-1/4″ pocket hole screws
- 2″ pocket hole screws
- 2-1/2″ pocket hole screws
- 1-1/4″ brad nails
- Edge banding for seat, if desired (<– affiliate link!)
Lumber:
- 1 – 2×4 at 6′
- 1 – 1×6 at 6′
- Scrap of 3/4″ plywood for the seat
Cut List:
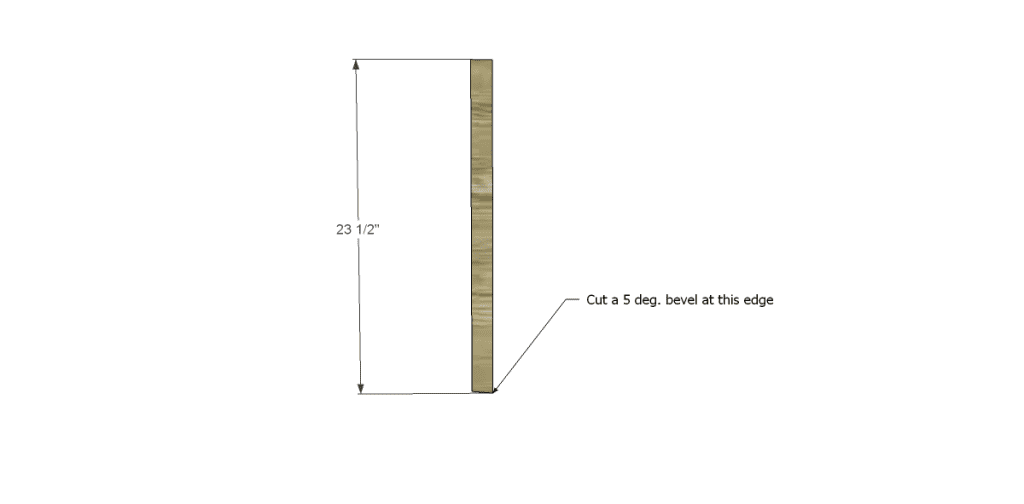
- 2 – 2×2 at 23-1/2″ – Upper Back Legs
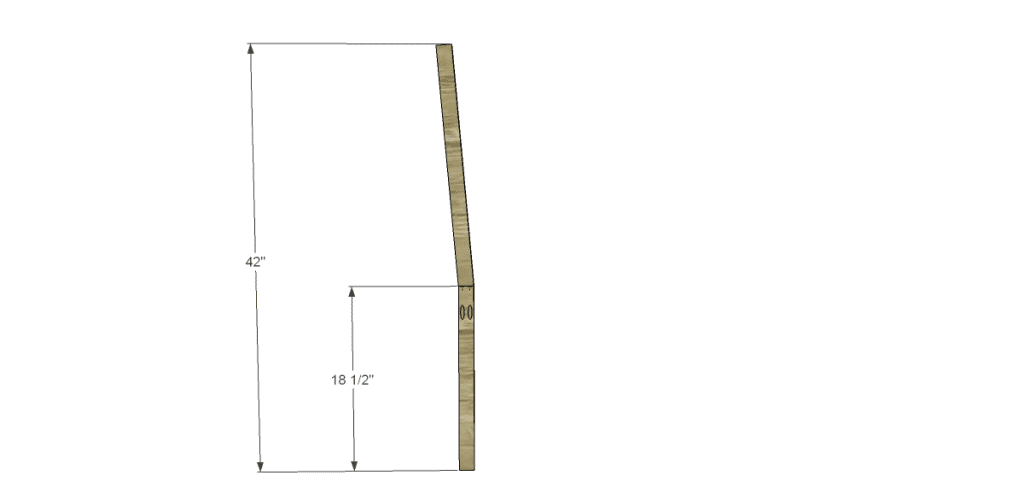
- 2 – 2×2 at 18-1/2″ – Lower Back Legs
- 2 – 2×2 at 17-3/4″ – Front Legs
- 3 – 1×3 at 15″ – Front & Back Aprons, Back Slat
- 1 – 1×4 at 15″ – Upper Back Slat
- 2 – 1×2 at 20-1/8″ – X
- 2 – 1×3 at 14″ – Stretchers
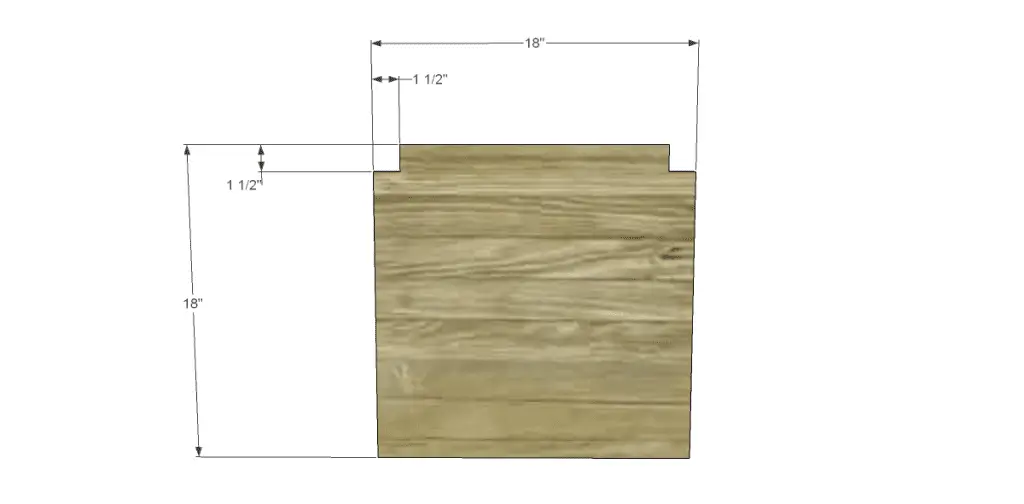
- 1 – 3/4″ plywood at 18″ x 18″ – Seat
Step One
Cut the pieces for the legs. Cut a 5 degree bevel in the bottom of each upper piece. The angle allows the back to “recline” so to speak! Drill pocket holes in the top edge only of the lower leg pieces then attach the top using glue and 2-1/2″ pocket hole screws.
Step Two
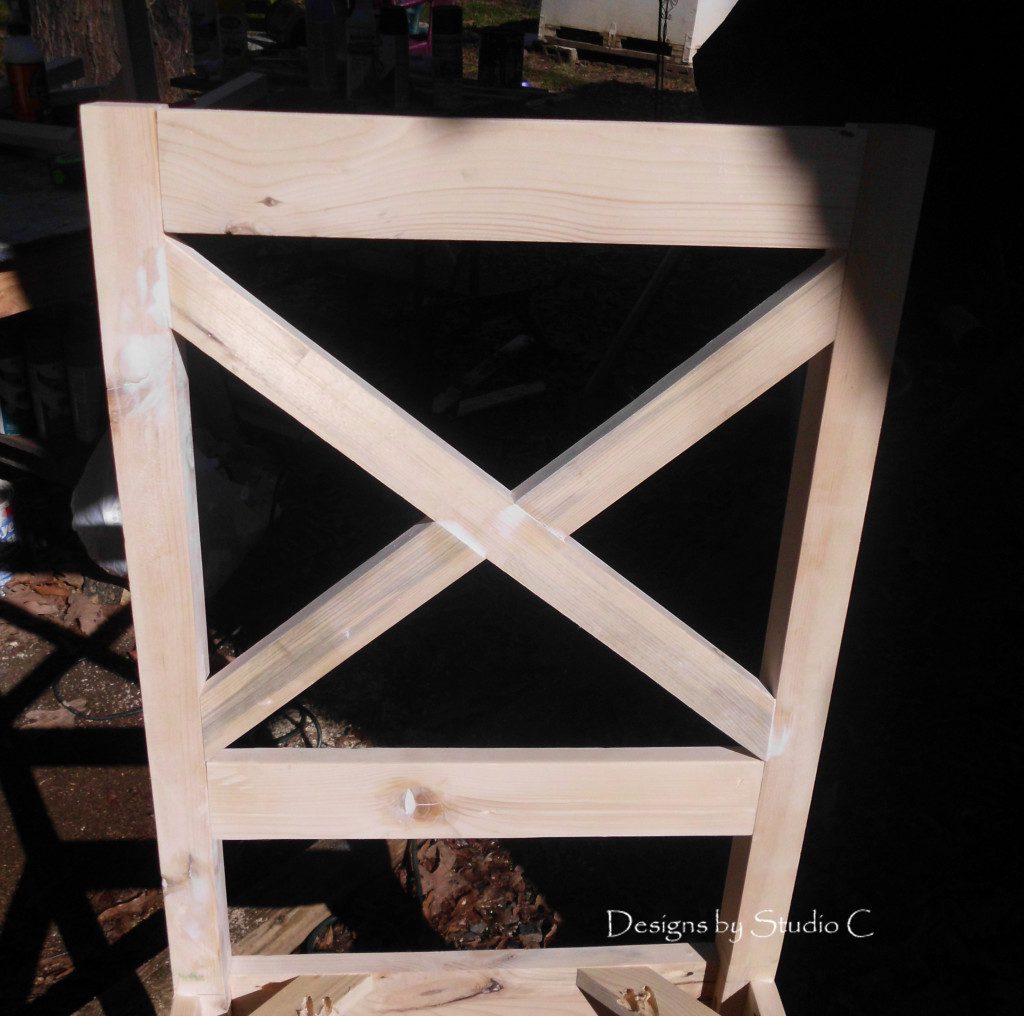
Cut the pieces for the X. The angles may have to be adjusted… The dimensions are what the program gives me and sometimes a few adjustments will need to be made. Once the pieces have been cut, assemble as shown using glue and 1-1/4″ pocket hole screws, then attach to the back using 1-1/4″ brad nails. the front face of the X will be flush with the front face of the legs.

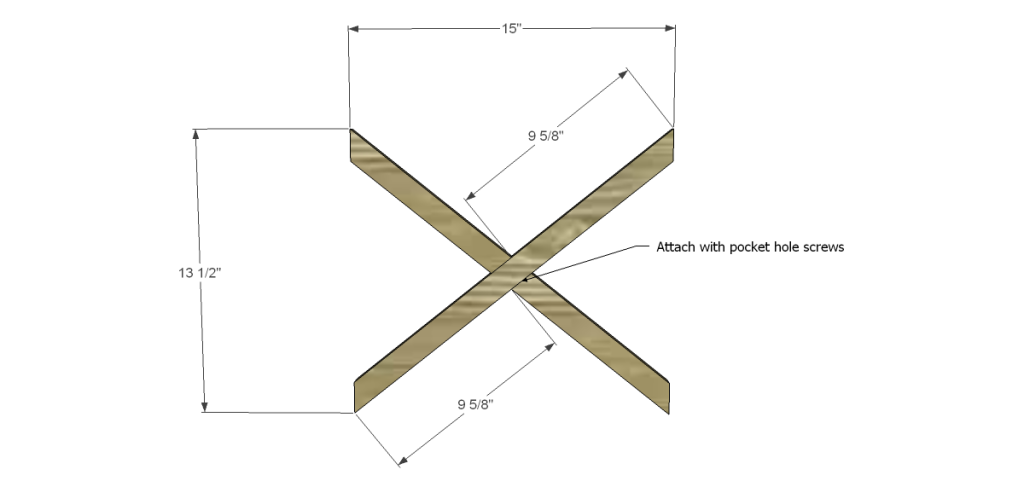
** You may have to play with the angles on the X… I’m building this chair for another project and couldn’t get the angle right. Here’s how mine looks –
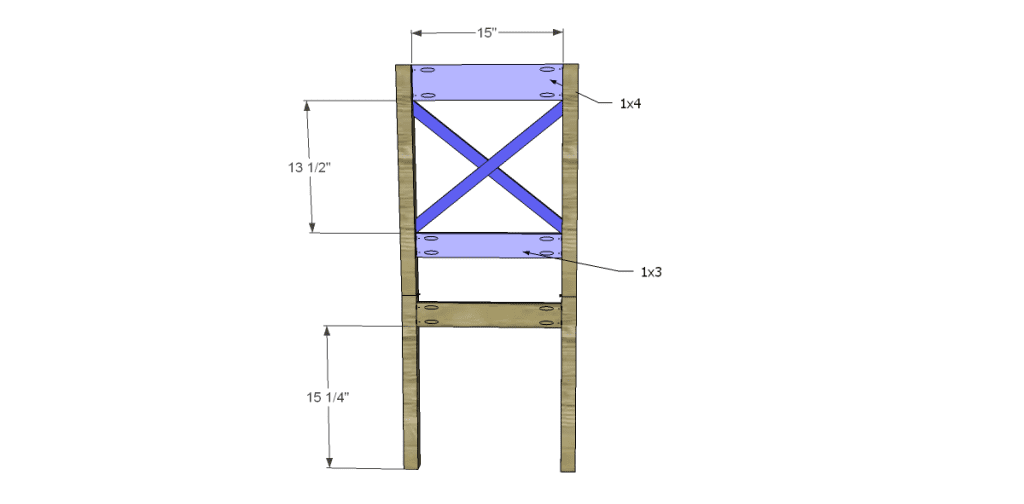
Cut the pieces for the back apron and the back slats. Drill pocket holes in each end of each piece. Secure using glue and 1-1/4″ pocket hole screws. The front faces of the slats will be flush with the front faces of the legs.
Drill pocket holes in each end of the back apron. Secure the piece as shown, the outer face will be flush with the back face of the lower legs.
Step Three
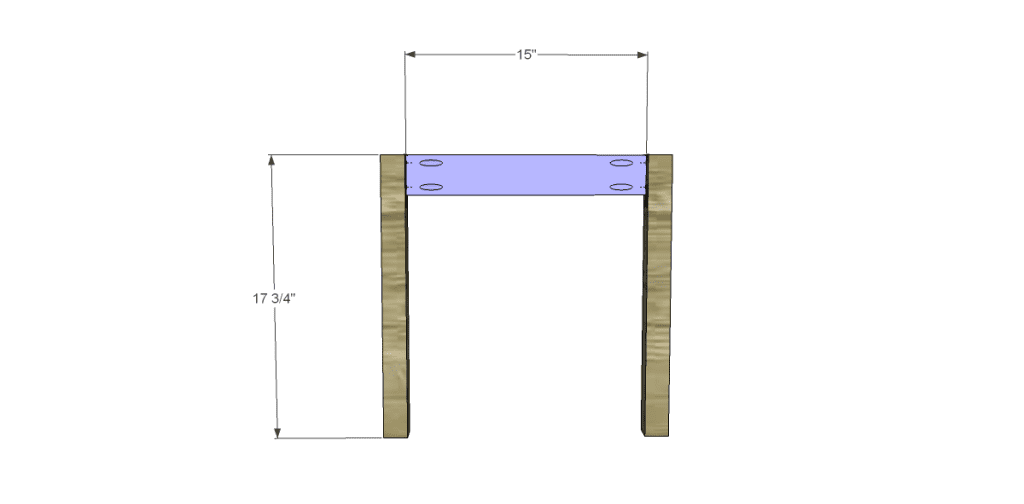
Cut the pieces for the front frame. Drill pocket holes in each end of the apron. Secure using glue and 1-1/4″ pocket hole screws. The front faces of the apron will be flush with the front faces of the legs.
Step Four
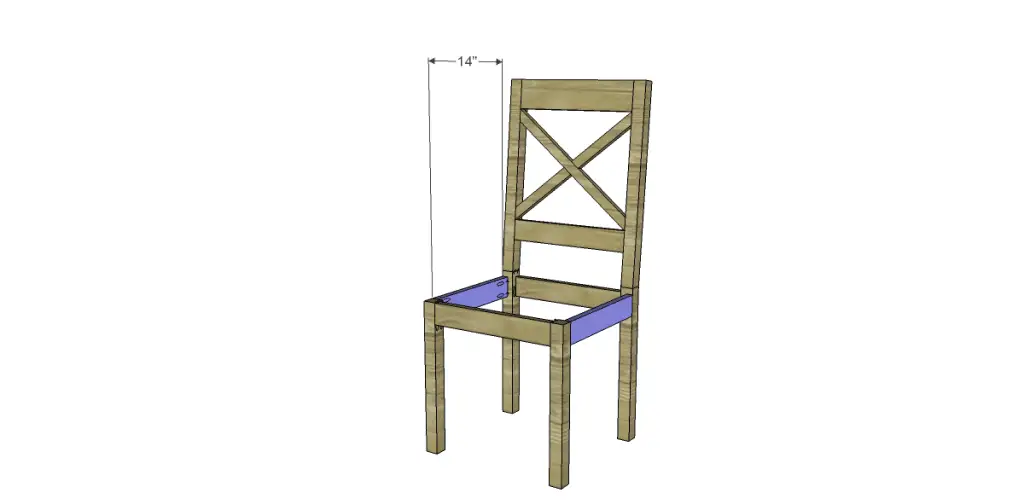
Cut the pieces for the stretchers and drill pocket holes in each end. Secure as shown using glue and 1-1/4″ pocket hole screws in the front legs and 2″ pocket hole screws in the back legs.
Step Five
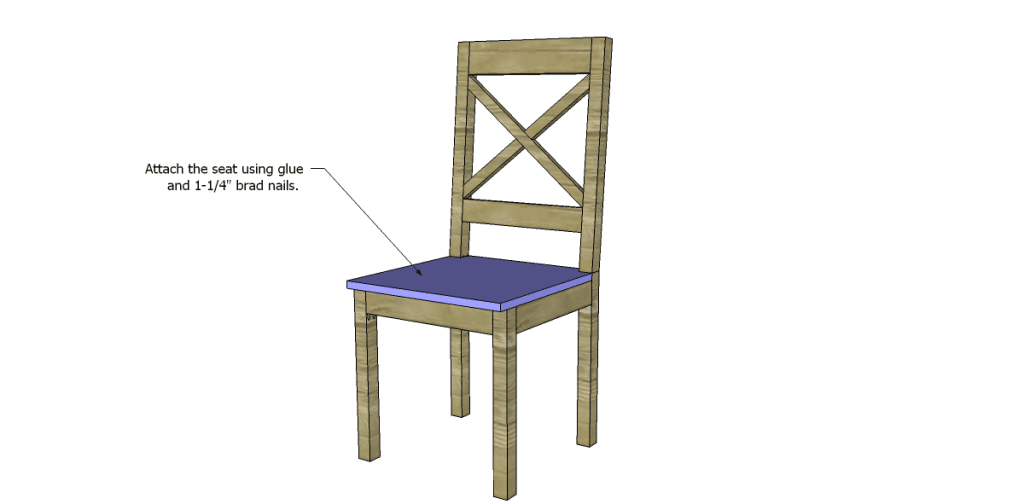
Cut the piece for the seat. Cut the notches for the legs as shown and apply edge banding if desired. Secure the seat to the frame using glue and 1-1/4″ brad nails.
Finish as desired.
Have any questions about the free plans to build a dining chair (#2)? Leave a comment below!
Originally posted 2013-02-06 08:00:18.


[…] the past few weeks, I’ve posted plans for three separate dining chairs – #1, #2, and #3. In the meantime, I’ve been alluding to an awesome project using all three […]
[…] Over the last couple of weeks I’ve posted plans for Dining Chair #1 and Dining Chair #2. Today’s plan is for Chair #3 and next week will be the last part of the series but it is […]
How did you hide the countersunk screws?
Hi, Danielle!
the countersunk screws can be hidden in a variety of ways including wood buttons, wood filler, etc. I hope this helps!
[…] I’ve posted plans for three separate dining chairs – #1, #2, and #3. In the meantime, I’ve been alluding to an awesome project using all three chairs…. So […]
[…] not build a fabulous chair to go with this […]
[…] Over the last couple of weeks I’ve posted plans for Dining Chair #1 and Dining Chair #2. Today, the free plans to build a dining chair (3) are here! This completes the dining chair series […]