
Free Plans to Build a Dining Chair (3)
The Third Dining Chair in a Special Series
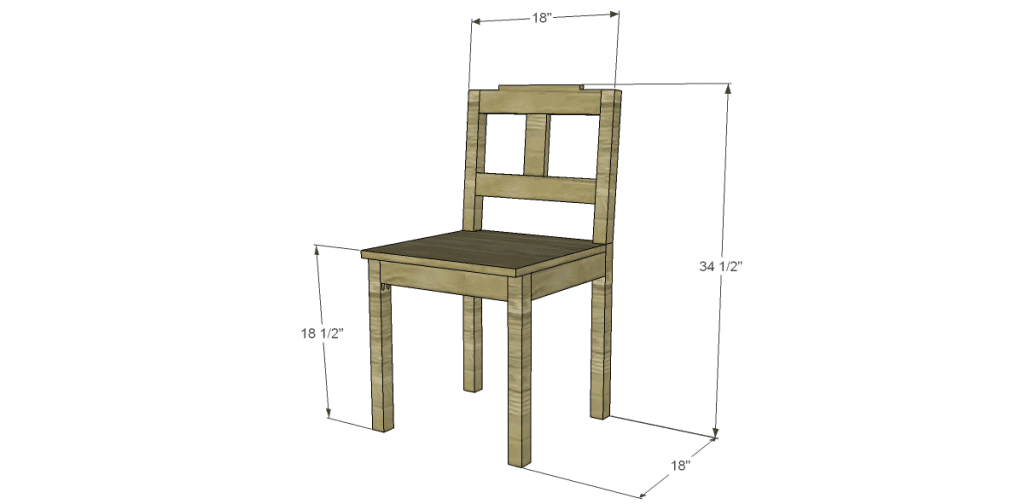
Alrighty… Over the last couple of weeks I’ve posted plans for Dining Chair #1 and Dining Chair #2. Today, the free plans to build a dining chair (3) are here! This completes the dining chair series that are all used in one project.
The back legs in these wooden dining chair plans are constructed in two pieces and can be altered to use a one-piece rear leg by combining the dimensions of the upper and lower leg with a 5° bevel on the upper portion!
Materials:
- 1-1/4″ pocket hole screws
- 2″ pocket hole screws
- 2-1/2″ pocket hole screws
- 1-1/4″ brad nails
- Edge banding for seat, if desired (<– affiliate link!)
Lumber:
- 1 – 2×4 at 6′
- 1 – 1×6 at 6′
- Scrap of 3/4″ plywood for the seat
Cut List:
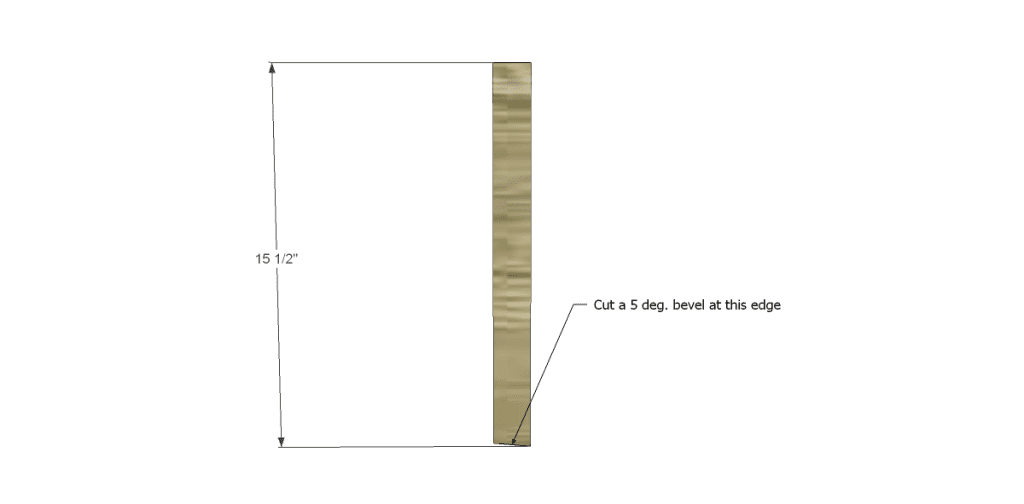
- 2 – 2×2 at 15-1/2″ – Upper Back Legs
- 2 – 2×2 at 18-1/2″ – Lower Back Legs
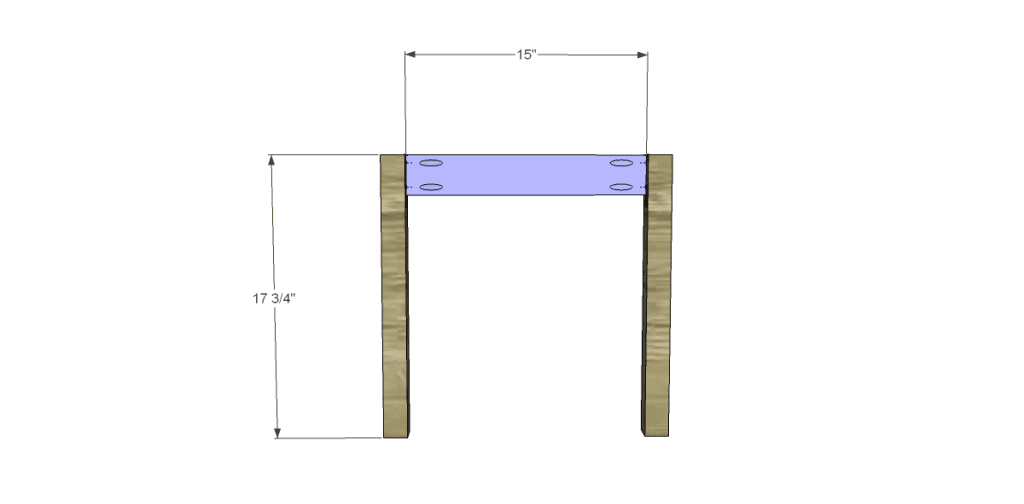
- 2 – 2×2 at 17-3/4″ – Front Legs
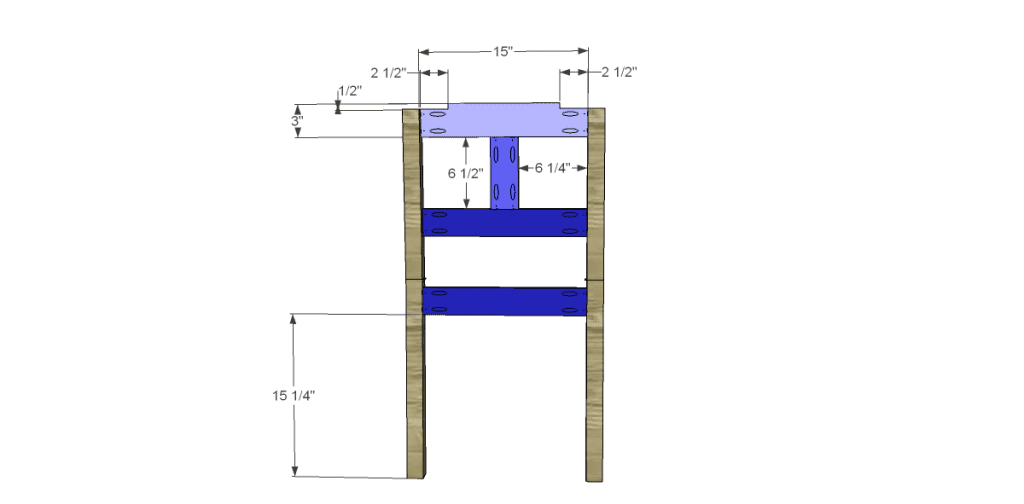
- 3 – 1×3 at 15″ – Front & Back Aprons, Back Slat
- 1 – 1×4 at 15″ – Upper Back Slat
- 1 – 1×3 at 6-1/2″ – Center Back
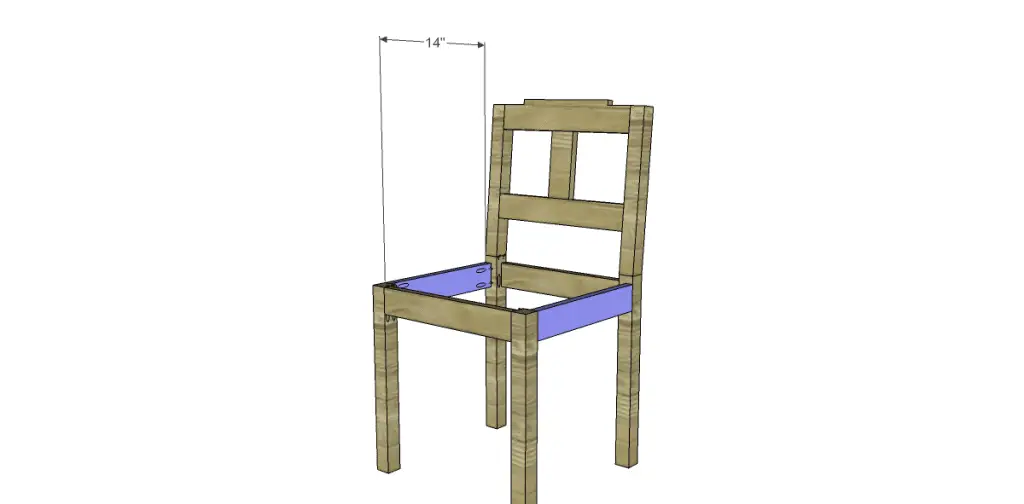
- 2 – 1×3 at 14″ – Stretchers
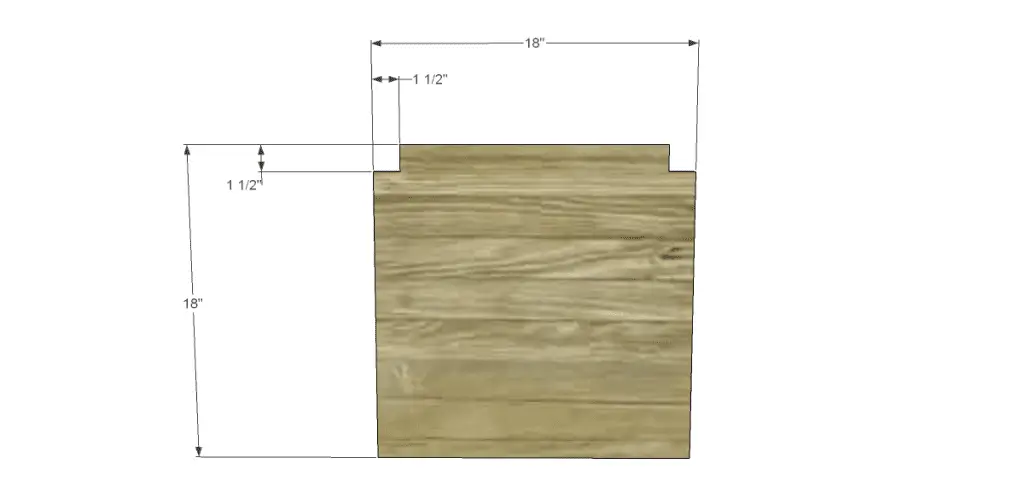
- 1 – 3/4″ plywood at 18″ x 18″ – Seat
Step One
Cut the pieces for the legs. Cut a 5 degree bevel in the bottom of each upper piece. The angle allows the back to “recline” so to speak! Drill pocket holes in the top edge only of the lower leg pieces then attach the top using glue and 2-1/2″ pocket hole screws.

Step Two
Cut the pieces for the back apron and the back slats. Cut the upper back slat using a jigsaw as shown. Drill pocket holes in each end of each piece. Secure using glue and 1-1/4″ pocket hole screws. The front faces of the slats will be flush with the front faces of the legs.
Drill pocket holes in each end of the back apron. Secure the piece as shown, the outer face will be flush with the back face of the lower legs.
Step Three
Cut the pieces for the front frame. Drill pocket holes in each end of the apron. Secure using glue and 1-1/4″ pocket hole screws. The front faces of the apron will be flush with the front faces of the legs.
Step Four
Cut the pieces for the stretchers and drill pocket holes in each end. Secure as shown using glue and 1-1/4″ pocket hole screws in the front legs and 2″ pocket hole screws in the back legs.
Step Five
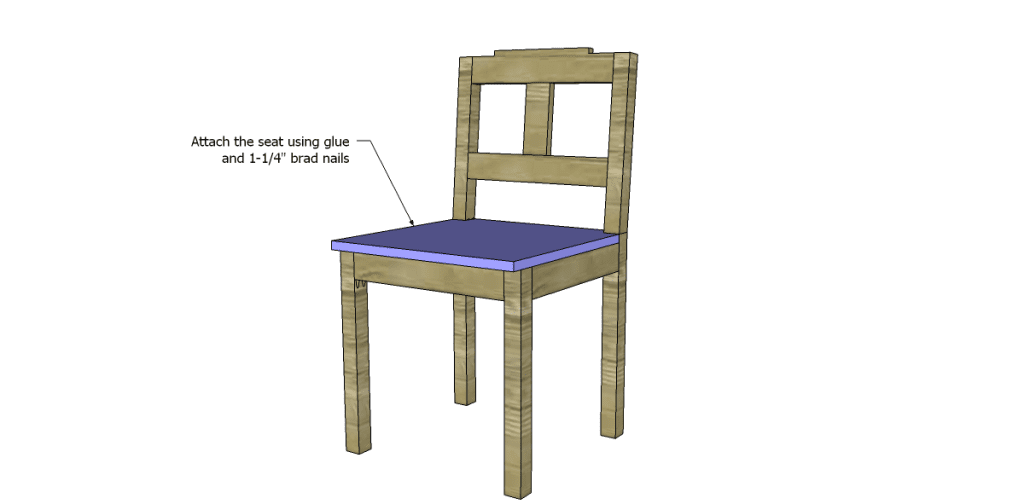
Cut the piece for the seat. Cut the notches for the legs as shown and apply edge banding if desired. Secure the seat to the frame using glue and 1-1/4″ brad nails.
Finish as desired.
Have questions about the free plans to build a dining chair (3)? Leave a comment below!
Originally posted 2013-02-13 08:00:19.