

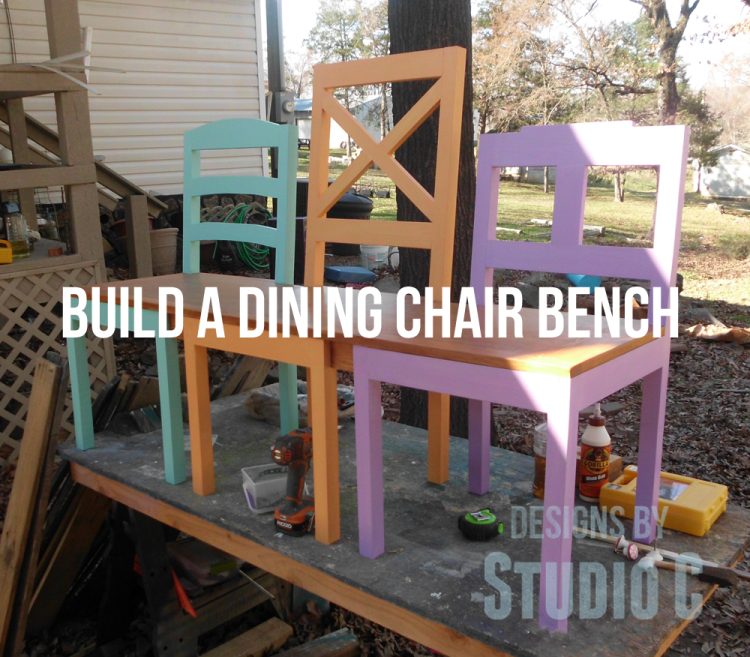
An Easy to Build Bench Using DIY Chair Frames
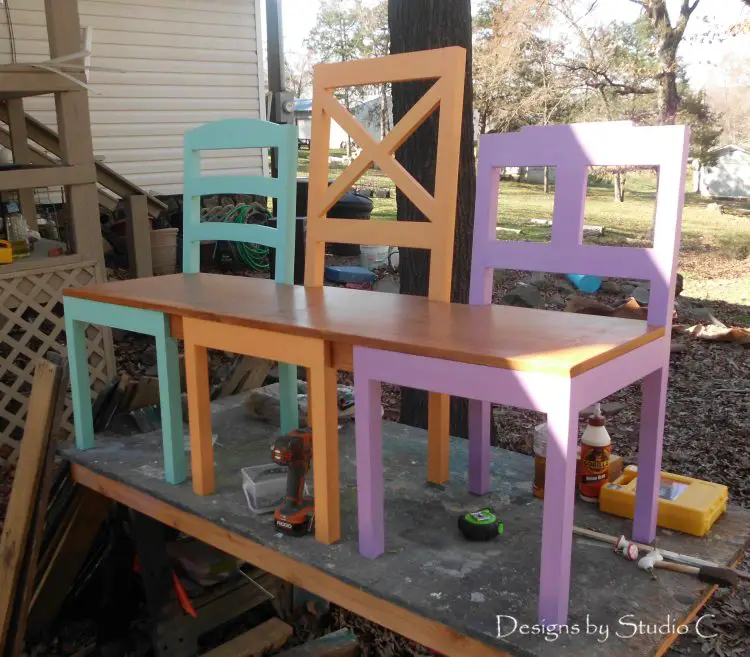
Previously, I’ve posted plans for three separate dining chairs – #1, #2, and #3. In the meantime, I’ve been alluding to an awesome project using all three chairs…. So (drumroll, please) I have created free plans to build a dining chair bench! Using the entire frame of each of the three chairs minus the seats, a few spacers, and one long seat make up this fantastic bench!
It was such an easy and fantastic build! Each chair is constructed of 2x4s and 1x6s ripped down to the appropriate sizes making this project cost me less than $50 to build! Yahoo! I spent more time on the finish that I did building! I gave the bench I built to my mom for her birthday. She was very surprised!
Materials:
- 1-1/4″ pocket hole screws (<– affiliate link!)
- 1-1/4″ screws
- 6 – 1-1/2″ corner braces (<– affiliate link!)
- Finishing supplies
Lumber:
- I used 2 – 2x4s at 8′, 2 – 1x6s at 8′, and a sheet of 3/4″ plywood for the entire bench
- If you are not comfortable ripping lumber on the tablesaw, see the lumber list for each chair for materials.
Cut List:
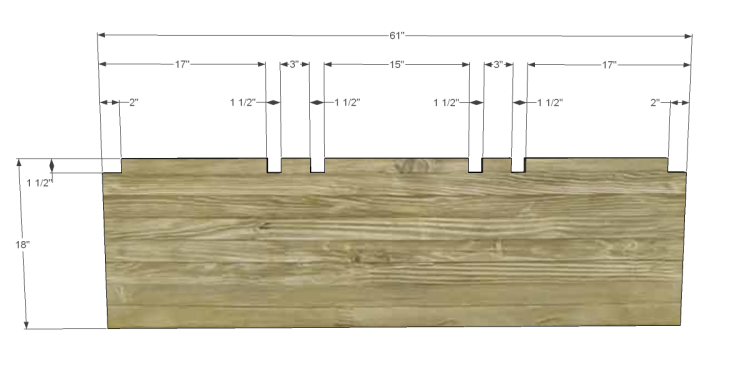
- 1 – 3/4″ plywood at 18″ x 61″ – Seat
- 3 – 1×3 at 3″ – Spacers
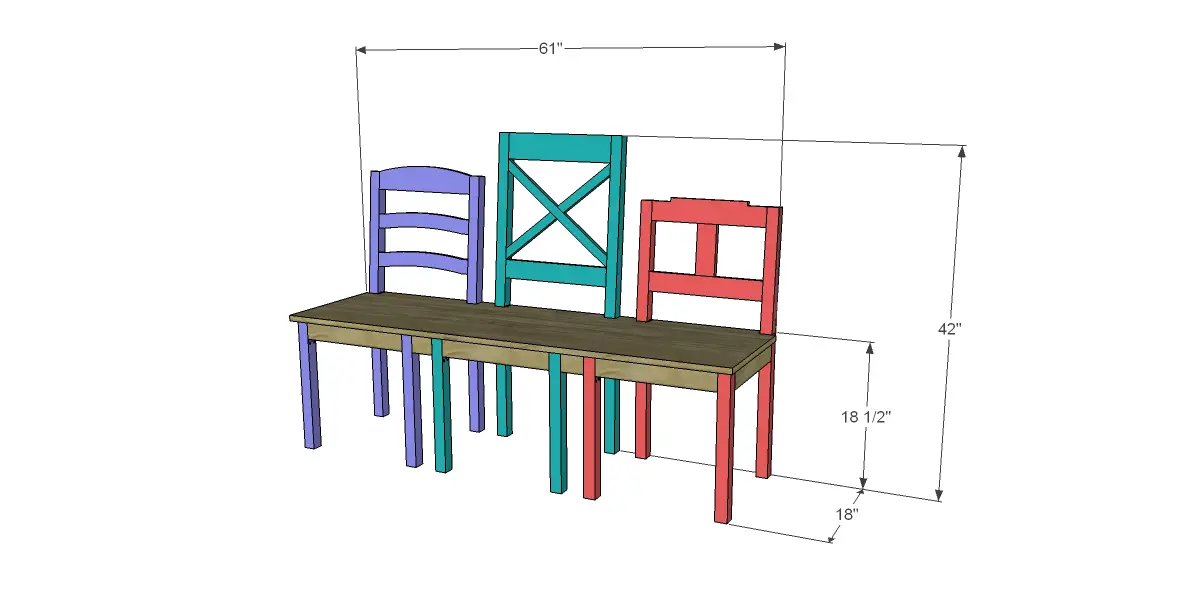
Click on the drawings for a larger view!
Step One
Each of the chairs should be fully constructed except for the seats. It also helps if each frame has been painted or stained.
Step Two
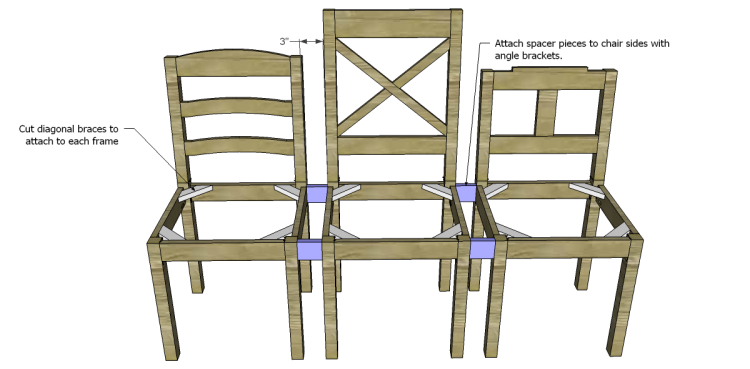
Cut the pieces for the spacers. Drill pocket holes in one end only of each piece. Attach to each side of the chair frame that will be in the center using glue and 1-1/4″ pocket hole screws. Use angle brackets to attach the other end of the spacers to the other chairs. Pocket holes are not used on both sides because it will be impossible to get the drill in there to secure the second set of screws!
Cut four diagonal braces for each chair frame from scrap 1x2s. Cut a 45 degree angle in each end and drill pocket holes. Attach to the seat frame using glue and 1-1/4″ pocket hole screws.
Step Three
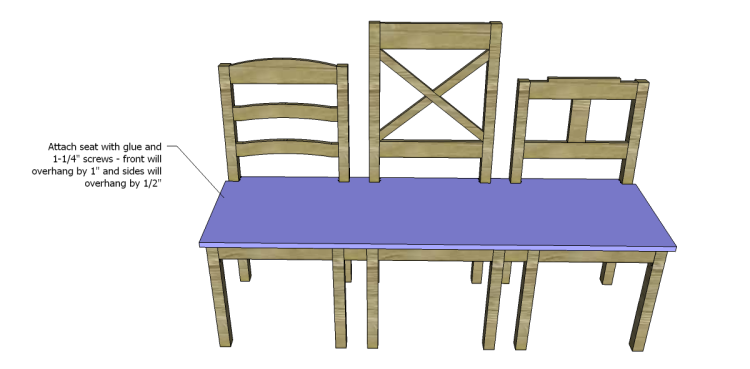
Cut the piece for the seat. Apply edge banding on the exposed edges of the plywood, if desired. For accuracy, I assembled the chairs with the spacers then marked the seat for the notches. The front of the seat will hang over by 1″ and the sides will hang over by 1/2″. Secure with 1-1/4″ screws through the diagonal braces into the bottom of the seat.
This bench would not only be fabulous on a porch or in an entryway, but it would look really awesome in the dining room at the table with a few of the individual chairs! Add casters to the bottom of the legs for extra mobility! Have any questions about the free plans to build a dining chair bench? Contact me at cher {at} designsbystudioc {dot} com or designsbystudioc {at} gmail {dot} com.
Sharing with The Real Thing with the Coake Family, Thirty Handmade Days, My Romantic Home, Common Ground, Jennifer Rizzo, 504 Main, Funky Junk Interiors
Originally posted 2014-04-09 08:00:04.


11 Comments
Genius idea!
Thank you so much! It came out so great and my mom really loves it! I think I’ll build another just for my dining table!
This is amazing! I initially thought you had secured a piece of wood across the top of three thrift store chairs…but you built them all. This is a really really cool idea. The plans are awesome- thanks so much for sharing those too.
Thank you! Initially, it was my idea to buy old wooden chairs but I couldn’t find any where I live and when I did, they were horribly expensive! I made these three chairs using two 2x4s and two 1×6 (ripped as needed), and it only cost me about $20 to build the whole bench! Stop by again soon!
What a neat looking bench…great birthday present. Thanks so much for linking up at the Real Family Fun link
party! Hope to see you next week.
KC
Thank you so much! I will definitely be there!
what a very sweet (unique) piece of handmade furniture! Great present for mom!
gail
ps catching you!
Thank you so much! It is so beautiful! My mom loves it but she won’t sit on it or let anyone touch it! I guess I’ll have to build her another to use!