
DIY 16 20 24 Plyo Box Plans
DIY Plyometric Box with Step-by-Step Instructions
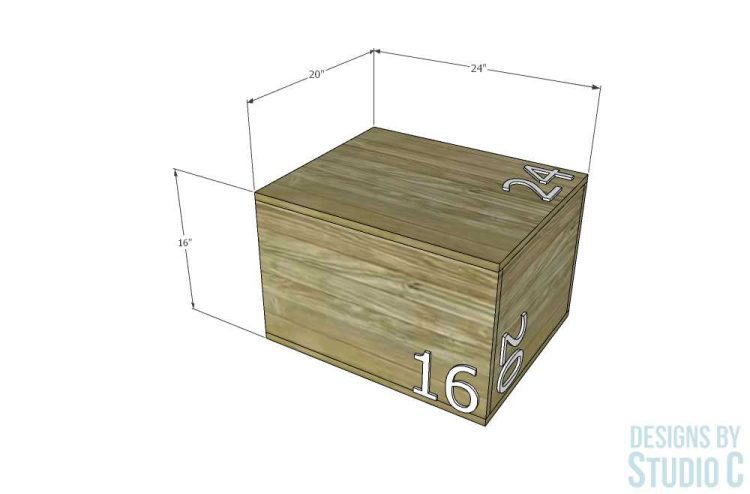
Ready to take your box jumps and HIIT workouts up a notch? Check out these DIY 16 20 24 plyo box plans! These plans are designed to construct a sturdier, bigger plyometric box using 3/4″ plywood and 1-1/2″ countersunk screws. An inner support ensures durability and strength even under the weight of your jumps, allowing for more intense workouts. Get ready for bigger gains!
The plyo box makes an excellent addition to the home gym. This plan is suitable for all skill levels and is an especially quick project since there will be no finishing!
Materials:
- 1-1/2″ screws (<– affiliate link!)
- Countersink bit
- Wood glue
Lumber:
- 1 – 4 x 8 sheet of 3/4″ plywood
Cut List:
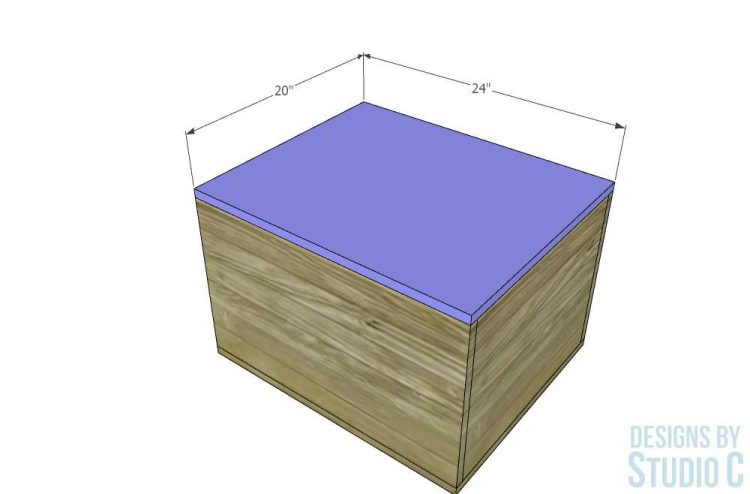
- 2 – 3/4″ plywood at 20″ x 24″ – Top and Bottom
- 2 – 3/4″ plywood at 14-1/2″ x 24″ – Sides
- 2 – 3/4″ plywood at 14-1/2″ x 18-1/2″ – Ends
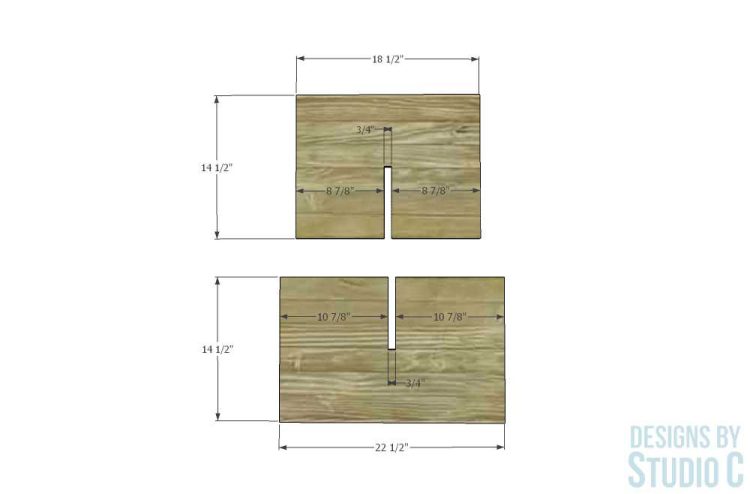
- 1 – 3/4″ plywood at 14-1/2″ x 18-1/2″ – Support Insert
- 1 – 3/4″ plywood at 14-1/2″ x 22-1/2″ – Support Insert

Notes About the Project:
- A jigsaw or bandsaw will be needed to cut the notches in the supports
- Sanding is totally optional… With repeated use of the plyometric box for workouts, the wood will smooth itself out!
Step One
Cut the pieces for the box: the top and bottom, sides, ends, and supports. Mark the position for the notches on the supports, and cut using a jigsaw. Sand the pieces if desired!
Step Two
Pre-drill countersunk holes along all four of the edges of the top and bottom pieces. Also drill countersunk holes along the 14-1/2″ edges of the end pieces as well as along the center (the 14-1/2″ direction) of the end and side pieces to secure the support.
Pro tip: Position the countersunk holes and screws about 2″ from each end to avoid conflicting with screws from the opposing side.
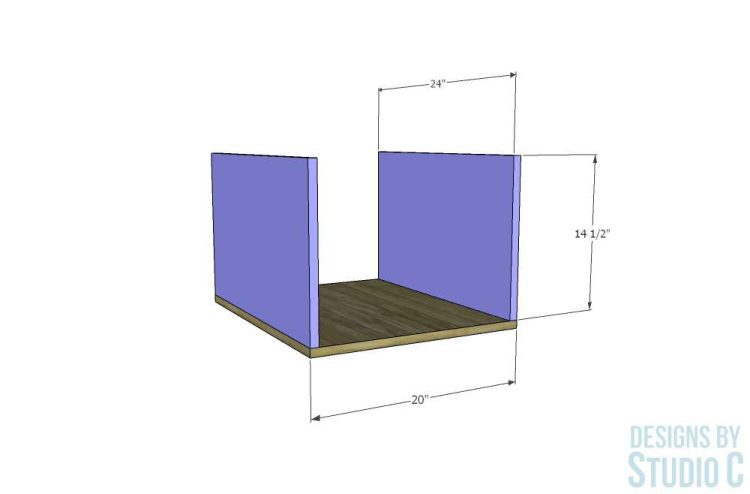
Apply a bead of glue, and place a side piece on the long edge. Insert and drive 1-1/2″ screws to secure. Repeat for the opposite side.
Step Three
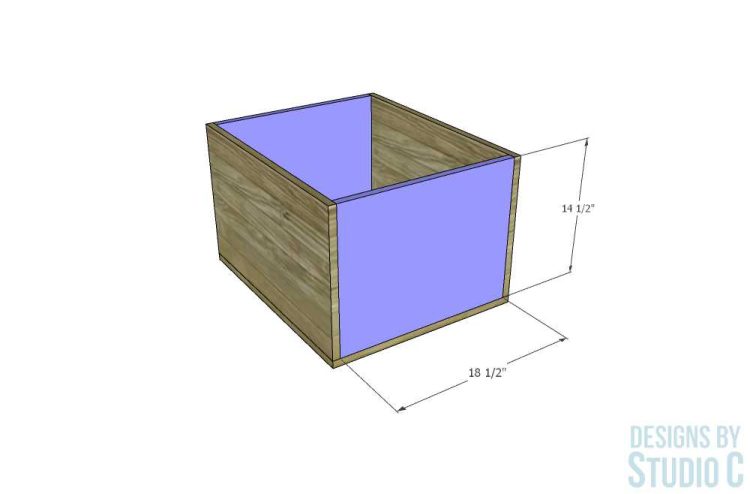
Apply a bead of glue along the 14-1/2″ edges of the end pieces. Place the end pieces between the side pieces, and secure in place using 1-1/2″ screws.
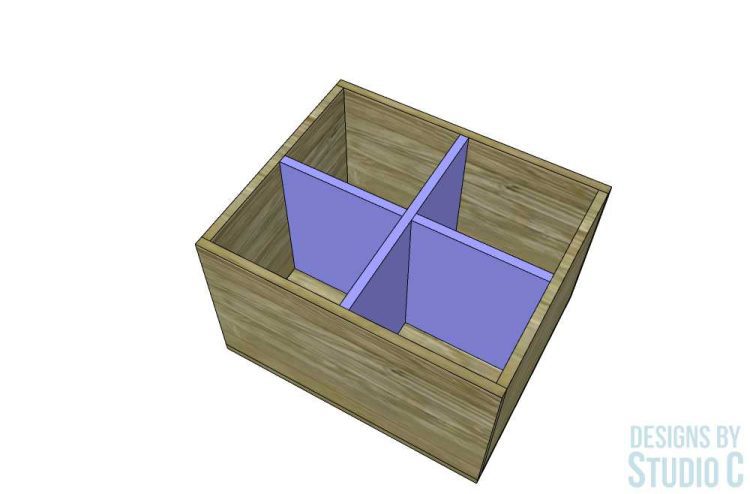
Step Four
Assemble the supports and place them inside. Secure the support in place using 1-1/2″ screws through the pre-drilled holes down the center of the ends and sides.
Step Five
Apply a bead of glue around the top edge. Add the top piece, and secure in place using 1-1/2″ screws.
Use a stencil and spray paint to add numbers to the appropriate sides of the DIY plyo box for jumps!
Have questions about the DIY 16 20 24 plyo box plans? Leave a comment below!
Originally posted 2021-12-11 18:15:25.
