DIY Plans to Build a Desk with an Old Door
A Fabulous Desk with a Unique Top
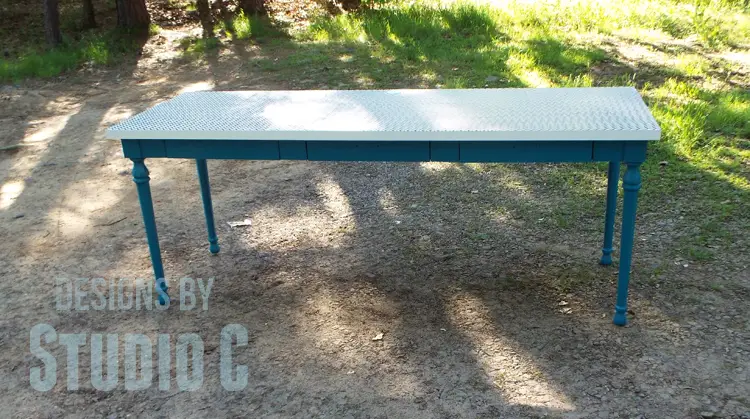
I’ve been wanting to make this desk for a while now – not because I needed another desk, but because I thought it would be a really fun project! The DIY plans I below show how to build a desk using an old door and it even has three drawers underneath the top. Instead of using new table legs, I decided to use some old ones I had and built a new frame that includes the drawers. The drawers are a bit narrow, but they’re perfect for storing paper and small office or craft supplies. I also found a clever way to manage cords by using the doorknob hole and adding a furniture grommet. Trust me, this project is super easy and you can finish making this DIY desk from an old door in just one weekend!
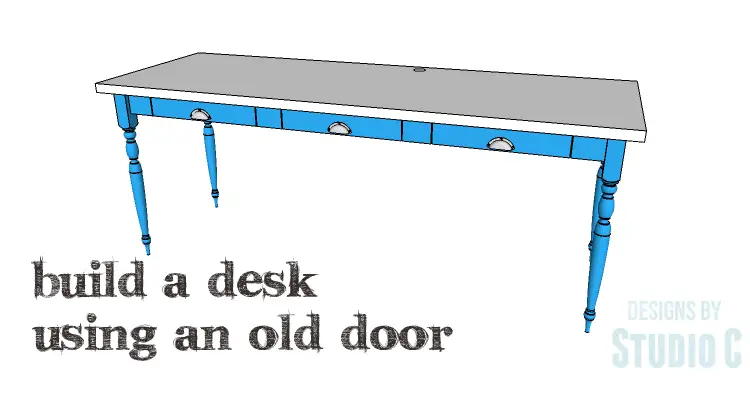
I used a solid slab door. A six panel or arch panel door can be used but a piece of tempered glass or Plexiglas will have to be used as a top.
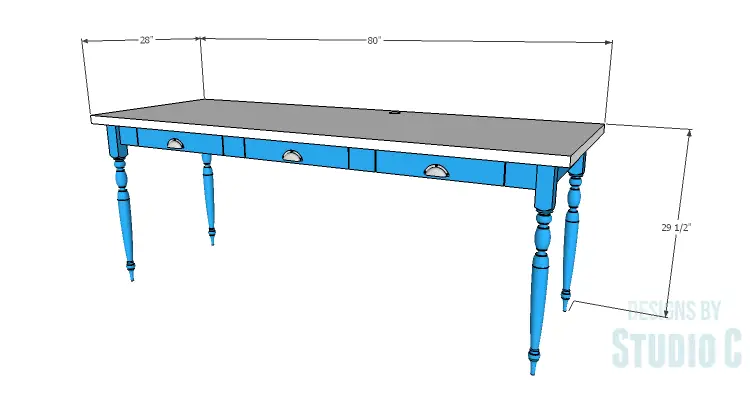
Note that in the cut list a lot of the pieces will have to be measured before they are cut, especially if using table legs from a big-box home improvement store. The set I used measured 2-3/8″ square at the top.
Materials:
- 1-1/4″ pocket hole screws
- 1″ brad nails
- 1-1/4″ screws
- 4 – 30″ table legs (<– affiliate link!)
- 3 sets of 18″ bottom mount drawer slides
- 28″ hollow core interior door
- 1″ angle brackets
- Wall anchors with 1″ screws
- Drawer slides
- Cabinet pulls
- Wood glue
- Sandpaper (100, 150, 220 grits)
- Finishing supplies (primer & paint, or stain, sealer)
Lumber:
- 3 – 1×2 at 8′
- 1 – 1×4 at 6′
- 4 – 1×4 at 8′
- 1 – 4′ x 4′ sheet of 1/4″ plywood
Cut List:
- 2 – 1×4 at 19-3/4″ – Side Framing
- 1 – 1×4 at 70″ – Back Framing
- 4 – 1×4 at 4″ – Front Framing
- 6 – 1×4 at 21″ – Front Framing Supports (Measure before cutting!)
- 3 – 1×4 at 18″ – Drawer Supports (Measure before cutting!)
- 3 – 1×2 at 18″ – Front Drawer Supports (Measure before cutting!)
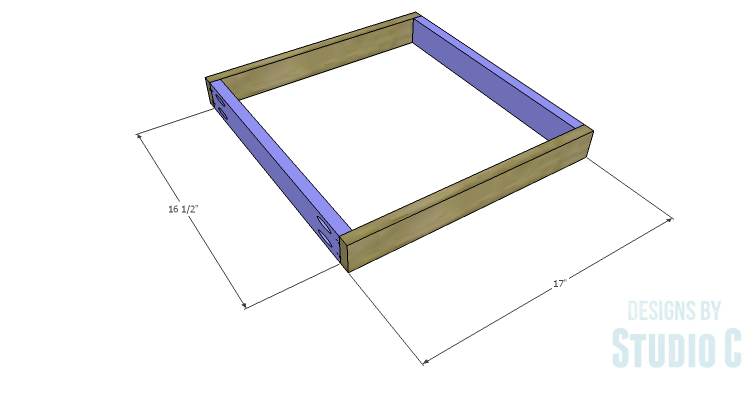
- 6 – 1×2 at 16-1/2″ – Drawer Box Sides (Measure before cutting!)
- 6 – 1×2 at 17″ – Drawer Box Front & Back (Measure before cutting!)
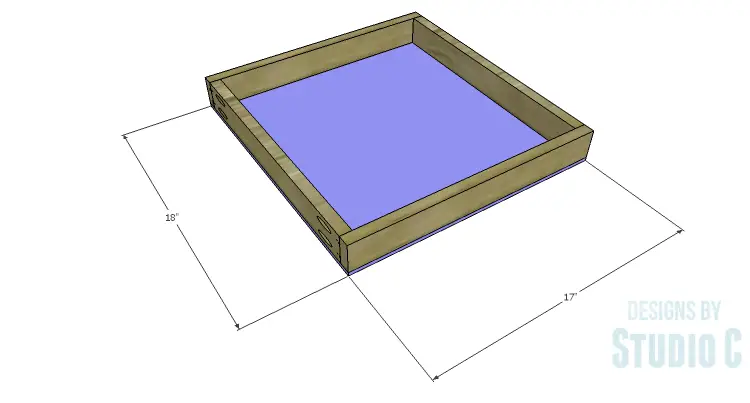
- 3 – 1/4″ plywood at 17″ x 18″ – Drawer Box Bottom (Measure before cutting!)
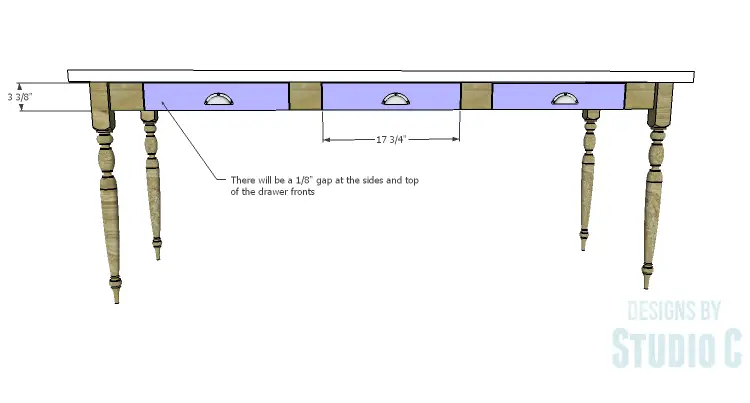
- 3 – 1×4 (ripped to 3-3/8″ wide) at 17-3/4″ – Drawer Fronts (Measure before cutting!)
Step One
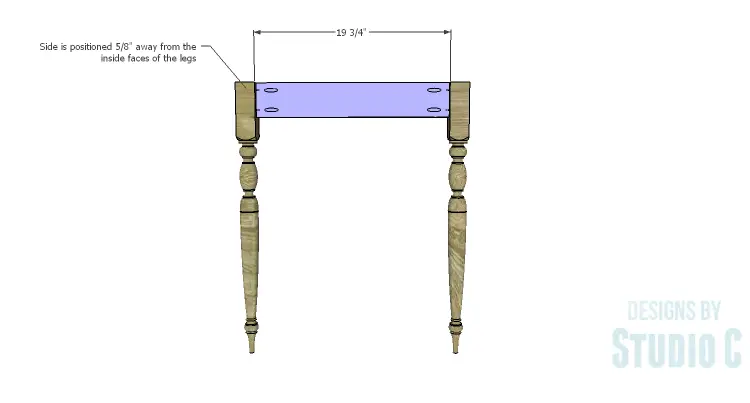
Cut the pieces for the side framing. With the pocket hole jig set for 3/4″ material, drill pocket holes in each end of the framing pieces. Position the framing approximately 5/8″ away from the inside face of each leg.
Step Two
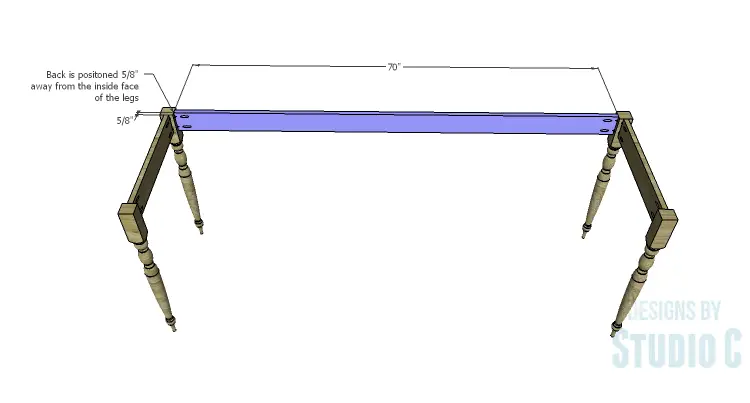
Cut the piece for the back and drill pocket holes in each end. Secure the back to the legs using glue and 1-1/4″ pocket hole screws, positioning the back approximately 5/8″ away from the inside face of each leg.
Step Three
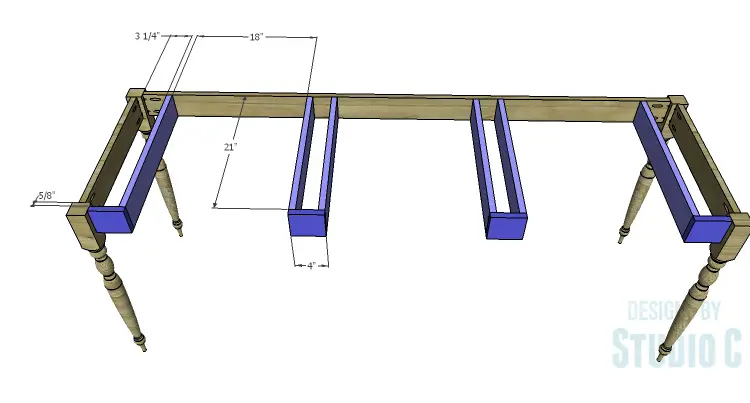
Measure and cut the pieces for the front framing and the front framing supports. Drill pocket holes in one end only of two of the front framing pieces (the 4″ long pieces). These pieces will be secured to the legs using glue and 1-1/4″ pocket hole screws, positioning the back approximately 5/8″ away from the inside face of the leg.
Drill pocket holes in each end of the front framing supports. These are pieces to which the drawer slides will attach. Secure the two of the supports to each of the remaining front framing pieces (the 4″ pieces). Secure the remaining support pieces to the two front framing pieces that are already attached to the legs using glue and 1-1/4″ pocket hole screws. Secure the back edge of the supports to the back using glue and 1-1/4″ pocket hole screws.
Position the remaining front framing and supports as shown, adjusting as necessary. Secure the supports to the back using glue and 1-1/4″ pocket hole screws.
Step Four
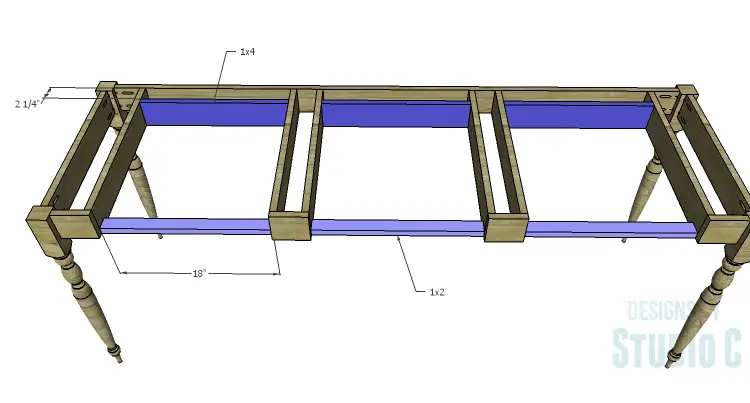
Measure and cut the pieces for the 1×2 and 1×4 drawer supports. Drill pocket holes in each end. Secure the 1×2 pieces to the supports just behind the front framing (3/4″) to allow for the drawer fronts using glue and 1-1/4″ pocket hole screws. Secure the 1×4 pieces at the back of the supports using glue and 1-1/4″ pocket hole screws.
Step Five
Install the drawer slides on the supports according to the manufacturer’s instructions, locating them 3/4″ back from the front face of the front framing.
Before cutting the pieces for the drawers, measure between the drawer slides to determine the width of the drawers. The measurement should be 1″ narrower than the overall opening. Make any adjustments to the cut list for the drawers as necessary, and cut the pieces for the drawers including the bottom.
Drill pocket holes in each end of the sides. Secure the sides of the drawers to the front and back pieces using glue and 1-1/4″ pocket hole screws. Cut the 1/4″ plywood to fit the bottom of the drawers securing in place using glue and 1″ brad nails.
Install the drawer slides on the bottom of the drawers and check the fit. Make any necessary adjustments.
Step Six
Measure the opening for each drawer front and subtract 1/4″ from the length. Mark the position for the drawer pull on the drawer front and drill the holes. Shim the drawer front in the opening – there will be a 1/8” gap at each side and a 1/8″ gap at the top – then drive screws through the holes for the drawer pulls into the drawer box. The bottom of the drawer front will be aligned with the bottom of the front framing pieces. Open the drawer, and secure the drawer front from the inside of the drawer box using countersunk 1-1/4” screws from the inside. Remove the screws from the holes for the drawer pull then finish drilling the holes. Install the drawer pull. Check out this easy tutorial on installing drawer fronts. Remove the drawers to install the top.
Finish the frame and the door as desired.
Step Seven
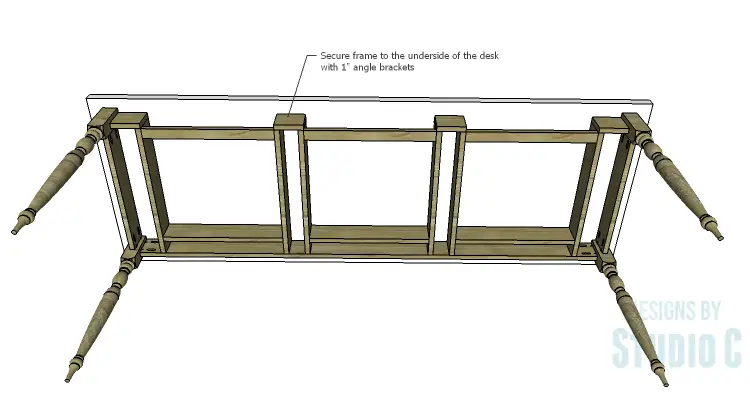
Because the top (the door) is hollow, I secured the door to the frame using 1″ angle brackets and wall anchors.
Lay the top face down on a flat work surface, then position the frame on top of it. If the doorknob bore is going to be used for cord management, the back of the frame will need to clear the hole. In other words, the hole will be to the outside of the back of the frame. Attach the angle brackets to the frame, not to the door – yet! Use enough to securely hold the door in place. Once all of the angle brackets are attached to the frame, mark the position of the holes in the brackets on the door. Drill a hole large enough to drive a wall anchor into the door, then install the anchors. Position the frame with the brackets over the wall anchors and drive a screw through the hole in each bracket into the anchors in the door.
Re-install the drawers.
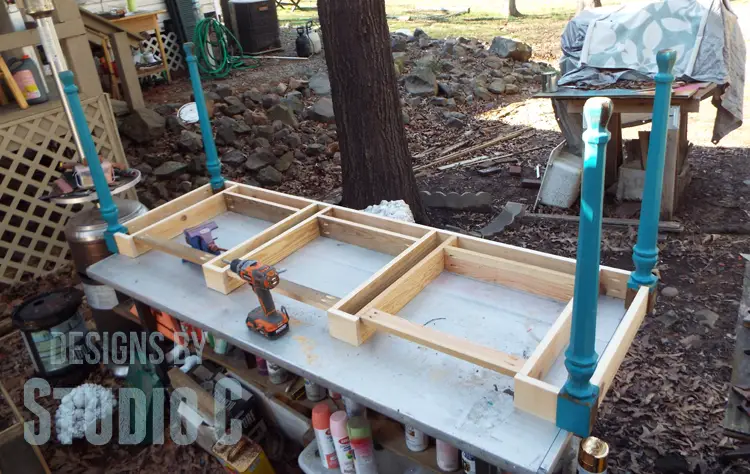
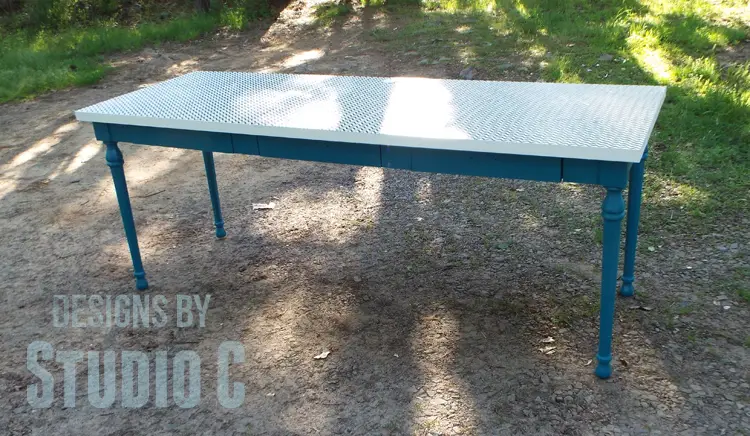
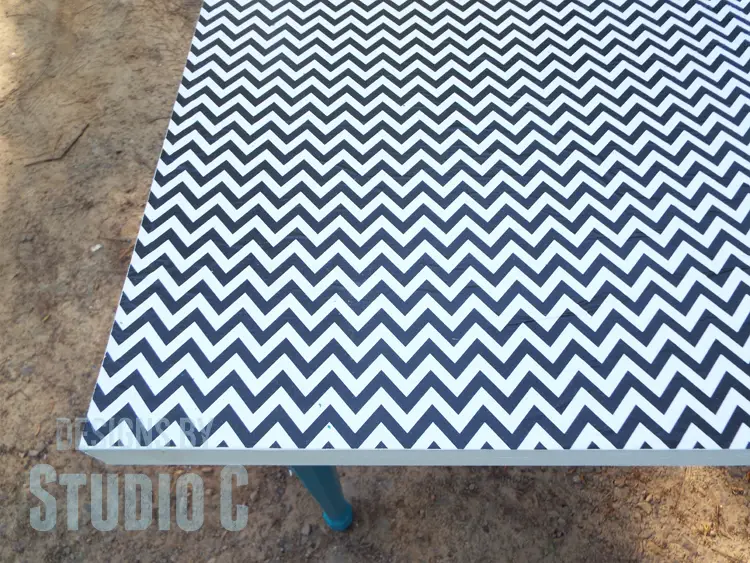
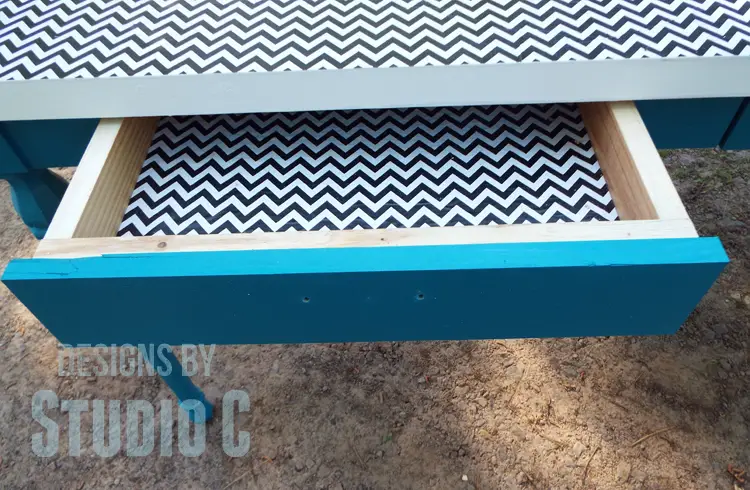
I used patterned paper and Mod Podge (which wrinkled a little bit) to cover the door that I used. I painted the edges and back side. For the frame and drawer fronts, I spray painted them (Lagoon satin!). The legs were actually already a peacock blue because they were part of my old dining room table.
Have any questions about the DIY plans to build a desk with an old door? Leave a comment below!
Originally posted 2015-05-04 08:00:38.


[…] a standard height. When I needed a new door for the bathroom (because I used the old one to make a fabulous top for a desk), I knew I could easily build one myself that would fit the doorway perfectly! Today, I will share […]