A Simply Modern Coat Rack to Build
DIY Furniture Plans to Build the Toby Coat Rack Inspired by Pottery Barn
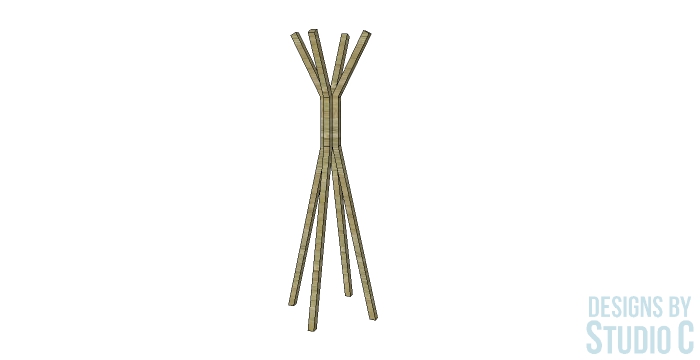
Is there such a thing as having too many coat racks? I mean, I already have two: a Coat Rack Post with various knobs and handles, and the Livingston Coat Rack also inspired by Pottery Barn, but I really want this one!! Not only is it an easy build but it is also super inexpensive and very modern in style! The pieces for the DIY furniture plans to build a Toby Coat Rack (inspired by Pottery Barn) use 2×12 lumber with a scrap piece of 2×2 to hold everything together. The legs are cut using a jigsaw or a band saw, then they are stacked and gang-sanded (sanding the pieces all together).
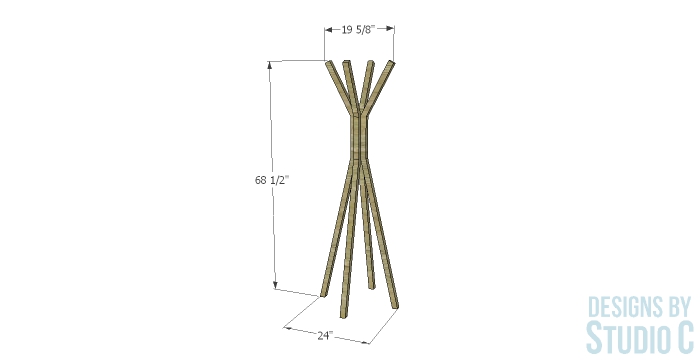
The pieces should be finished prior to assembly, and can be further embellished with smaller hooks attached to the center portion. Regular countersunk screws can be used or (my newest most favorite pieces of hardware) washer head lag screws.
Materials:
- 2-1/2″ screws OR
- 1/4″ x 3″ washer head lag screws (<–affiliate link!)
- Wood glue
- Sandpaper (80, 150, 220 grits)
- Finishing supplies
Lumber:
- Scrap piece of 2×2 at 12″
- 4 – 2×12 at 6′ (8′ boards will give you scrap for other projects!)
Cut List:
- 4 – 2×12 at 68-1/2″
Notes About the Project:
- Draw the leg on one board and cut it out, then use it as a template for the remaining boards.
- If using a bandsaw, draw the leg on one board then stack the boards and cut out the legs at the same time.
- Gang-sand the boards, and finish prior to assembly.
- The heads of the screws can be spray painted to add an extra pop!
- For an alternative look, the legs can be cut from layered plywood utilizing the exposed edges (eight legs will be cut from 3/4″ plywood).
Step One
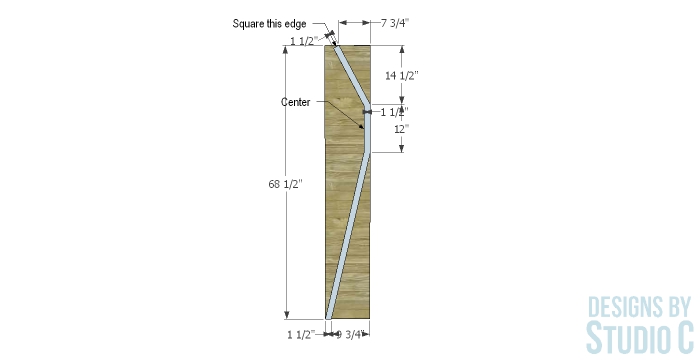
Draw the first leg on one of the boards. Start by drawing a horizontal line at 14-1/2″ down from the top, then draw another line 12″ from the first line. Make a mark at the top of the board 7-3/4″ from what will be the inside of the leg and draw a diagonal line from this mark to the end of the upper horizontal line.
Make a mark at the bottom of the board 9-3/4″ from the inside of the leg. Draw a diagonal line from this mark to the end of the lower horizontal line.
Offset each of these lines 1-1/2″ toward the outside, including the center, then cut out the leg. Square the end of the top of the leg but leave the bottom of the leg as is for balance.
Step Two
Sand and finish the legs as desired.
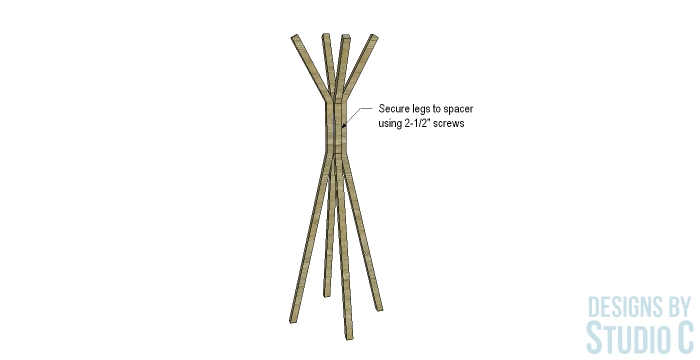
Secure two opposing legs to the 2×2 spacer using glue and countersunk screws or lag screws (staggered so they don’t interfere with each other) aligning the pieces so that the top portion of the center of the legs are flush with the top of the 2×2 spacer. Use a long scrap board to help align the bottom of the legs before securing to the spacer (if they are uneven, the coat rack will wobble and adjustable furniture feet installed on the bottom will fix it!)
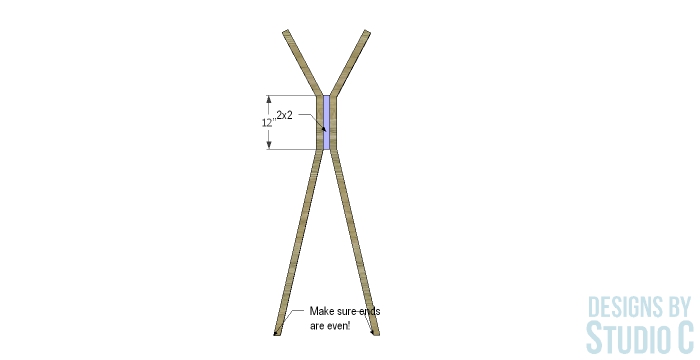
Secure the remaining two legs in the same manner.
I still really, really want to build this project… I love it so much and the plan is perfect for all skill levels! If you build it, please share it with me! I would love to see it! Have questions about the DIY furniture plans to build a Toby Coat Rack inspired by Pottery Barn? Leave a comment below!

