Plans to Build a Livingston Coat Rack
Build a Coat Rack Inspired by Pottery Barn
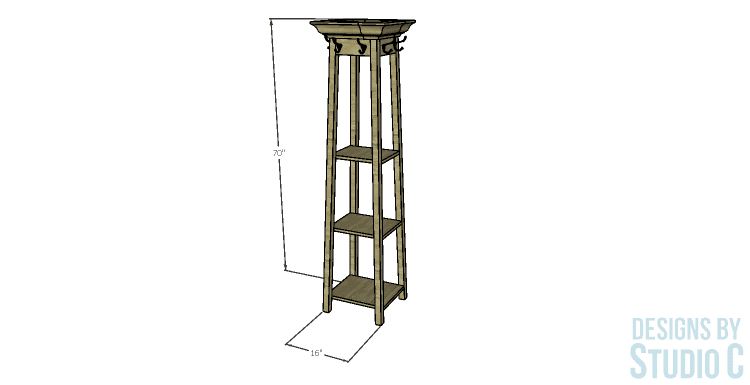
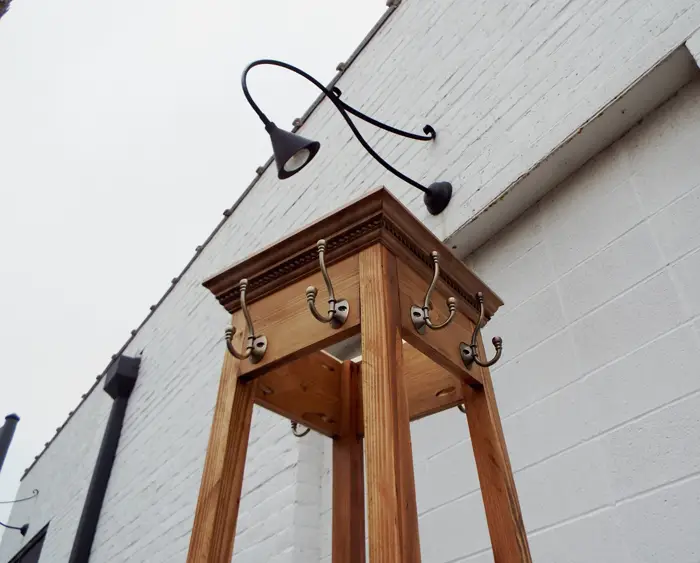
This coat rack is an incredibly easy build, even with the crown moulding at the top! The actual piece is sold for $399 and I built this knock-off for around $50! The DIY furniture plans to build a Livingston coat rack feature a total of eight coat hooks and three shelves between the legs. The angles to be cut are easy; cutting and fitting the crown moulding is also pretty easy and an excellent way to learn a new skill! I’ve included links to cutting crown moulding with and without a jig toward the end of the post.
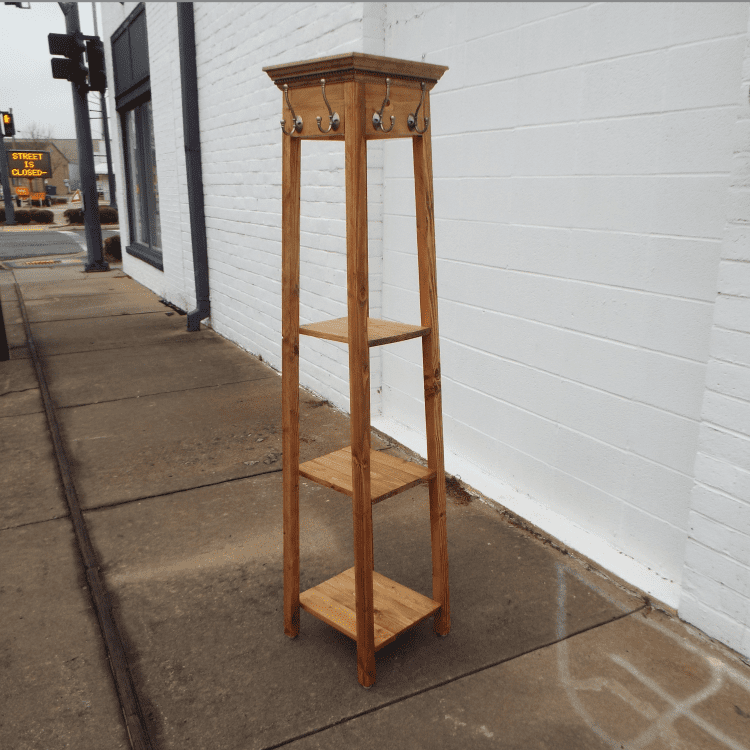
I stained the example piece using RustOleum wood stain in Golden Oak, and I purchased the hooks at Target. The antique brass looks amazing with the golden stain! I mainly used scrap wood to build this DIY coat rack, except for the crown moulding, of course!
Materials:
- 1-1/2″ pocket hole screws (<– affiliate link!)
- 1″ brad nails
- 4 – nail-on chair feet for angled legs (<– affiliate link!)
- 8 – coat hooks
- Crown moulding jig, optional (<– affiliate link!)
- Wood glue
- Sandpaper (80, 120, 220 grits)
- Finishing supplies
Lumber:
- 2 – 1×6 at 8′
- 4 – 2×2 at 6′
- 1 – 8′ piece of crown moulding
Cut List:
- 4 – 2×2 at 68-1/2″ – Legs
- 4 – 1×6 at 8-5/8″ (with a 2° angle at each end) – Stretchers
- 2 – 1×6 at 13-3/16″ (secured to each other and ripped to 10-3/16″ wide) – Upper Shelf
- 3 – 1×6 at 14-7/16″ (secured to each other and ripped to 11-7/16″ wide) – Middle Shelf
- 3 – 1×6 at 15-11/16″ (secured to each other and ripped to 12-3/4″ wide) – Lower Shelf
- Crown moulding cut to fit
Notes About the Project:
- The DIY plans to build the coat rack are suitable for all skill levels.
- A different type of decorative trim can be used at the top of the coat rack, though it will have a different look than the crown moulding gives. The trim will have 45° angles with a compound angle of 2° because of the angle of the stand itself.
- The shelves are 1x6s pieced together using pocket holes then ripped down to the width necessary for each shelf.
- Thoroughly sand the pieces prior to assembly.
Step One
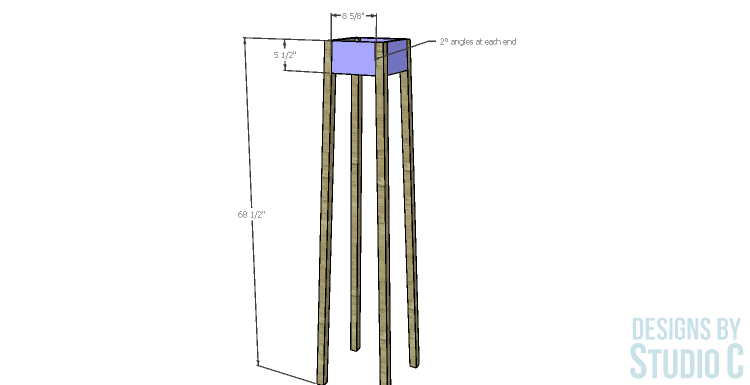
Cut the pieces for the legs and the stretchers. The stretchers will have a 2° angle cut at each end. With the pocket hole jig set for 3/4″ material, drill pocket holes in each end of the stretchers along the angled edges.
Secure the stretchers to the legs using glue and 1-1/4″ pocket hole screws. The front face of the stretchers will be flush with the front face of the legs.
Step Two
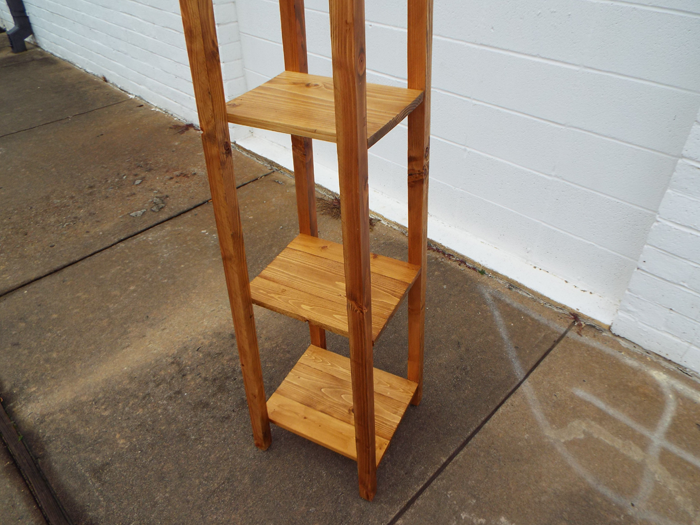
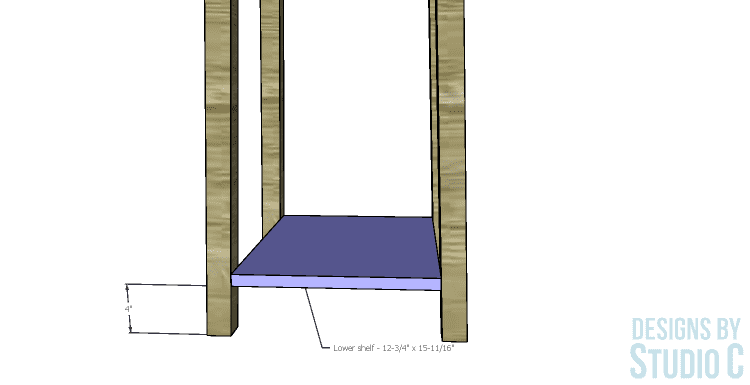
Cut the pieces for the lower shelf. Drill pocket holes along one long edge of two of the three pieces for the shelf. Assemble the shelf using glue and 1-1/2″ pocket hole screws, then rip the shelf to the width needed. Drill pocket holes in each corner of the long edges to attach the shelf to the legs, positioning it 4″ up from the bottom of the legs.
Step Three
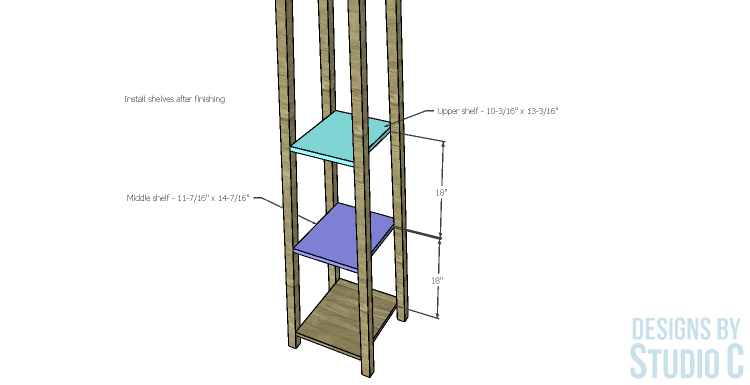
Cut the pieces for the middle shelf and upper shelf, and follow the same steps for creating the shelves as the lower shelf (in the previous step). Note that the widths and the lengths of each shelf are different but they are constructed in the same manner.
I found it easier to stain the middle and upper shelves (as well as the coat rack) before installing them. Install the nail-on furniture feet before installing the crown moulding.
Install the remaining two shelves using 1-1/2″ pocket hole screws. Each shelf will be spaced approximately 18″ apart.
Step Four
I wrote a tutorial on using a jig to cut crown moulding.
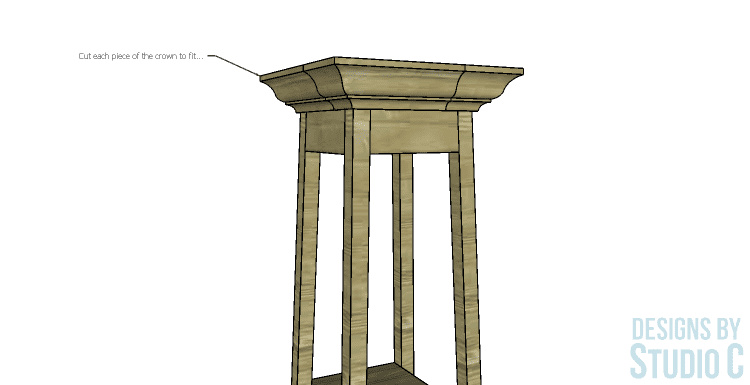
Determine the spring angle of the crown moulding and subtract 2° (because the coat rack legs taper inward 2°). The crown moulding I used has a 38° spring angle, so I set my jig for 36°. I wanted the crown to fit as closely to the top as possible, so I measured the width of the stretchers plus the legs at 1/2″ down from the top of the coat rack. I cut two pieces, then made sure the angled edges met at the corner without a gap. Once I had the angle and corners right, I cut the remaining pieces to fit. I stained the crown, then secured it to the top of the coat rack using 1″ brad nails.
Step Five
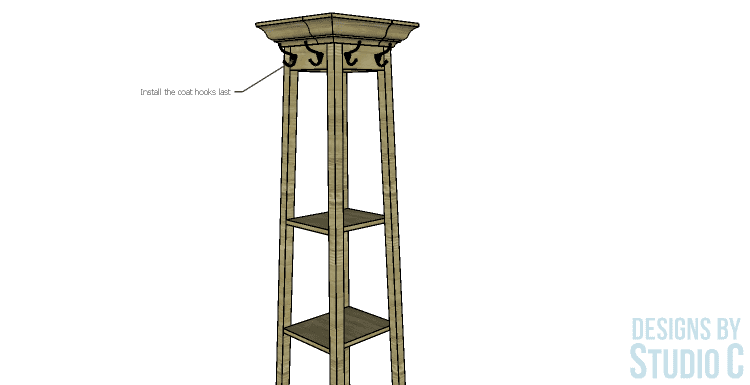
Determine the placement of the hooks, and mark the holes for the screws. Pre-drill the holes, then drive the screws.
I am so happy with the way the coat rack came out! It will be the perfect accent piece in our small entryway.
Have questions about the DIY furniture plans to build a Livingston coat rack? Leave a comment below!


[…] coat racks? I mean, I already have two: a Coat Rack Post with various knobs and handles, and the Livingston Coat Rack also inspired by Pottery Barn, but I really want this one!! Not only is it an easy build but it is […]
[…] Livingston Coat Rack […]