
DIY Furniture Plans to Build a Newport Wall Cabinet
FREE + Easy to Build Wall-Mounted Storage
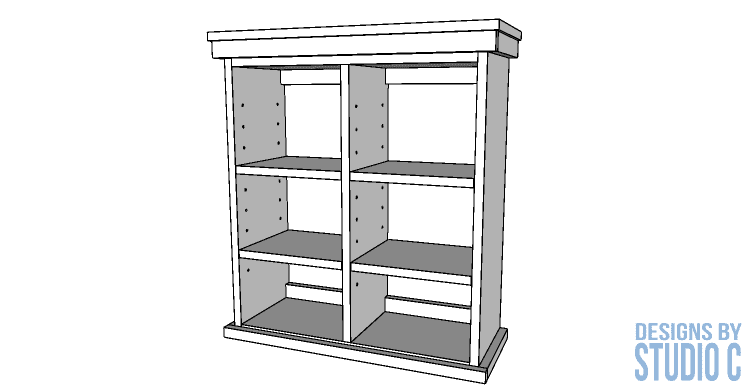
Storage space is always at a premium, especially in our house! This little wall-mounted cabinet will be an excellent addition to any space! The DIY furniture plans to build a Newport wall cabinet (inspired by Pottery Barn) feature lots of storage space with adjustable shelves, all in an easy to mount cabinet! The plans use straight off-the-shelf lumber and is assembled using countersunk screws for an easy to build weekend project!

Materials:
- 1-1/2″ screws
- 1/4″ shelf pins – four for each shelf (<– affiliate link!)
- Shelf pin jig with drill bit (<– affiliate link!)
- 1″ brad nails
- 3-1/2″ screws (if wall studs are present for hanging) OR
- Screw-on keyhole hangers, optional (<– affiliate link!)
- Auger anchors, optional
- Wood glue
- Sandpaper
- Finishing supplies
Lumber:
- 2 – 1×2 at 8′
- 2 – 1×10 at 8′
- 1 – 1×12 at 4′
- 1 – 2′ x 4′ sheet of 1/4″ plywood
Cut List:
- 2 – 1×10 at 28″ – Sides
- 2 – 1×10 at 22-1/2″ – Top & Bottom
- 1 – 1×10 at 24-1/2″ – Center Divider
- 3 – 1×2 at 22-1/2″ – Front & Supports
- 1 – 1×12 (ripped to 10-1/4″ wide) at 26″
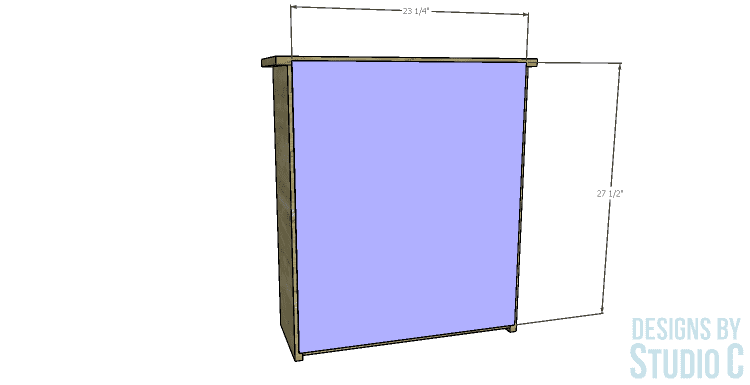
- 1 – 1/4″ plywood at 23-1/4″ x 27-1/2″ – Back
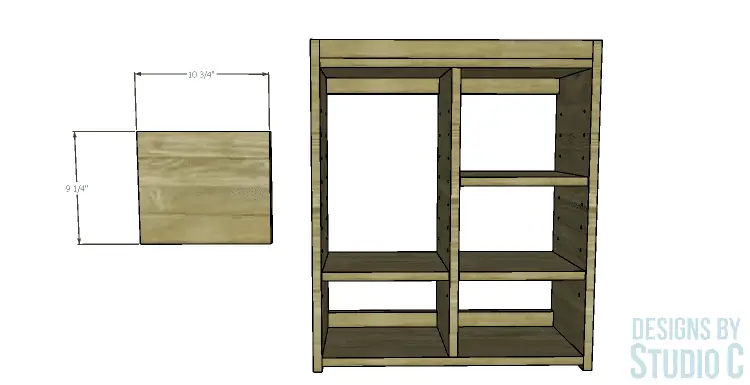
- 4 – 1×10 at 10-3/4″ – Shelves
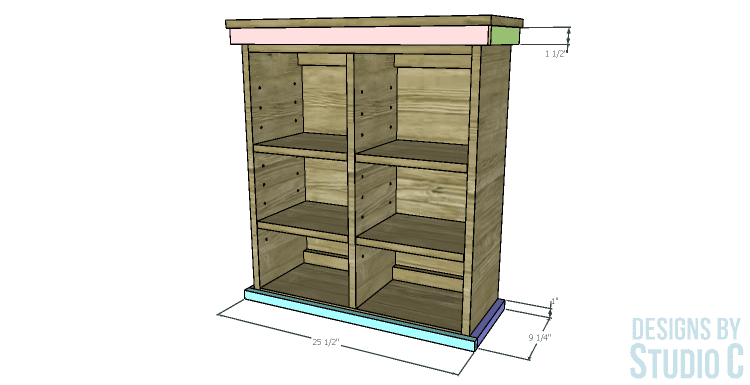
- 2 – 1×2 at 9-1/4″ – Upper Side Trim
- 1 – 1×2 at 25-1/2″ – Upper Side Trim
- 2 – 1×2 (ripped to 3/4″ wide) at 9-1/4″ – Lower Side Trim
- 1 – 1×2 (ripped to 3/4″ wide) at 25-1/2″ – Lower Side Trim
Notes About the Project:
The screw-on keyhole hangers are optional and should be used in conjunction with auger anchors if there are no wall studs in the area where the cabinet will be hung. Otherwise, long screws can be driven through the upper and lower back supports into the wall studs.
Step One
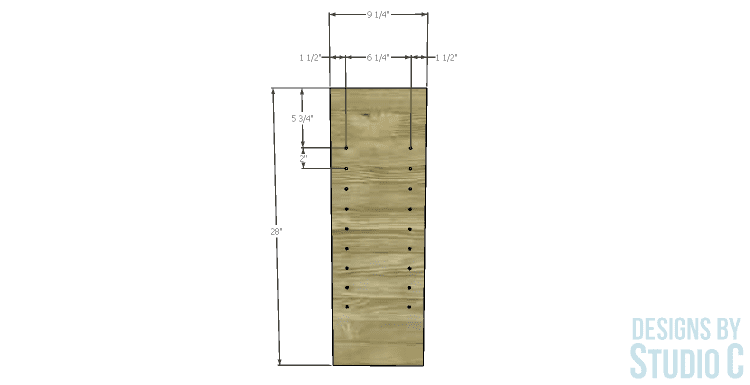
Cut the pieces for the sides. Using the shelf pin jig (free how-to!), drill holes evenly spaced along the inside face of each side piece at about 3/8″ depth. A shelf pin jig is NOT required, but it does make it easier to drill the holes at a consistent depth!
Step Two
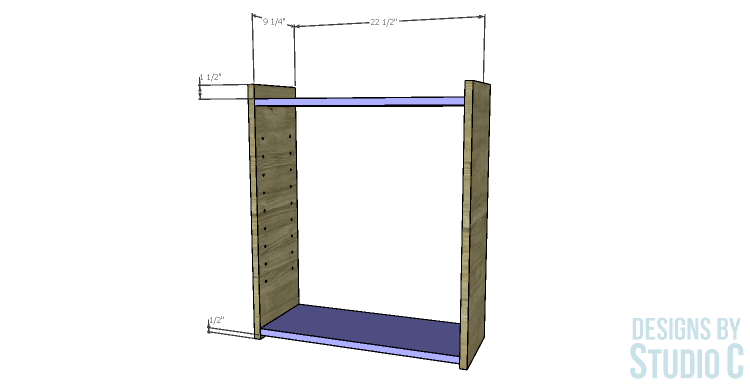
Cut the pieces for the top and bottom. Position the pieces on the sides (with the shelf pin holes facing in), securing the top and bottom using glue and countersunk 1-1/2″ screws.
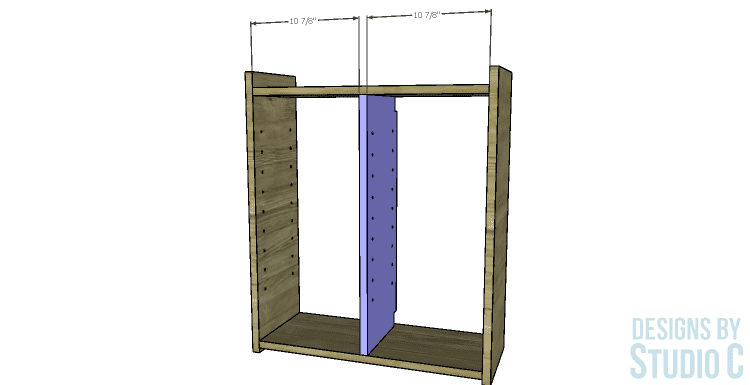
Step Three
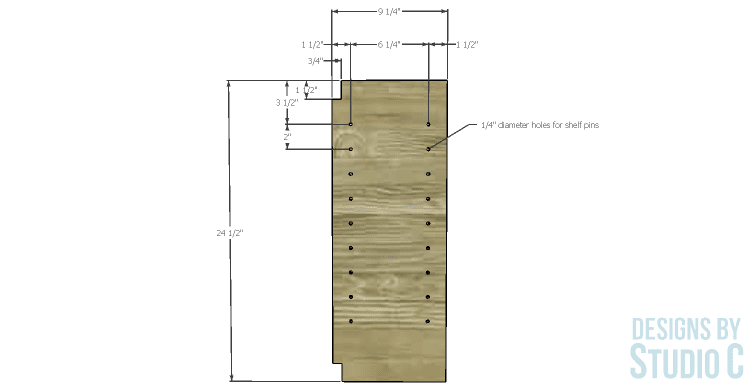
Cut the piece for the center divider and cut the notch using a jigsaw or a hand saw. Drill the holes for the shelf pins all the way through this piece, so that the holes are on both sides of the piece. Secure the divider to the top and bottom using glue and 1-1/2″ screws.
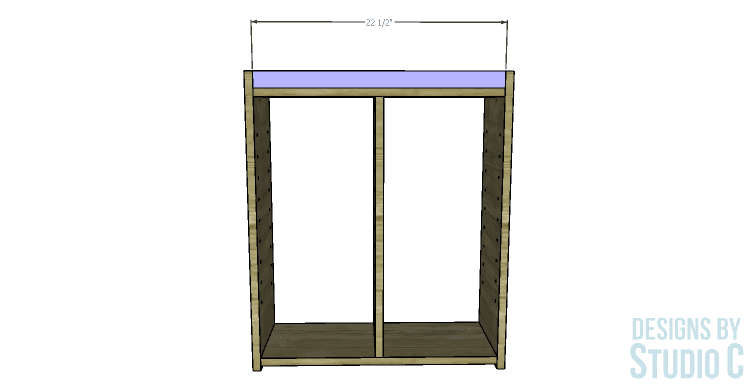
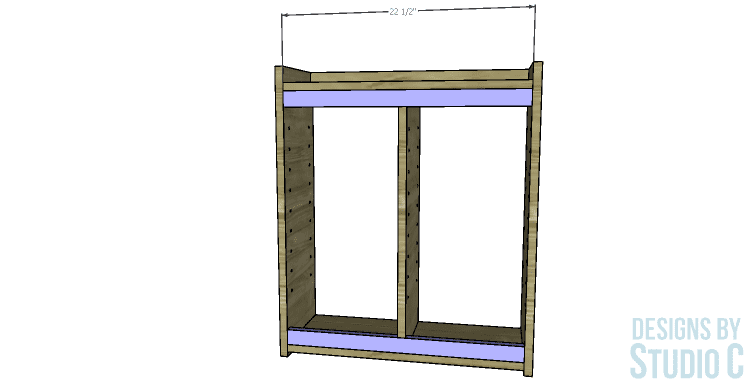
Step Four
Cut the pieces for the front and supports. Secure the pieces to the sides, as shown in the drawings, using glue and countersunk 1-1/2″ screws.
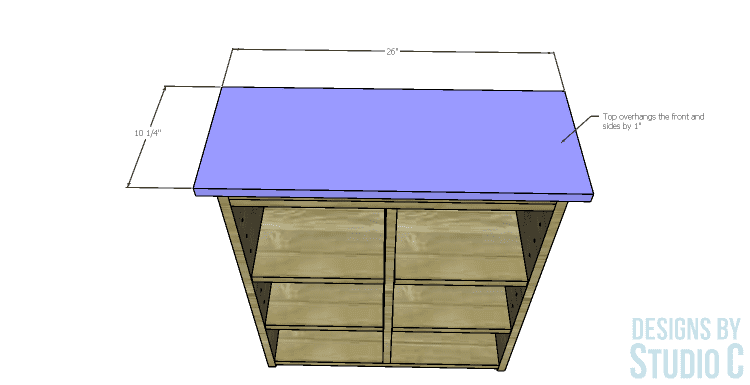
Step Five
Cut the piece for the top. The front and sides of the top will overhang by 1″ – the back edge will be flush with the back of the cabinet. Secure the top in place using glue and countersunk 1-1/2″ screws.
Step Six
Cut the piece for the back. Secure the back to the frame using 1″ brad nails.
Step Seven
Cut the pieces for the shelves. Check the shelves for fit and trim as necessary. The actual width will depend on the profile of the shelf pins.
Step Eight
Cut the pieces for the upper and lower trim. Secure the side pieces first using glue and clamping until dry, then secure the front piece. Decorative trim with mitered corners can also be used but the pieces will have to be cut a little longer than the cut list states.
Fill all holes and finish the cabinet as desired.
To mount to the wall:
If wall studs are present in the area where the cabinet will be hung:
Drill countersunk holes directly through the supports and back piece, and drive 3″ screws through the cabinet and wall into the studs.
If wall studs are NOT present where the cabinet will be hung:
Install screw on keyhole hangers on the back. Install auger anchors with screws in the wall where the cabinet will be hung, and mount the cabinet.
This little cabinet would be perfect in a bathroom, a bedroom, a kitchen, or any other space where storage is needed. Plus, the cabinet can be finished however desired!
Have questions about the DIY furniture plans to build a Pottery Barn inspired Newport wall cabinet? Leave a comment below!