
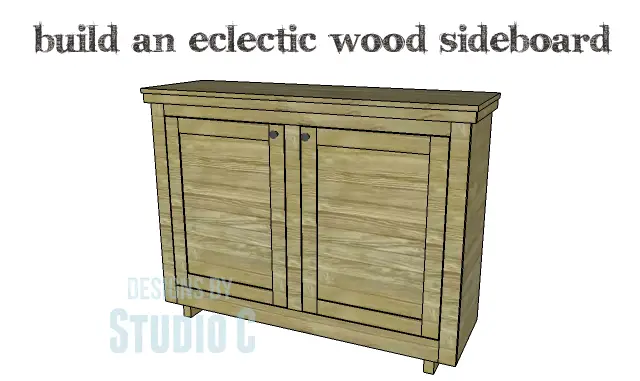
Build an Eclectic Wood Sideboard
An Awesome Piece of Storage for Any Room
Here is another storage piece that is on the rustic and plain side, and is fabulous with any finish! The DIY plans to build an Eclectic Wood Sideboard feature a large top, two doors, and two shelves. The sideboard would be fabulous with a chippy painted finish, a weathered stain finish, or stenciled with paint or the glue-resist technique! This is a super-easy build and can be completed in a weekend!
Materials:
- 1″ pocket hole screws
- 1-1/4″ pocket hole screws
- 1-1/4″ brad nails
- 2″ screws
- Edge banding, optional (<– affiliate link!)
- 2 sets of hinges
- 2 cabinet pulls or cupboard latches
- Wood glue
- Sandpaper (100, 150, 220 grits)
- Finishing supplies (primer & paint, or stain, sealer)
Lumber:
- 4 – 1×3 at 8′
- 1 – 1×4 at 8′
- 1 – 2×3 at 4′
- 1 – 2′ x 4′ sheet of 1/2″ plywood
- 2 – 4′ x 8′ sheets of 3/4″ plywood
Cut List:
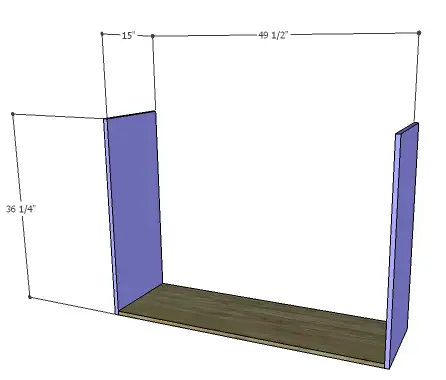
- 2 – 3/4″ plywood at 15″ x 36-1/4″ – Sides
- 1 – 3/4″ plywood at 15″ x 49-1/2″ – Bottom
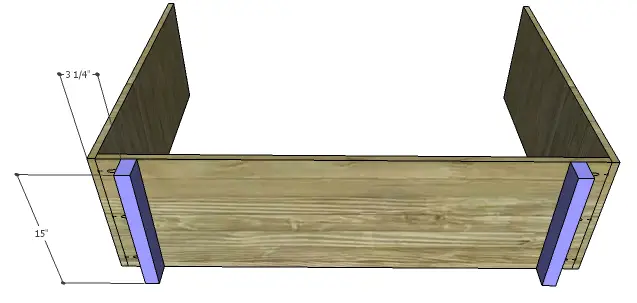
- 2 – 2×3 at 15″ – Feet
- 1 – 3/4″ plywood at 35-1/2″ x 49-1/2″ – Back
- 2 – 3/4″ plywood at 14-1/4″ x 49-1/2″ – Shelves
- 2 – 1×3 at 36-1/4″ – Front Frame Sides
- 1 – 1×3 at 29-1/4″ – Front Frame Center
- 2 – 1×4 at 46″ – Front Frame Top & Bottom
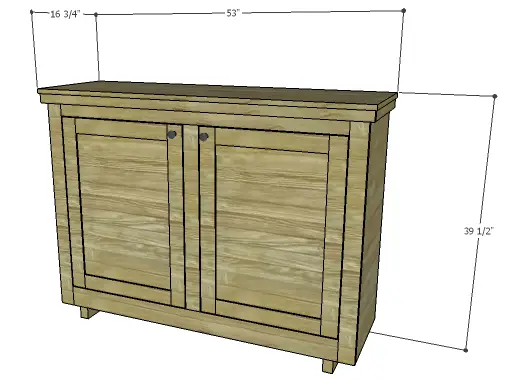
- 1 – 3/4″ plywood at 16-3/4″ x 53″ – Top
- 2 – trim for sides cut to fit
- 1 – trim for front cut to fit
- 4 – 1×3 at 16-1/2″ – Door Rails
- 4 – 1×3 at 29″ – Door Stiles
- 2 – 1/2″ plywood at 16-1/2″ x 24″ – Door Panels
Click on the drawings for a larger view!
Step One
Edge banding will be applied to the exposed edges of the plywood prior to assembly.
Cut the pieces for the sides and the bottom. With the pocket hole jig set for 3/4″ material, drill pocket holes in each end of the bottom piece. Secure the sides to the bottom using glue and 1-1/4″ pocket hole screws.
Step Two
Cut the pieces for the feet. Position the feet on the bottom as shown securing in place using glue and 2″ screws through the bottom into the feet.
Step Three
Cut the piece for the back and drill pocket holes in the side and bottom edges. Secure to the sides and bottom using glue and 1-1/4″ pocket hole screws.
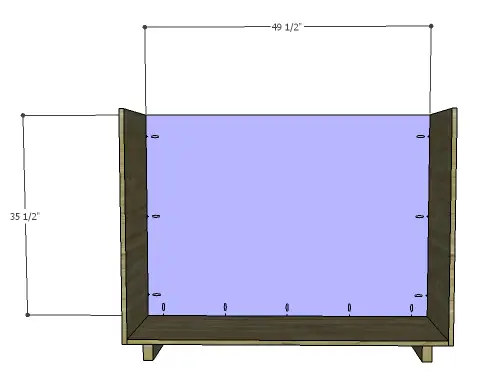
Step Four
Cut the pieces for the shelves. Drill pocket holes in each end as well as along the back edge. Secure to the sides and back of the cabinet as shown using glue and 1-1/4″ pocket hole screws.
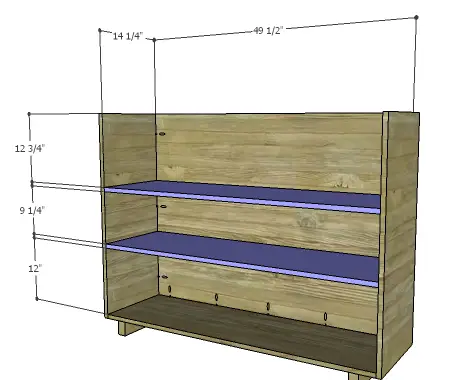
Step Five
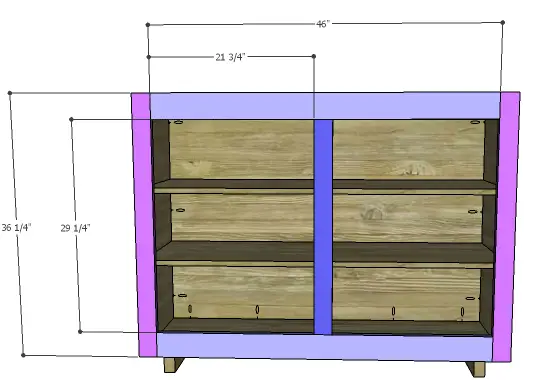
Cut the pieces for the front frame. Drill pocket holes in each end of the center frame pieces, as well as the top and bottom framing pieces (the 1×4 pieces). Assemble the frame as shown using glue and 1-1/4″ pocket hole screws.
Position the frame on the front of the cabinet with the side edges flush with the sides, securing in place with glue and 1-1/4″ brad nails. Add a few brad nails through the center frame piece into the front of the shelves.
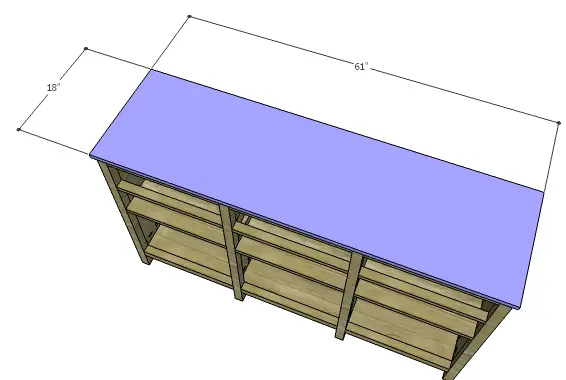
Step Six
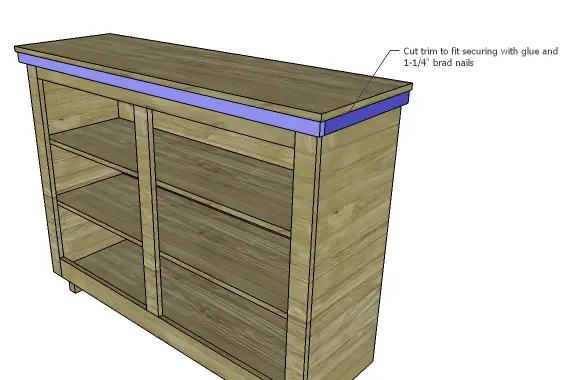
Cut the piece for the top. The front and the sides will overhang by 1″. Secure the top in place using glue and 1-1/4″ brad nails.
Cut the pieces for the trim. There are no dimensions given for the trim because it will depend on the type of trim and whether it will have mitered corners or will be butted against the front piece. You can also purchase an 8′ 1×2 and cut your own trim using a router and a decorative bit!
Secure the side pieces of the trim first, using glue and 1-1/4″ brad nails, then secure the front piece.
Step Seven
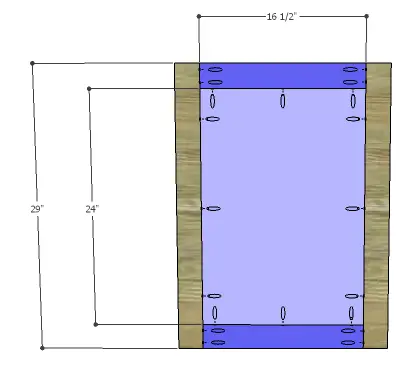
Cut the pieces for the doors. Drill pocket holes in each end of the door rails. Assemble the door frame using glue and 1-1/4″ pocket hole screws.
Cut the pieces for the door panels. Set the pocket hole jig for 1/2″ material and drill pocket holes in all four edges of the panels. Insert the panel into the frame – with the back face flush with the back face of the frame – and secure in place using glue and 1″ pocket hole screws.
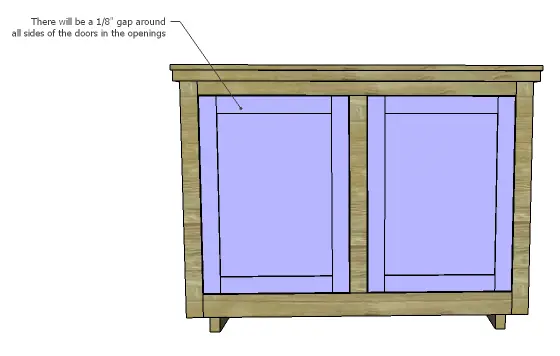
Install the hinges on the doors, then install the doors in the openings. Install the cabinet latches or pulls.
Finish as desired.
The sideboard would be a great addition as blanket or sweater storage in a bedroom, or also as a media stand for a TV! Have any questions about the DIY plans to build an Eclectic Wood sideboard? Leave a comment below or contact me at cher {at} designsbystudioc {dot} com!
Originally posted 2014-08-25 08:00:19.