Vintage Buffet Plans
How to Build A Vintage Style Buffet Table with Step-by-Step Plans
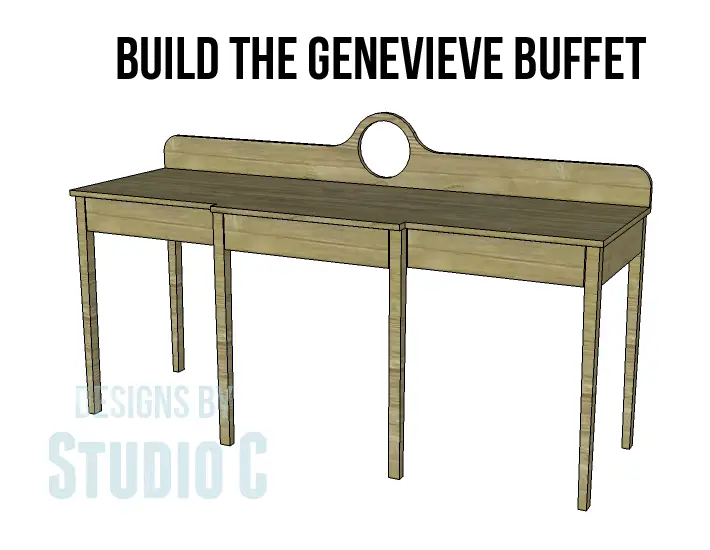
This is the perfect piece for all of your entertaining needs! Use these vintage buffet plans to create a beautiful piece of furniture in a style that will last for years to come! Featuring three drawers and a beautiful backsplash, your guests will be amazed at your fabulous DIY skills!
Materials:
- 1-1/4″ pocket hole screws
- 1-1/4″ brad nails
- Edge banding, optional
- 3 sets of 20″ drawer slides
- 3 cabinet pulls
- Wood glue
- Sandpaper (100, 150, 220 grits)
- Finishing supplies (primer & paint, or stain, sealer)
Lumber:
- 1 – 1×2 at 6′
- 5 – 1×3 at 8′
- 3 – 2×2 at 6′
- 1 sheet of 3/4″ plywood
- 1 half sheet (4′ x 4′) sheet of 3/4″ plywood
Cut List:
- 6 – 2×2 at 31-1/4″ – Legs
- 1 – 3/4″ plywood at 4-3/4″ x 69″ – Back
- 2 – 3/4″ plywood at 4-3/4″ x 19″ – Sides
- 2 – 3/4″ plywood at 4-3/4″ x 21-1/2″ – Center Supports
- 2 – 1×3 at 19″ – Side Drawer Spacers
- 2 – 1×3 at 21-1/4″ – Center Drawer Spacers
- 2 – 1×2 at 21-1/2″ – Front Stretchers
- 1 – 1×2 at 23″ – Center Front Stretcher
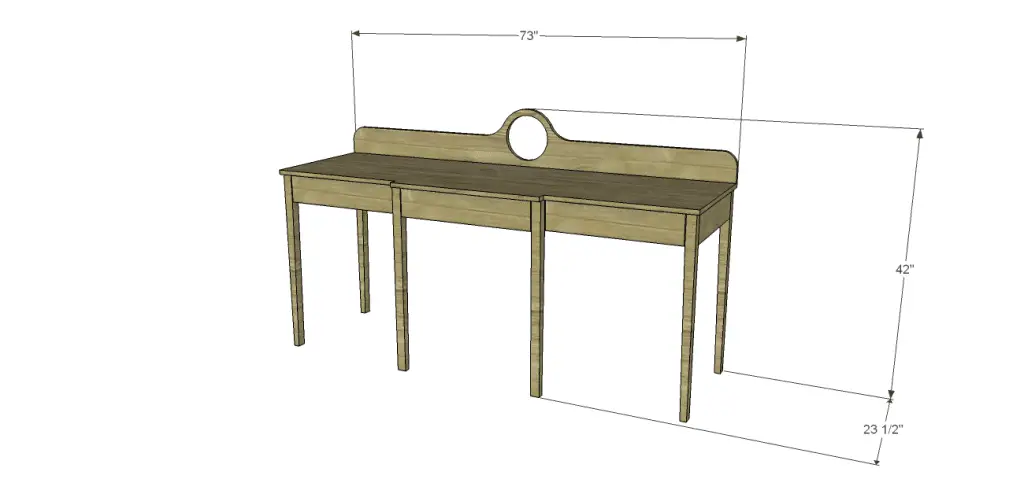
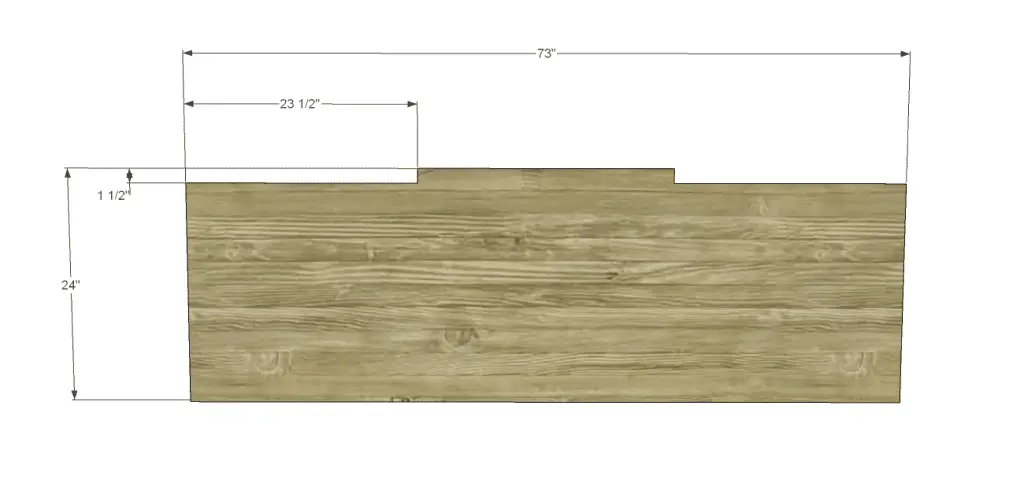
- 1 – 3/4″ plywood at 24″ x 73″ – Top
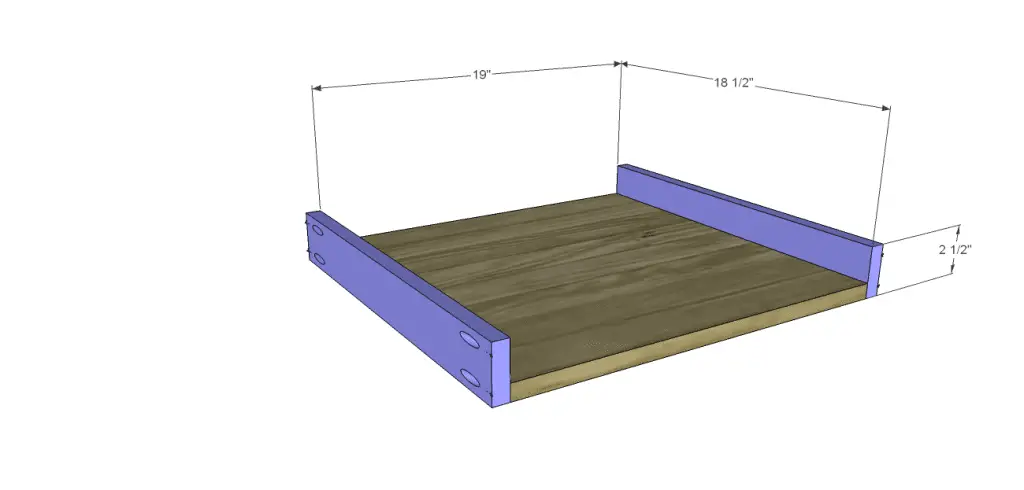
- 2 – 3/4″ plywood at 18-1/2″ x 19″ – Side Drawer Bottoms
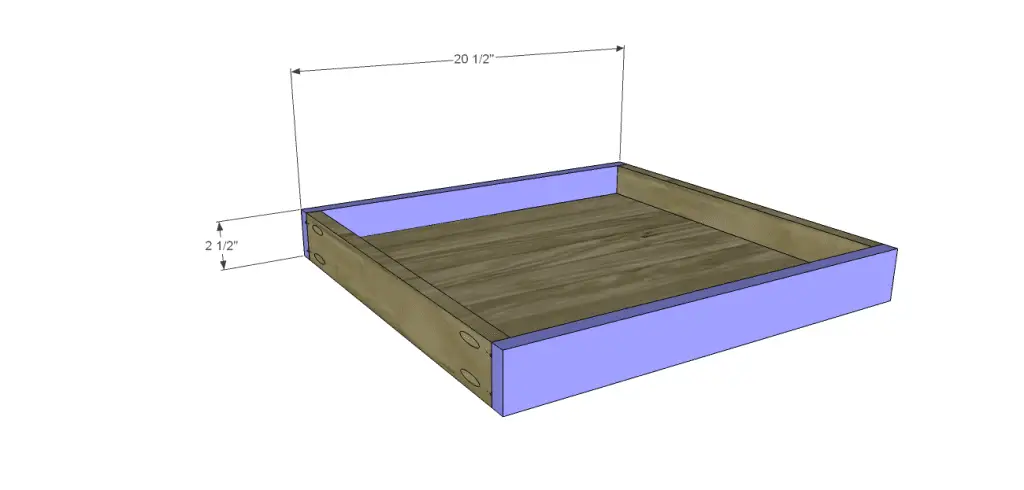
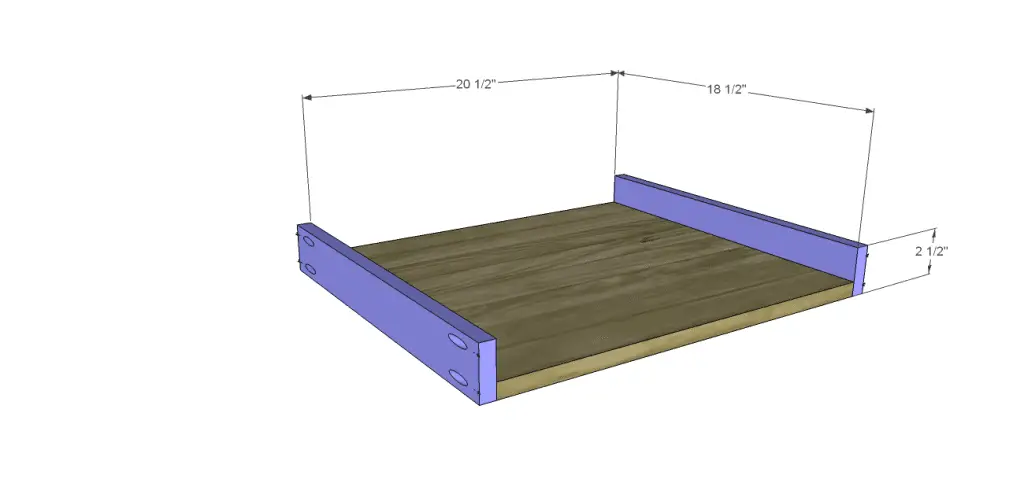
- 1 – 3/4″ plywood at 18-1/2″ x 20-1/2″ – Center Drawer Bottom
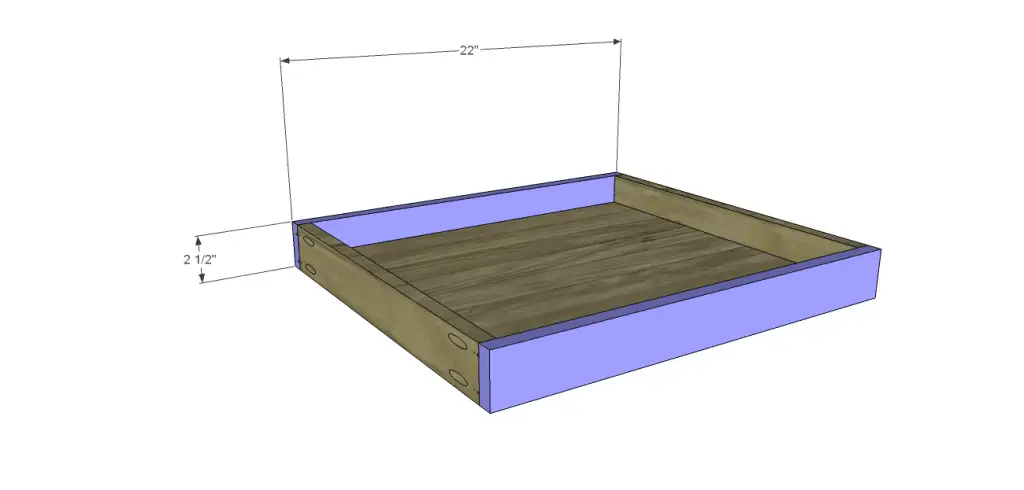
- 6 – 1×3 at 18-1/2″ – Drawer Box Sides
- 4 – 1×3 at 20-1/2″ – Side Drawer Front & Back
- 2 – 1×3 at 22″ – Center Drawer Front & Back
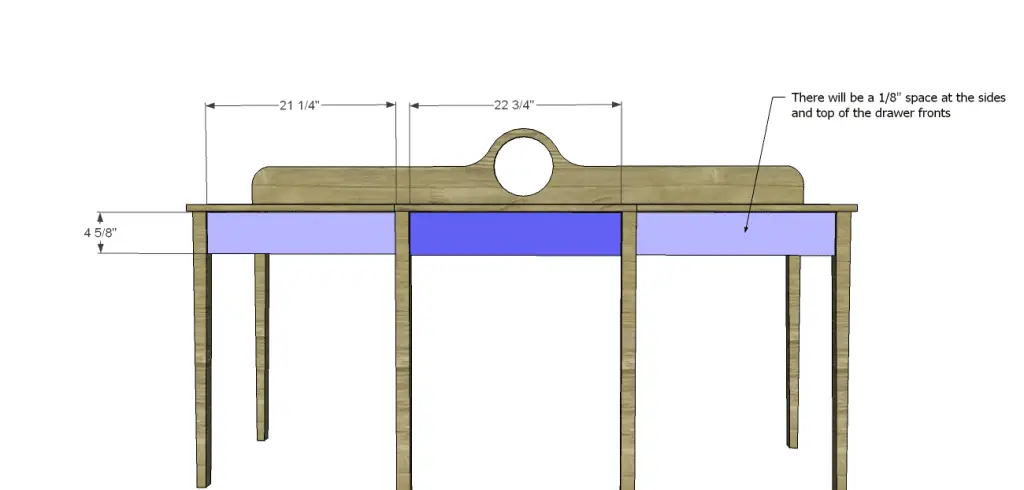
- 2 – 3/4″ plywood at 4-5/8″ x 21-1/4″ – Side Drawer Fronts
- 1 – 3/4″ plywood at 4-5/8″ x 22-3/4″ – Center Drawer Front
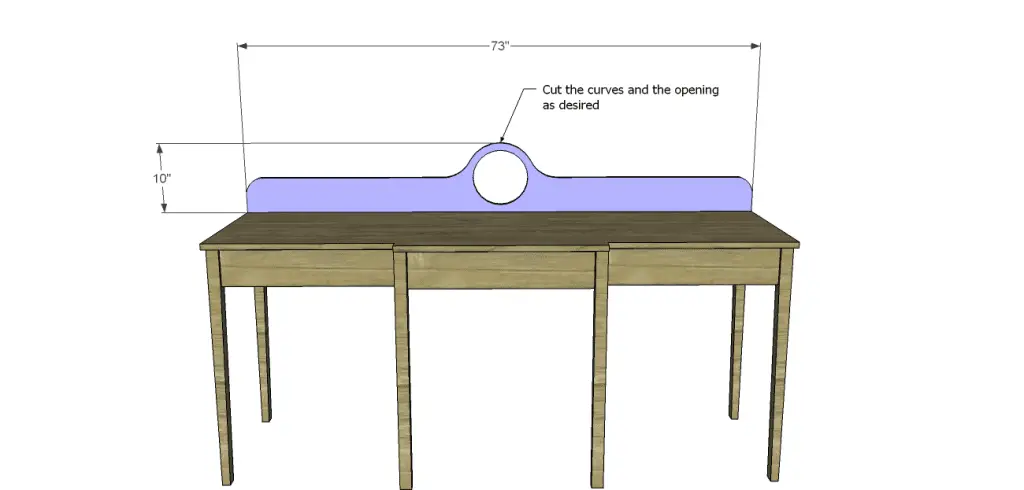
- 1 – 3/4″ plywood at 10″ x 73″ – Backsplash
Notes About the Project:
Edge banding will be applied to the exposed edges of the plywood before assembly.
Step One
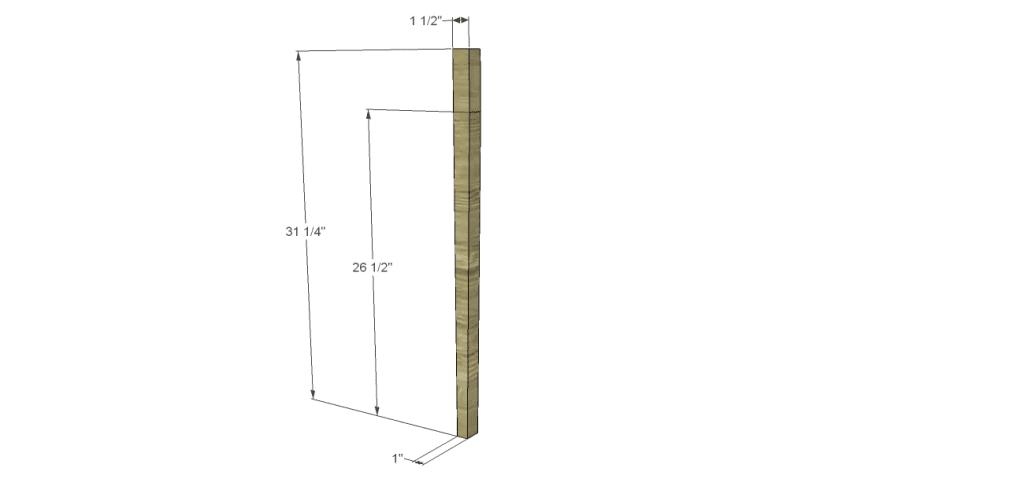
Cut the pieces for the legs. Cut the taper using a jigsaw, bandsaw or tapering jig on the table saw.
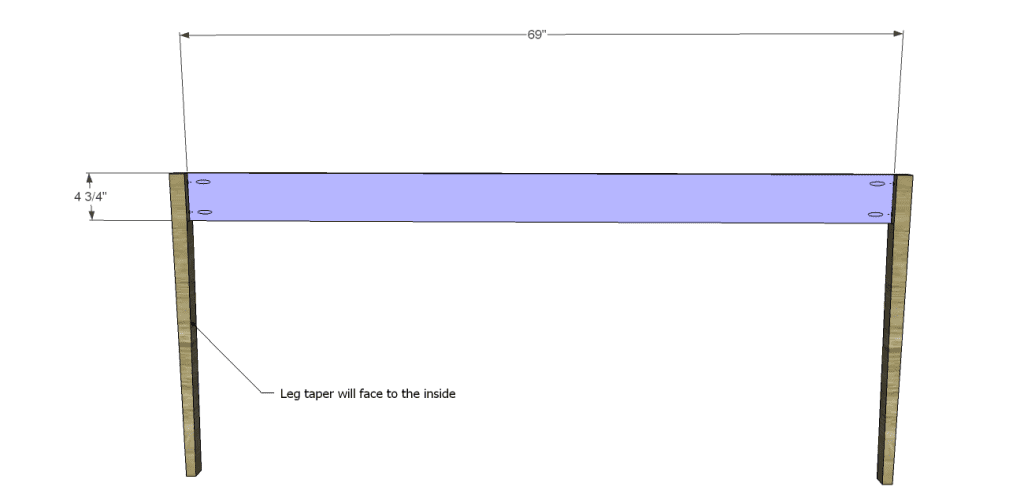
Cut the piece for the back. With the pocket hole jig set for 3/4″ material, drill holes in each end of the back piece. Secure tot he legs using glue and 1-1/4″ pocket hole screws. The tapers on the legs will face each other, and the outside face of the back will be flush with the outside face of the legs.
Step Two
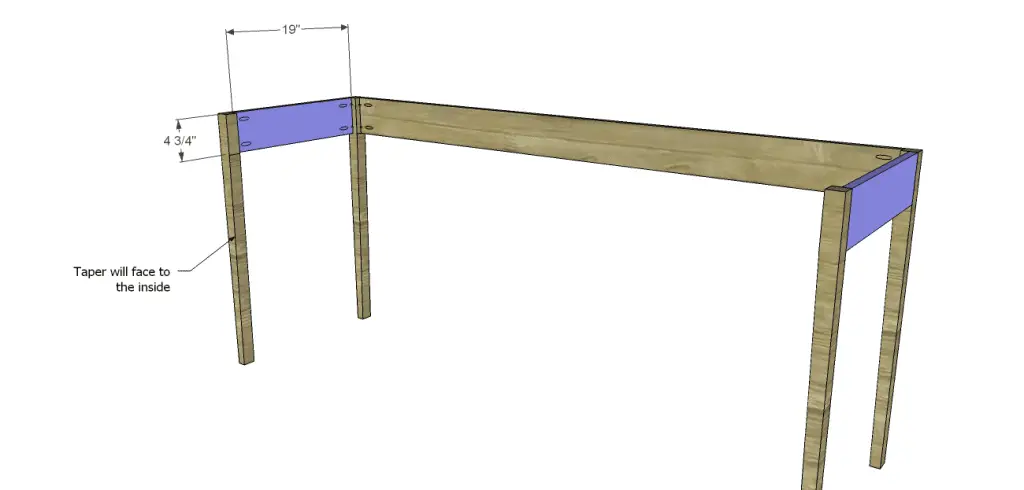
Cut the pieces for the sides and drill pocket holes in each end. Secure to the back legs, as well as another set of legs that were previously cut, using glue and 1-1/4″ pocket hole screws. The tapers on the legs will face each other, and the outside face of the sides will be flush with the outside face of the legs.
Step Three
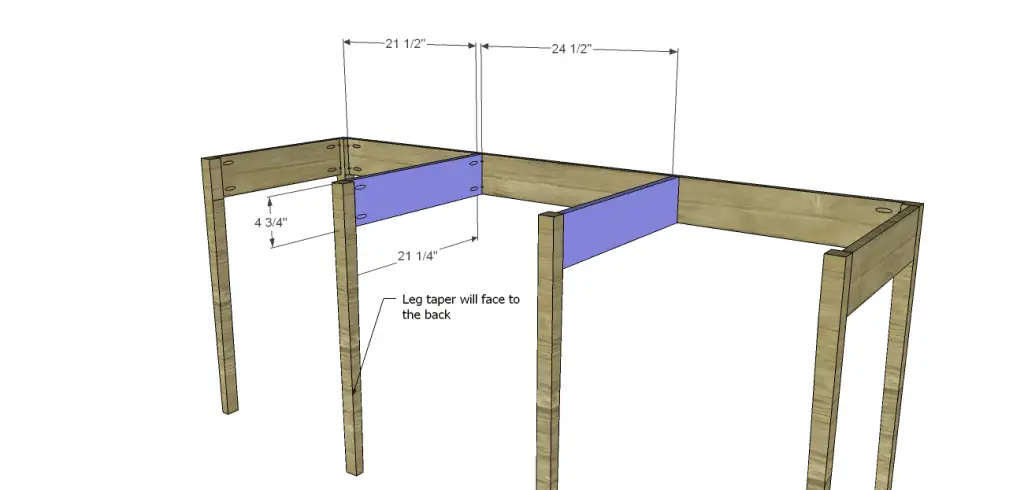
Cut the pieces for the center supports and drill pocket holes in each end. Secure to the back as shown, as well as another set of legs that were previously cut, using glue and 1-1/4″ pocket hole screws. The tapers for the front legs will face to the back. The supports will be flush with the outer face of the legs.
Step Four
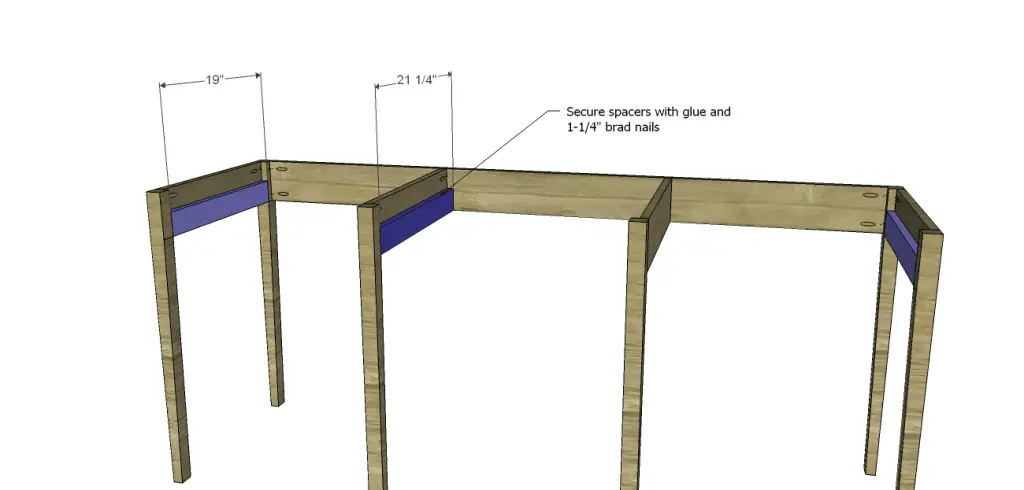
Cut the pieces for the drawer spacers. Secure to the sides and the center supports using glue and 1-1/4″ brad nails.
Step Five
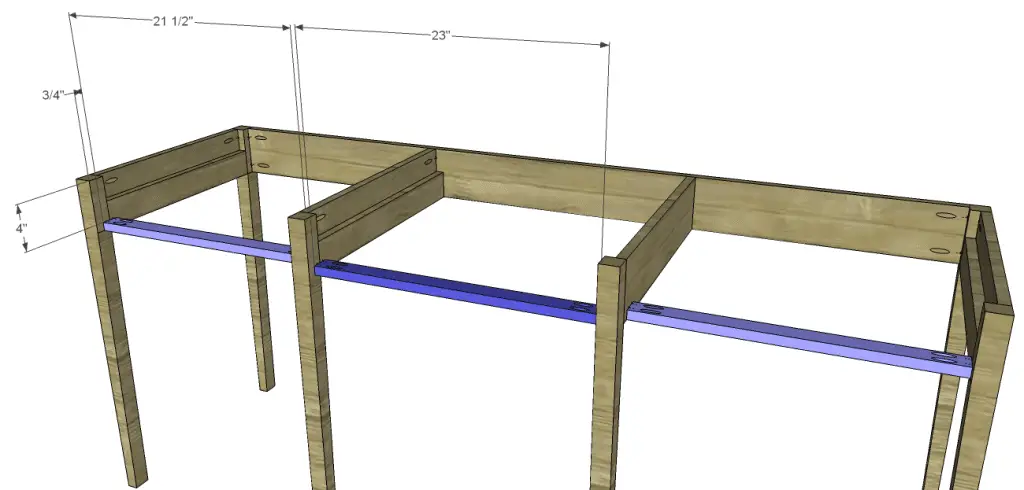
Cut the pieces for the stretchers and drill pocket holes in each end. Secure to the legs and spacers as shown, locating each piece 3/4″ back from the front face of the legs, using glue and 1-1/4″ pocket hole screws.
Step Six
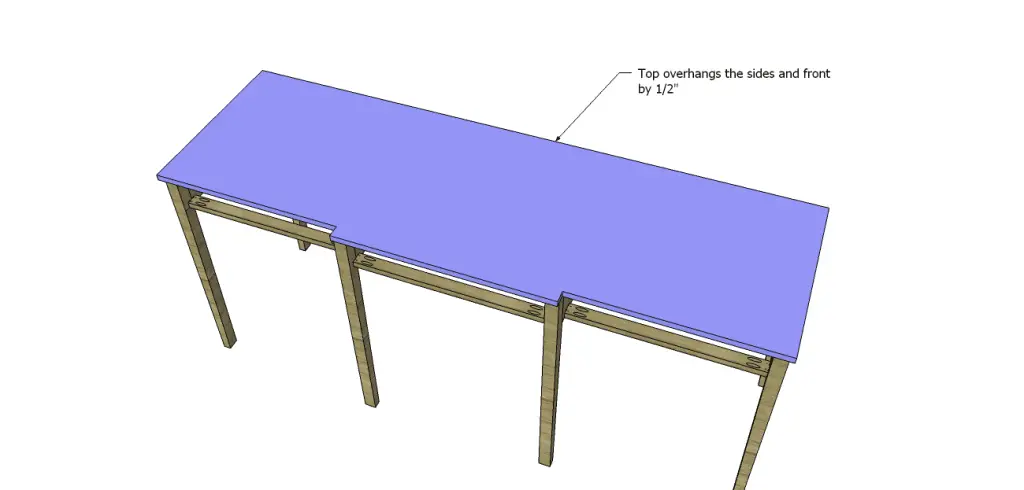
Cut the piece for the top. Position the top so that the sides and front overhang the legs by 1/2″. Secure in place using glue and 1-1/4″ brad nails.
Step Seven
Cut the pieces for the drawer boxes. Drill pocket holes in all four edges of the bottom as well as each end of the sides. Assemble the drawer box as shown using glue and 1-1/4” pocket hole screws. Install the drawer slides according to the manufacturer’s installation instructions, locating them ¾” back from the front edge of the sides. Take a look at this easy tutorial on installing drawer slides. Make any necessary adjustments.
Step Eight
Cut the pieces for the drawer fronts. Mark the position for the drawer pulls and drill the holes. Shim the drawer front in the opening – there will be a 1/8” gap around all sides – then drive screws through the holes for the drawer pulls into the drawer box. Open the drawer, and secure the drawer front using countersunk 1-1/4” screws from the inside. Remove the screws from the holes for the drawer pull then finish drilling the holes. Install the drawer pull. This easy tutorial on installing drawer fronts will be helpful.
Step Nine
Cut the piece for the backsplash. There are no dimensions shown for the curve or the cutout, the only dimensions shown are for the overall size – the curve and cutout will be cut at your discretion. Be creative!
Finish as desired!
A mirror or photograph in the backsplash of these vintage buffet plans would look beautiful, as well as regular scrapbooking paper or tile! Have questions? Leave a comment below!


This is so pretty. Must be my heritage – I love the look of vintage things.
I love this table, also. I may build it just because!!
You can build it! I can help walk you through it!!
I love this. Very Pottery Barn.
Thank you!! This is one of the pieces I’d really like to build!