Build a Large Craft Table with Storage
Plans to Build a Fabulous Table
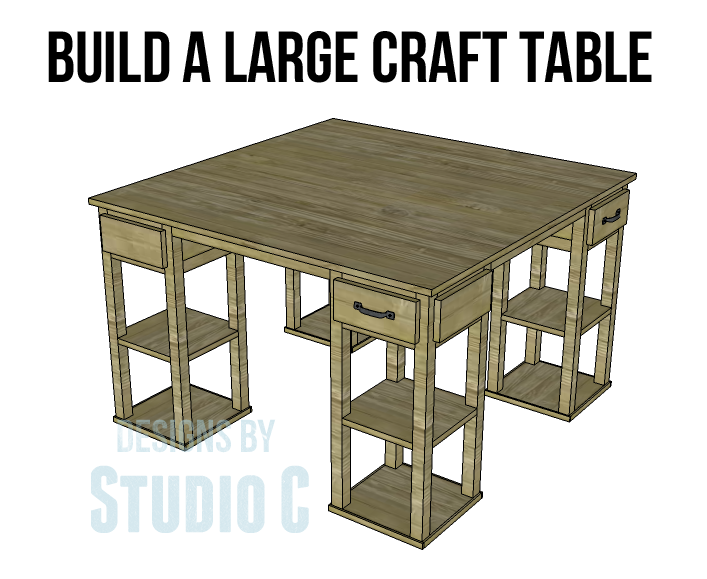
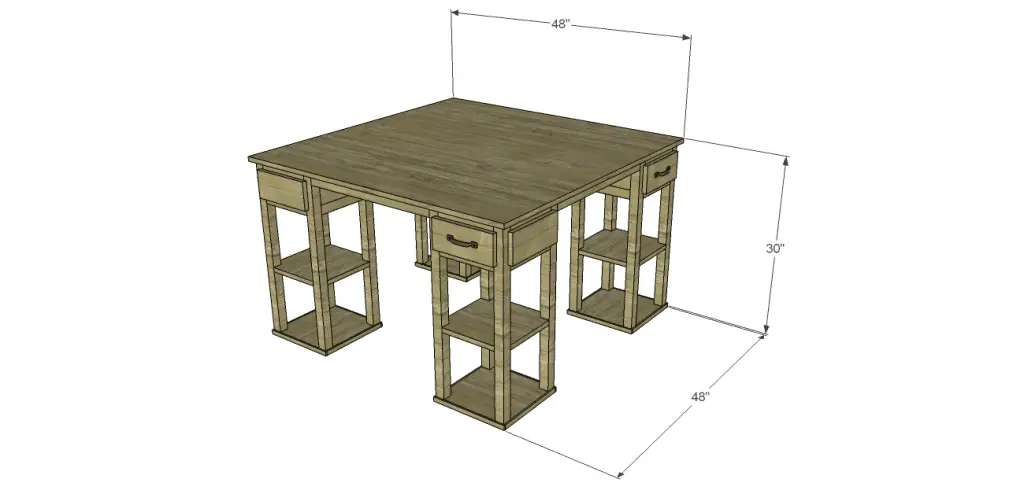
I was recently contacted by a reader asking if I could draw plans for a craft table with storage… Who couldn’t use a fabulous craft table with a roomy table top and lots of space for storage? I could certainly use one of these tables, myself! This particular table features four drawers and eight shelves perfect for crates or baskets.
Materials:
- 1-1/4” pocket hole screws (<– affiliate link!)
- 1″ brad nails
- 1-1/4” brad nails
- 1-1/4″ screws
- Edge banding, optional
- 4 – Cabinet pulls
- Wood glue
- Sandpaper (100, 150, 220 grits)
- Finishing supplies (primer & paint, or stain, sealer)
- Paste wax
Lumber:
- 3 – 1×2 at 8′
- 3 – 1×3 at 8′
- 1 – 1×6 at 8′
- 6 – 2×2 at 8′ (PureBond would be an excellent choice!)
- 3 – 8′ pieces of 3/4″ trim (decorative or shoe molding)
Cut List:
- 16 – 2×2 at 29-1/4″ – Legs
- 40 – 1×2 at 9″ – Front & Back Frames, Stretchers & Drawer Spacers
- 12 – 1×3 at 9″ – Panels
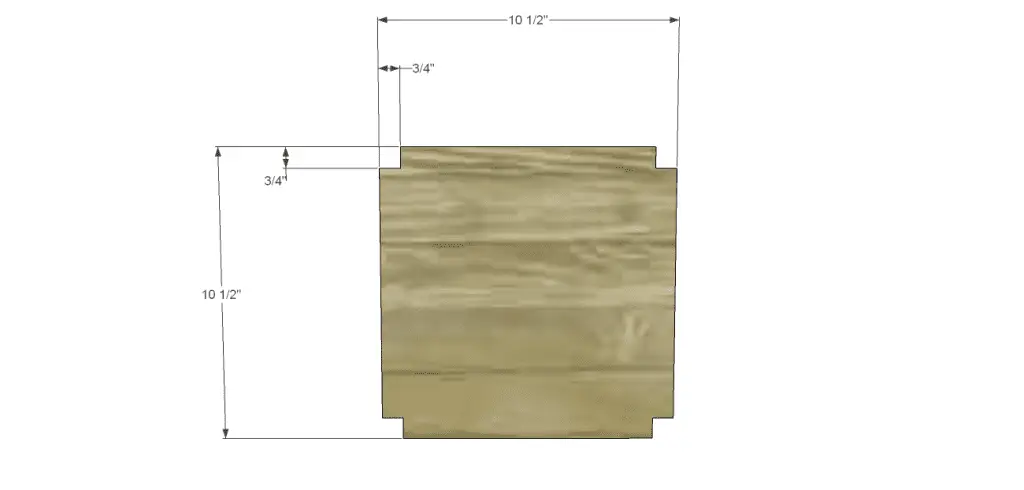
- 4 – 3/4″ plywood at 10-1/2″ x 10-1/2″ – Drawer Cubby Bottom
- 8 – 3/4″ plywood at 12″ x 12″ – Shelves
- 8 – 1×2 at 22-1/2″ – Long Stretchers
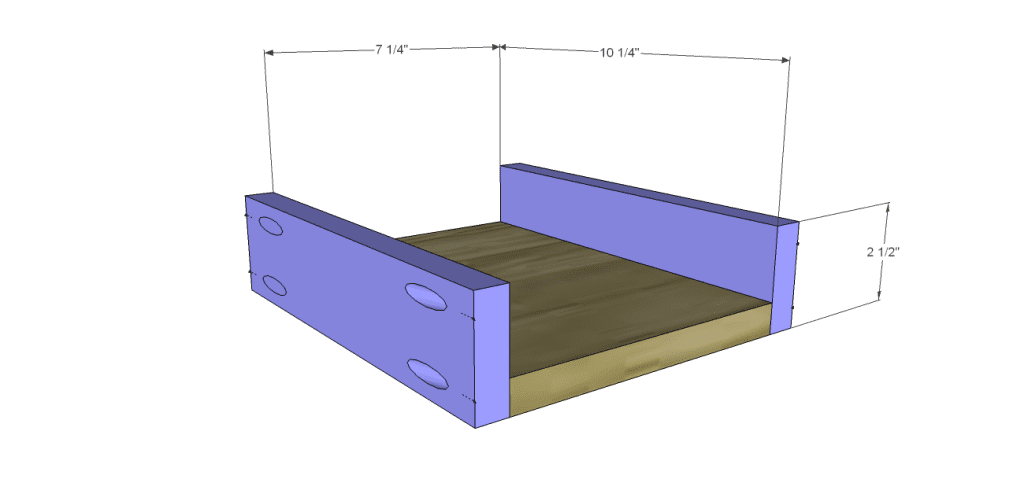
- 4 – 3/4″ plywood at 7-1/4″ x 10-1/4″ – Drawer Box Bottoms
- 8 – 1×3 at 10-1/4″ – Drawer Box Sides
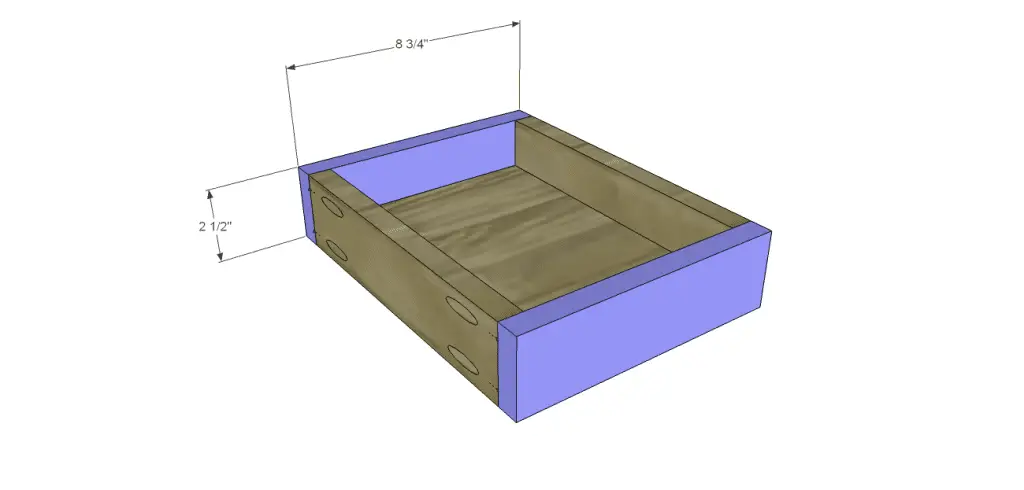
- 8 – 1×3 at 8-3/4″ – Drawer Box Front & Back
- 8 – 1×6 (ripped to 4-1/2″ wide) at 10″ – Drawer Fronts & False Fronts
- Trim cut to fit
Notes:
Edge banding will be applied to the exposed edges of the plywood before assembly. A router with a decorative bit can be used on the drawer fronts.
Step One
Four of the base assemblies will be constructed. These make up the base of the table.
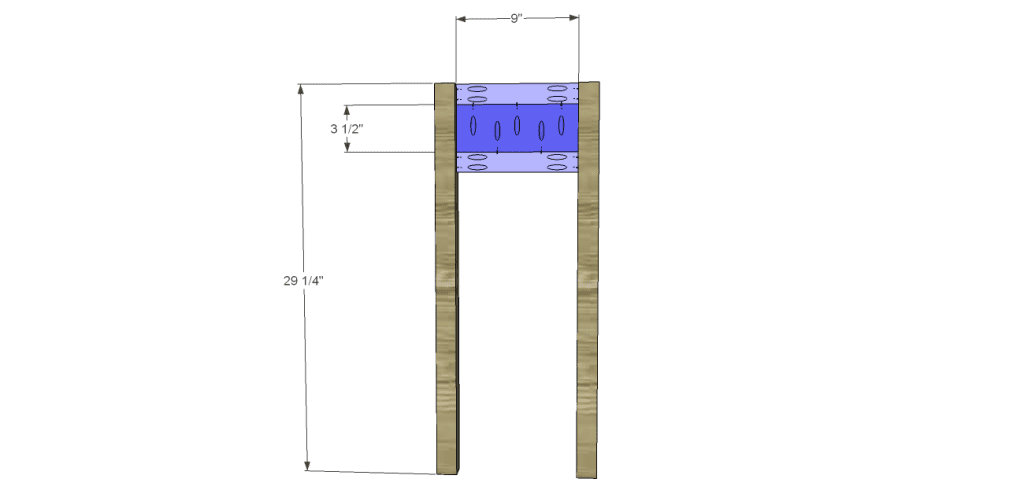
Cut the pieces for the legs, the side frame pieces, and the panels. With the pocket hole jig set for 3/4″ material, drill pocket holes in each end of the frame pieces as well as both long edges of the panel. Secure the frame pieces to the panel using glue and 1-1/4″ pocket hole screws. Attach the panel assembly to the legs using glue and 1-1/4″ pocket hole screws. The front face of the assemblies will be flush with the outside face of the legs.
Step Two
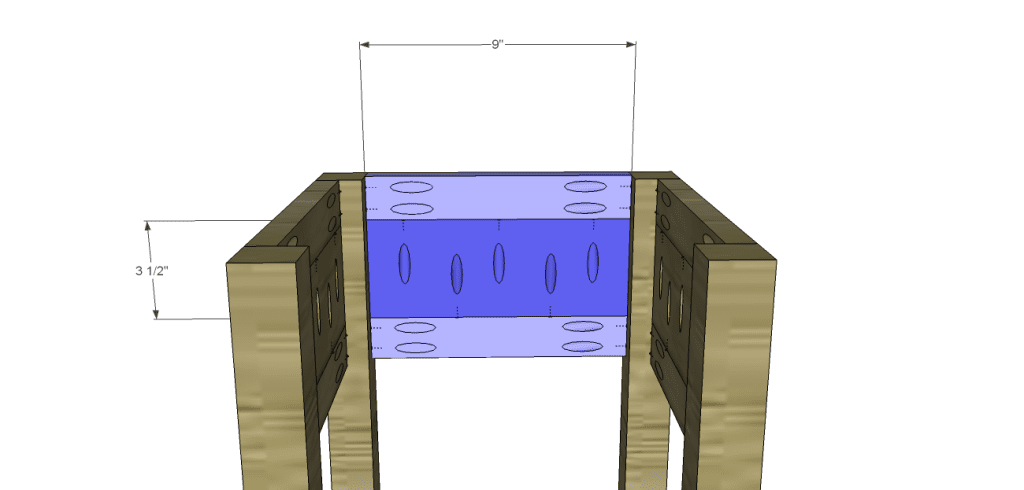
Cut the pieces for the back frame and panels. Drill pocket holes in each end of the frame pieces as well as both long edges of the panel. Secure the frame pieces to the panel using glue and 1-1/4″ pocket hole screws. Attach the panel assembly to the legs using glue and 1-1/4″ pocket hole screws. The outside face of the assemblies will be flush with the outside face of the legs.
Step Three
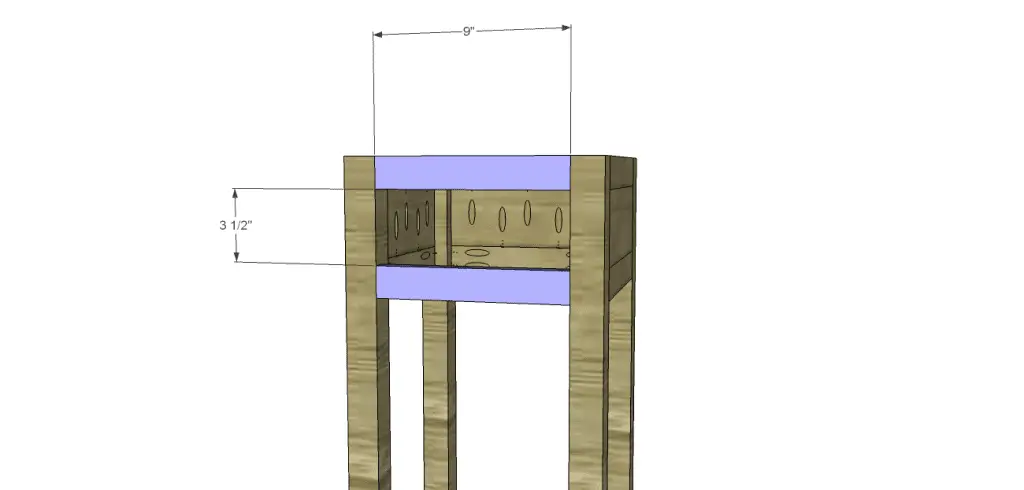
Cut the pieces for the stretchers and drill pocket holes in each end. Secure to the legs as shown using glue and 1-1/4″ pocket hole screws.
Step Four
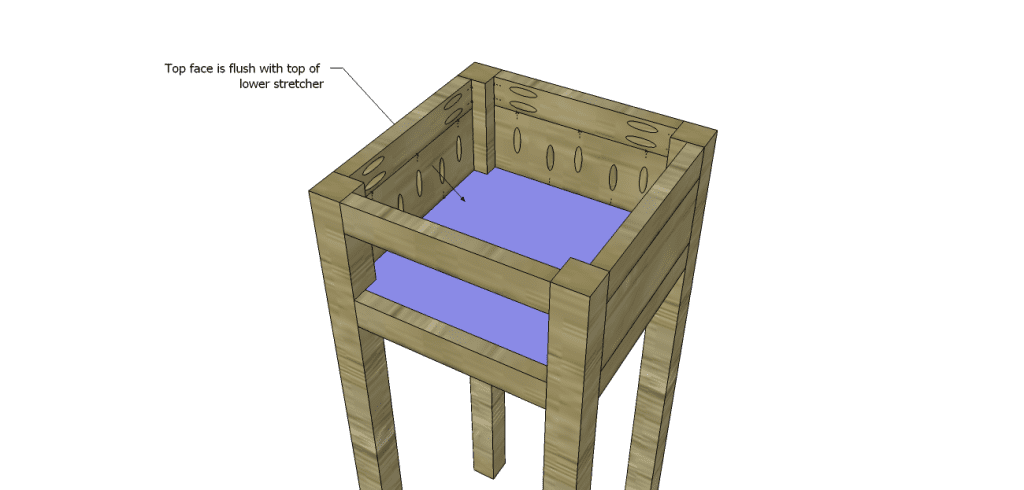
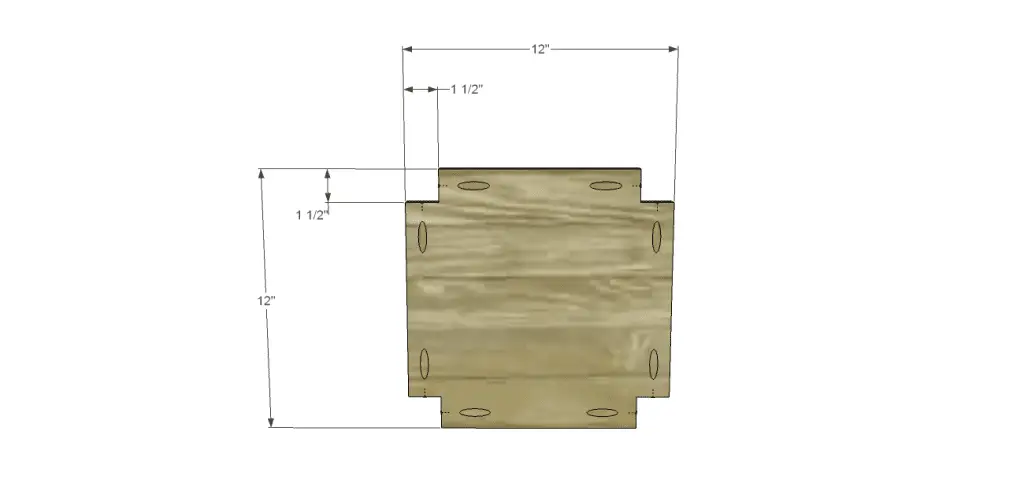
Cut the pieces for the drawer cubby bottom. Cut the notches using a jigsaw. Position the pieces in each base assembly as shown with the top edge flush with the top edge of the front stretcher. Secure using glue and 1-1/4″ brad nails through the sides, back, and front stretchers into the bottom piece.
Step Five
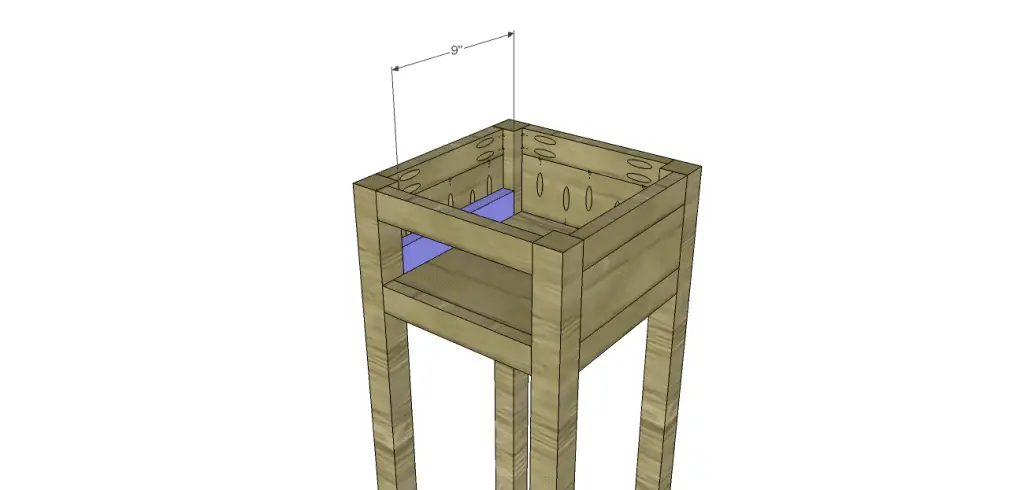
Cut the pieces for the drawer spacers. Secure to the sides between each leg using glue and 1-1/4″ brad nails.
Step Six
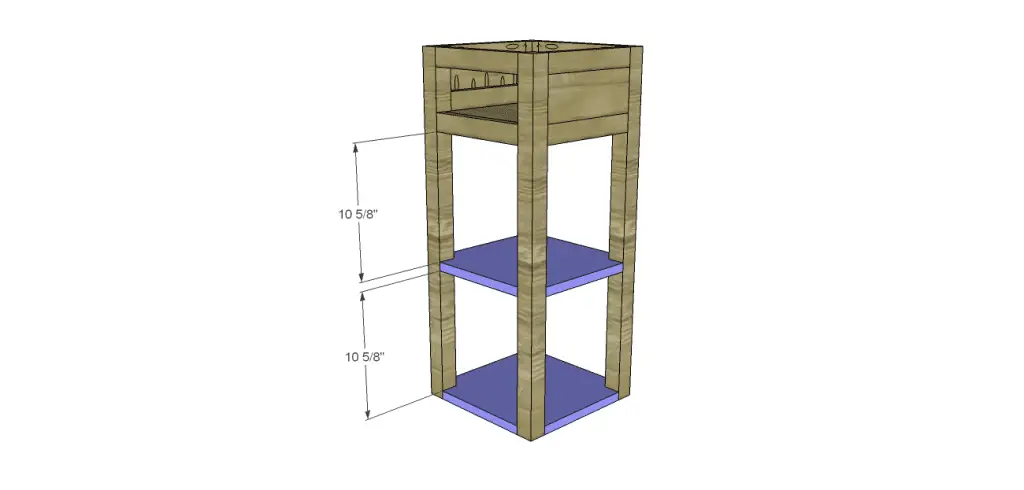
Cut the pieces for the shelves. Cut the notches using a jigsaw. Drill pocket holes as shown, then attach to the legs using glue and 1-1/4″ pocket hole screws.
Step Seven
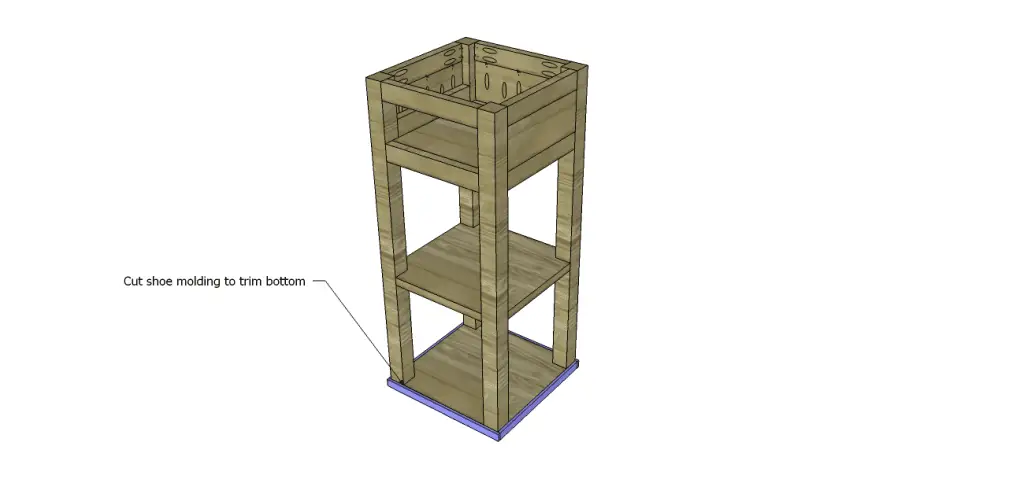
Measure the lower edge to apply the trim and cut the trim to fit. Secure the side pieces first using glue and 1″ brad nails, then secure the front and back.
Step Eight
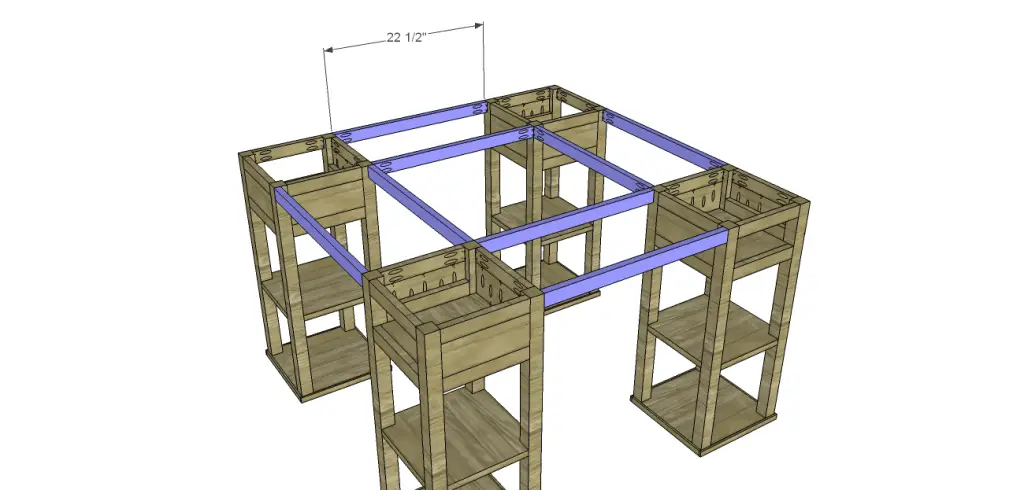
Cut the pieces for the longer stretchers and drill pocket holes in each end. Secure to the legs as shown using glue and 1-1/4″ brad nails.
Step Nine
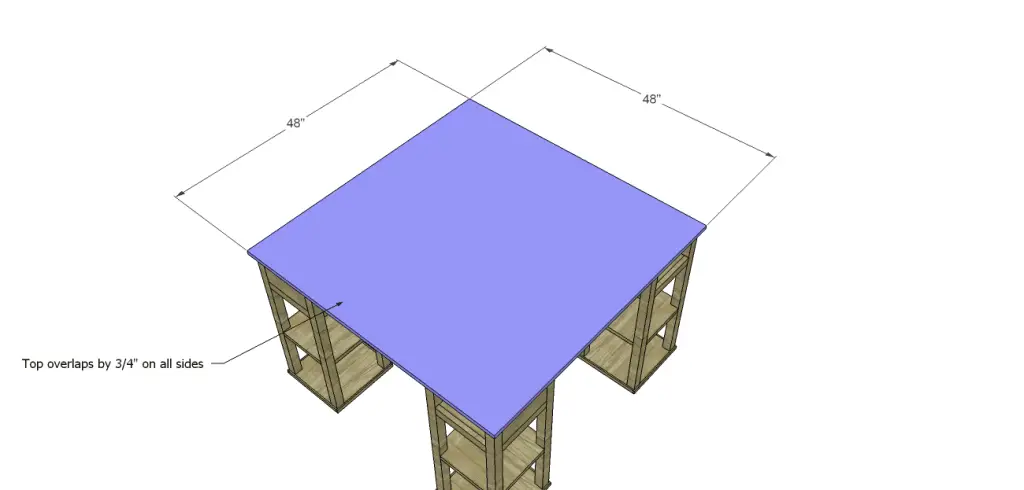
Cut the piece for the top. The top will overhang all sides by 3/4″. Secure using glue and 1-1/4″ brad nails through the top into the stretchers and legs.
Step Ten
Cut the pieces for the drawer boxes. Drill pocket holes in all four edges of the bottom, as well as in each end of the side pieces. Attach the sides to the bottom using glue and 1-1/4″ pocket hole screws, then attach the front and back. Insert the drawers in the opening. There will be a 1/8″ gap at the sides in the opening.
Step Eleven
Cut the pieces for the drawer fronts and the false drawer fronts. Use a router and a decorative bit on the edges if desired. The fronts will overlap the opening by 1/2″ on each side. For the drawer fronts, mark the position for the drawer pull, then drill the holes. Position the drawer front over the drawer box in the opening then drive screws through the holes for the pulls into the drawer box. Remove the drawer then secure the front from the inside using glue and 1-1/4″ screws.
For the false drawer fronts, align the piece so that it is in the same position as the drawer fronts, then secure in place using glue and 1-1/4″ brad nails.
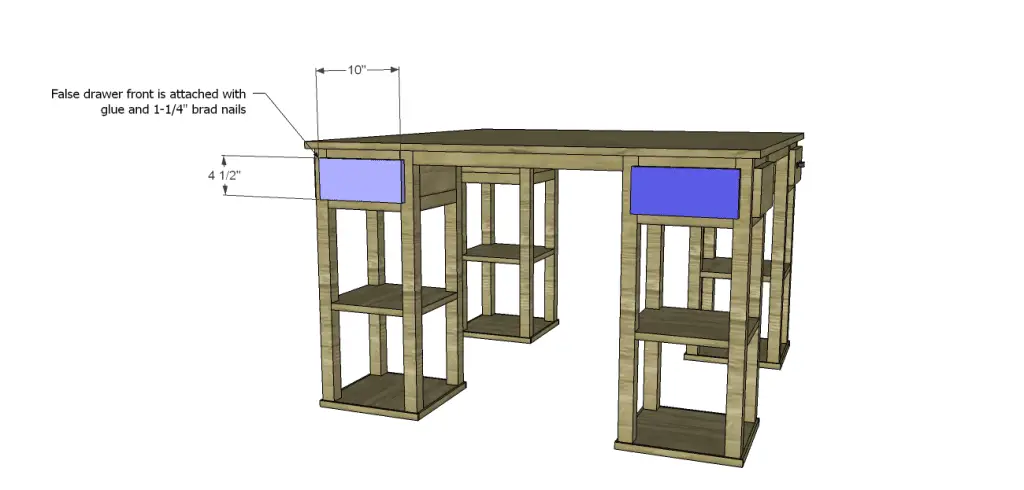
Finish as desired. Apply a coat of paste wax to the bottom and sides of each drawer box so that it slides smoothly in the opening.
Add crates or baskets to the shelves for additional storage and organization. This craft table with storage is sure to make your projects a whole lot more fun!

