Free Plans to Build a Pedestal for a Washer and Dryer
An Easy to Build DIY Washer/Dryer Pedestal
Guess what? I finally caved in and bought myself a brand new washer and dryer! Honestly, my old ones were barely hanging on – the dryer took forever to dry a single load and the washer had its fair share of quirks. But here’s the exciting part – I didn’t just settle for the first set I found. Oh no, I did my research and splurged on a super fancy high efficiency set. And let me tell you, with this new duo comes a whole new set of tasks. First up, I need to get my laundry room organized, and secondly, I want to build a pedestal for a washer and dryer.
I got the idea for this DIY project from Ana White’s website, where she shared plans for a pedestal. However, I decided to put my own spin on it and create a custom washer/dryer pedestal that suits my needs perfectly. Since I couldn’t find untreated 4×4 posts, I came up with a clever solution – I laminated two 2x4s together and then ripped them on the table saw to make 3″ wide posts. I also made sure to rip all the 2x4s to 3″ wide, giving them nice square edges instead of rounded ones.
I’m really excited about this project and can’t wait to see how it turns out. Wish me luck!
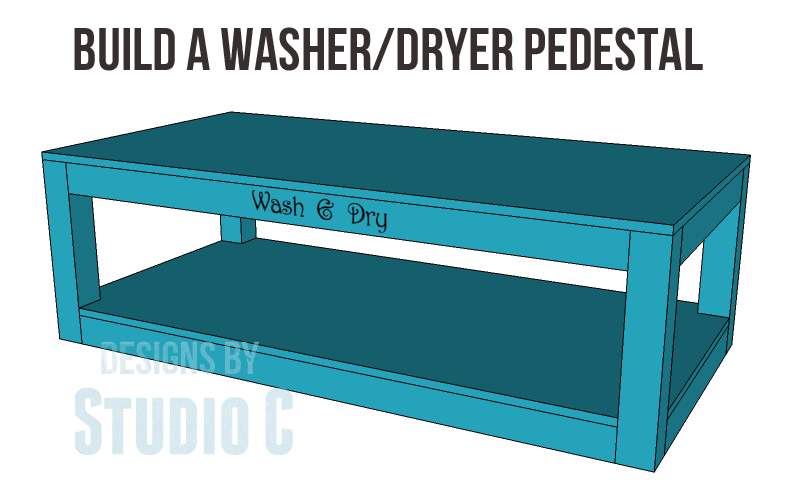
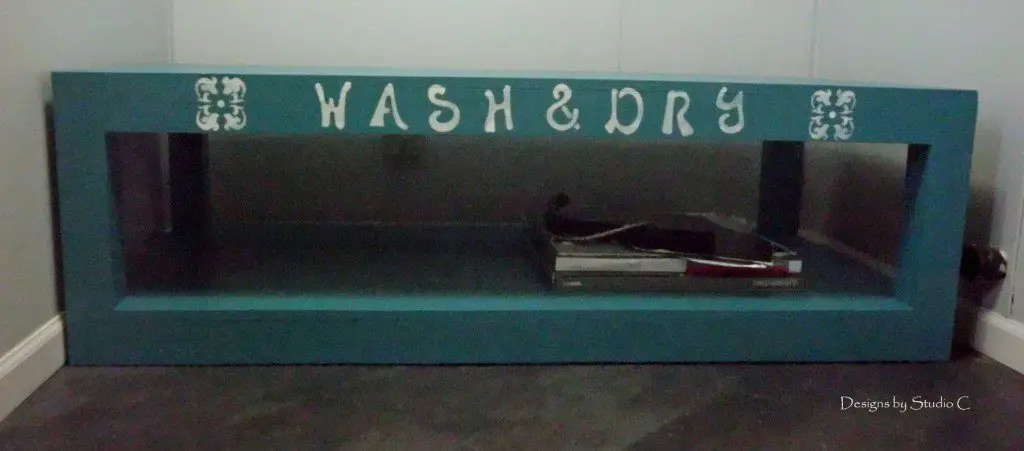
For an easy tutorial on how to create posts with 2x4s, click here.
Materials:
Lumber:
- 9 – 2×4 at 8′ OR
- 7 – 2×4 at 8′ AND
- 1 – 4×4 at 8′
- Two sheets of 3/4″ plywood (I used Purebond plywood )
Cut List:
- 4 – Posts (either 3″ from 2x4s or 4×4) at 18-1/4″ – Legs
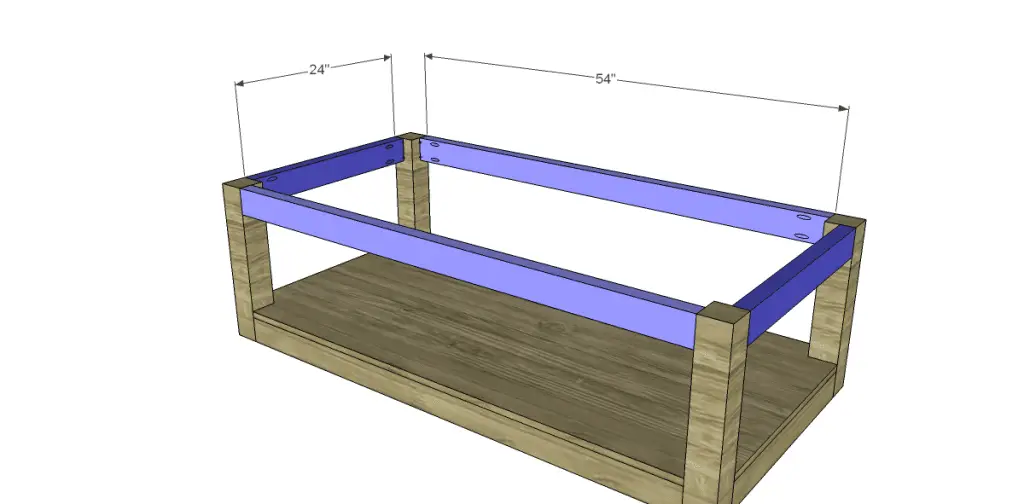
- 4 – 2×4 at 24″ (23″ if using 4×4 posts) – Side Frames
- 4 – 2×4 at 54″ (53″ if using 4×4 posts) – Front and Back Stretchers
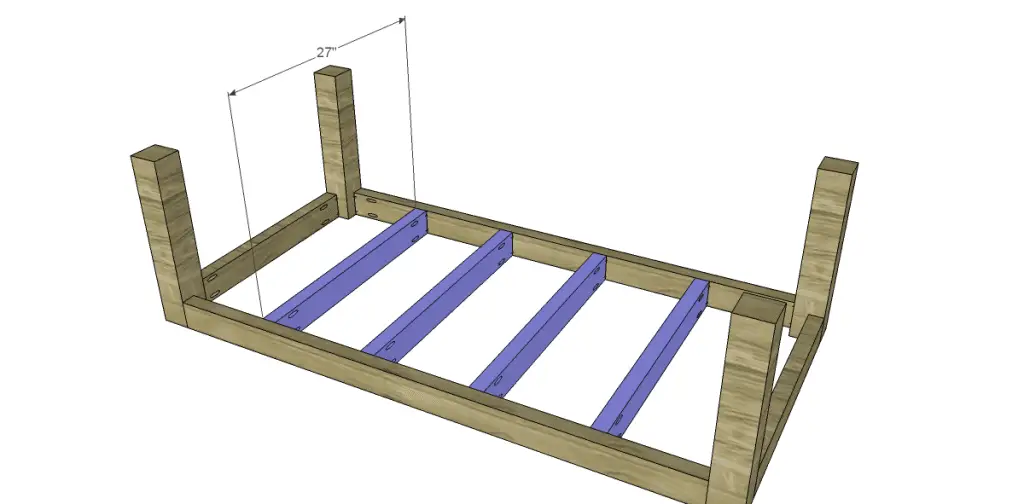
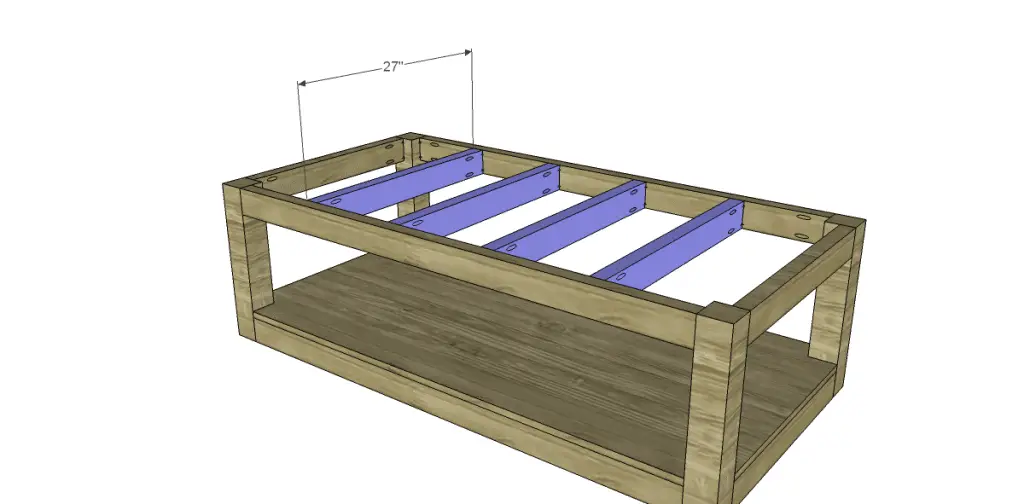
- 8 – 2×4 or 4×4 at 27″ – Supports
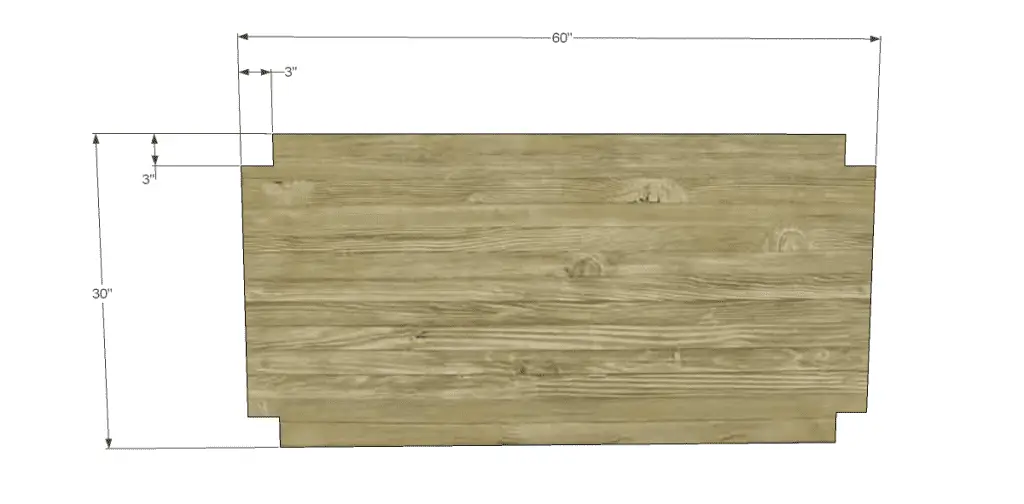
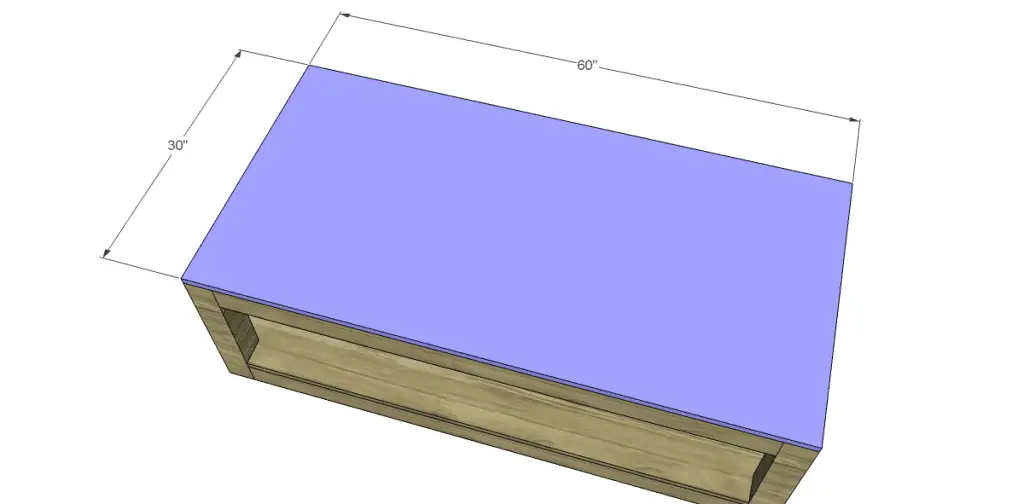
- 2 – 3/4″ plywood at 30″ x 60″ – Shelves
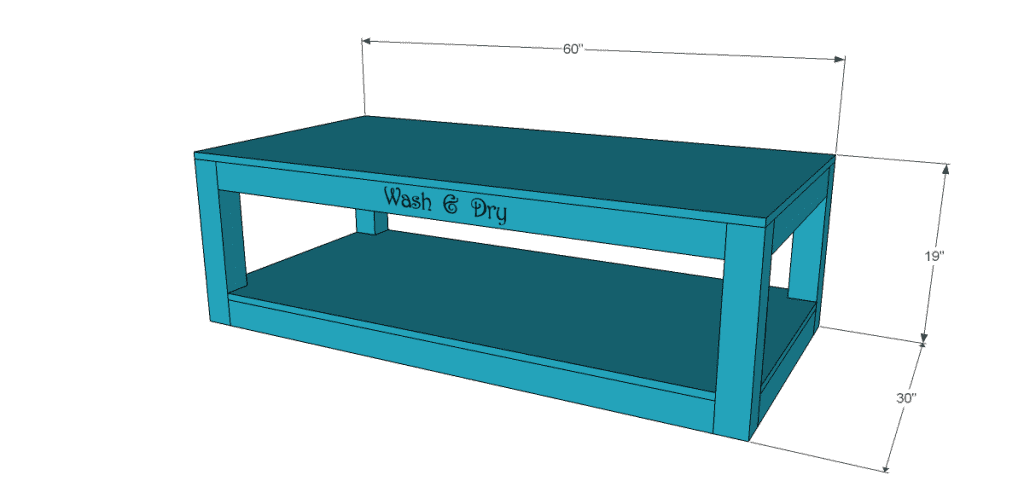
Click on the drawings to for a larger view!
Step One
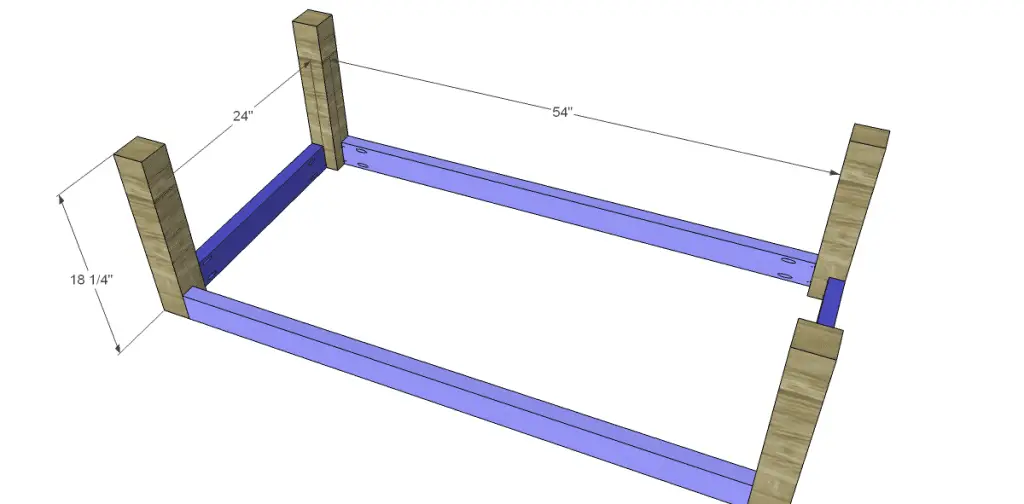
Cut the posts to length. Cut the lower frame pieces and drill pocket holes in each end. Attach to the legs as shown using glue and 2-1/2″ pocket hole screws.
Step Two
Cut the pieces for the lower supports and drill pocket holes in each end. Attach as shown using glue and 2-1/2″ pocket hole screws.
Step Three
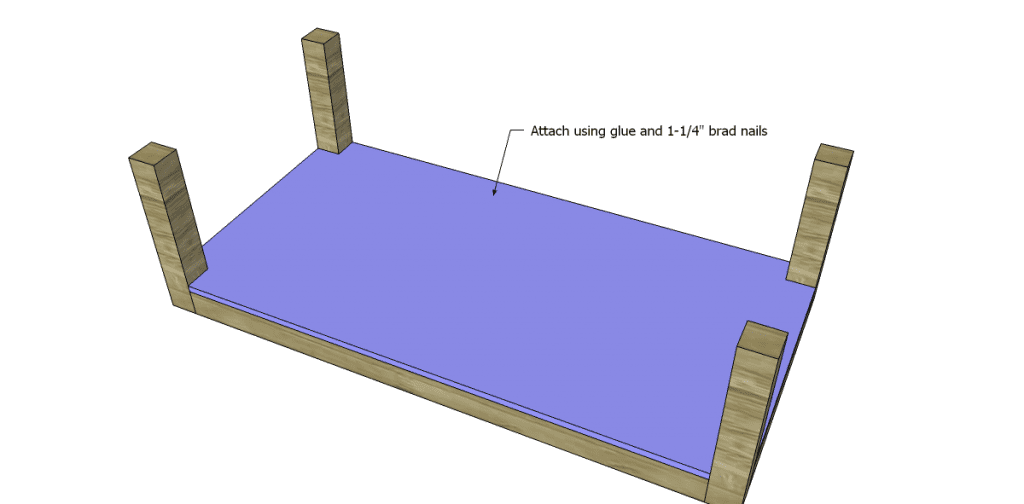
Cut the piece for the lower shelf and cut the notches using a jigsaw. Attach to the lower frame using glue and 1-1/4″ brad nails.
Step Four
Cut the pieces for the upper frame and drill pocket holes in each end. Position as shown and attach using glue and 2-1/2″ pocket hole screws.
Step Five
Cut the pieces for the upper supports and drill pocket holes in each end. Position as shown then attach using glue and 2-1/2″ pocket hole screws.
Step Six
Cut the piece for the upper shelf. Attach the top shelf to the upper portion of the frame using glue and 1-1/4 brad nails or countersunk screws.
 Finish as desired.
The free plans to build a pedestal for a washer and dryer can be finished any way you choose – stained, painted (like mine!), distressed, etc. It is a very easy and inexpensive build! As usual, if you have a project built from my plans and would like to be featured on DbSC, send me an email at designsbystudioc [at] gmail [dot] com!
Originally posted 2012-12-03 08:00:15.


Your supports will need to be 27″ regardless of the size of the legs.
Hi, Nicki! If two 2x4s (laminated together) are used as the legs, they will measure 3″ x 3-1/2″ instead of 3-1/2″ x 3-1/2″ for a 4″ x 4″ post. If the “seam” (the line between the two 2x4s) faces to the side so it will not be visible, it will shorten the side aprons and the supports by 1″, thus making the supports 26″ instead of 27″. Thank you for stopping by!
You are correct about the adjustment for the side aprons but not the supports. I cut my lumber according to the plan dimentions without adding up the measurements first and my supports are an inch too short. I didn’t think about the fact that the supports are just going between the 2x4s and the total distance will still need to be 30″. If you take into account that the 2x4s make up a total of 3″ and subtract from 30″ you will still need 27″ supports regardless of the size of the legs.
Hi, Nicki! Ok, I see what you mean – I’ve had coffee and am better able to visualize, lol! I think you are correct and I appreciate you pointing this out. I will change the plan, ASAP! Thanks again!
Hi Nick,
Thank you so much for your instructions on ‘how to build washer dryer pedestals’ . They are impressive and inspired me to make one for myself. I just have couple of questions. I was never into carpentry and this will be my very first project. Since I don’t have drill, can you suggest an alternative for the pocket holes?. and Do you recommend any sealant or just paint is good enough?. Does it needs any sanding?.
Hi, there! A drill will definitely be necessary for attaching any type of supports unless you are He-Man with a screwdriver – then go for it! I would use mending plates like these: http://www.homedepot.com/p/Unbranded-2-in-Zinc-Plated-Double-Wide-Mending-Plate-Brace-4-per-Pack-13544/202950158 or T-Braces like these: http://www.homedepot.com/p/Unbranded-5-in-x-5-in-Zinc-Plated-T-Plate-15068/202034097 to connect the aprons to the legs. Corner braces or L-brackets can be used to attach the supports to the aprons.
Paint is perfectly good enough and sanding is a must for a smooth finish. If you have any other questions, please let me know ~ Cher
[…] Yourself a Pedestal for Washer and Dryer.Build this pedestal for your front loading washer and dryer. It is easy with these free woodworking […]
[…] I posted plans to build a laundry pedestal, so how about plans for single pedestals? The DIY plans to build Single Washer […]
How do you support the washing machine on the pedestal so that it will not vibrate off? I had made a pedestal using cinderblocks and my husband and I just picked it up off the floor as it was lying face down.
Hi, Rosemary! In all the years I had m pedestal, I never had a problem with the washer vibrating off of it. A 2×4 secured to the front and the back of the top edge of the pedestal may help but if the washer is vibrating that much, a pedestal probably wouldn’t be a good idea. I hope this helps!