
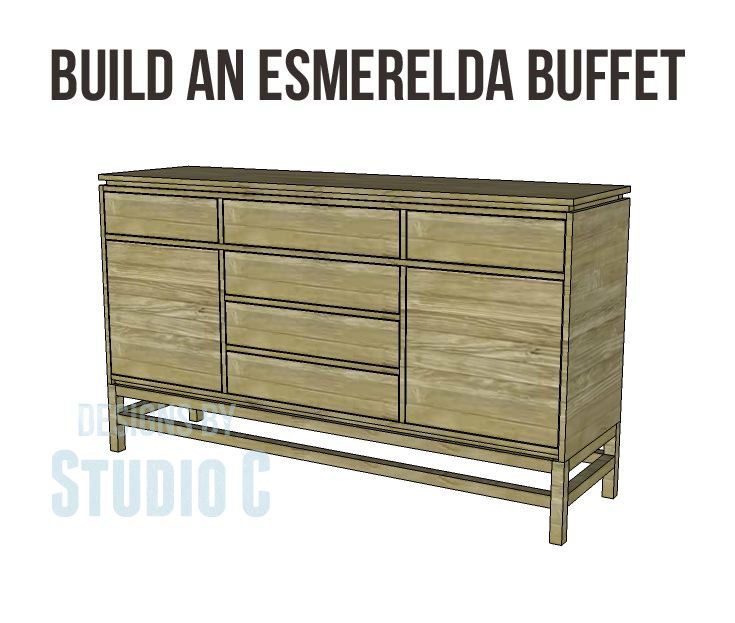
Easy DIY Projects: Building an Esmerelda Buffet
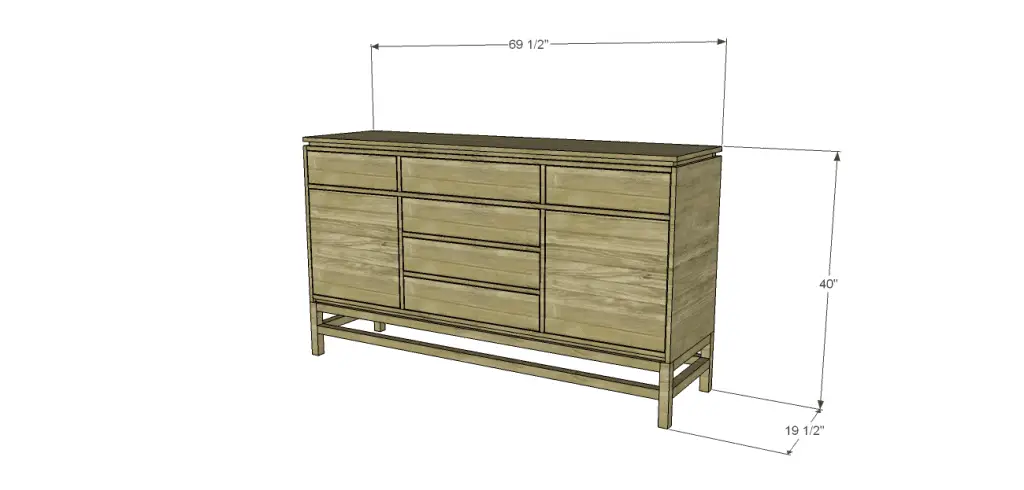
Who doesn’t love a good buffet? I do especially those of the Chinese variety – haha! In terms of furniture, this buffet takes the cake… With a floating top, the cabinet itself floats on the base and boasts tons of storage – six drawers and two shelved cabinets, to be exact! The plans to build an Esmerelda buffet only look complicated but is really easy!
Materials:
- 1-1/4″ pocket hole screws
- 2-1/2″ pocket hole screws
- 1-1/4″ brad nails
- Edge banding
- 6 sets of 16″ Drawer slides (<– affiliate link!)
- 2 sets of hinges
- 8 – Cabinet pulls
- Wood glue
- Sandpaper (100, 150, 220 grits)
- Finishing supplies (primer & paint, or stain, sealer)
Lumber:
- 1 – 1×2 at 4′
- 6 – 1×2 at 6′
- 2 – 1×2 at 8′
- 4 – 1×6 at 8′
- 5 – 2×2 at 8′
- 3 sheets of 3/4″ plywood
Cut List:
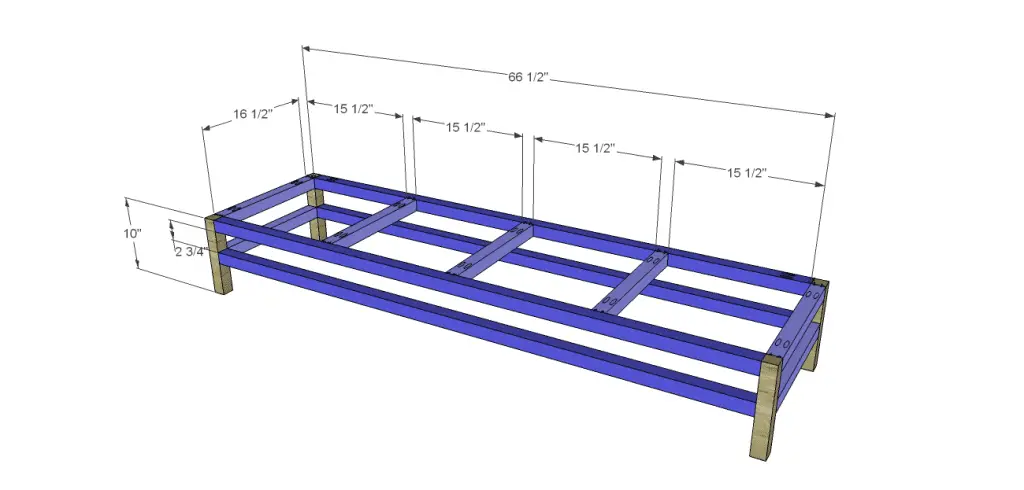
- 4 – 2×2 at 10″ – Legs
- 4 – 2×2 at 66-1/2″ – Base Frame
- 7 – 2×2 at 16-1/2″ – Base Frame
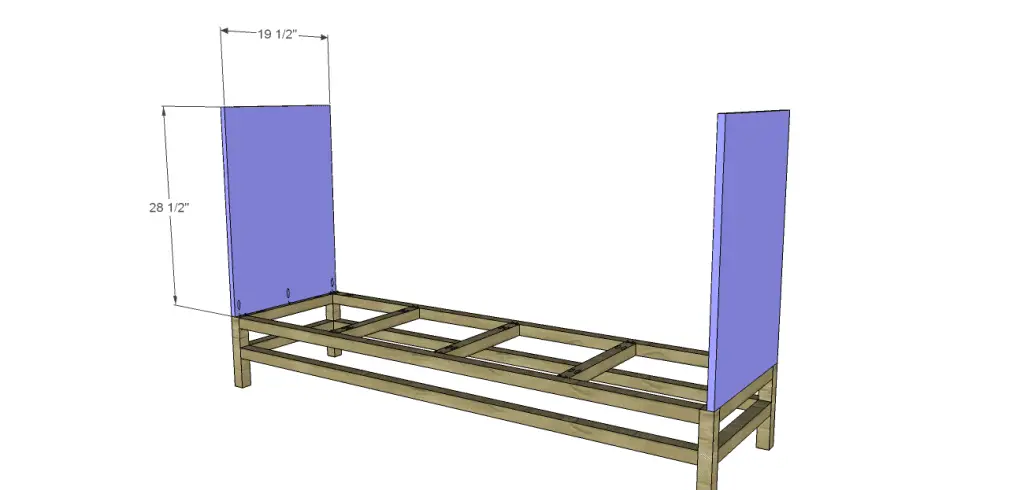
- 2 – 3/4″ plywood at 19-1/2″ x 28-1/2″ – Sides
- 1 – 3/4″ plywood at 28-1/2″ x 68″ – Back
- 2 – 1×2 at 15″ – Bottom Frame
- 2 – 1×2 at 68″ – Bottom Frame
- 1 – 3/4″ plywood at 18-3/4″ x 68″ – Bottom
- 2 – 1×2 at 68″ – Front Stretchers
- 2 – 1×2 at 6″ – Dividers
- 2 – 1×2 at 19-1/2″ – Dividers
- 2 – 3/4″ plywood at 17-1/4″ x 27″ – Cabinet Dividers
- 2 – 1×2 at 26-1/2″ – Center Stretchers
- 2 – 3/4″ plywood at 17-3/4″ x 20″ – Shelves
- 2 – 1×2 at 68″ – Top Frame
- 4 – 1×2 at 15″ – Top Frame
- 1 – 3/4″ plywood at 19-1/2″ x 69-1/2″ – Top
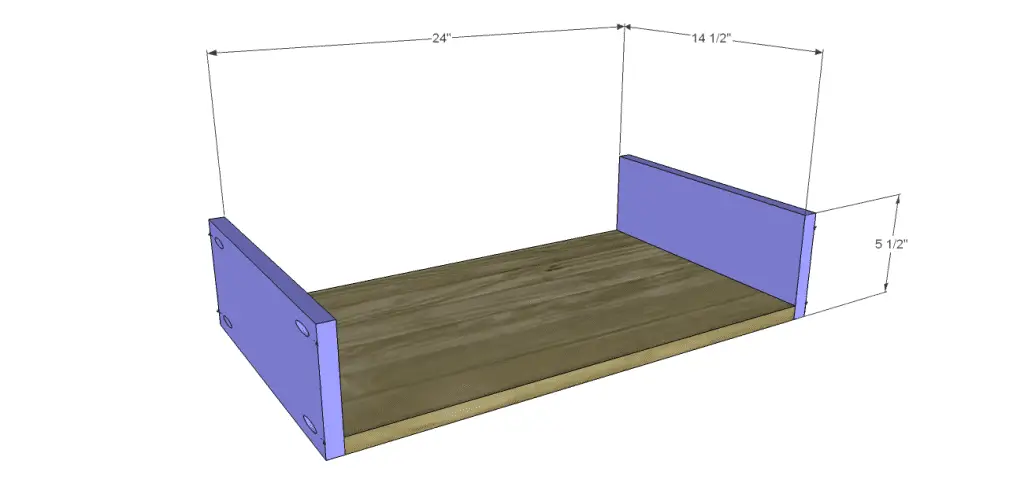
- 2 – 3/4″ plywood at 14-1/2″ x 17-1/2″ – Outer Drawer Bottoms
- 12 – 1×6 at 14-1/2″ – Drawer Box Sides
- 4 – 1×6 at 19″ – Outer Drawer Front & Back
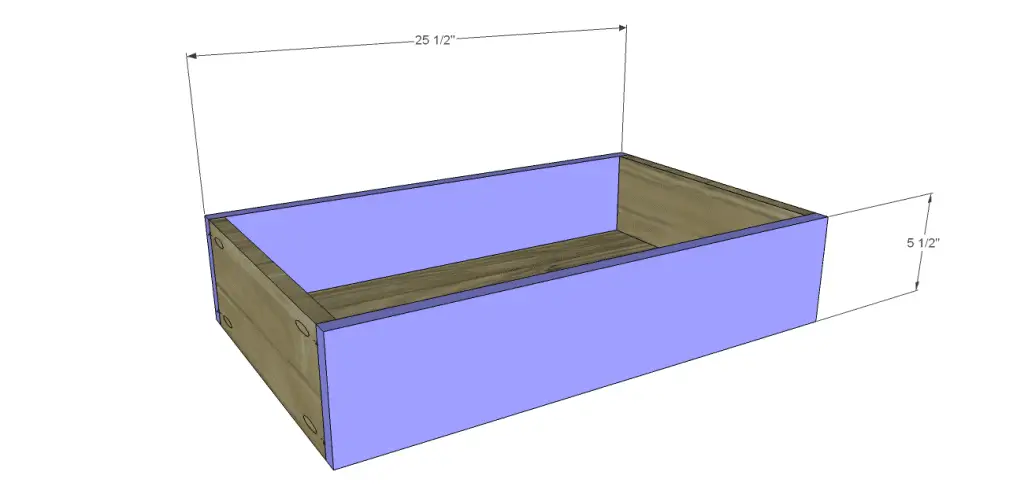
- 4 – 3/4″ plywood at 14-1/2″ x 24″ – Center Drawer Box Bottom
- 8 – 1×6 at 25-1/2″ – Center Drawer Box Front & Back
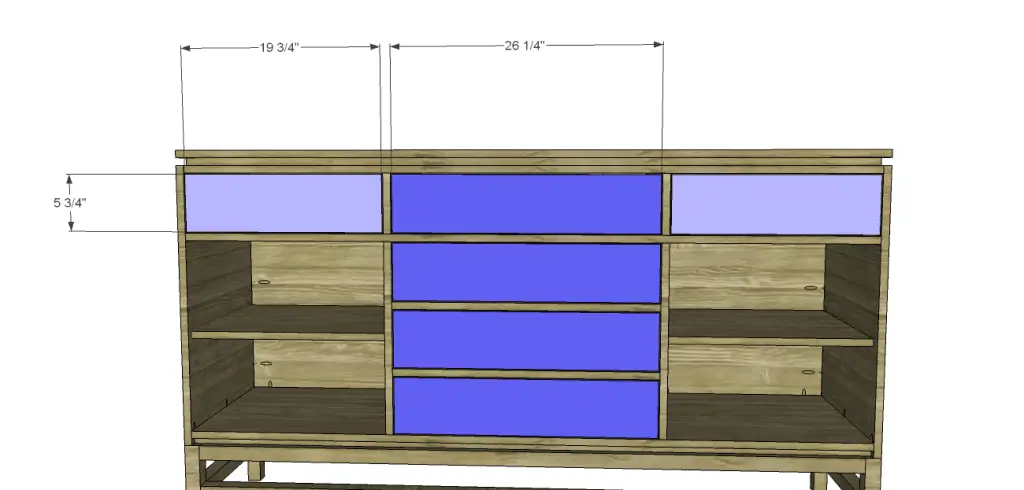
- 2 – 3/4″ plywood at 5-3/4″ x 19-3/4″ – Outer Drawer Fronts
- 4 – 3/4″ plywood at 5-3/4″ x 26-1/4″ – Center Drawer Fronts
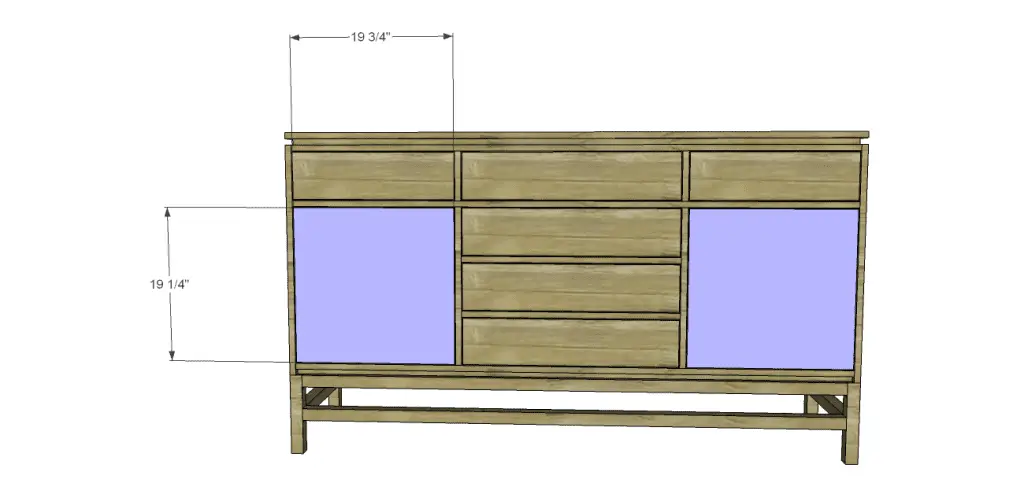
- 2 – 3/4″ plywood at 19-1/4″ x 19-3/4″ – Doors
Step One
Edge banding will be applied to the exposed edges of the plywood prior to assembly.
Cut the pieces for the base frame and legs. With the pocket hole jig set for 1-1/2″ material, drill pocket holes in each end of the frame pieces. Assemble the frame using glue and 2-1/2″ pocket hole screws.
Step Two
Cut the pieces for the sides. Set the pocket hole jig for 3/4″ material and drill pocket holes in the lower edge. Secure to the base frame using glue and 1-1/4″ pocket hole screws.
Step Three
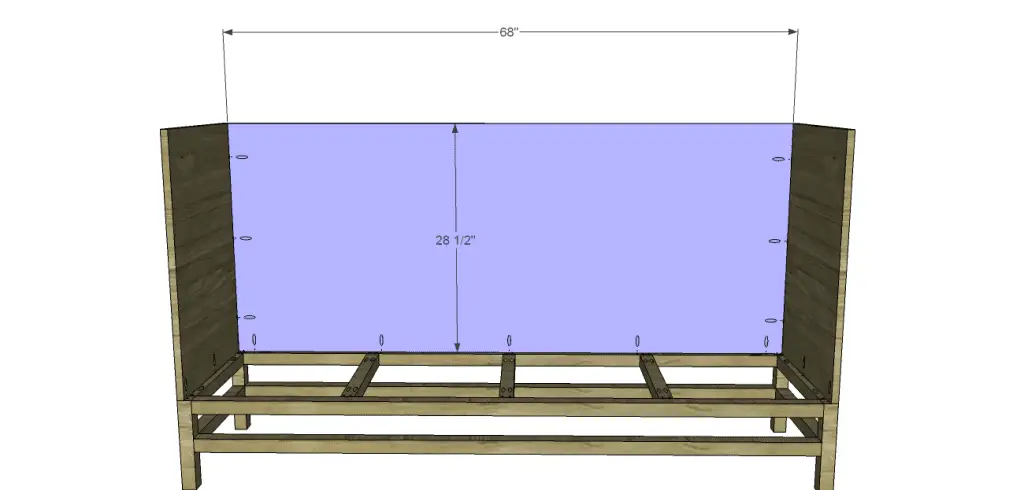
Cut the piece for the back and drill pocket holes in the side and lower edges. Secure to the sides and base frame using glue and 1-1/4″ pocket hole screws.
Step Four
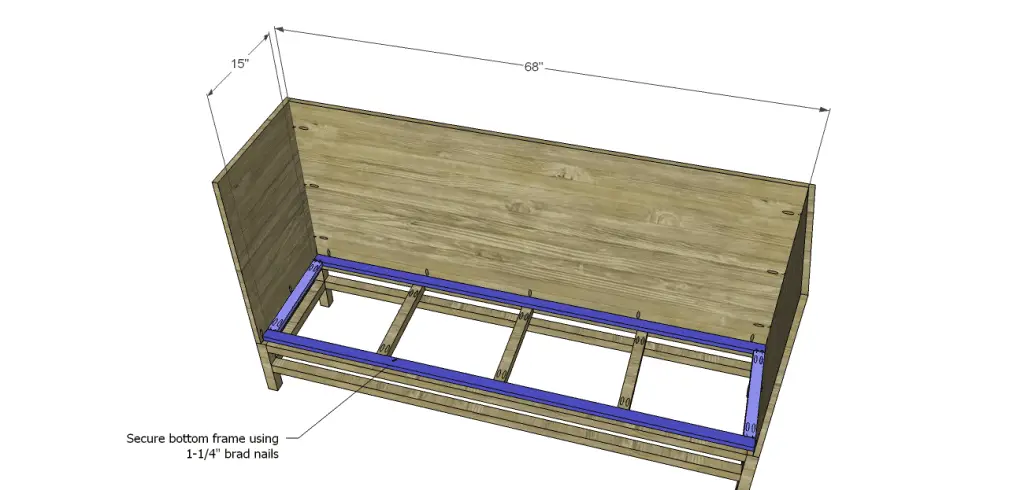
Cut the pieces for the bottom frame and drill pocket holes in each end of the shorter pieces. Assemble the frame as shown using glue and 1-1/4″ pocket hole screws. Secure to the base frame (inside the sides and back) using glue and 1-1/4″ brad nails. The front edge of the frame will be located 3/4″ back from the front edge of the frame.
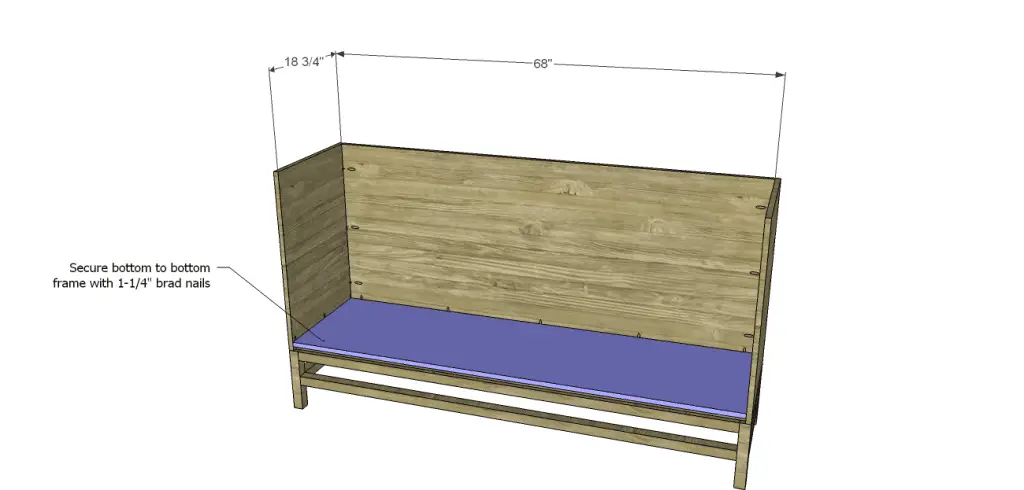
Cut the piece for the bottom. Position on the bottom frame and secure using glue and 1-1/4″ brad nails. The front edge of the bottom will be flush with the sides of the cabinet.
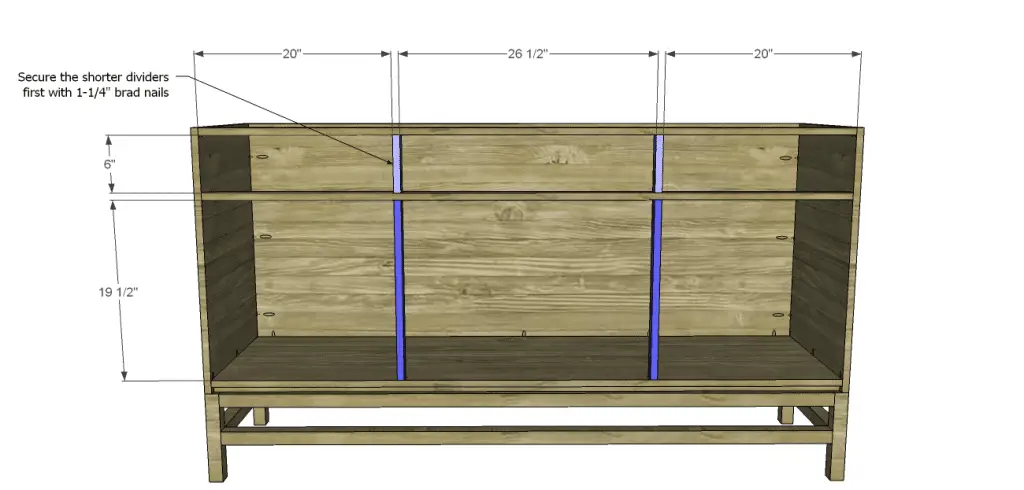
 Step Five
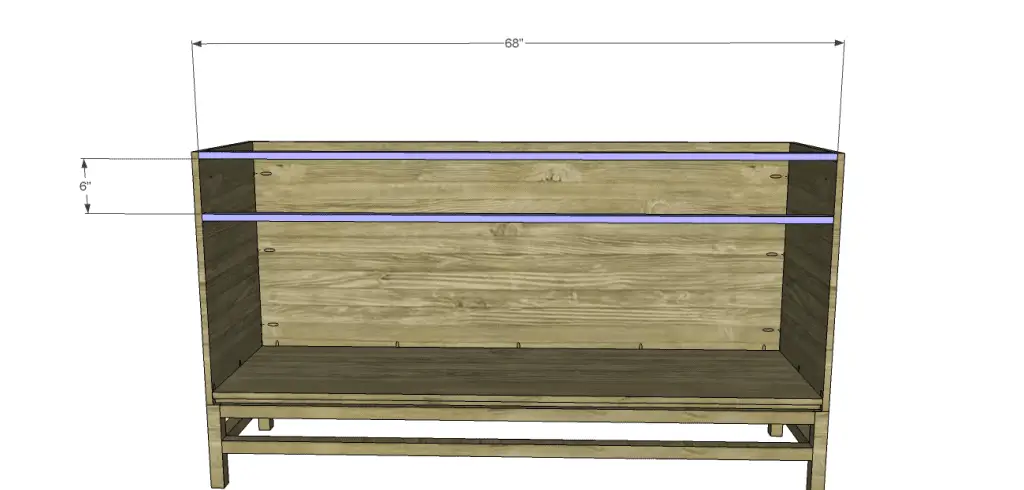
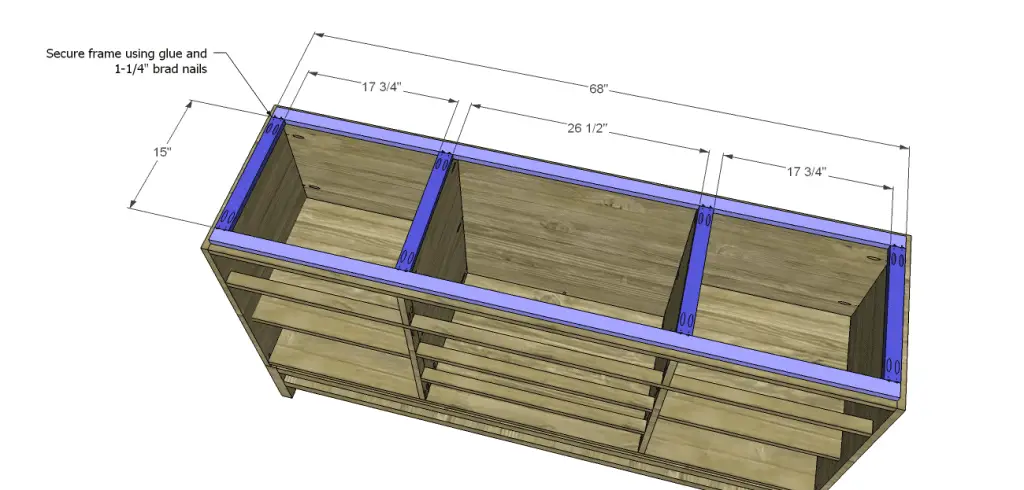
Cut the pieces for the front stretchers and drill pocket holes in each end. Secure to the sides using glue and 1-1/4″ pocket hole screws.
Cut the pieces for the dividers. Drill pocket holes in each end of the longer dividers. Secure the shorter dividers to the stretchers using glue and 1-1/4″ brad nails through the stretchers. Secure the longer dividers using glue and 1-1/4″ pocket hole screws.
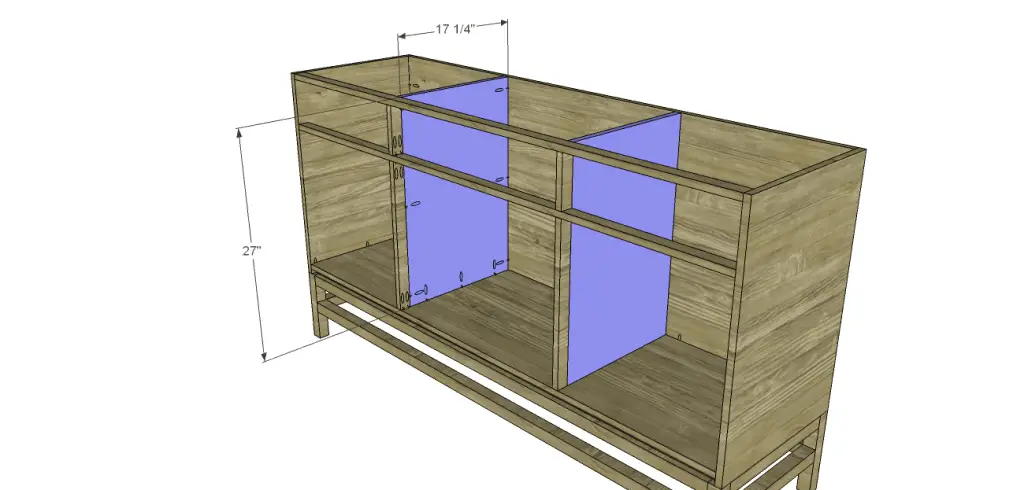
 Step Six
Cut the pieces for the cabinet dividers. Drill pocket holes in the side and bottom edges. Secure to the divider, bottom, and back using glue and 1-1/4″ pocket hole screws. Orient the pocket holes so they face toward the center and will be concealed by the center drawers.
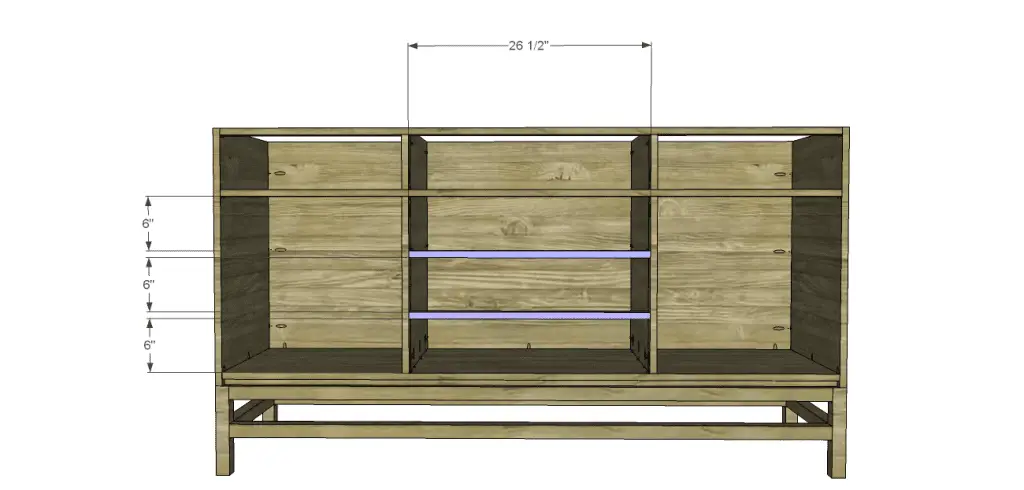
Step Seven
Cut the pieces for the center stretchers and drill pocket holes in each end. Secure to the dividers using glue and 1-1/4″ pocket hole screws.
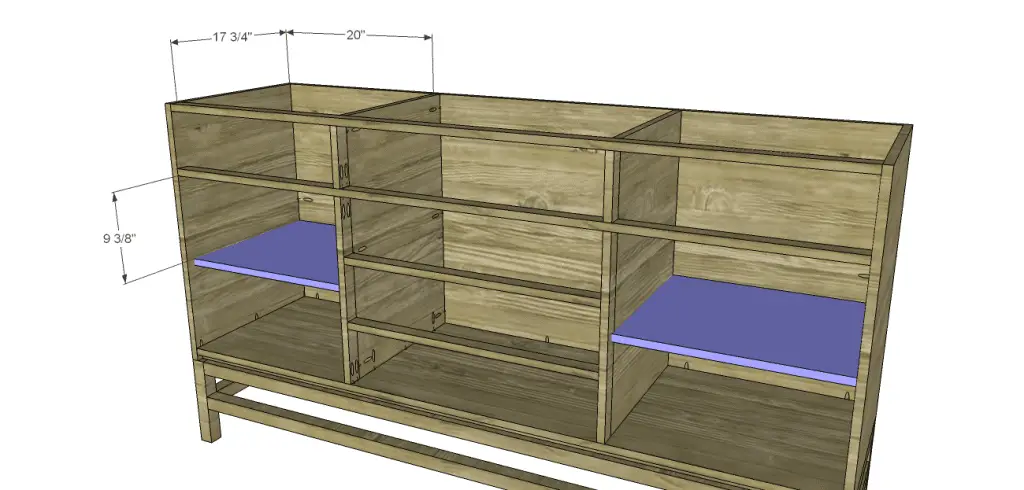
Step Eight
Cut the pieces for the shelves, and drill pocket holes in the side and back edges. Secure to the sides and dividers using glue and 1-1/4″ pocket hole screws. The shelves are located 1″ back from the front edge of the sides.
Step Nine
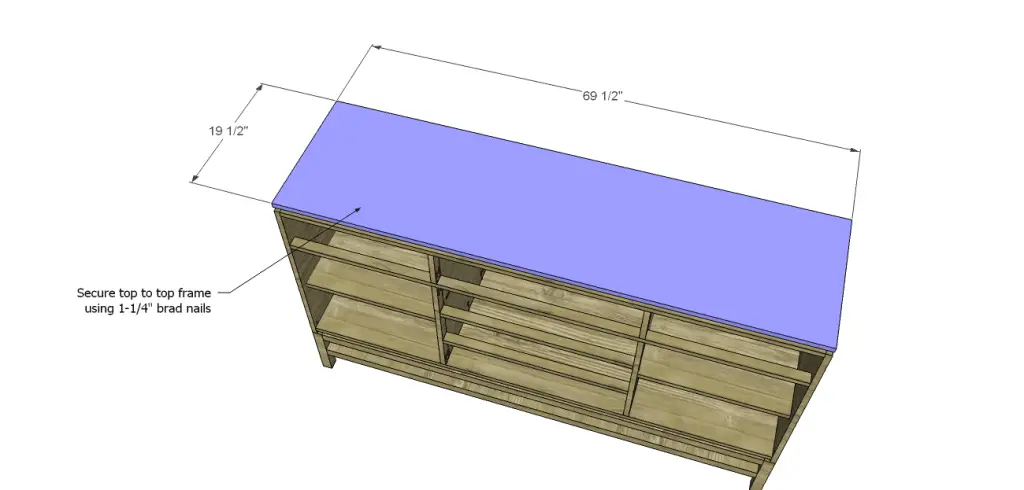
Cut the pieces for the top frame. Assemble the frame using glue and 1-1/4″ pocket hole screws. The frame will be “shorter” than the cabinet by 3/4″ on all sides. This is what makes the top “float”. Secure the frame to the cabinet using glue and 1-1/4″ brad nails.
Cut the piece for the top. Position the top so that it is flush with the outside of the cabinet on all sides. Secure in place using glue and 1-1/4″ brad nails.
 Step Ten
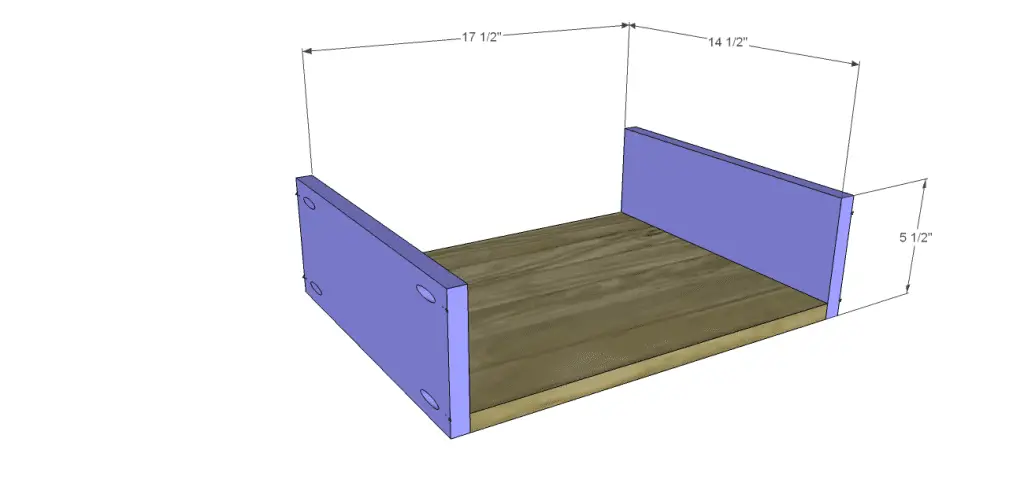
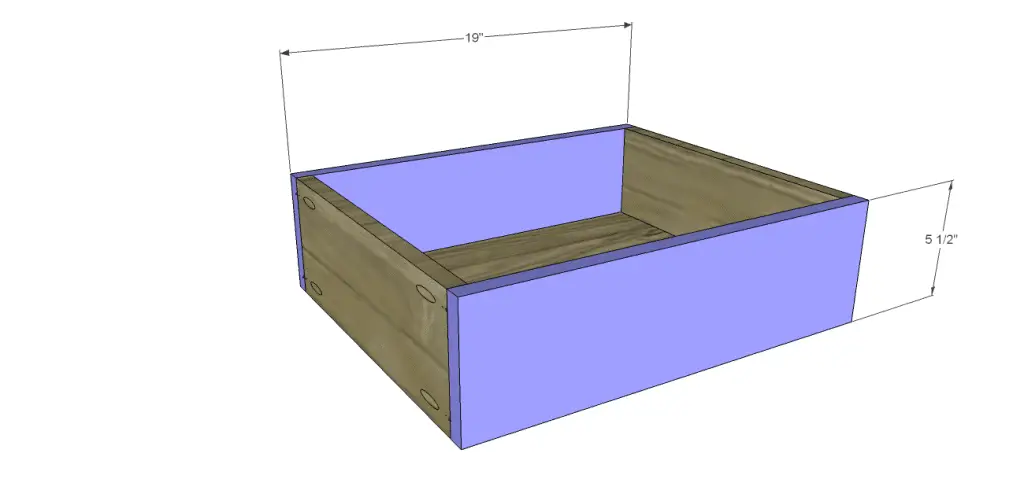
Cut the pieces for the drawer boxes. Drill pocket holes in all four edges of the bottom as well as each end of the sides. Assemble the drawer box as shown using glue and 1-1/4” pocket hole screws. Install the drawer slides according to the manufacturer’s installation instructions, locating them ¾” back from the front edge of the sides and dividers. Try this easy tutorial on installing drawer slides. Make any necessary adjustments.
 Step Eleven
Cut the pieces for the drawer fronts. Mark the position for the drawer pulls and drill the holes. Shim the drawer front in the opening – there will be a 1/8” gap around all sides – then drive screws through the holes for the drawer pulls into the drawer box. Open the drawer, and secure the drawer front using countersunk 1-1/4” screws from the inside. Remove the screws from the holes for the drawer pull then finish drilling the holes. Install the drawer pull. This easy tutorial on installing drawer fronts will be helpful.
Step Twelve
Cut the pieces for the doors. There will be a 1/8″ gap around all sides. Install the hinges on the doors, then install the doors in the cabinet. Install the cabinet pulls.
Finish as desired.
This buffet would also double as a great dresser or media stand! Any questions about the plans to build an Esmerelda buffet? Contact me at cher {at} designsbystudioc {dot} com!
Originally posted 2014-04-18 08:00:45.


7 Comments
This looks pretty ambitious…pretty, but ambitious.
Lol, Linda! I really love this design!
LOVE the fence and the story with it! Thank you very much for your kind words, I really appreciate it! I think that is how I got into woodworking – by being stubborn. I always like a good challenge! So glad to meet you, isn’t Vidya awesome?
This looks amazing, Cher! I don’t think I have the courage or stamina to give it a try, though, I’d like to think maybe one day I could.
You can totally do it, Jessica, I know you can!