Build a Greek Key Dresser
Free DIY Woodworking Plans
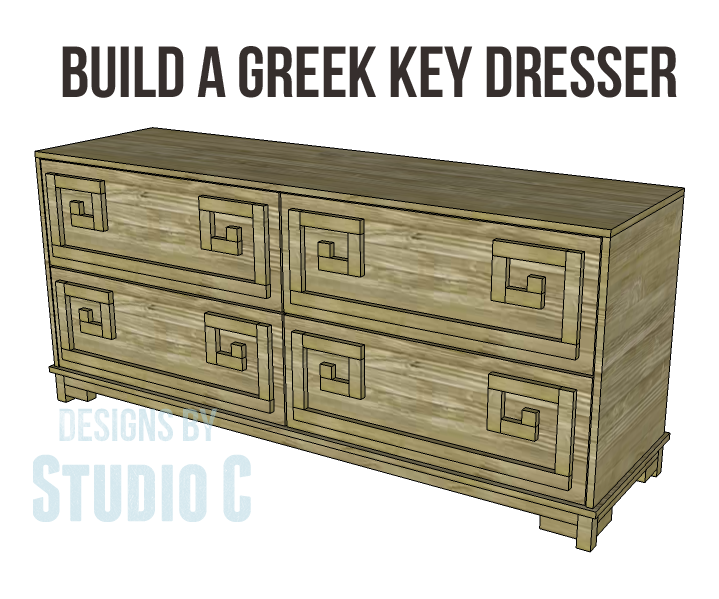
This dresser is so stylish, isn’t it? Very “Hollywood Regency”! The plans to build a Greek Key Dresser are such an easy project, I bet it can be constructed and finished in a weekend even with the detailing on the front!
Materials:
- 1-1/4″ pocket hole screws (<– affiliate link!)
- 2-1/2″ pocket hole screws (<– affiliate link!)
- 1-1/4″ brad nails
- 2-1/2″ screws
- Edge banding, if desired (<–affiliate link!)
- 4 sets of 18″ drawer slides (<–affiliate link!)
- 4 drawer pulls
- Finishing supplies
Lumber:
- 7 – 1×2 at 8′
- 3 – 2×2 at 8′
- 5 – 1×12 at 8′ (3/4″ plywood cut at 11-1/4″ wide can also be substituted for the drawer boxes)
- 2 sheets of 3/4″ plywood
Cut List:
-
- 12 – 2×2 at 4″ – Legs & Decorative Base Pieces
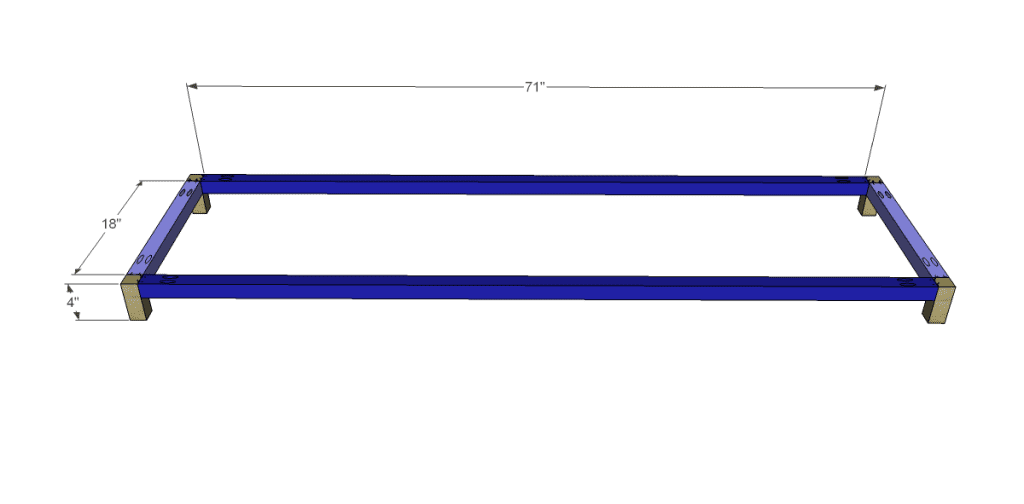
- 2 – 2×2 at 18″ – Base Sides
- 2 – 2×2 at 71″ – Base Front & Back
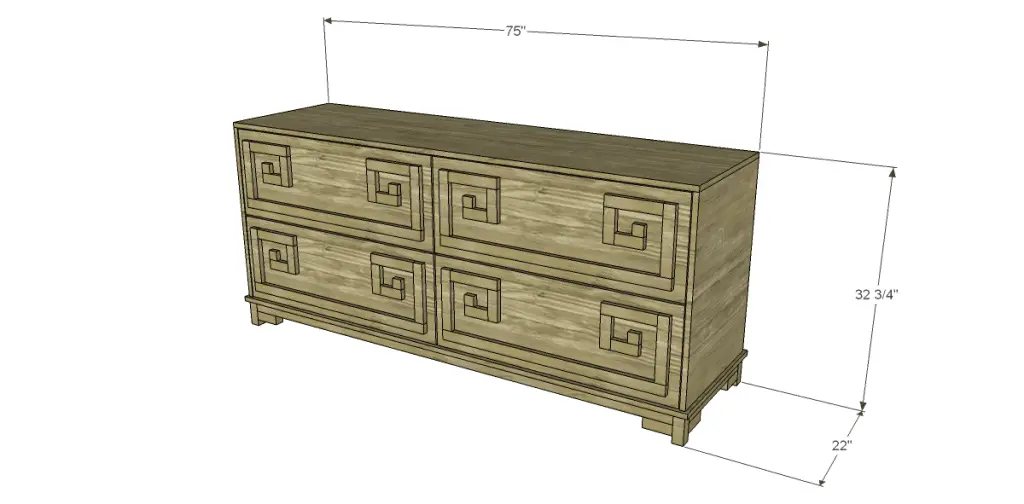
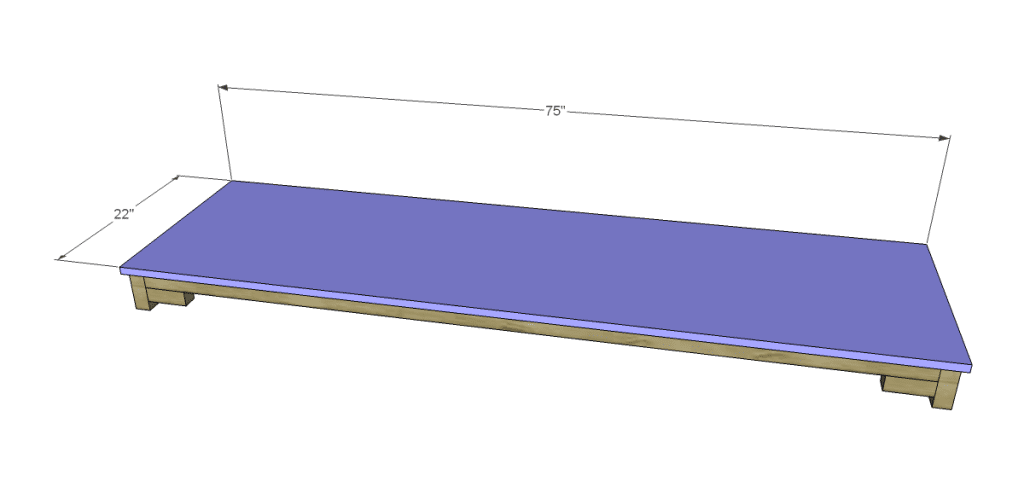
- 1 – 3/4″ plywood at 22″ x 75″ – Bottom
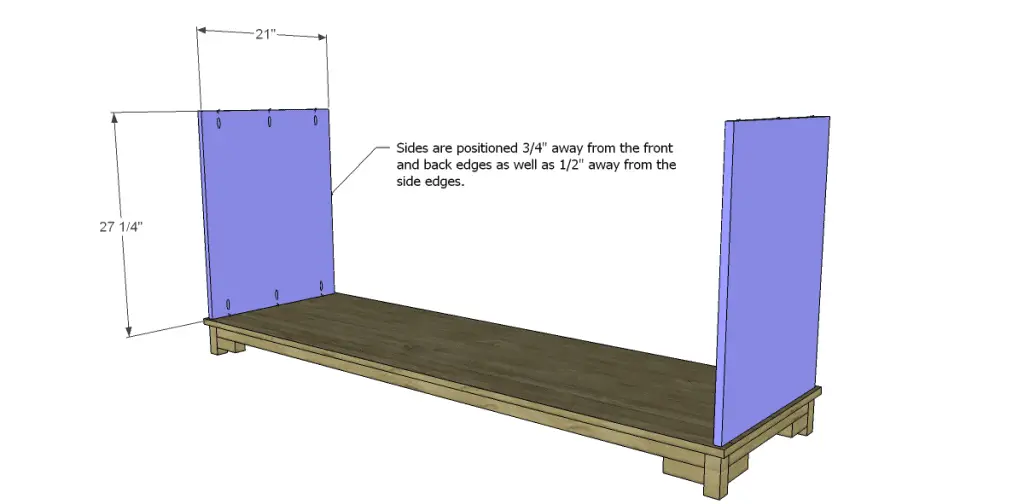
- 2 – 3/4″ plywood at 21″ x 27-1/4″ – Sides
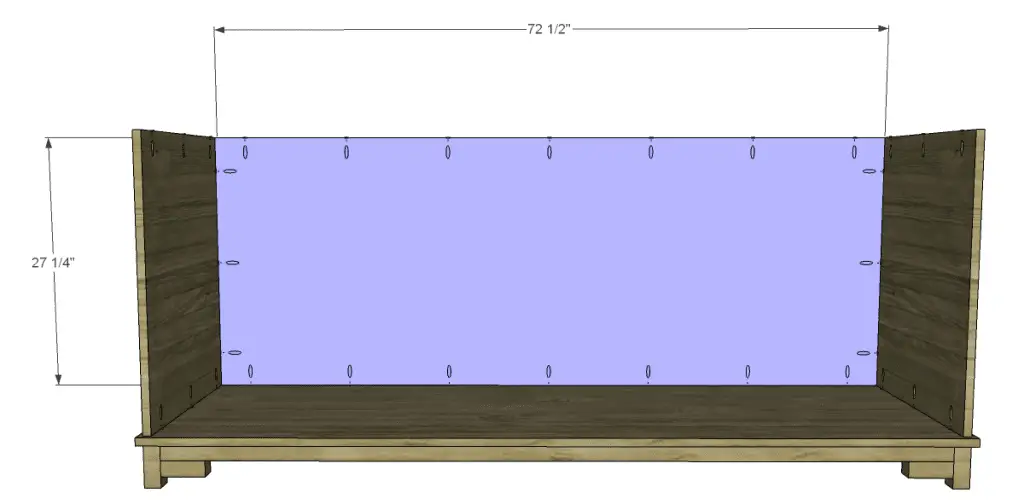
- 1 – 3/4″ plywood at 27-1/4″ x 72-1/2″ – Back
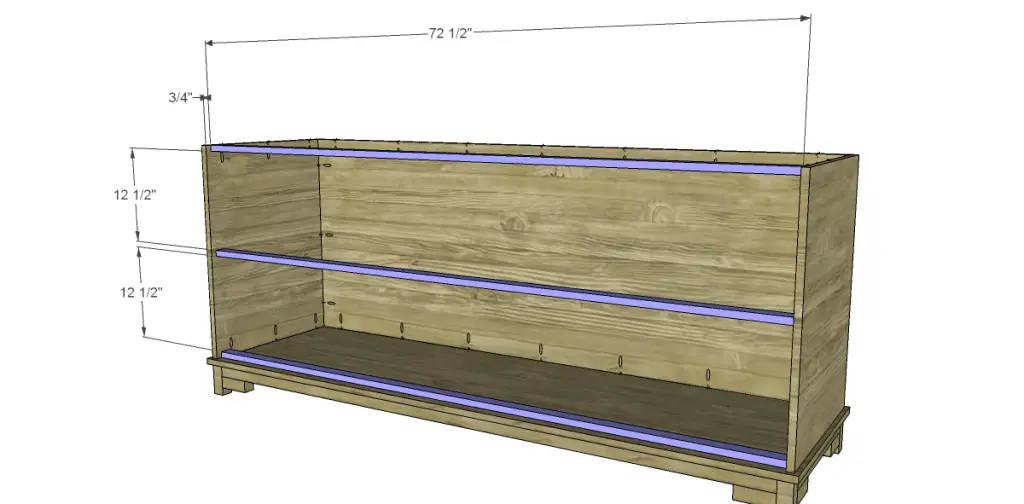
- 3 – 1×2 at 72-1/2″ – Stretchers
- 2 – 1×2 at 12-1/2″ – Dividers
- 2 – 1×2 at 18″ – Drawer Slide Supports
- 1 – 3/4″ plywood at 21″ x 74″ – Top
- 4 – 3/4″ plywood at 16-1/2″ x 33-3/8″ – Drawer Bottoms
- 8 – 1×12 at 16-1/2″ – Drawer Box Sides
- 8 – 1×12 at 34-7/8″ – Drawer Box Front & Back
- 4 – 3/4″ plywood at 13-3/8″ x 36″- Drawer Front Base
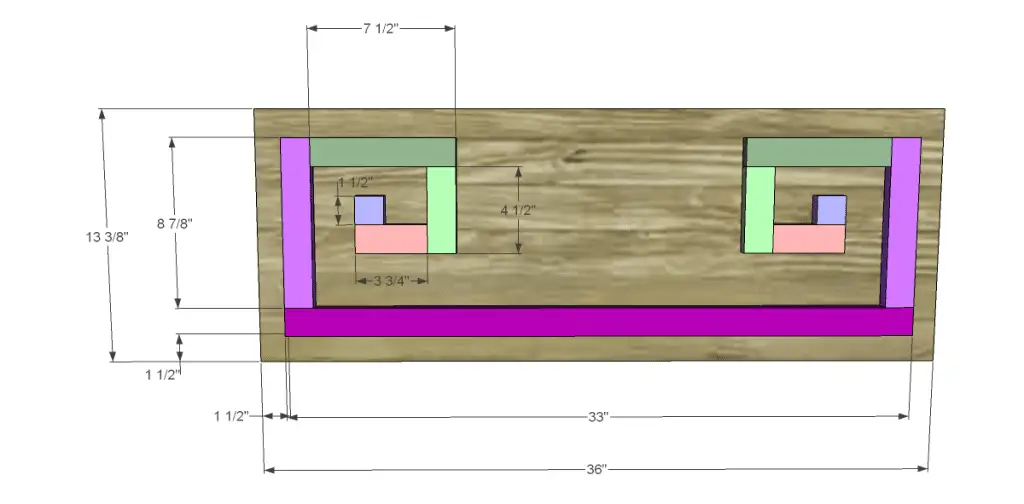
- 8 – 1×2 at 1-1/2″ – Greek Key
- 8 – 1×2 at 3-3/4″ – Greek Key
- 8 – 1×2 at 4-1/2″ – Greek Key
- 8 – 1×2 at 7-1/2″ – Greek Key
- 8 – 1×2 at 8-7/8″ – Greek Key
- 4 – 1×2 at 33″ – Greek Key
Step One
Edge banding will be applied to the exposed edges of the plywood before assembly.
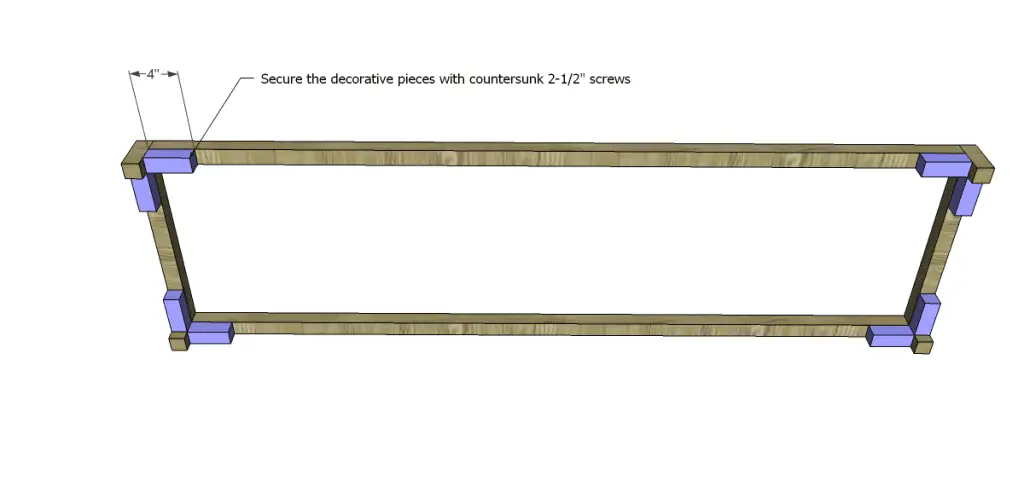
Cut the pieces for the base frame, legs, and decorative pieces. Drill pocket holes in each end of the frame pieces then attach to the legs using glue and 2-1/2″ pocket hole screws. Cut the decorative pieces then secure them as shown using glue and 2-1/2″ countersunk screws.
Step Two
Cut the piece for the bottom. Position the piece so that 1/2″ overhangs on all sides. Secure using glue and 1-1/4″ brad nails.
Step Three
Cut the pieces for the sides and drill pocket holes in the top and bottom edges. The sides will be positioned so that they are 3/4″ from the front and back edge, and 1/2″ from the side edges. Secure to the bottom using glue and 1-1/4″ pocket hole screws.
Step Four
Cut the piece for the back and drill pocket holes in all four edges. Secure to the sides and bottom using glue and 1-1/4″ pocket hole screws.
Step Five
Cut the pieces for the stretchers. Drill pocket holes in each end of TWO of the pieces. Position the piece without pocket holes on the bottom, locating it 3/4″ back from the front edges of the sides (1-1/2″ back from the front edge of the bottom). Secure in place using glue and 1-1/4″ brad nails. Attach the remaining two stretchers as shown using glue and 1-1/4″ pocket hole screws.
Step Six
Cut the pieces for the dividers and drill pocket holes in each end. Position them in the center of the stretchers as shown, then secure using glue and 1-1/4″ pocket hole screws.
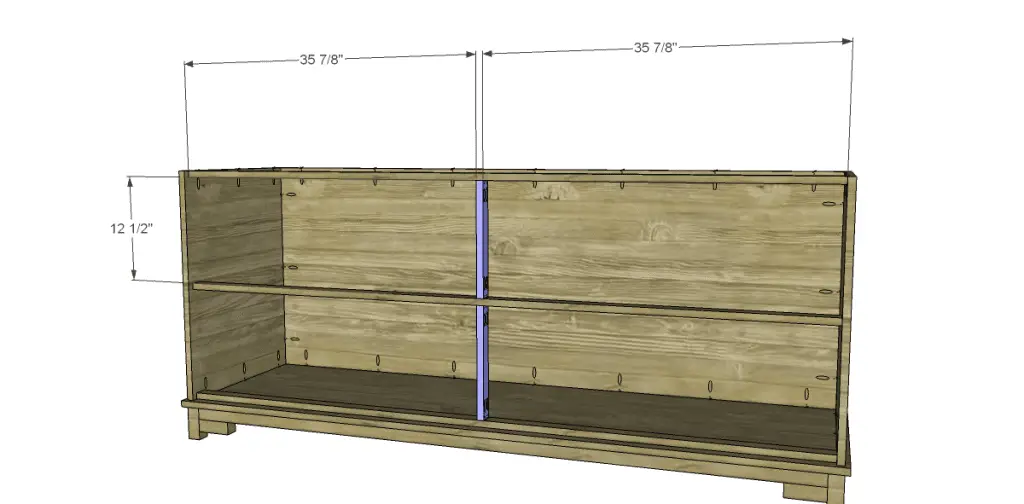
Step Seven
Cut the pieces for the drawer slide supports and drill pocket holes in each end. Secure to the dividers and back, locating them just above the stretchers, using glue and 1-1/4″ pocket hole screws.
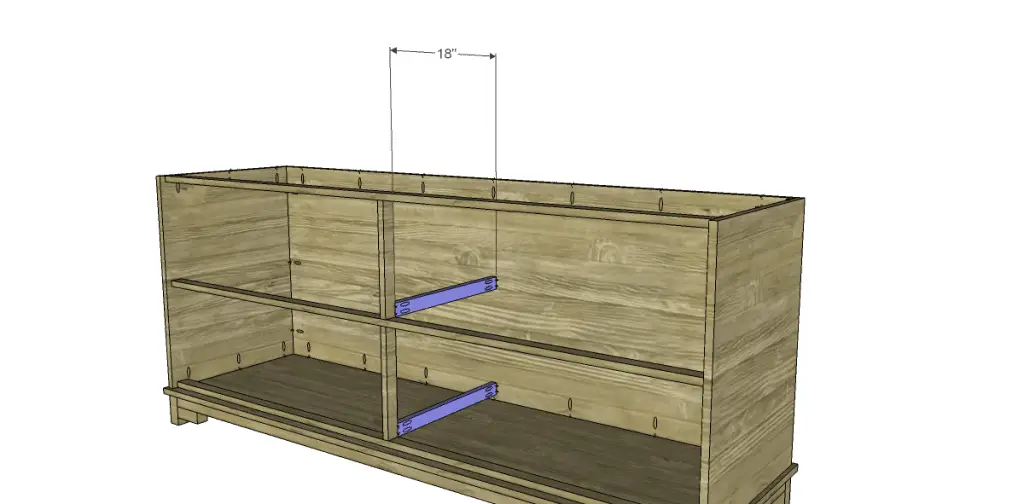
Step Eight
Cut the piece for the top. Secure in place using glue and 1-1/4″ pocket hole screws through the sides and back into the bottom.
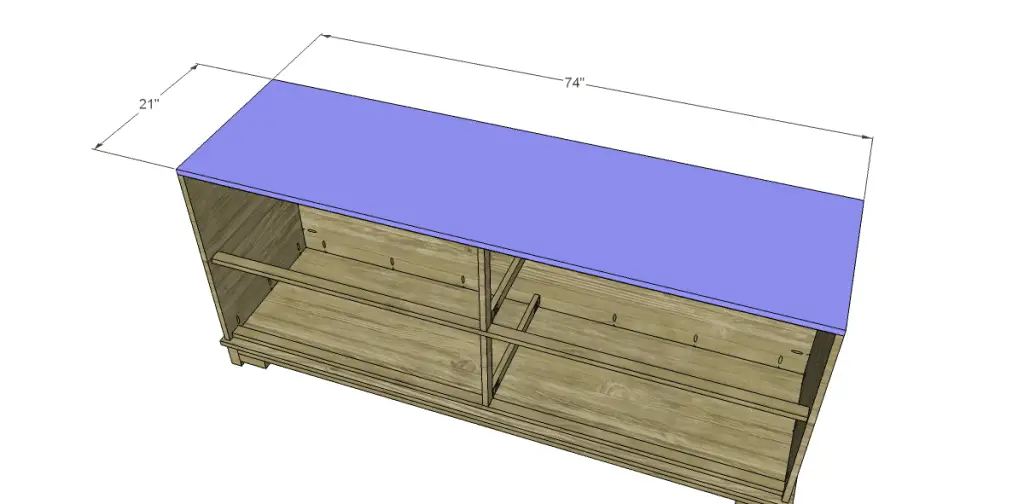
Step Nine
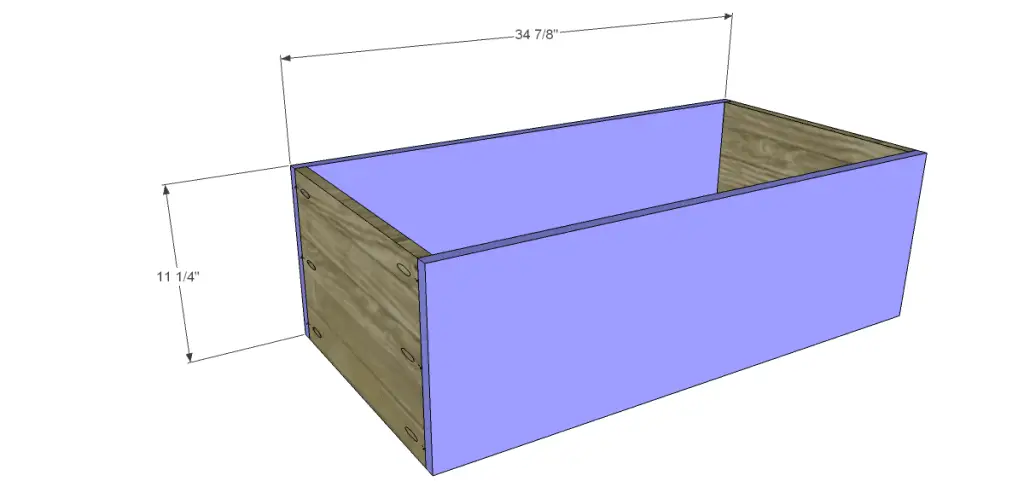
Cut the pieces for the drawer boxes. Drill pocket holes in each end of the sides as well as all four edges of the bottom. Assemble as shown using glue and 1-1/4″ pocket hole screws. Install the drawer slides according to the manufacturer’s installation instructions. This easy tutorial on installing drawer slides will be helpful! Make any necessary adjustments.
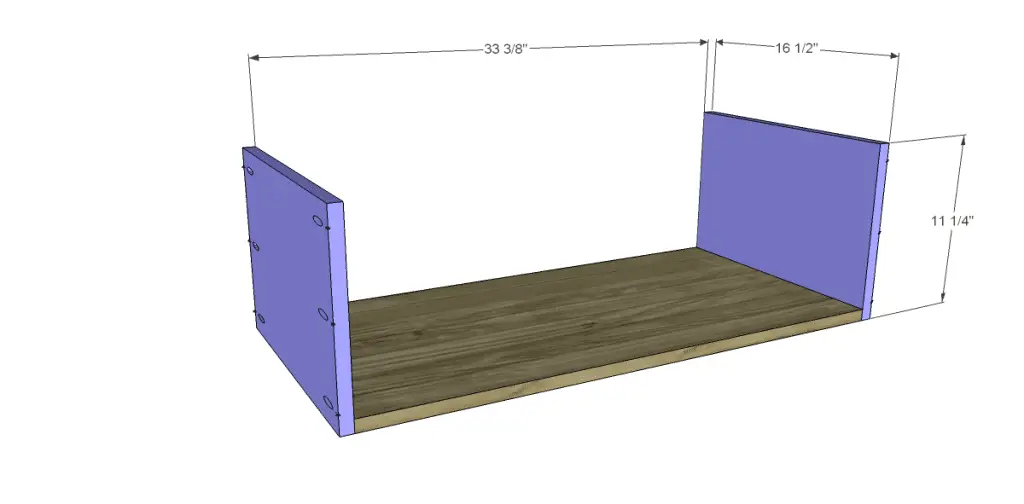
Step Ten
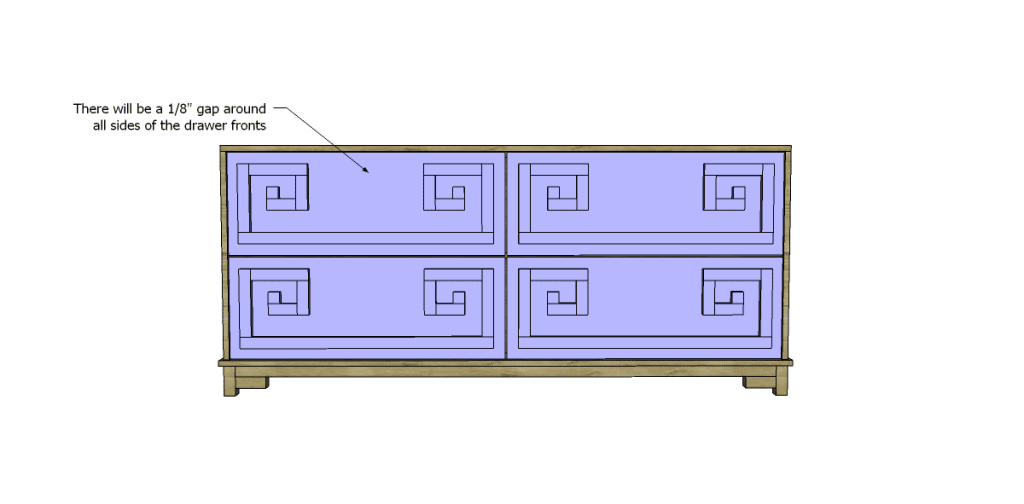
Cut the pieces for the drawer fronts. The “Greek Key” design will be created by placing the 1×2 pieces sort of like a puzzle. They will be attached using glue and 1-1/4″ brad nails. Starting with the 33″ piece, position it so that it is located 1-1/2″ from the side and bottom edges. Secure in place. Add the remaining pieces moving around in a circle. Secure each piece before moving on to the next piece.
This easy tutorial on installing the drawer fronts is a great guide!
 Finish as desired!
The free DIY woodworking plans to build a Greek Key Dresser would create a great piece to use as a sideboard in a dining room to store linens or in an entryway to store scarves and gloves, backpacks, and conceal a purse! Have any questions? Let me know at cher {at} designsbystudioc {dot} com!
Sharing with: Alderberry Hill
Originally posted 2013-08-12 08:00:57.


[…] I posted plans to build a Greek Key Dresser. This chest would be the perfect companion! The DIY plans to build a Greek Key Chest feature two […]