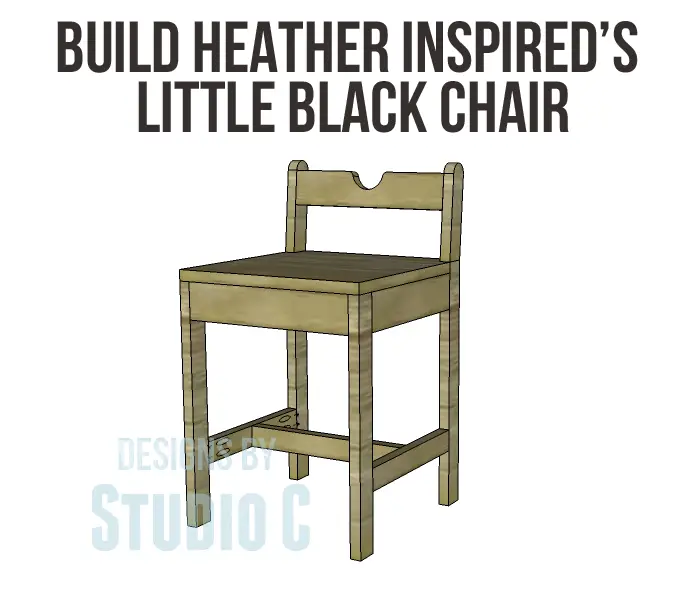
Build Inspire Me Heather’s Little Black Chair
A Cute Little Black Chair
I like to look at other websites for inspiration. I stopped by Inspire Me Heather (the page/post I was inspired by no longer exists) and was intrigued by a post Heather wrote about spray painting outdoor furniture. It wasn’t just the content of the post that sparked my interest but the cute little black chair she used as the example! I contacted Heather and asked if it was okay to create the free plans to build Inspire Me Heather’s Little Black Chair. Thankfully, she said yes! This is such a cute little chair with a low back that can be used as an accent piece on the porch, in the garden, or in virtually any room! Though I can’t completely replicate the turned legs, trim can be added along the length of the legs to make them a little more fancy!
Materials:
- 1-1/4″ pocket hole screws
- 1-1/4″ brad nails
- Finishing supplies
Lumber:
- 2 – 1×2 at 8′
- 1 – 1×3 at 6′
- 1 – 2′ x 2′ sheet of 3/4″ plywood
Cut List:
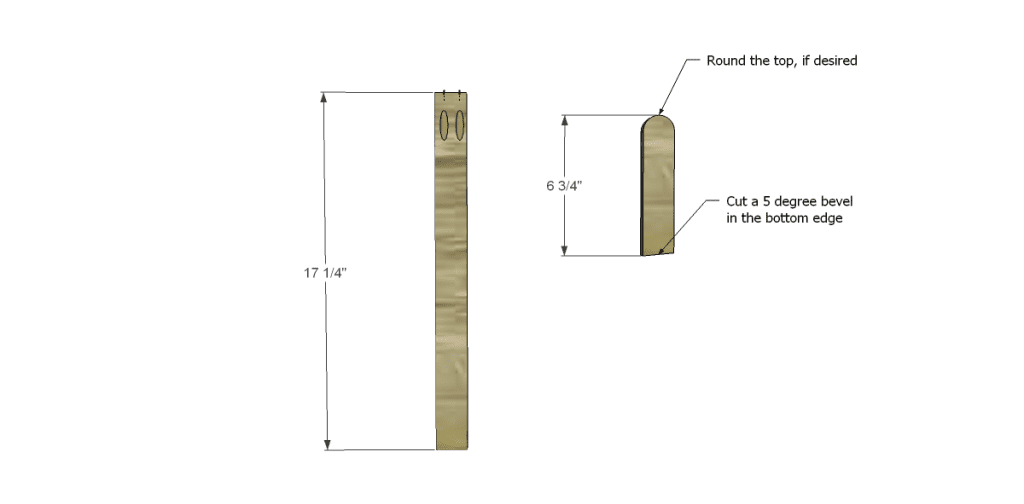
- 2 – 1×2 at 17-1/4″ – Lower Back Legs
- 2 – 1×2 at 6-3/4″ – Upper Back Legs
- 3 – 1×3 at 12″ – Front & Back Frames
- 2 – 1×2 at 16-1/2″ – Front Legs
- 2 – 1×3 at 10-1/2″ – Side Stretchers
- 2 – 1×2 at 10-1/2″ – Lower Stretchers
- 1 – 1×2 at 12″ – Lower Stretcher
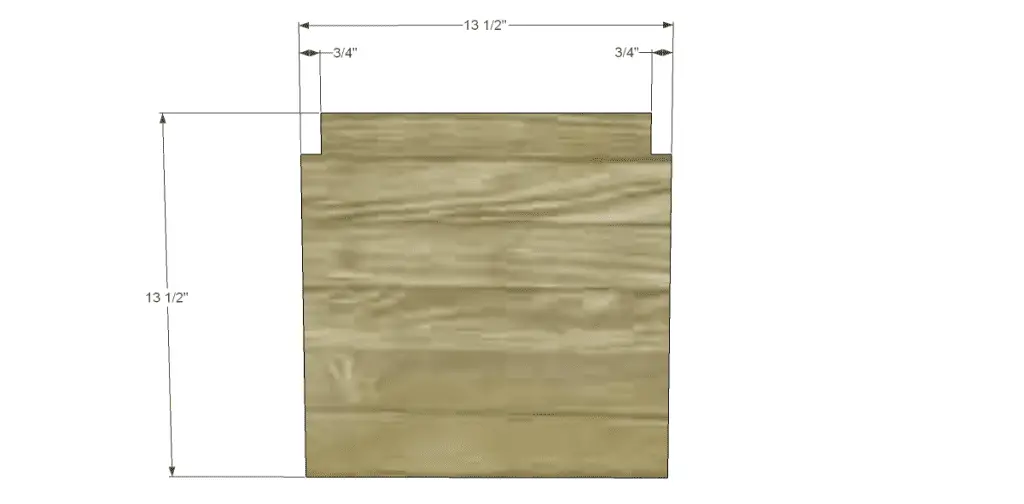
- 1 – 3/4″ plywood at 13-1/2″ x 13-1/2″ – Seat
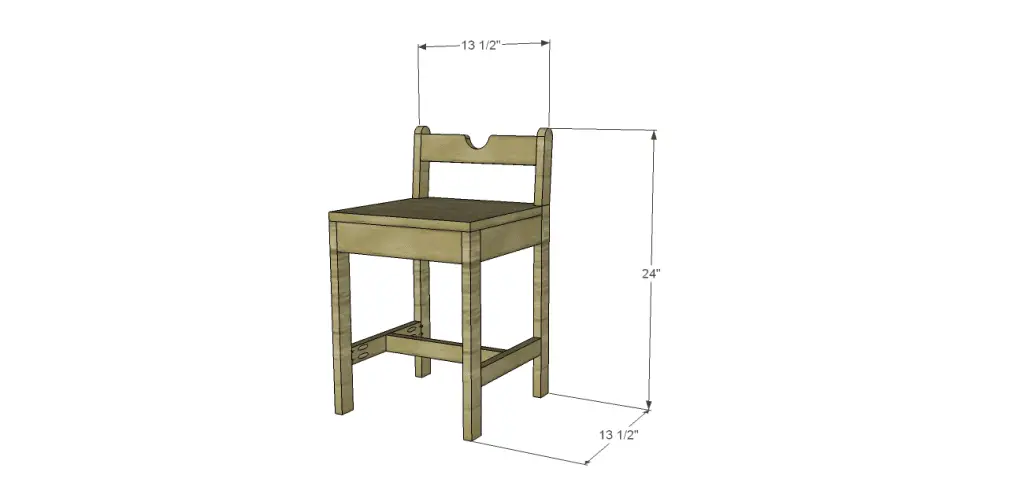
Step One
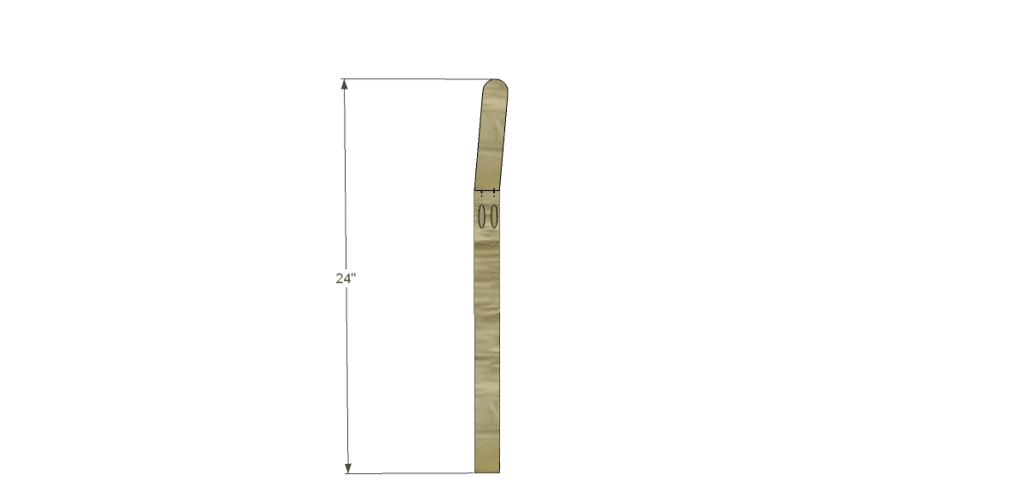
Cut the pieces for the back legs. Cut a 5 degree bevel in the lower edge of the upper back leg and round off the top using a jigsaw or a bandsaw. Drill pocket holes in the top edge of the lower back leg piece. Assemble the legs as shown using glue and 1-1/4″ pocket hole screws noting there will be a left and a right leg. (This way, the pocket holes can be hidden by the seat).
 Step Two
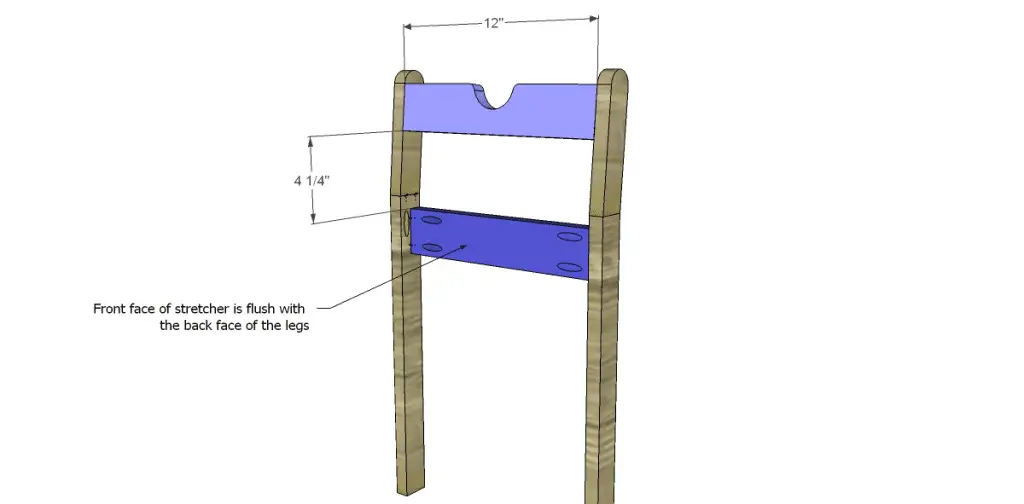
Cut the pieces for the front and back stretchers. Drill pocket holes in each end and set the piece for the front stretcher aside. Cut a decorative curve in the piece used for the upper back using a jigsaw or bandsaw. Attach the pieces to the back legs as shown using glue and 1-1/4″ pocket hole screws. The upper stretcher will follow the angle of the upper back legs, and will be flush with the front face. The lower stretcher will be positioned so that the outside face is flush with the outside face of the lower legs.
Step Three
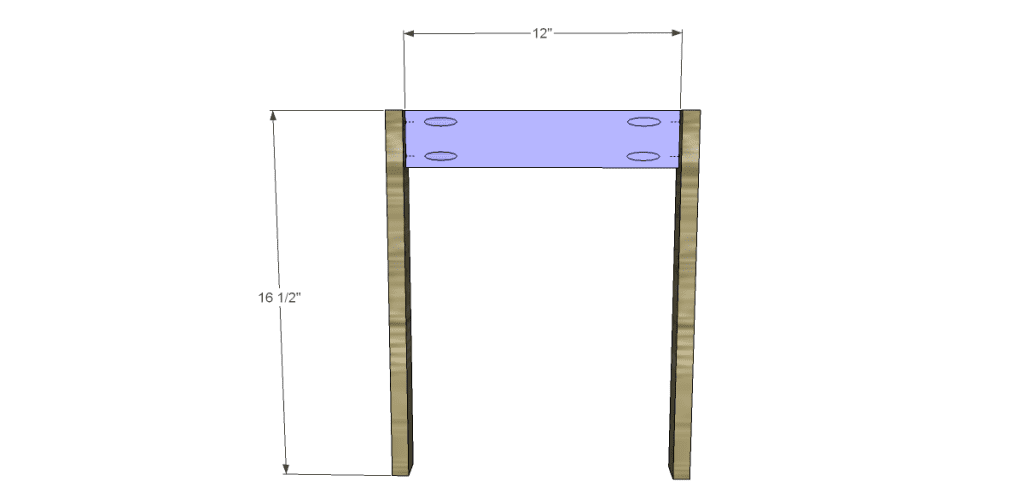
Cut the pieces for the front legs. Attach the front stretcher to the legs using glue and 1-1/4″ pocket hole screws. The front face of the stretcher will be flush with the front face of the legs.
Step Four
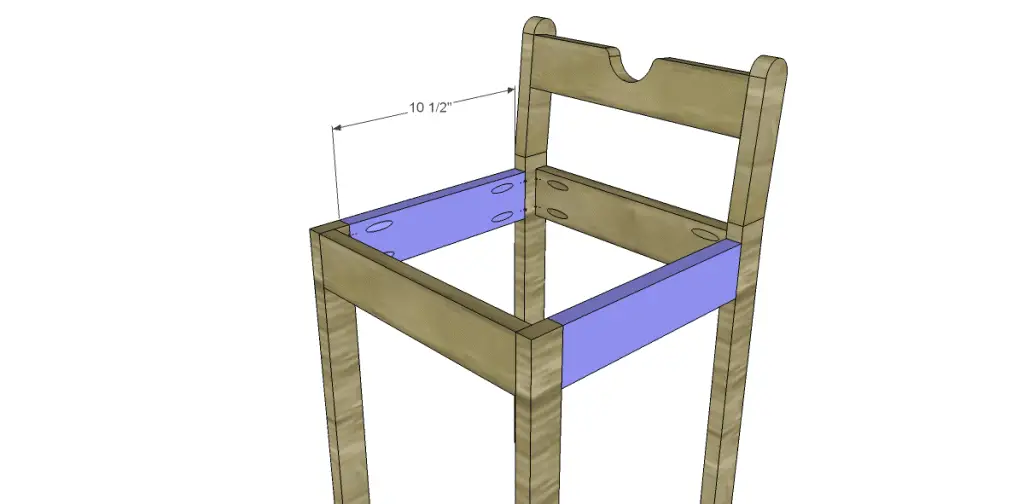
Cut the pieces for the side stretchers and drill pocket holes in each end. Attach to the legs using glue and 1-1/4″ pocket hole screws. The outside face of the stretchers will be flush with the outside face of the legs.
Step Five
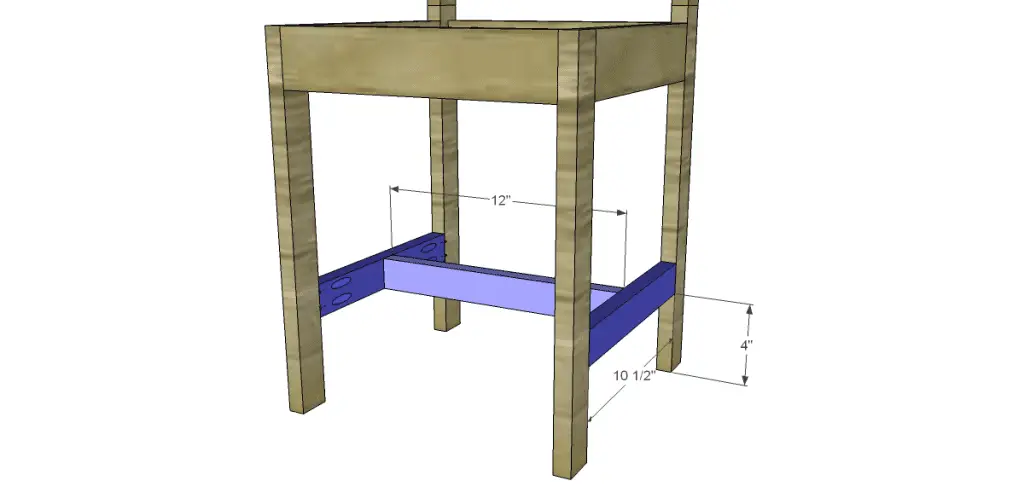
Cut the pieces for the lower stretchers and drill pocket holes in each end of each piece. Position the side pieces first then secure using glue and 1-1/4″ pocket hole screws. Position the center stretcher then secure using glue and 1-1/4″ pocket hole screws.
Step Six
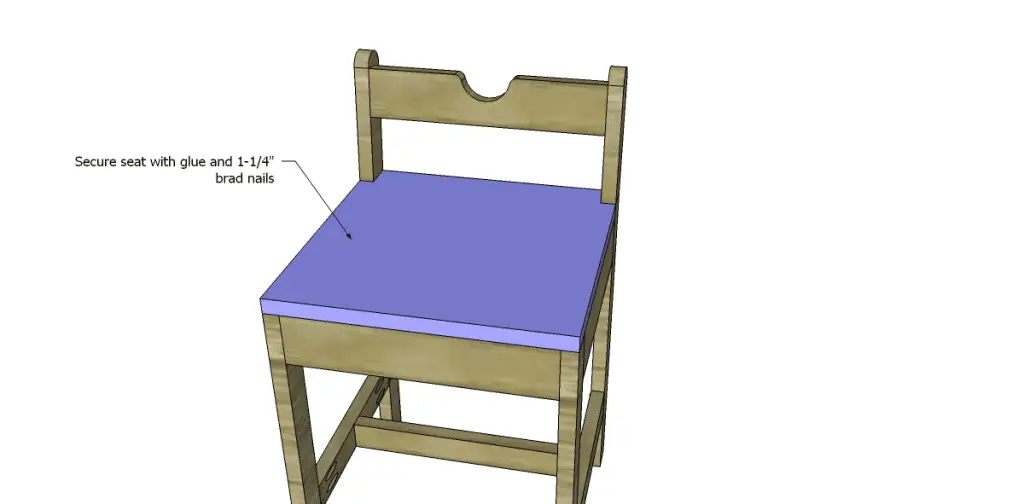
Cut the piece for the seat. Cut the notches using a jigsaw or a bandsaw. Position on the seat frame as shown then secure using glue and 1-1/4″ brad nails.
Finish as desired!
The free plans to build Inspire Me Heather’s Little Black Chair can be used to create a bench by building two or three frames, then stretching the seat across! Wouldn’t that be great?
Originally posted 2013-06-03 08:00:26.


Oh my gosh, you came up with the plans for my little black chair and it’s perfect!!! I just have to share this all over, I’m sooo impressed!!
Thank you so much! I hope I did that little cutie some justice! I want to build this for myself!