
DIY Three-Drawer Dresser Plans
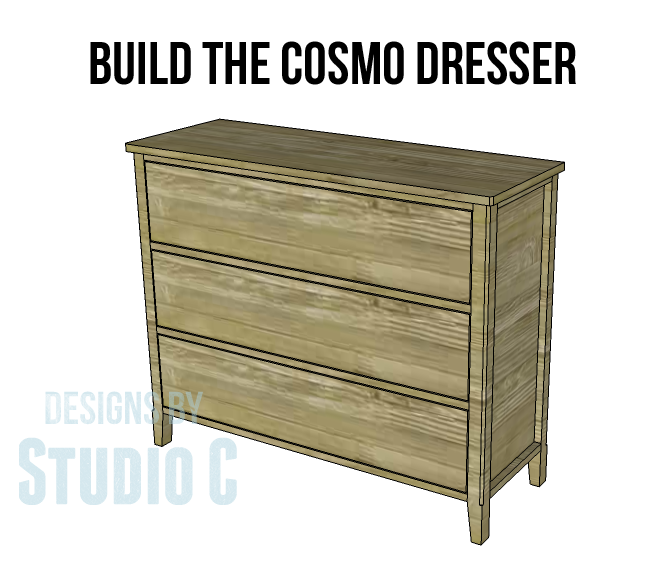
Build the Cosmo Dresser
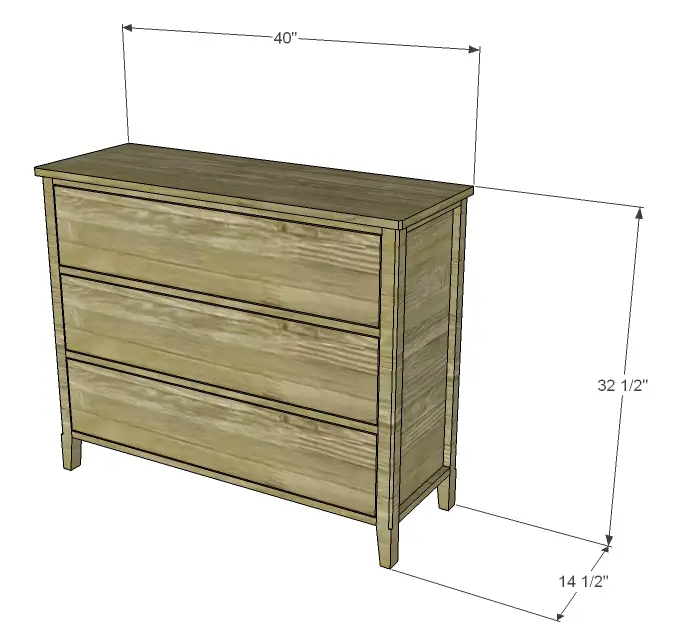
The new year is sneaking up quickly and for me, it will mean making a better effort to get organized! These DIY three-drawer dresser plans will fit the bill and keep my stuff neatly put away! Featuring a narrow profile, tapered legs with a bevel detail on the outside edge, as well as an angle cut at the front edges of the top, this dresser will quickly become a classic piece of furniture!
Materials:
- 1-1/4″ pocket hole screws (<– affiliate link!)
- 1-1/4″ brad nails
- Edge banding, optional (<– affiliate link!)
- 3 sets of drawer slides (shortened to 11-1/2″) (<– affiliate link!)
- 3 cabinet pulls
- Wood glue
- Sandpaper (100, 150, 220 grits)
- Finishing supplies (primer & paint, or stain, sealer)
Lumber:
- 3 – 1×2 at 8′
- 4 – 1×8 at 6′
- 2 – 2×2 at 6′
- 1 – 2′ x 4′ sheet of 3/4″ plywood
- 1 full sheet of 3/4″ plywood
Cut List:
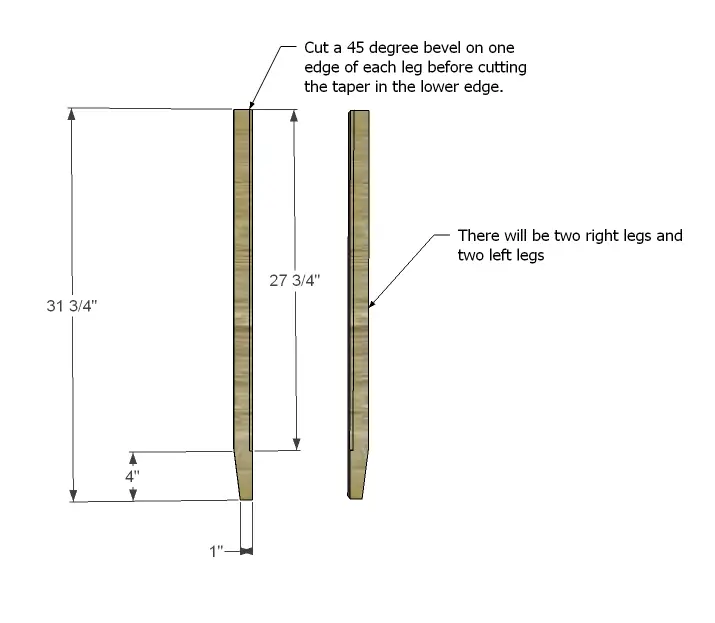
- 4 – 2×2 at 31-3/4″ – Legs
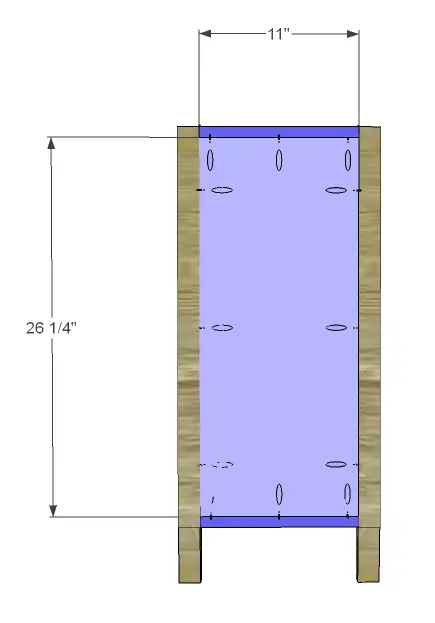
- 4 – 1×2 at 11″ – Side Frames
- 2 – 3/4″ plywood at 11″ x 26-1/4″ – Side Panels
- 6 – 1×2 at 36″ – Back Frame & Front Stretchers
- 1 – 3/4″ plywood at 26-1/4″ x 36″ – Back
- 1 – 3/4″ plywood at 14-1/2″ x 40″ – Top
- 3 – 3/4″ plywood at 10″ x 33-1/2″ – Drawer Bottoms
- 6 – 1×8 at 10″ – Drawer Box Sides
- 6 – 1×8 at 35″ – Drawer Box Front & Back
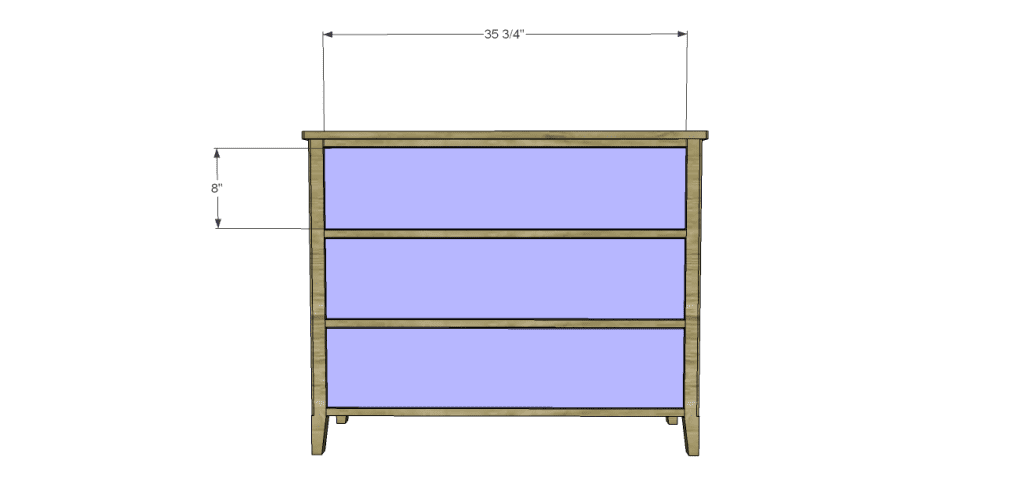
- 3 – 3/4″ plywood at 8″ x 35-3/4″ – Drawer Fronts
Notes:
Edge banding will be applied to the exposed edges of the plywood before assembly.
Step One
Cut the pieces for the legs. Cut a 45 degree bevel in one edge of each piece at 27-3/4″ long. Cut the taper in the lower edge of each piece using a jigsaw or a tapering jig on the table saw. The tapers will face to the inside of the dresser while the beveled edges will face to the outside edge. Keep in mind there will be two legs with the bevel on the right and two legs with the bevel on the left.
Step Two
Cut the pieces for the side frame and panels. With the pocket hole jig set for 3/4″ material, drill pocket holes in each end of the frame pieces as well as all four edges of the panels. Secure the frame pieces to the panels using glue and 1-1/4″ pocket hole screws. The back face of the panel will be flush with the back edge of the frame pieces. Orient the pocket holes in the frame pieces so they face away from the panels. Secure the panel assembly to the legs using glue and 1-1/4″ pocket hole screws.
Step Three
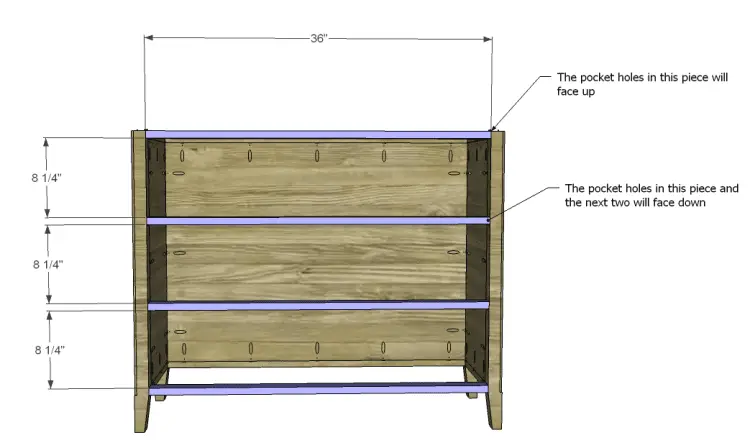
Cut the pieces for the back frame, front stretchers, and back panel. Drill pocket holes in each end of the frame pieces and stretchers, as well as all four edges of the panel. Secure the frame pieces to the panel using glue and 1-1/4″ pocket hole screws. The back face of the panel will be flush with the back edge of the frame pieces. Orient the pocket holes in the frame pieces so they face away from the panels. Secure the panel assembly to the legs using glue and 1-1/4″ pocket hole screws.
Secure the stretchers to the front legs as shown using glue and 1-1/4″ pocket hole screws.

Step Four
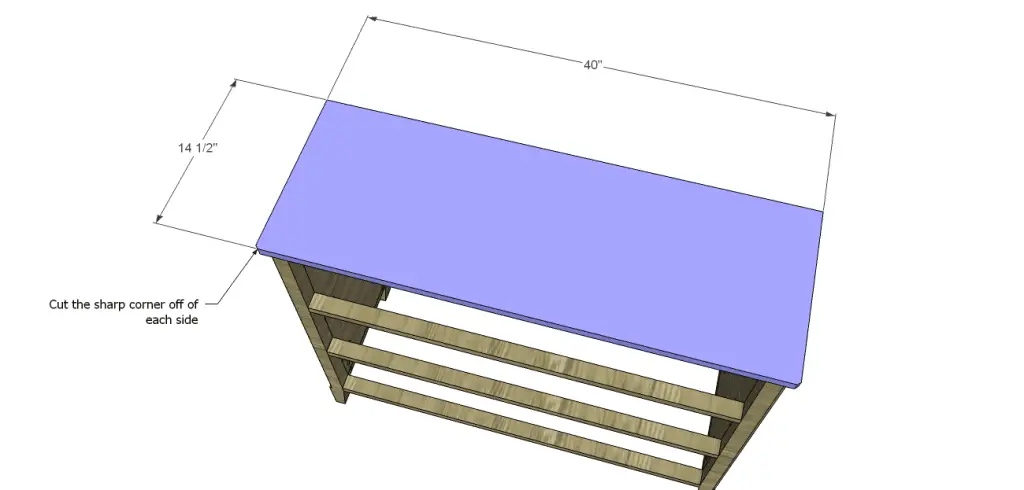
Cut the piece for the top. Cut a 45 degree bevel in each corner of the front edge making it 1/4″ deep. The front and sides will overhang by 1/2″. Secure using glue and 1-1/4″ brad nails.
Step Five
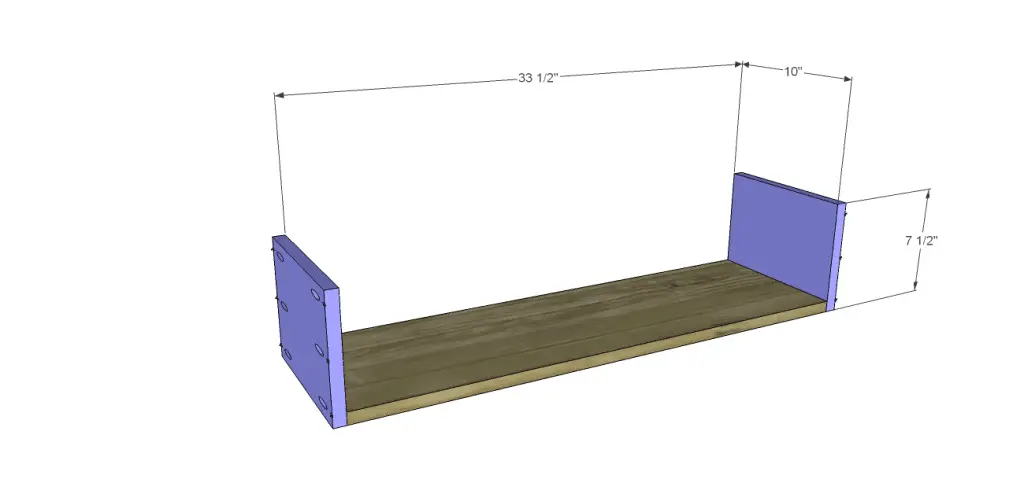
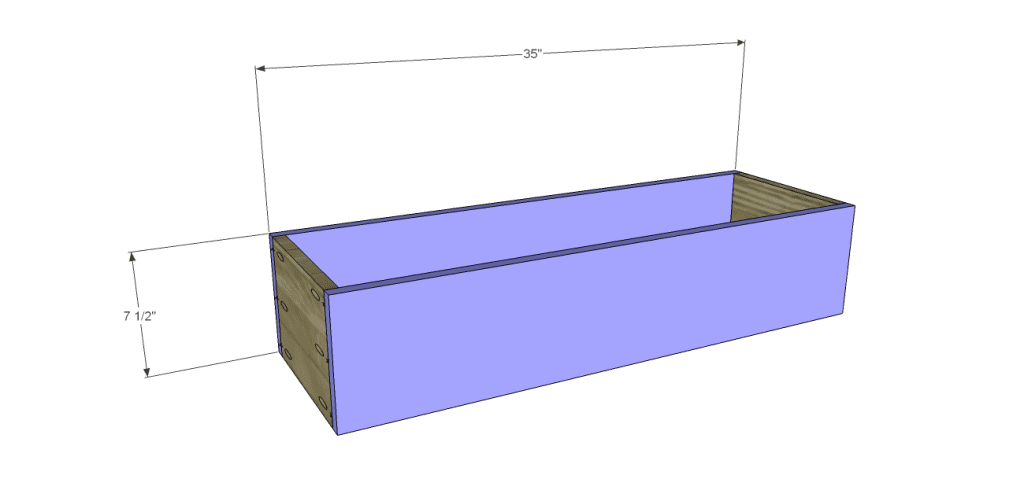
Cut the pieces for the drawer boxes. Drill pocket holes in all four edges of the bottom as well as each end of the sides. Assemble the drawer box as shown using glue and 1-1/4” pocket hole screws.
Use a hacksaw to shorten the drawer slides. Take a look at this quick tutorial on cutting drawer slides. Install the drawer slides according to the manufacturer’s installation instructions, locating them ¾” back from the front edge of the sides. This easy tutorial on installing drawer slides will be helpful. Make any necessary adjustments.
Step Six
Cut the pieces for the drawer fronts. Mark the position for the drawer pulls and drill the holes. Shim the drawer front in the opening – there will be a 1/8” gap around all sides – then drive screws through the holes for the drawer pulls into the drawer box. Open the drawer, and secure the drawer front using countersunk 1-1/4” screws from the inside. Remove the screws from the holes for the drawer pull then finish drilling the holes. Install the drawer pull. Check out this easy tutorial on installing drawer fronts.
Finish as desired!
Have questions about the DIY three-drawer dresser plans? Leave a comment below!
Originally posted 2013-12-16 08:00:37.

I could always use a little more organizing and these drawers would go a long way to help. Now I just need someone to build it! You’re remarkable Cher.
Thank you so much, Elle! I love what I do!
Getting more organized is a goal for 2014, these may just help that happen…
I really love this dresser – it is on my “to build” list!
timing is perfect for this post Cher? Who doesn’t want to organize on a new year lol! Great idea 🙂
I definitely need to do so, Vinma! I’m tired of my house looking like an episode of Hoarders!!
I could use two of these.
In all honesty, I could use about twelve of them… LOL!
What if I wanted it 32 x 32 x 17? How do I modify? And can I use poplar?
Hi, Heidi!
Of course you can use poplar! Any species of wood can be used – it is just a matter of preference! To change the dimensions, just subtract or add to the corresponding pieces. For example, the dresser measures 40″ wide over all so that means that all of the pieces that lay across the width (the top, the stretchers, the drawer fronts, the drawer box front and back, the back, and the drawer bottoms) will be shortened by 8″ to make it 32″ wide. For the depth, the side panels, the side framing pieces, the top, the drawer bottoms, and the drawer sides will be lengthened by 2-1/2″ to make it 17″ deep. For the height since it is only 1/2″, the legs can be shortened so that it doesn’t affect the spacing of the stretchers or the drawers. So instead of having 4″ from the bottom of the legs to the bottom of the cabinet, it will be 3-1/2″. Hope this helps!
Yes this helps! Thank you! : )
The beveled edges and leg tapers use tools I don’t have yet, but those are just decorative, right? I only have a miter/drop saw at my disposal for the moment.
Absolutely, Holly! The legs can be straight and square! Hope this helps!