DIY Plans to Build a Pet Bed
Build a Place for Your Furry Friend to Nap
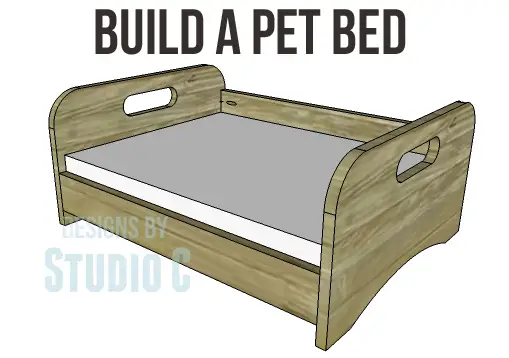
Our furry friends need their own place to rest, am I right? Even though they love to claim the sofa or our beds as their own, they deserve their own piece of furniture! The DIY plans to build a pet bed can be constructed out of plywood, straight off-the-shelf boards, or pieced pallet boards. This is a super-easy plan, and can accommodate most sizes of pet beds!
Materials:
- 1-1/4″ pocket hole screws (<– affiliate link!)
- Wood glue
- Sandpaper (100, 150, 220 grits)
- Finishing supplies (primer & paint, or stain, sealer)
Lumber:
- 1 – 1×4 at 4′
- 1 – 1×8 at 4′
- 1 – 1×12 at 4′
- 1 – 2′ x 4′ sheet of 3/4″ plywood
Cut List:
- 2 – 1×12 at 22″ – Sides
- 1 – 1×8 at 26-1/2″ – Back
- 1 – 1c4 at 26-1/2″ – Front
- 1 – 3/4″ plywood at 20-1/2″ x 26-1/2″ – Bottom
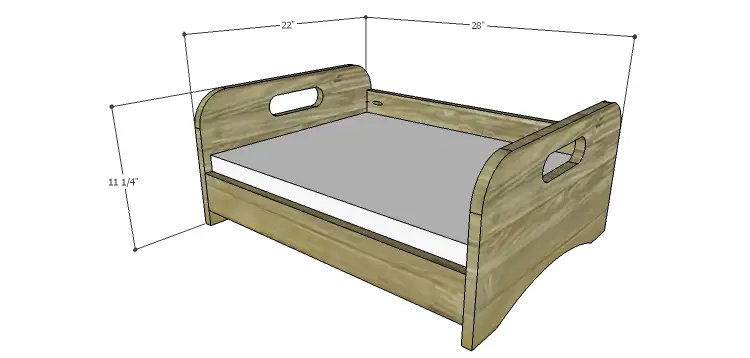
Click on the drawings for a larger view!
Here are a couple of other projects to make for your furry friends:
Step One
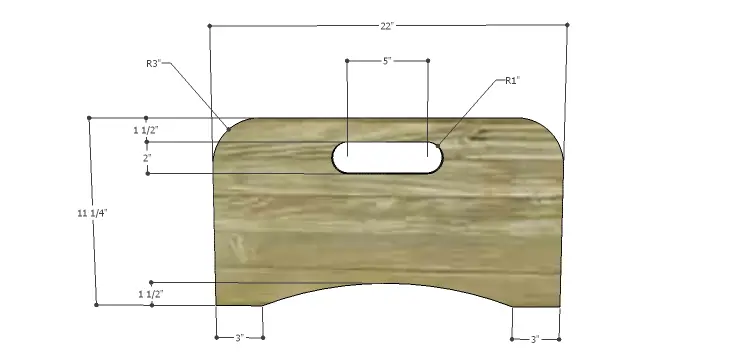
Cut the pieces for the sides. Mark the position for the handles, and cut the holes with a 1″ hole saw or paddle bit. Draw a straight line to connect the holes at the top and bottom, then cut along the lines to create the handles.
Mark the radius at the top corners and cut with a jigsaw. Draw the arc at the bottom and cut with a jigsaw.
Step Two
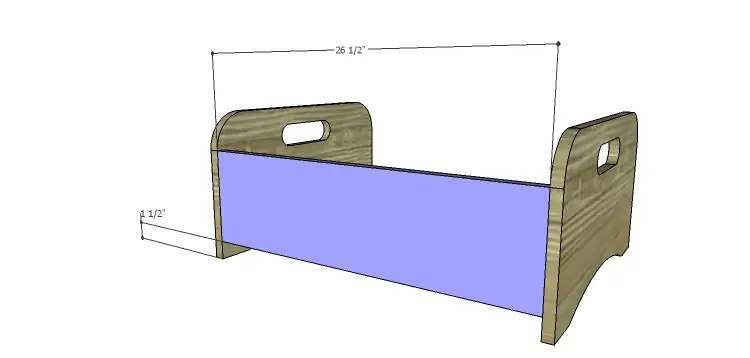
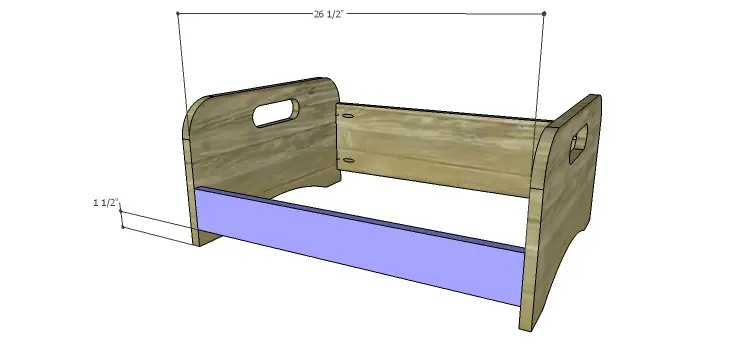
Cut the piece for the back. With the pocket hole jig set for 3/4″ material, drill pocket holes in each end of the piece. Secure to the sides using glue and 1-1/4″ pocket hole screws. Position the back 1-1/2″ up from the bottom of the sides.
Step Three
Cut the piece for the front and drill pocket holes in each end. Secure to the sides using glue and 1-1/4″ pocket hole screws. Position the front 1-1/2″ up from the bottom of the sides.
Step Four
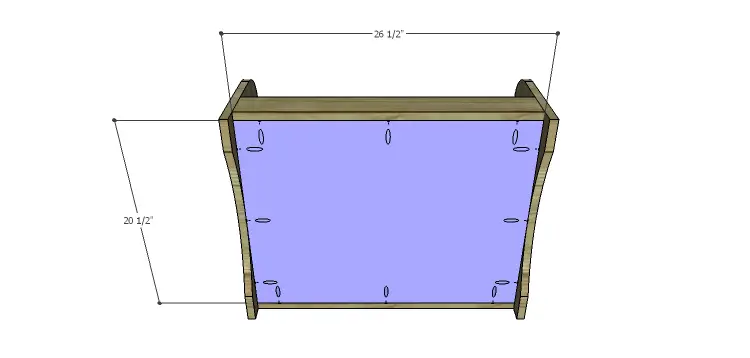
Cut the piece for the bottom and drill pocket holes in all four edges. Secure to the sides, front, and back using glue and 1-1/4″ pocket hole screws. The bottom will be flush with the bottom of the front and back.
Finish as desired. use my tutorial on how to make a basic box cushion to make a custom cushion to fit the bed!
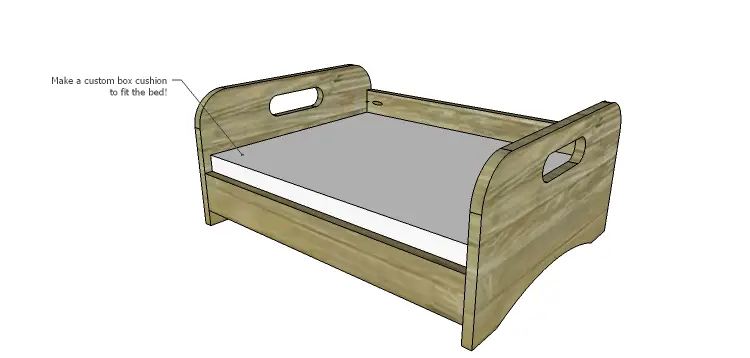
This pet bed would be great with a rustic, weathered finish and your pet’s name stenciled on the front! Have any questions about the DIY plans to build a pet bed? Leave a comment below or contact me at cher {at} designsbystudioc {dot} com!
Originally posted 2014-07-08 08:00:37.
