DIY Furniture Plans to Build a Hamilton Media Stand
A Fabulous Modern Media Stand That is Easy to Build!
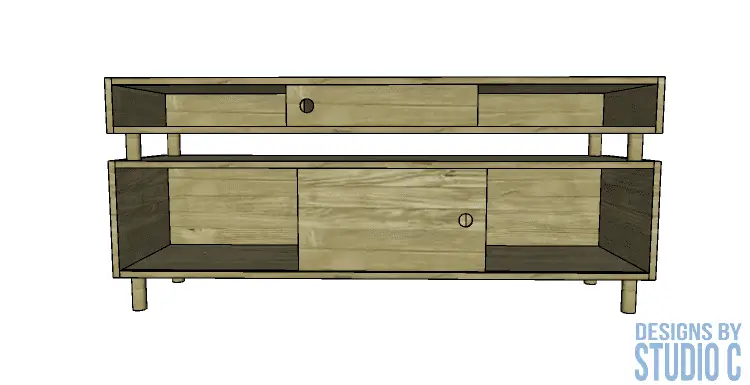
Inspired by a media stand from Urban Outfitters, the DIY plans to build a Hamilton Media Stand feature two cabinets, each with open shelving and a sliding door. The legs are constructed out of 1-1/2″ diameter dowels and are easy to install (other legs can also be used). The entire cabinet can be built using plywood or edge glued boards, with 1/4″ plywood doors. This is also the perfect weekend project and a great plan for those new to furniture building!
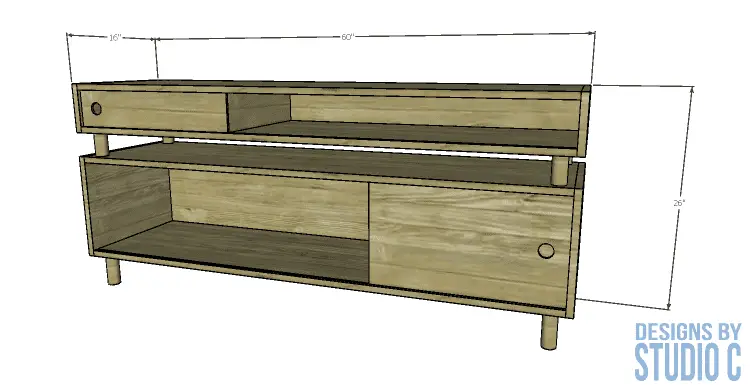
Materials:
- 1-1/2″ screws
- 2-1/2″ screws
- 1-1/4″ brad nails
- 1-1/2″ Forstner Bit (<– affiliate link!)
- Edge Banding (if using plywood) (<– affiliate link!)
- Wood Glue
- Sandpaper
- Finishing Supplies
Lumber:
- 1 – 4′ x 8′ sheet of 1/4″ plywood
- 2 – 4′ x 8′ sheets of 3/4″ plywood
- 1 – 1-1/2″ dowel rod at 36″ long
Cut List:
- 4 – 3/4″ plywood at 16″ x 58-1/2″ – Upper & Lower Cabinet Top & Bottom
- 1 – 3/4″ plywood at 15-5/16″ x 11-1/2″ – Lower Cabinet Divider
- 2 – 3/4″ plywood at 16″ x 13″ – Lower Cabinet Sides
- 4 – 1-1/2″ dowels at 4-3/8″ – Lower Cabinet Legs
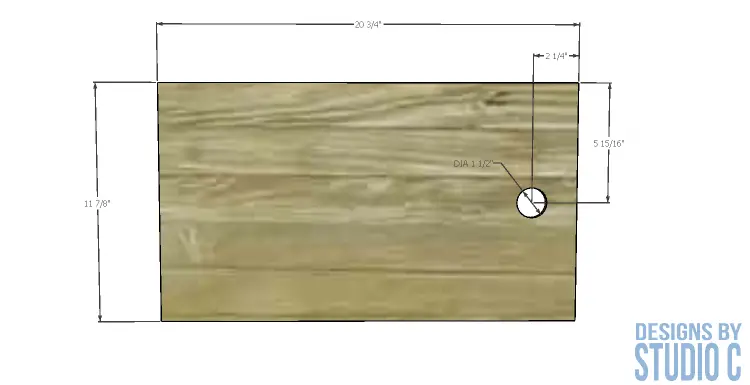
- 1 – 1/4″ plywood at 20-3/4″ x 11-7/8″ – Lower Cabinet Door
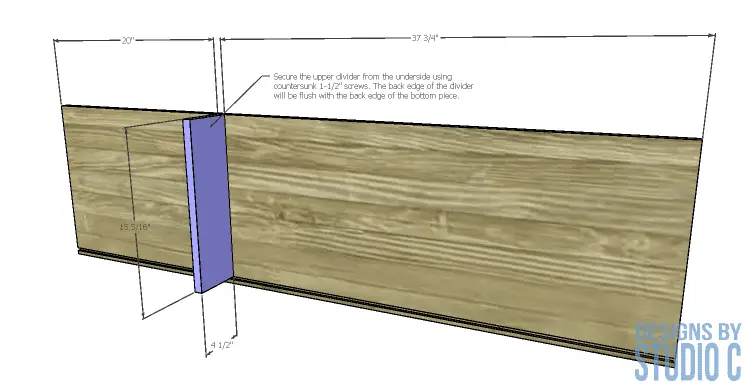
- 1 – 3/4″ plywood at 15-5/16″ x 4-1/2″ – Upper Cabinet Divider
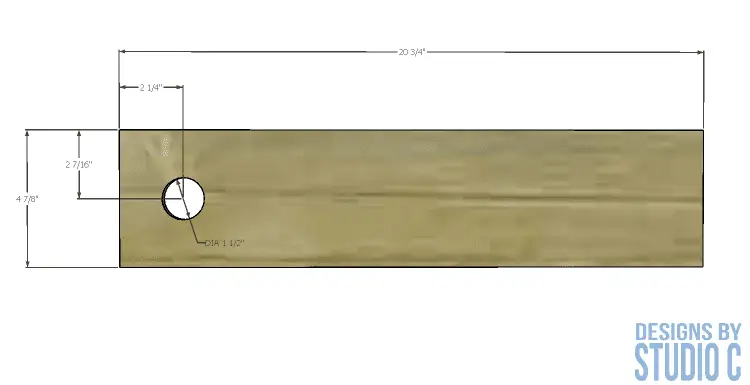
- 1 – 1/4″ plywood at 20-3/4″ x 4-7/8″ – Upper Cabinet Door
- 2 – 3/4″ plywood at 16″ x 6″ – Upper Cabinet Sides
- 4 – 1-1/2″ dowels at 3-3/4″ – Upper Cabinet Legs
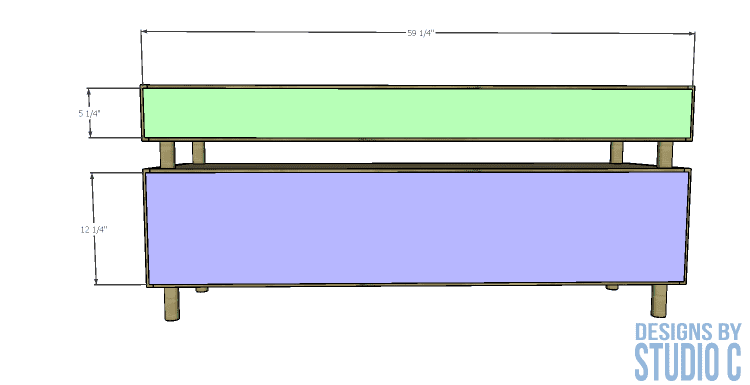
- 1 – 1/4″ plywood at 59-1/4″ x 5-1/4″ – Upper Cabinet Back
- 1 – 1/4″ plywood at 59-1/4″ x 12-1/4″ – Lower Cabinet Back
Notes About the Project:
Edge banding will be applied to the exposed edges of the plywood prior to assembly.
Step One
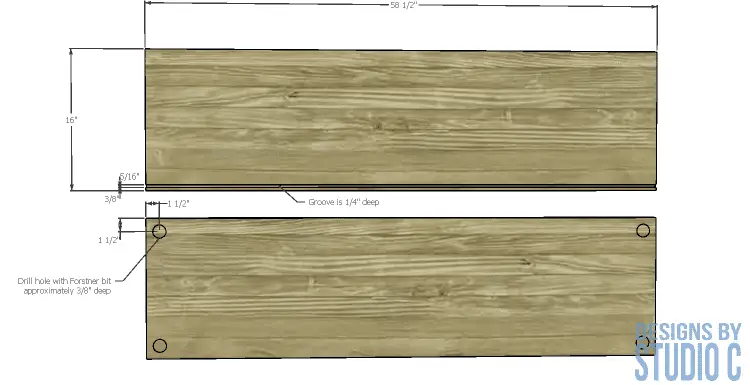
Cut the pieces for the top and bottom. There is a groove that will be cut approximately 3/8″ away from one long edge, at 1/4″ deep. This groove can be cut several ways:
- A 1/4″ straight bit on a router and with a straight edge making two passes to cut the groove at 5/16″ wide
- Cut on a table saw with the blade set at 1/4″ above the table
- Cut using a circular saw with the blade set 1/4″ below the plate and a straight edge
However the groove is cut, make sure ALL safety precautions are in place!
The grooves are cut in all four pieces. On three of the pieces, on the side opposite the groove, cut the holes for the legs using the 1-1/2″ Forstner bit, cutting the holes 3/8″ deep. The remaining piece without holes is for the upper cabinet top.
Step Two
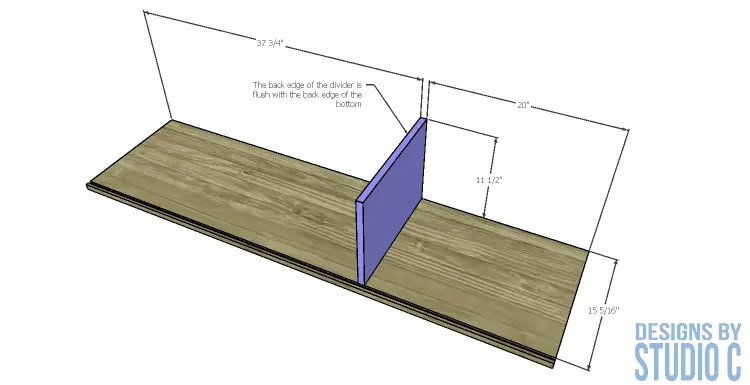
Cut the piece for the lower cabinet divider. The divider will be secured to the piece used as the bottom with countersunk 1-1/2″ screws and glue (screwed from the underside). The back edge of the divider will be flush with the back edge of the bottom piece, stopping short of the groove so the door slides freely.
Step Three
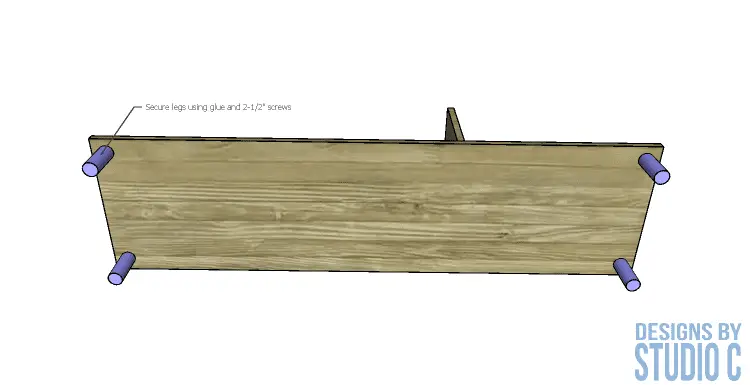
Cut the pieces for the legs. Insert the legs into the holes on the underside of the bottom. Secure in place using glue and 2-1/2″ screws from the opposite side.
Step Four
Cut the piece for the door. The hole in the door can be drilled through with the 1-1/2″ Forstner bit as long as there is a scrap block under the door piece.
Step Five
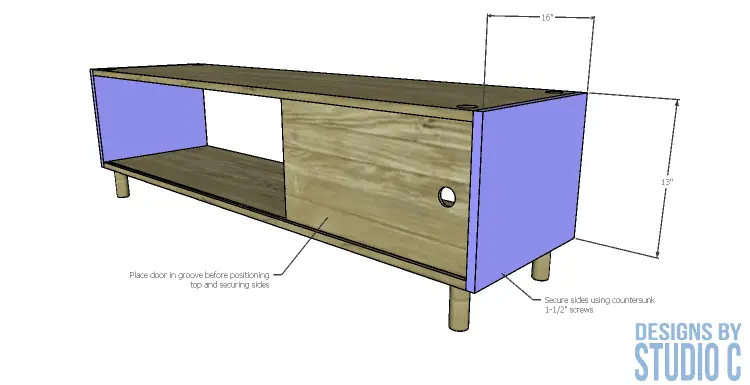
Insert the door into the groove on the bottom piece, then apply glue along the top edge of the divider and place the top piece into position (with the door in the groove). Secure the side pieces to the top and bottom, as shown, using glue and countersunk 1-1/2″ screws.
Step Six
Cut the piece for the upper cabinet divider. The divider will be installed in the same manner as the lower cabinet divider.
Step Seven
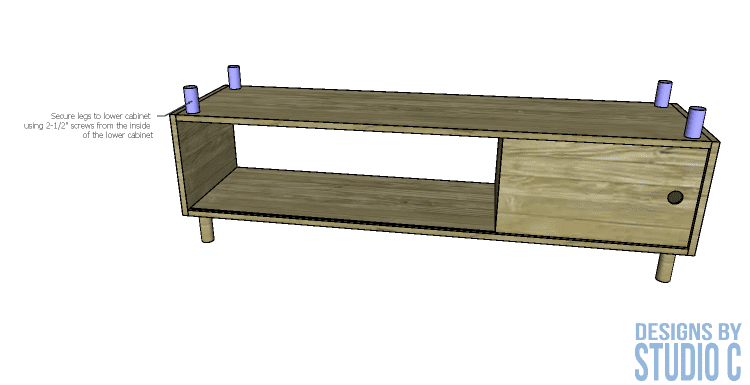
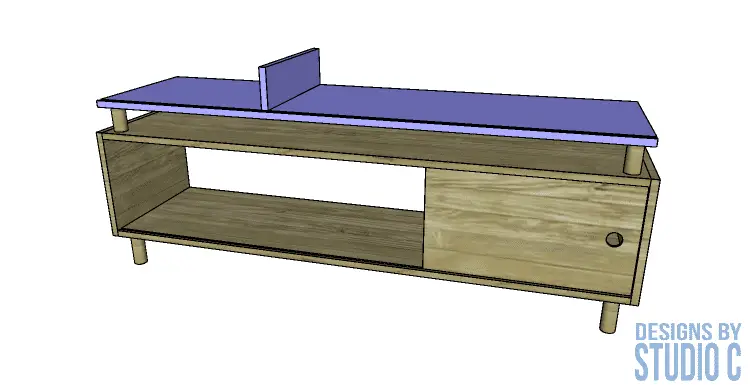
Cut the pieces for the upper cabinet legs. Secure the legs in the holes of the lower cabinet top using glue and 2-1/2″ screws from the underside. Position the upper cabinet bottom on top, and secure to the legs using glue and 1-1/2″ screws.
Step Eight
Cut the piece for the upper cabinet door, and cut the hole in the same manner as the lower cabinet door.
Step Nine
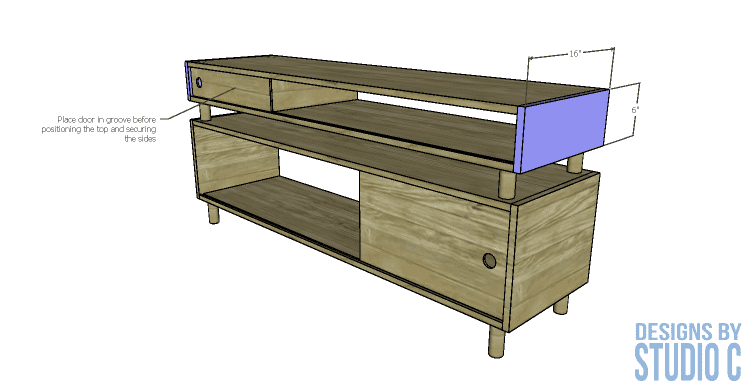
Insert the door into the groove on the upper cabinet, and secure the top and sides in the same manner as the lower cabinet.
Finish the cabinet as desired.
Step Ten
Cut the pieces for the back, and finish the inside faces. Secure the back pieces to the corresponding cabinet using glue and 1-1/4″ brad nails.
This piece doesn’t have to be just a media stand… It would be a fabulous console table against a wall or behind a sofa! Have questions about the DIY plans to build a Hamilton Media Stand? Leave a comment below!
Other Easy to Build Media Stands:
Originally posted 2019-02-03 08:00:43.

