Easy Project: DIY Nativity Stable
An Easy to Build Christmas Stable
Hey there! So, here’s the story: my coworker recently got this absolutely stunning Nativity set for his wife as a Christmas gift. The only problem was, he couldn’t find a stable to go along with it. That’s where I come in! He asked if I could lend a hand and make one for him.
Now, let me tell you about this DIY Nativity stable. I used these solid 1/4″ x 6″ boards and fastened them together with some trusty glue and brad nails. It turned out pretty sturdy, if I do say so myself! But you know what really brings it to life? The beautiful green forest moss that we added. It just completes the whole look and makes it feel like a cozy little home for the Nativity scene.
I gotta say, it was a fun little project and I’m so glad I could help my coworker out. It’s all about spreading that Christmas cheer, right?
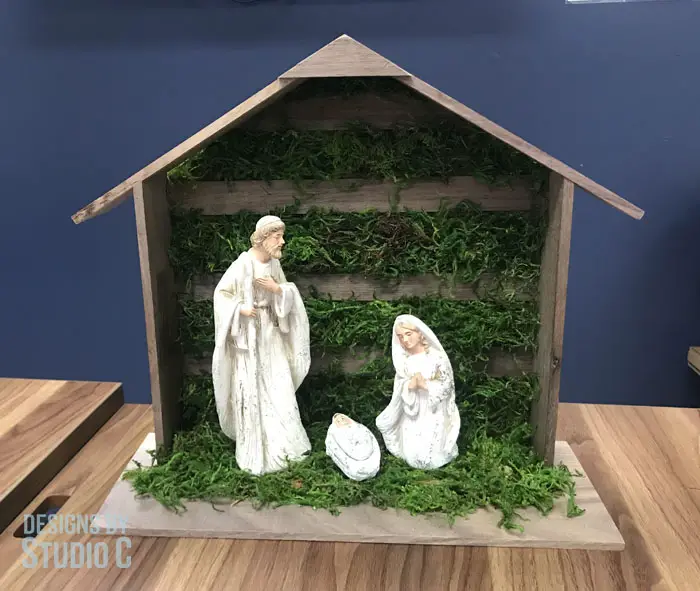
Materials:
- DAP® Weldwood Instant Adhesive (<– affiliate link)
- Wood glue
- Forest moss (Spanish moss can also be used) (<– affiliate link)
- White glue
Lumber:
- 2 – 1/4″ x 6″ x 24″ craft boards
- 1 – scrap piece of thin cardboard
Cut List:
- 1 – 1/4″ x 6 at 14″ – Base
- 2 – 1/4″ x 6 (ripped to 2-1/2″ wide) at 8-11/16″ – Sides
- 6 – 1/4″ x 6 (ripped to 1-1/4″ wide) at 12″ – Joining Slats
- 2 – 1/4″ x 6 (ripped to 2-1/2″ wide) at 8-13/16″ – Roof
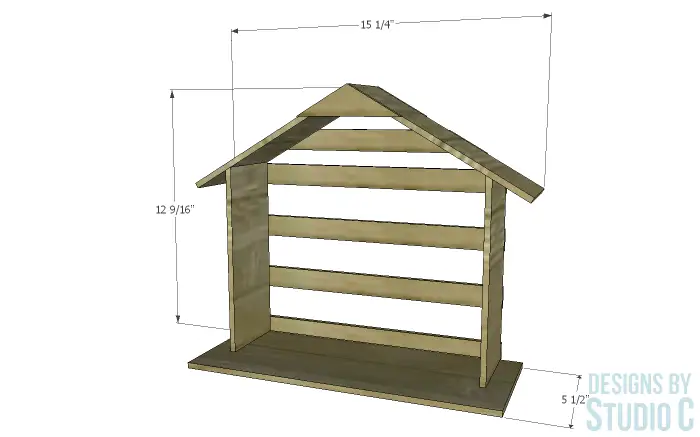
Notes About the Project:
- Use a miter saw or miter box and handsaw to cut the angles in the boards.
- Lightly sand any rough edges with a sanding block.
- I used Walnut craft boards but any other species would work.
- The white glue (such as Elmer’s) is used to adhere the moss to the floor and back of the stable. It works really well and dries clear.
- The same Nativity set can be purchased on Amazon (<– affiliate link).
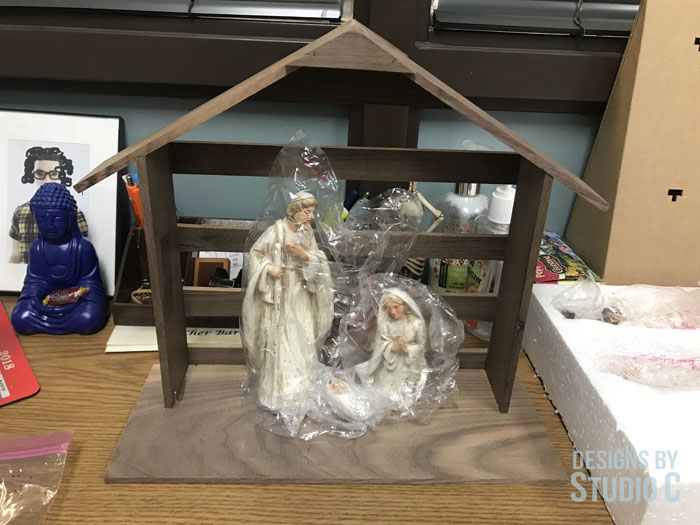
Step One
Cut the pieces for the base and sides. Cut a 30° angle in the top edge of each piece for the side. Secure the sides to the base using glue and 5/8″ brad nails. The sides will be positioned so that the back edge of the side pieces are flush with the back edge of the base.
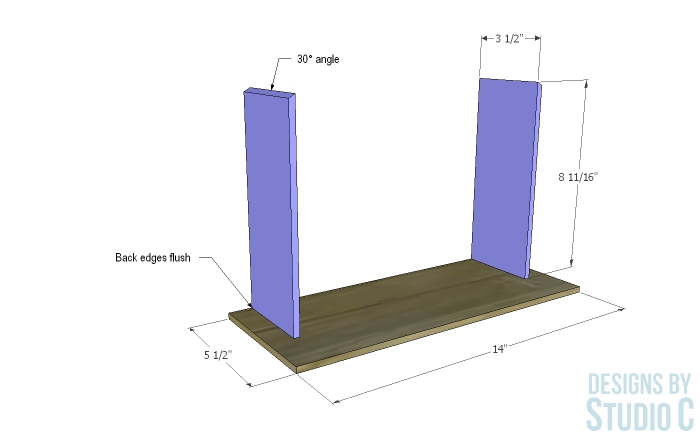
Step Two
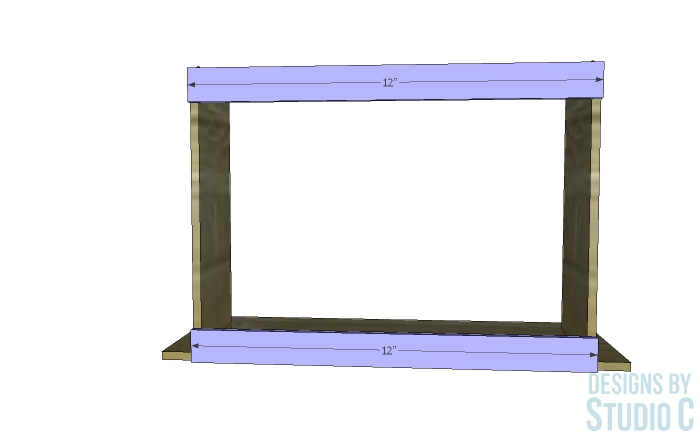
Cut the pieces for the joining slats. In this step, two will be used to stabilize the sides so the roof can be attached. Secure one slat to the top of the sides (below the angle) using glue and 5/8″ brad nails, then secure one slat to the bottom over the base and flush at the sides.
Step Three
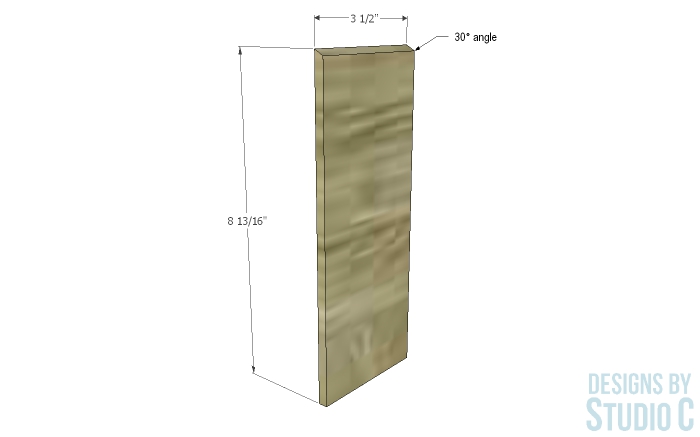
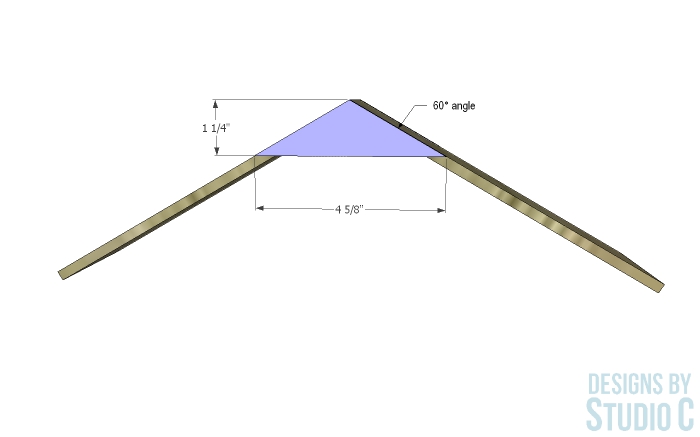
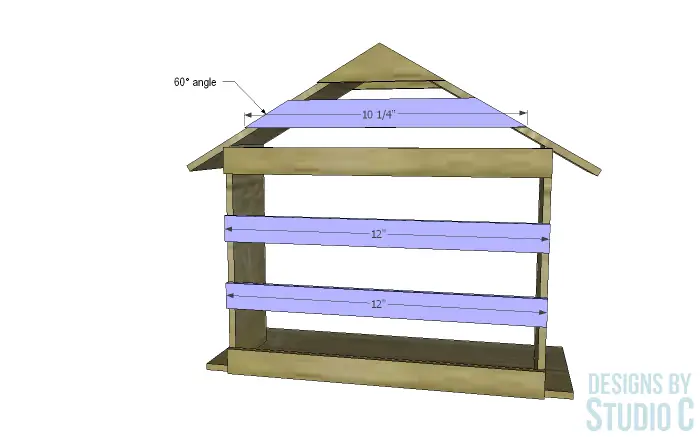
Cut the pieces for the roof and cut a 30° angle in one short edge of each piece. Using one of the joining slats, cut two roof braces, triangular shaped, with a 60° angle on each side. Apply glue along the peak of the roof and press the pieces together. Secure the roof braces on either side using glue and 5/8″ brad nails.
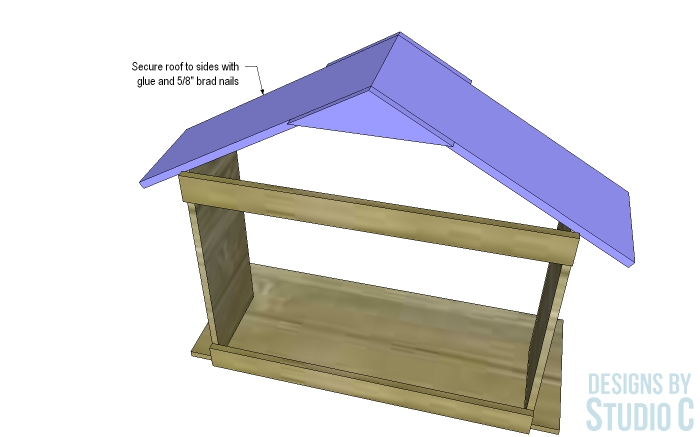
Position the roof assembly on the sides and secure using glue and 5/8″ brad nails.
Step Four
Add the remaining joining slats to the back, evenly spaced, securing in place with glue and 5/8″ brad nails.
Sand any rough edges, and finish the stable as desired.
Step Five
To add the moss:
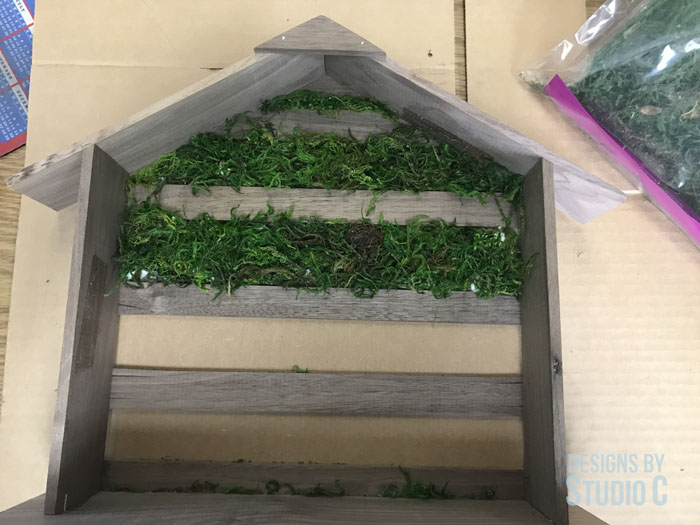
Lay the stable on the piece of cardboard and trace around it. Cut out the shape with scissors and glue it to the back of the stable.
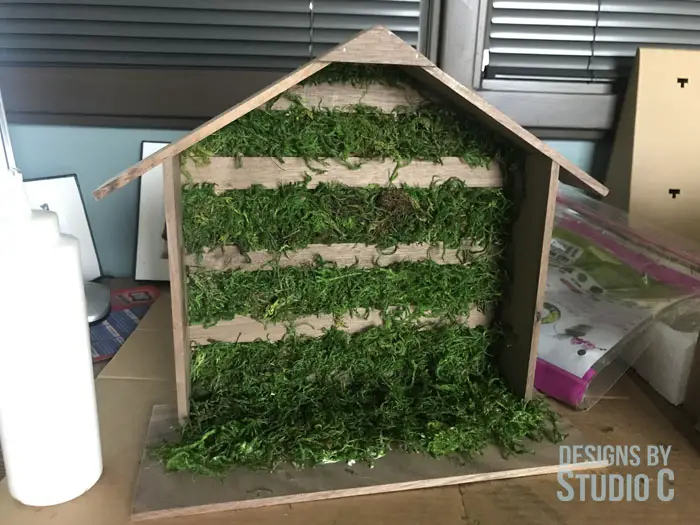
Apply white glue to the cardboard and press the moss in place. Be liberal with the glue, and note that the moss will make a mess! Secure the moss to the floor of the stable in the same manner.
Have questions about how to make a DIY Nativity stable? Leave a comment below!
Originally posted 2019-12-15 08:00:57.

