Build a Folsom Console Bookcase
An Easy to Build Bookcase Inspired by a Catalog Retailer
The Folsom collection from Pottery Barn is extremely popular! Every piece has simple, clean lines in a minimalist style that looks great in any room. It’s also super-easy to DIY and replicate a few of these pieces for yourself! I have a few plans based on this style (just search for Folsom in the search bar!) and the easy to build Folsom console bookcase is included.
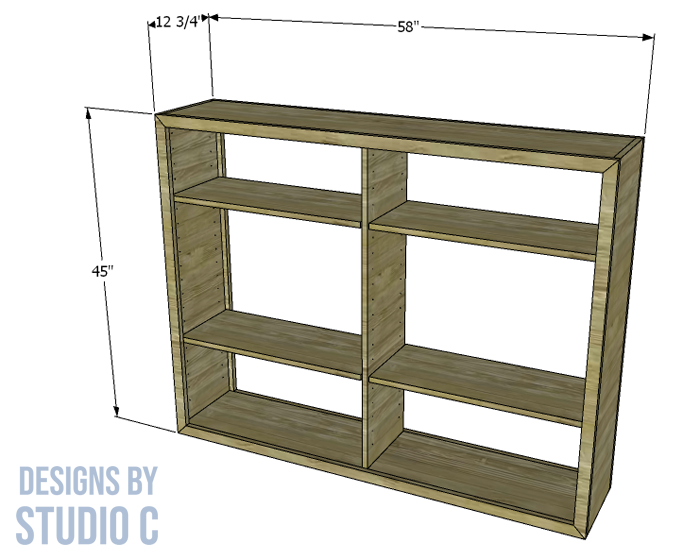
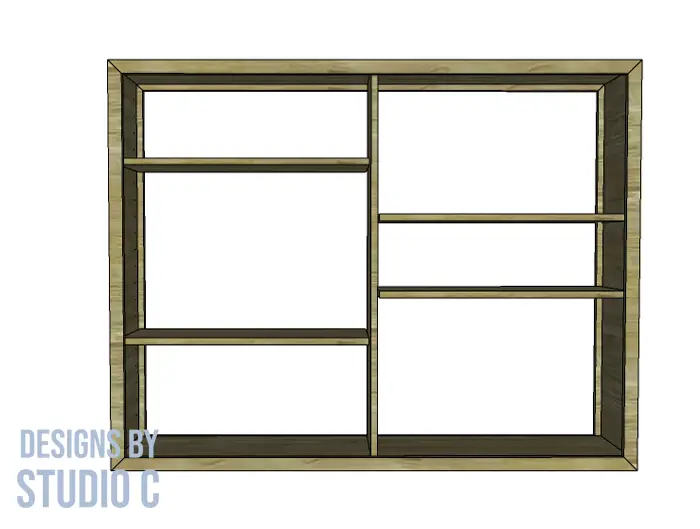
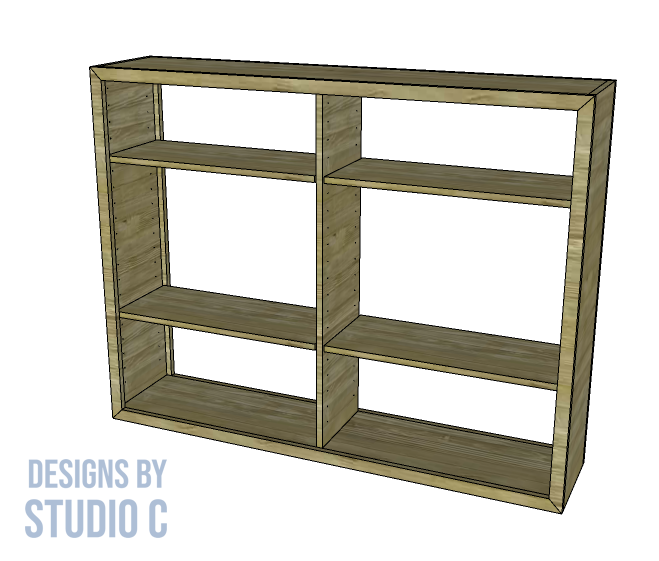
This project is great for first-timers, and makes a fantastic weekend project. The shelves are adjustable so that the configuration can fit your needs. The plan calls for four shelves but you can cut as many as you want – just make sure to add to the lumber list!
Materials:
- 1-1/4″ pocket hole screws
- 2″ brad nails
- 1/4″ shelf pins (<– affiliate link – 4 for each shelf)
- Wood glue
- Sandpaper (80, 120, 220 grits)
- Finishing supplies
Lumber:
- 4 – 1×2 at 6′
- 2 – 1×2 at 8′
- 6 – 1×12 at 8′
Cut List:
- 2 – 1×12 at 56-1/2″ – Top and Bottom
- 2 – 1×12 at 45″ – Sides
- 1 – 1×12 at 42-3/4″ – Divider
- 4 – 1×2 at 58″ – Face Frame
- 4 – 1×2 at 45″ – Face Frame
- 4 – 1×12 for the shelves – see Step Four
Notes About the Project:
- Sand all pieces prior to assembly
- A shelf pin jig with a 1/4″ drill bit (<– affiliate link) is extremely helpful! Also, the shelf pin holes do not have to run the entire length of the sides and the divider. They can be located in the middle third of the boards, if desired!
- The bookcase can be stained or left natural!
Step One
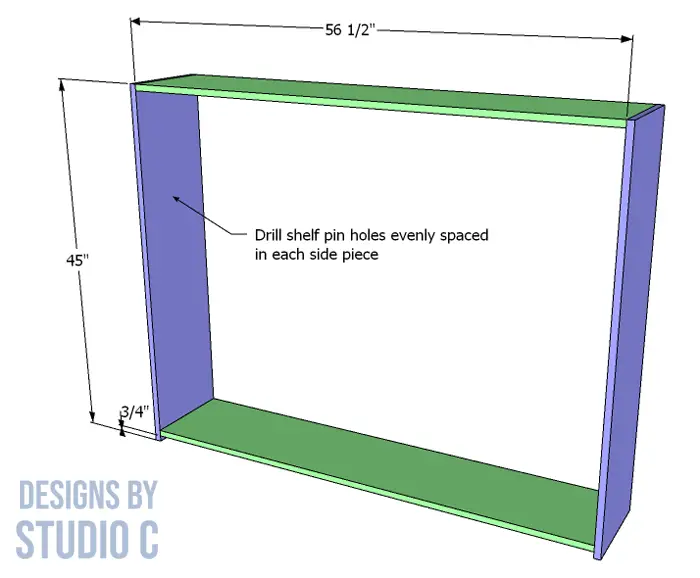
Cut the pieces for the top and bottom, and the sides. Using the shelf pin jig, drill holes for the shelf pins on the inside faces of the side pieces locating the rows approximately 1-1/2″ in from each long edge. Try to evenly space the rows of holes evenly from top to bottom. Note that the holes will NOT go all the way through the workpiece. I’ve written a post on using a shelf pin jig that could be helpful!
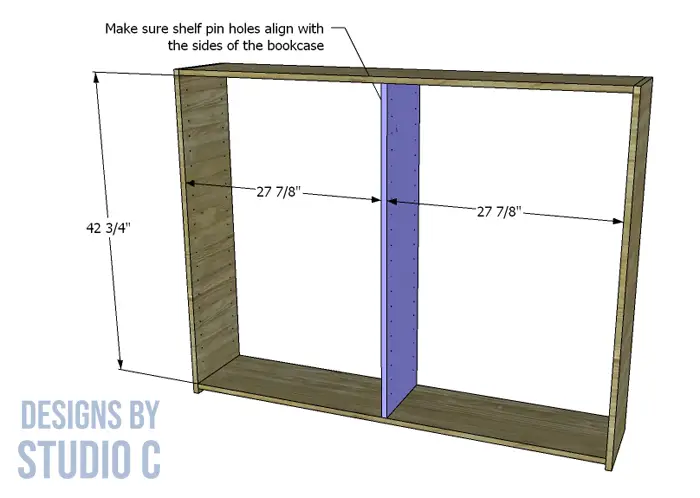
With the pocket hole jig set for 3/4″ material, drill pocket holes in each end of the top and bottom pieces. Assemble the case using glue and 1-1/4″ pocket hole screws. The bottom piece will be located 3/4″ up from the bottom of the side piece so that the top edge of the face frame is flush with the shelf (see drawing).
Step Two
Cut the piece for the divider and drill pocket holes in each end. Drill shelf pin holes with the jig on both sides of the divider, and make sure the holes will line up with the holes on the sides so that the shelves are level. For example, if the first hole on the sides is located 5″ from the top of the side piece, then the holes in the divider will need to be located 4-1/4″ down from the top of the piece to allow for the thickness of the top. In this piece, the holes will go all the way through the board so they can be accessible from each side.
Secure the divider to the top and bottom using glue and 1-1/4″ pocket hole screws.
Step Three
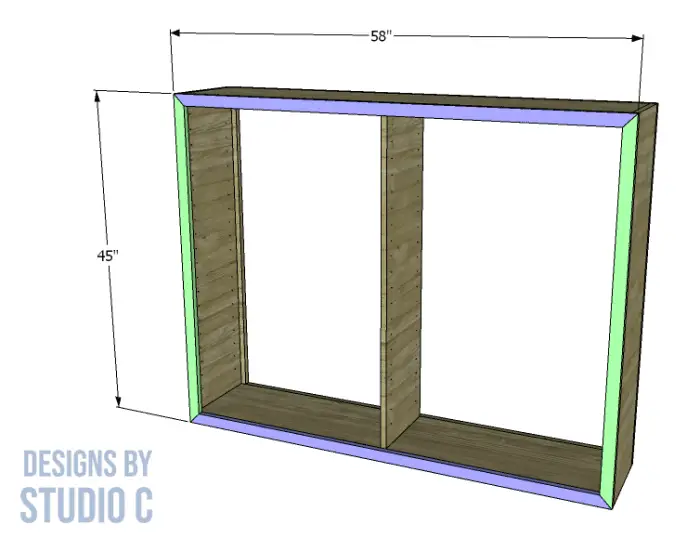
Cut the 1×2 pieces for the face frame, and cut a 45° miter in each end. Secure the pieces to the top, bottom and sides of the case (the outer edge with be flush with the top, bottom and side faces) using glue and 2″ brad nails. Repeat for both sides of the bookcase.
Step Four
Insert the two shelf pins in the side, and two in the corresponding holes in the divider, and measure the distance between the shelf pins. Repeat this process on the side opposite of the divider and subtract 1/8″ to 3/16″ for wiggle room, then cut the shelves at this dimension.
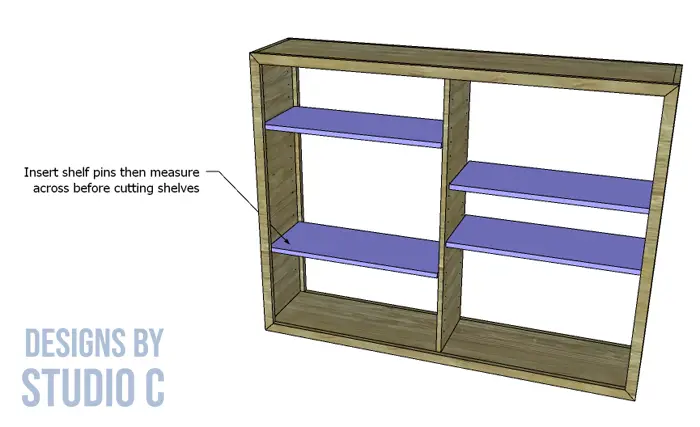
Finish the bookcase as desired!
As a side note, the bookcase can be made deeper by using plywood for the case, divider and shelves, or narrower by using smaller boards. If using plywood, edge banding can also be applied to the edges of the shelves.
Have questions about the plans to build a Folsom console bookcase? Leave a comment below!


[…] visual boundaries and differentiate between different areas. By strategically placing furniture and using decorative elements, homeowners can achieve a sense of division and create defined zones without the use of […]