Plans for a Designer Bookcase Divider You Can Build For Less!
This cube bookcase divider is so neat… I love the cubes offset by the spacers! It would be even more awesome with a two tone finish – the cubes finished one way with the spacers finished another way would be awesome but then again, it would be cool in one cohesive color. However you finish it, this is a super project suitable for all skill levels!
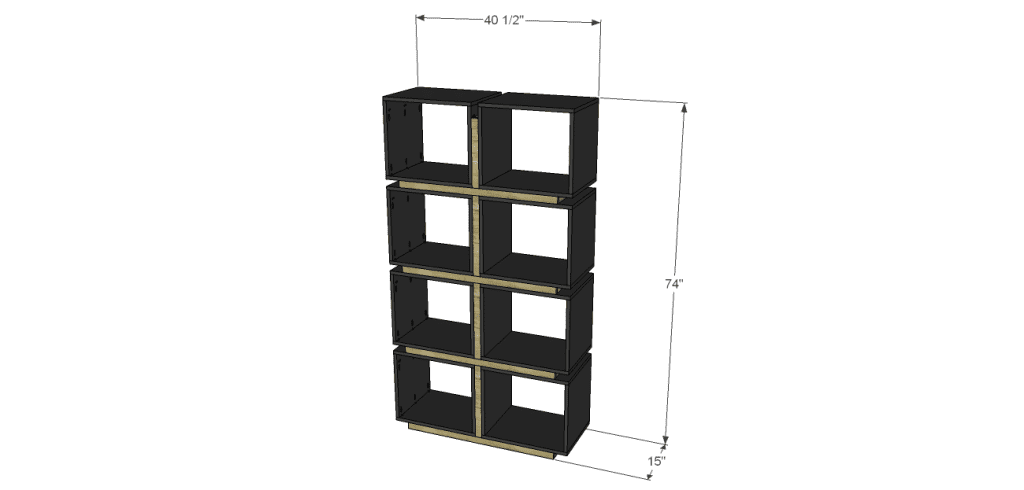
Materials:
- 1-1/4″ pocket hole screws (<– affiliate link!)
- 1-1/4″ brad nails
- Edge banding, optional (<– affiliate link!)
- Sandpaper (100, 150, 220 grits)
- Finishing supplies (primer & paint or stain)
Lumber:
- 7 – 1×2 at 8′
- 2 sheets of 3/4″ plywood (4′ x 8′)
- 1 half sheet of 3/4″ plywood (4′ x 4′)
Cut List:
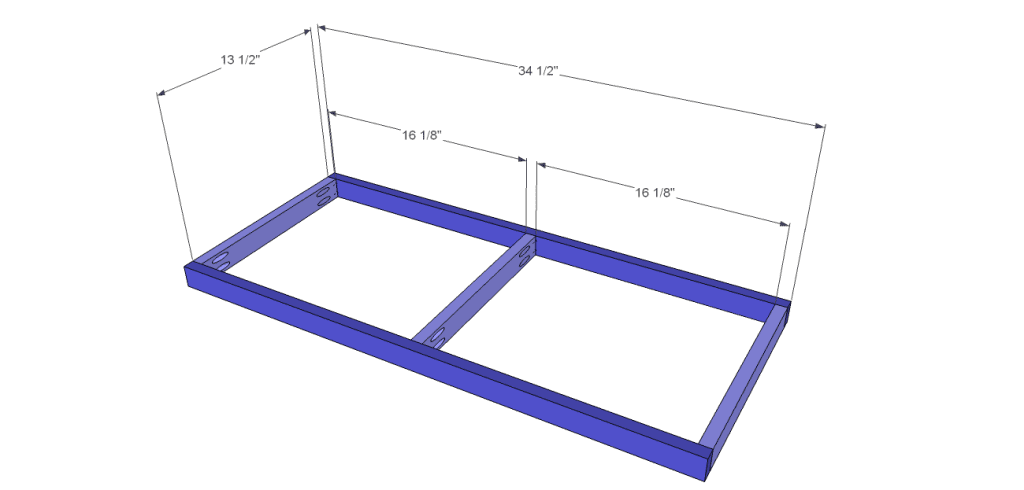
- 13 – 1×2 at 13-1/2″ – Spacer Frame
- 8 – 1×2 at 34-1/2″ – Spacer Frame
- 6 – 1×2 at 17″ – Spacer Frame
- 2 – 1×2 at 14″ – Spacer Frame
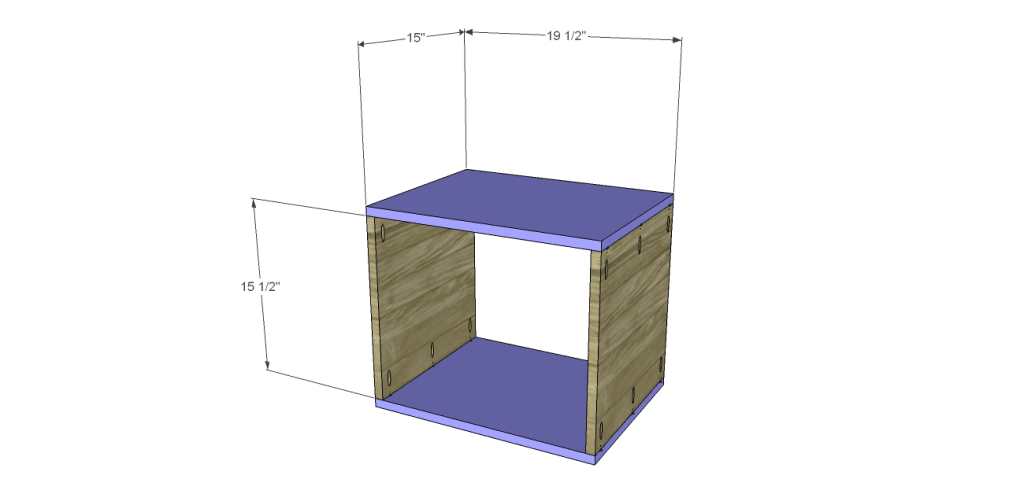
- 16 – 3/4″ plywood at 15″ x 15-1/2″ – Cube Sides
- 16 – 3/4″ plywood at 15″ x 19-1/2″ – Cube Top & Bottom
Click on the drawings for a larger view!
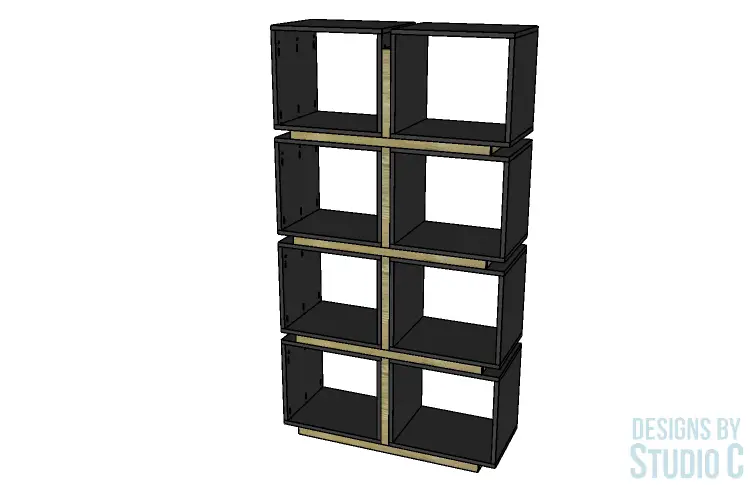
Notes:
If using edge banding, it will be applied to the exposed edges of the plywood before assembly. It may be easier if using two different finishes to finish the cubes and the spacer frame separately before assembly.
Step One
Start by cutting the pieces for the cubes. The easiest way to do this will be to cut the plywood sheets into strips 15″ wide, then cut the pieces to length. Using the pocket hole jig set for 3/4″ material, drill pocket holes in each of the 15″ ends. Assemble as shown using glue and 1-1/4″ pocket hole screws. Note that on one side, the pocket hole screws will face in and the other side the pocket holes will face out. The reason I have it drawn this way is so that only one set of pocket holes will have to be filled. The other set will face in toward the spacer frame!
Step Two
Cut the pieces for the spacer frames. Drill pocket holes in each end of the shorter 13-1/2″ pieces, the 17″ pieces, and one end only of the 14″ pieces. Start by assembling all of the rectangular frames first using glue and 1-1/4″ pocket hole screws.
Step Three
“Stack” the frames using the 17″ pieces located at the center of each rectangular frame securing with glue and 1-1/4″ pocket hole screws.
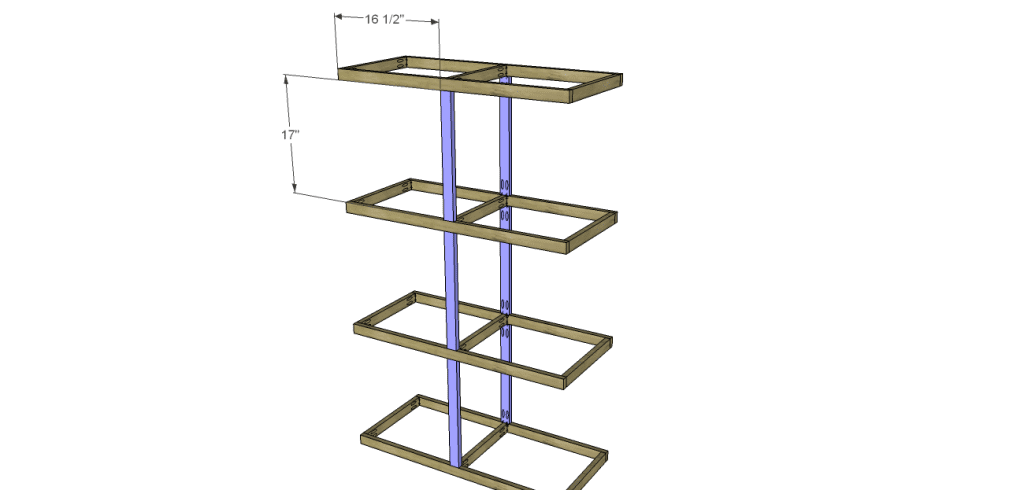
Step Four
Position the 14″ pieces at the top, then close off the top of the frame with the remaining 13-1/2″ piece.
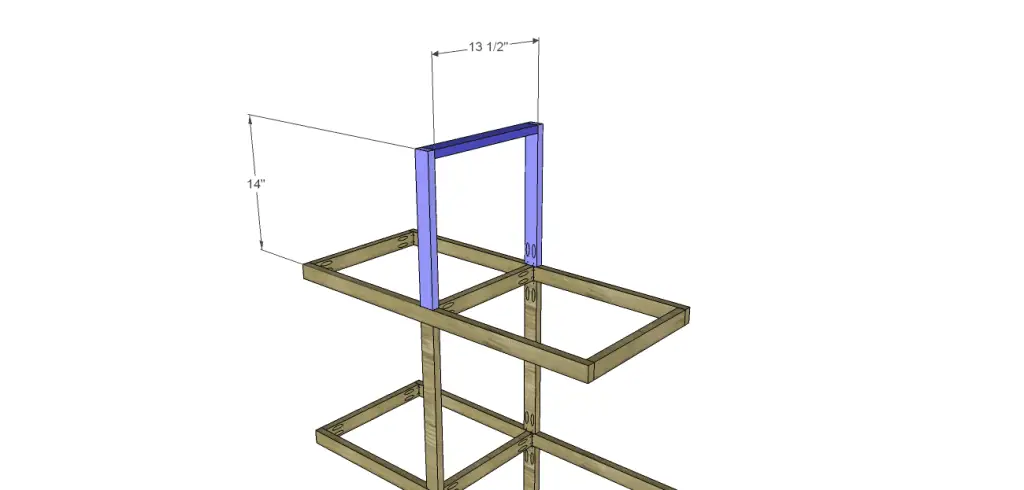
Step Five
Add the cubes in the openings created in the spacer frame. Secure the cubes using glue and 1-1/4″ brad nails through the cubes into the spacer frame. The cubes will overhang the ends of the frame by 3″ at each side, and the top vertical spacer piece will be 3″ shorter than the cube (see the drawing).
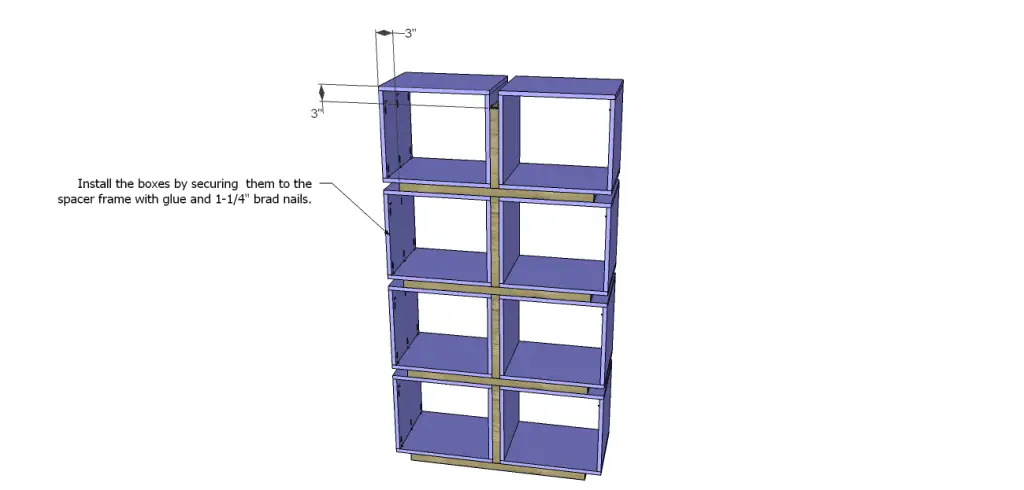
The plans to build the cube bookcase divider are easy, right? It is the perfect piece to place against the wall or dividing a space into more than one area. Actually, more than one bookcase divider can be constructed to create a one-of-a-kind organization space! Hmmm… Now that idea has me thinking….
Originally posted 2013-09-18 08:00:38.

1 Comment
Pingback: Studio Bookcase Room Divider – Free Woodworking Plan.com