
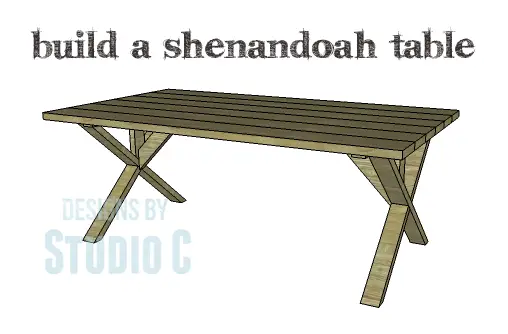
DIY Plans to Build a Shenandoah Table
A Beautifully Rustic Table You Can Build!
With the holidays coming up, now is the perfect time to build a table for use at your holiday events and show off your stellar DIY skills! The DIY plans to build a Shenandoah Table feature a planked top, crossed legs, and additional bracing that is as stylish as it is functional. The table is a really easy build and is suitable for all skill levels, plus it can be completed in a weekend. We all like projects like that, right?
Materials:
- 2-1/2″ pocket hole screws (<– affiliate link!)
- 2-1/2″ screws
- Countersink bit for drill (<– affiliate link!)
- Wood glue
- Sandpaper (100, 150, 220 grits)
- Finishing supplies (primer & paint, or stain, sealer)
Lumber:
- 1 – 2×3 at 6′
- 3 – 2×4 at 8′
- 6 – 2×8 at 8′
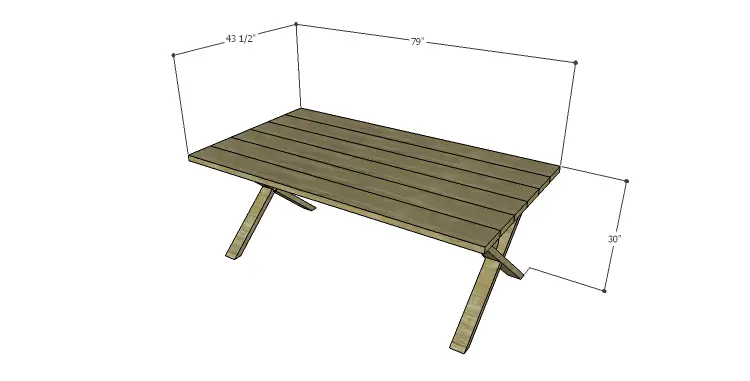
Cut List:
- 6 – 2×8 at 79″ – Top
- 2 – 2×3 at 35-1/2″ – Top Supports
- 2 – 2×4 at 45-1/2″ – Legs
- 4 – 2×4 at 22-1/8″ – Legs
- 2 – 2×4 at 13-5/16″ – Vertical Leg Braces
- 2 – 2×4 at 21-9/16″ – Leg Braces
Click on the drawings for a larger view!
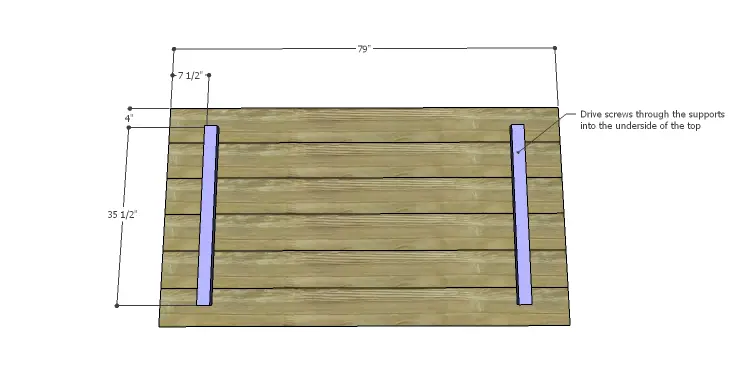
Step One
Cut the pieces for the top and the 2×3 top supports. Position the 2×3 supports as shown – 7-1/2″ in from the side edges of the boards, and 4″ from the longer edges of the boards. Use the countersink bit to pre-drill the holes in the supports for the screws adding two screws for each board. Use glue and 2-1/2″ screws to secure the supports to the boards.
Step Two
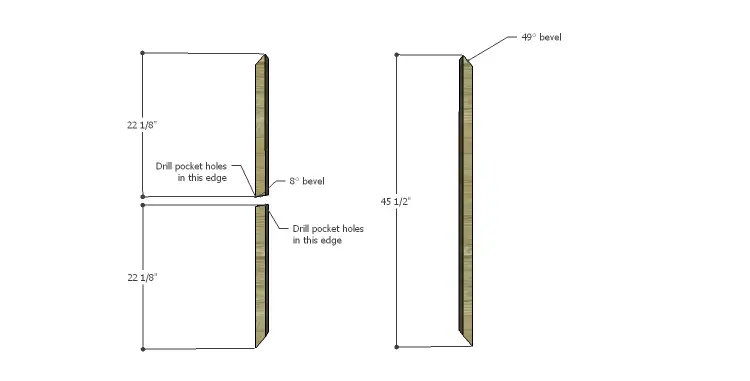
Cut the pieces for the legs. Cut the pieces to length, then cut the angles in each end. In the longer pieces, the angles will be cut at 49° as shown in the drawing. The shorter pieces will each have one 49° angle and one 8° bevel cut in them, as indicated in the drawing.
Set the pocket hole jig for 1-1/2″ material, and drill pocket holes in the shorter pieces in the ends with the 8° bevel. Assemble the legs as shown, locating the shorter pieces on the longer pieces as indicated. Secure the shorter pieces using glue and 2-1/2″ pocket hole screws.

Step Three
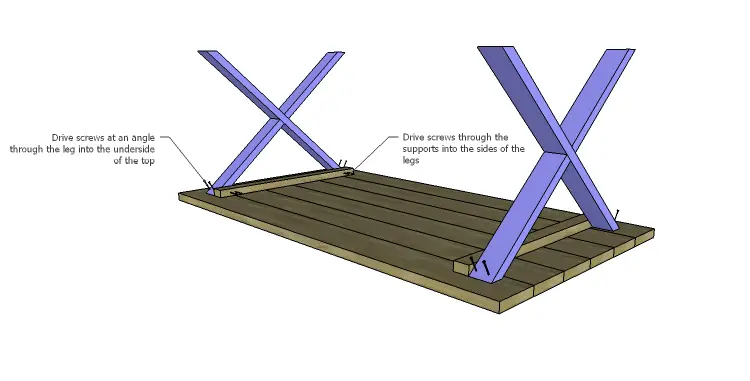
Position the leg assemblies on the outside of the top supports as shown. Drill countersunk holes in each side edge of the supports to attach the legs. Secure the legs to the supports using glue and 2-1/2″ screws. Further secure the legs to the top using screws drilled at an angle through the legs into the underside of the top.
Step Four
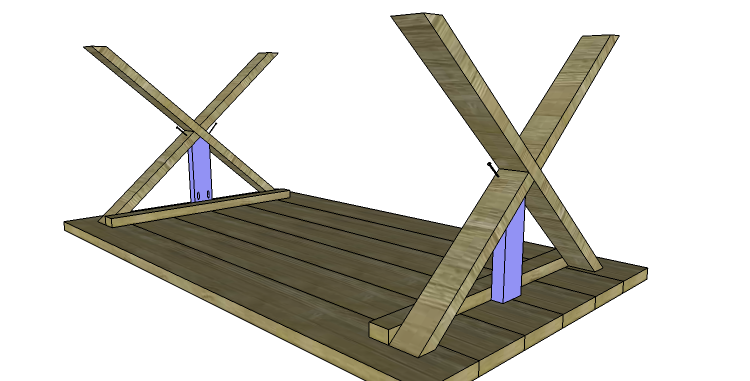
Cut the pieces for the vertical braces. Cut the pieces to length, then cut 40° angles in each side of one end so that the end has a “point”. Drill pocket holes in the other end of each piece. Position the piece under the legs and up against the support as shown, securing in place using glue and 2-1/2″ pocket hole screws. Drill countersunk holes in the legs so that the screws will be driven through the legs into each side of the “point”. Drive 2-1/2″ screws through the legs into the vertical braces.
Step Five
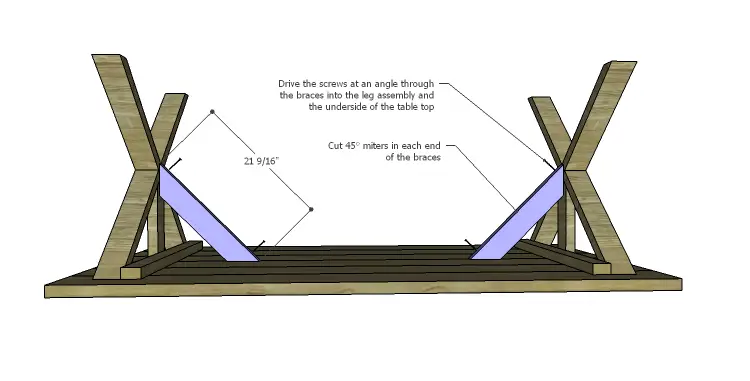
Cut the pieces for the braces. Cut 45° miters in each end of each piece. Position the braces on the underside of the top and on the leg assemblies as shown securing in place using glue and 2-1/2″ screws drilled at an angle.
Finish as desired.
This table will be quite inexpensive to build since it is requiring straight off-the-shelf boards. This would also be a great table for the outdoors when properly finished! Have any questions about the DIY plans to build a Shenandoah Table? Leave a comment below or contact me at cher {at} designsbystudioc {dot} com!
Originally posted 2014-09-26 08:00:28.