DIY Plans to Build an August Queen Bed
DIY Bed Frame Plans You Can Build Today
This is a plain, simple, and inexpensive bed. The DIY plans to build an August Queen bed are a platform style, which eliminates the need for box springs. (Box springs can be used but the bed will sit really high!) The plans are written for a queen size and easy alterations can be made for Full or King.
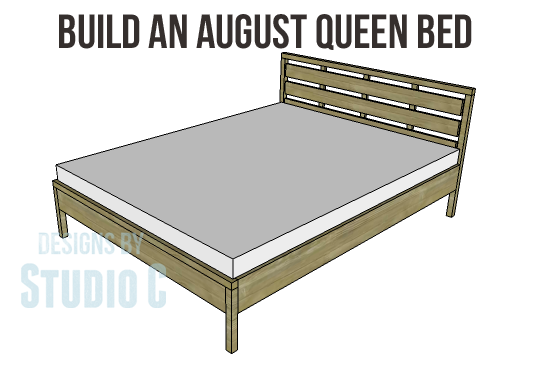
Materials:
- 1-1/4″ pocket hole screws (<– affiliate link!)
- 2-1/2″ pocket hole screws
- 1-1/4″ screws
- 2-1/2″ screws
- Wood glue
- Sandpaper (100, 150, 220 grits)
- Finishing supplies (primer & paint, or stain, sealer)
Lumber:
- 3 – 1×2 at 6′
- 14 – 1×3 at 8′
- 3 – 1×6 at 6′
- 3 – 2×2 at 6′
- 5 – 2×2 at 8′
- 2 – 2×6 at 6′
- 3 – 2×8 at 8′
Cut List:
- 2 – 2×2 at 33″ – Headboard Legs
- 1 – 2×2 at 59″ – Headboard Frame
- 1 – 2×2 at 62″ – Headboard Frame
- 1 – 2×6 at 59″ – Headboard Frame
- 3 – 1×2 at 18″ – Headboard Frame
- 3 – 1×6 (ripped to 4″ wide) at 58″ – Headboard Front
- 2 – 2×2 at 13-1/2″ – Footboard Legs
- 1 – 2×2 at 62″ – Footboard Frame
- 1 – 2×6 at 59″ – Footboard
- 3 – 2×8 (ripped to 7″ wide) at 79″ – Rails
- 4 – 1×2 at 13″ – Center Legs
- 4 – 2×2 at 79″ – Slat Supports
- 40 – 1×3 at 28-3/4″ – Slats
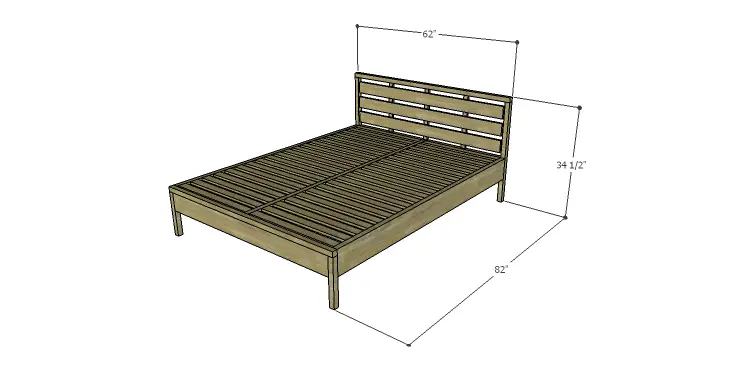
Step One
Cut the pieces for the headboard. With the pocket hole jig set for 1-1/2″ material, drill pocket holes in one end of each leg, both ends of the 59″ frame piece, and each end plus one long edge of the 2×6 piece. Assemble the frame using glue and 2-1/2″ pocket hole screws.
Set the pocket hole jig for 3/4″ material and drill pocket holes in each end of the 1×2 pieces. Secure the 1×2 pieces to the 2×2 pieces as shown using glue and 1-1/4″ pocket hole screws. The back face of the 1×2 pieces will be flush with the back faces of the frame.
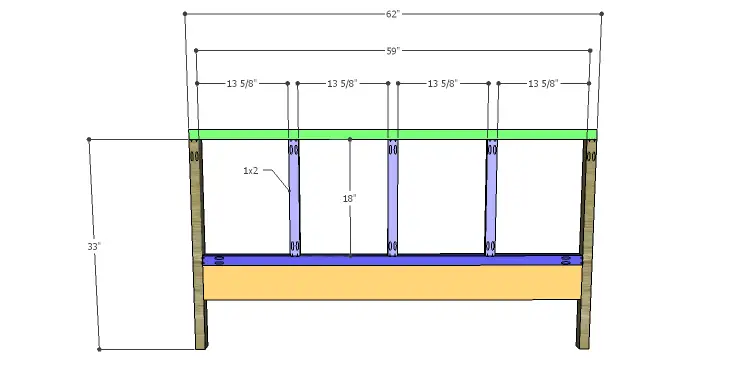
Step Two
Cut the 1×6 pieces (ripped to 4″ wide) for the headboard front. Secure to the 1×2 frame pieces as shown using glue and countersunk 1-1/4″ screws. The screws can be placed through the front of the pieces or through the 1×2 pieces into the back of the front headboard pieces.
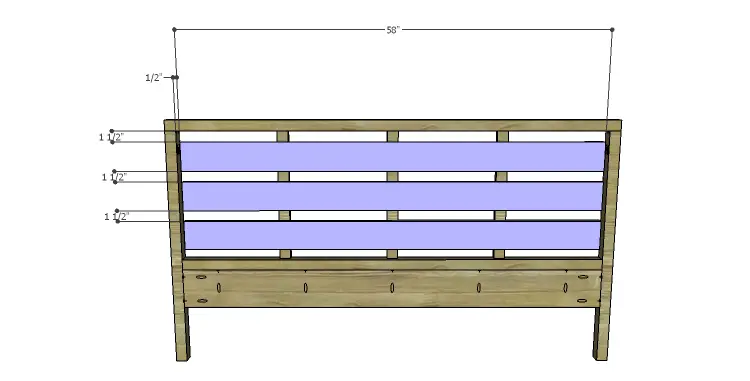
Step Three
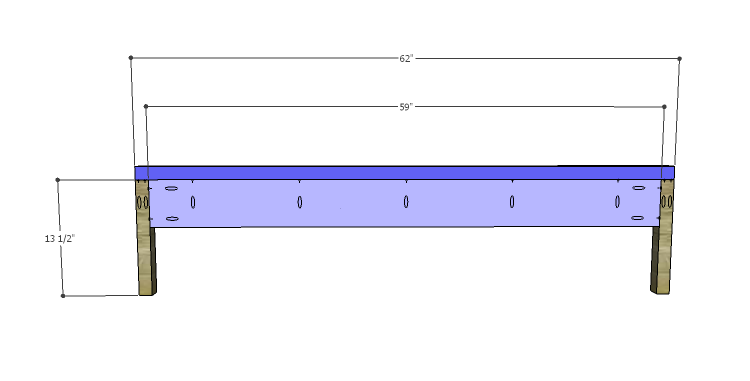
Cut the pieces for the footboard. Set the pocket hole jig for 1-1/2″ material and drill pocket holes in one end of the legs and both ends as well as one long edge of the 2×6 piece. Assemble the footboard using glue and 2-1/2″ pocket hole screws.
Step Four
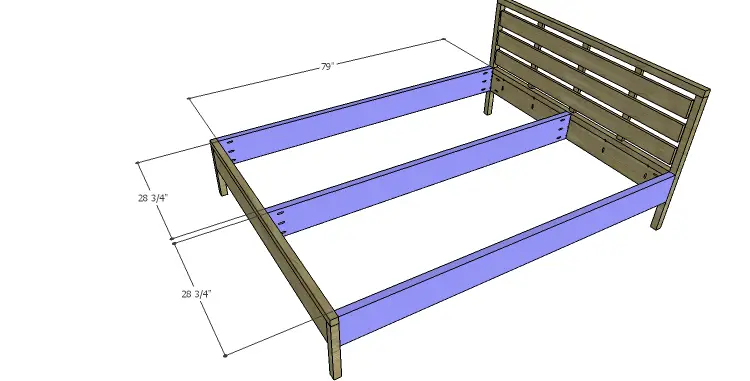
Cut the pieces for the rails and drill pocket holes in each end. Secure to the headboard and footboard as shown using 2-1/2″ pocket hole screws. DO NOT use glue – the bed may have to be disassembled someday!
Step Five
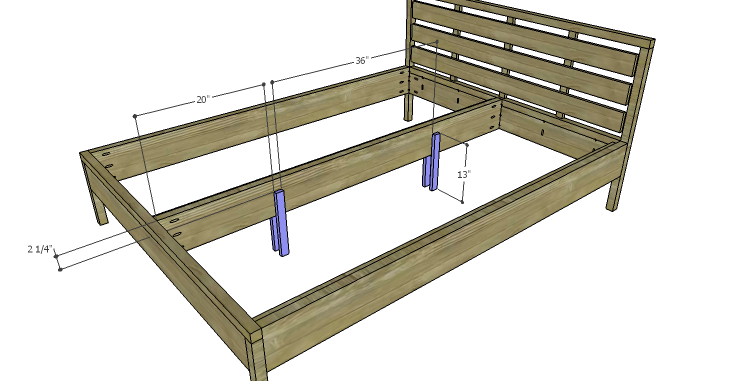
Cut the pieces for the center legs. Secure the legs to each side of the center rail (locating them 2-1/4″ down from the top edge of the center rail) using glue and countersunk 1-1/4″ screws.
Step Six
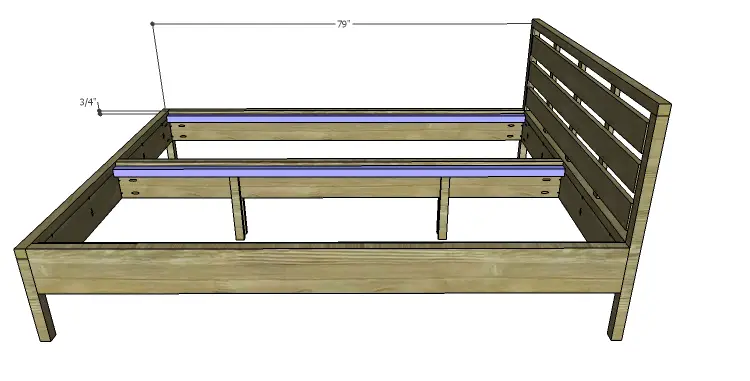
Cut the pieces for the slat supports. Secure to the inside of each of the side rails as well as each side of the center rail using countersunk 2-1/2″ screws. The supports will be positioned 3/4″ down from the top edge of the rails. DO NOT use glue!
Step Seven
Cut the pieces for the slats. Secure to the slat supports (spacing them approximately 1-1/2″ apart) using countersunk 1-1/4″ screws. DO NOT use glue!
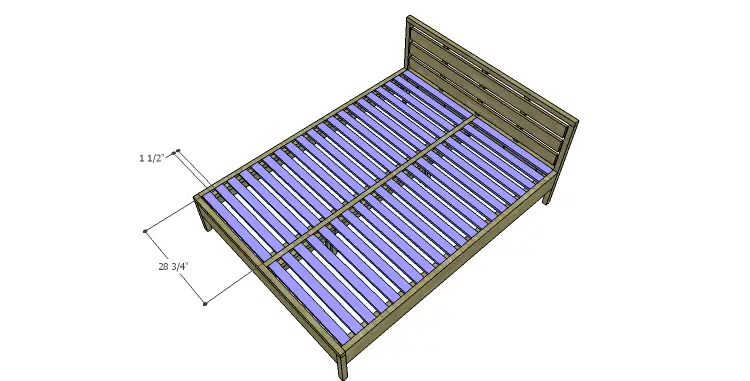
Finish as desired!
To change the width of the bed for Full or King, just change the length of all of the horizontal pieces – the headboard and footboard frames, as well as the slats. So easy! Have any questions about the DIY plans to build an August Queen bed? Leave a comment below or contact me at cher {at} designsbystudioc {dot} com!
Originally posted 2014-07-29 08:00:19.

If the headboard frame vertical pieces (3) are 18″ long, how can it take only 3 horizontal pieces ripped 4″ wide to cover (that’s 12″ total, plus (4) 1/2″ spaces in between).
Hi, Tim! I believe I already answered this on Facebook but just in case, the drawing indicates the spacing is 1-1/2″ between boards, not 1/2″ spacing. Hope this helps!
[…] free building plan are for a queen size platform-style bed. The plans could easily be altered to fit a king […]