Build a Burlington Dining Table
An Easy to Build Table with a Customizable Top – DIY Furniture Plans
In the market for a new dining table? The DIY plans to build a Burlington dining table are super-easy to construct making it an ideal project for those new to woodworking, plus the top is completely customizable! The boards can run the length of the table, the width of the table, in a herringbone pattern, or create your own design!
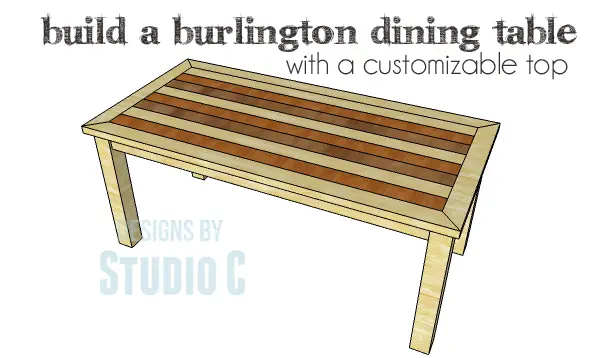
There is no lumber listed for the top in the lumber list or the cut list. The amount of lumber will depend on the design you choose to create!
Materials:
- 2-1/2″ pocket hole screws (<– affiliate link!)
- 1-1/4″ screws
- 2-1/2″ screws
- Wood glue
- Sandpaper (100, 150, 220 grits)
- Finishing supplies (primer & paint, or stain, sealer)
Lumber:
- 2 – 2×2 at 8′
- 2 – 2×4 at 6′
- 3 – 2×4 at 8′
- 2 – 4×4 posts at 6′
- 1 – 4′ x 8′ sheet of 3/4″ plywood
Cut List:
- 4 – 4×4 posts at 28-1/2″ – Legs
- 2 – 2×4 at 25″ – Aprons
- 2 – 2×4 at 62″ – Aprons
- 3 – 2×4 at 25″ – Center Supports
- 2 – 2×2 at 25″ – Top Supports
- 4 – 2×2 at 13-5/8″ – Top Supports
- 4 – 2×2 at 15-1/8″ – Top Supports
- 2 – 2×4 at 35″ – Top Frame
- 2 – 2×4 at 72″ – Top Frame
- 1 – 3/4″ plywood at 28″ x 65″ – Top Base
- Pieces for the top design
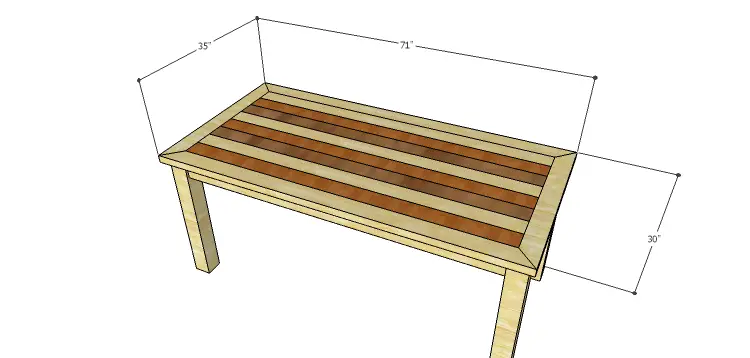
Step One
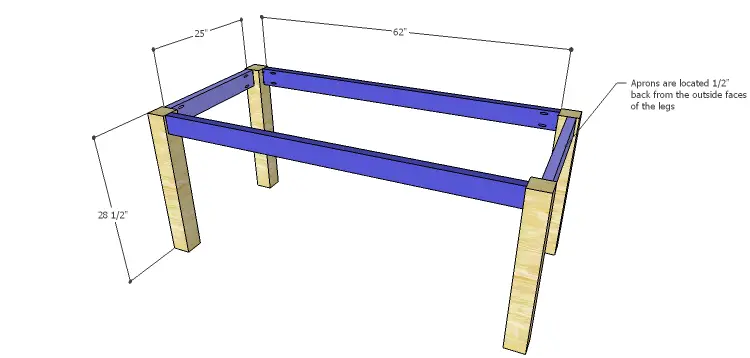
Cut the pieces for the legs and the aprons. With the pocket hole jig set for 1-1/2″ materials, drill pocket holes in each end of the aprons as well as one long edge of each piece to attach the top. Secure the aprons to the legs using glue and 2-1/2″ pocket hole screws. Make sure that the pocket hole in the long edges face up!
Step Two
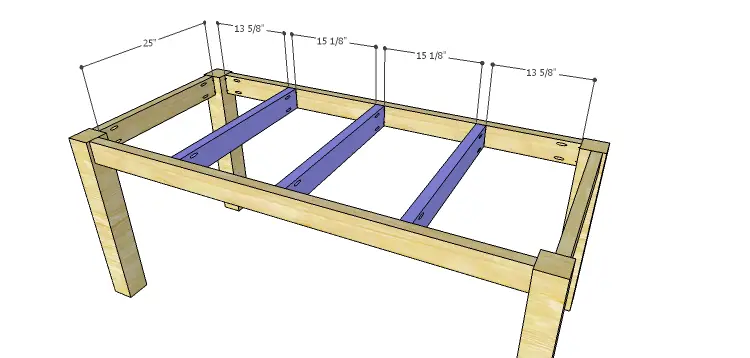
Cut the pieces for the center supports and drill pocket holes in each end. Secure the supports to the longer aprons as shown using glue and 2-1/2″ pocket hole screws.
Step Three
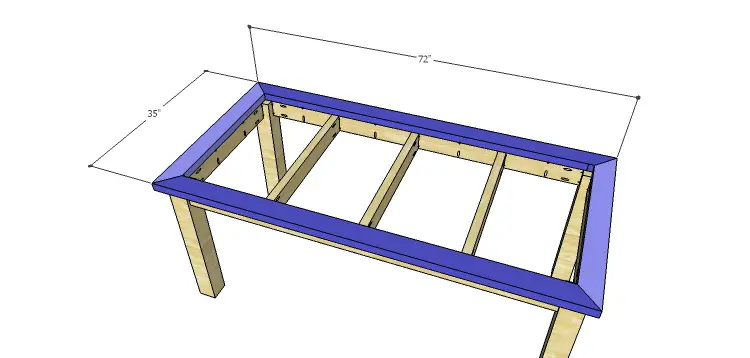
Cut the pieces for the top frame. Cut the miters in each end at 45° maintaining the overall length dimensions. Drill pocket holes in the miters, and assemble the frame using glue and 2-1/2″ pocket hole screws.
Position the frame so that 2″ overhangs on each side (the inside will be flush with the inside face of each apron) securing in place with glue and 2-1/2″ pocket hole screws through the aprons into the underside of the frame.
Step Four
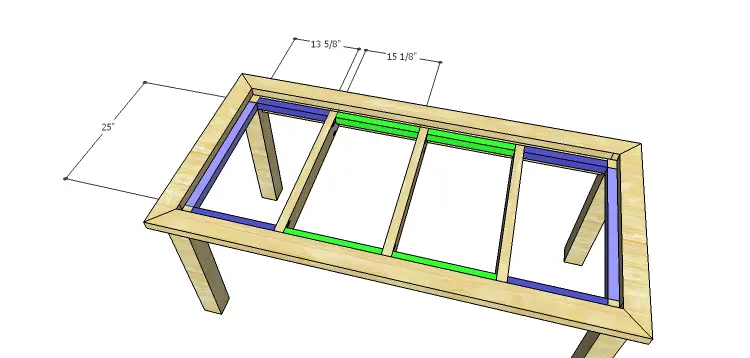
Cut the pieces for the top supports. Secure to the inside of the aprons as shown using glue and 2-1/2″ screws. The top face of the supports will be flush with the top face of the center supports.
Step Five
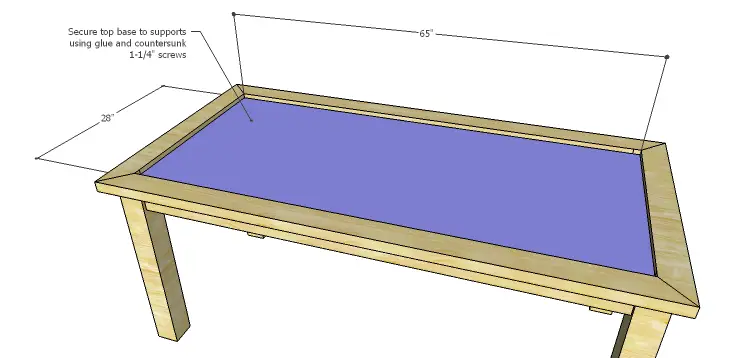
Cut the piece for the top base. Position inside the top frame securing to the top supports and the center supports using glue and countersunk 1-1/4″ screws.
Step Six
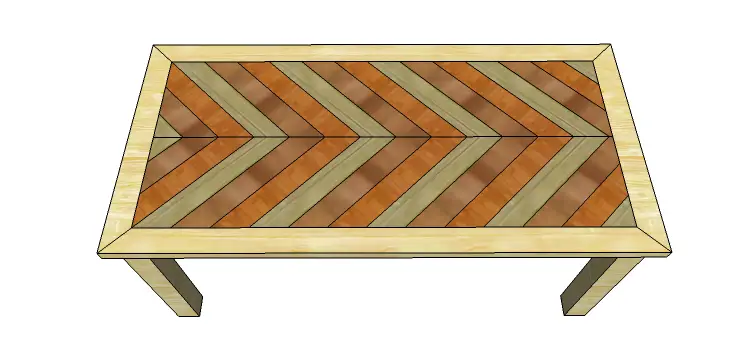
Here is the fun part… Using any wood species and wood type (plywood or solid wood), create the table top. The drawings below are examples of different designs that can be created for the top, though you may have your own ideas! A second sheet of 3/4″ plywood can also be added then a pattern or stripes can be stained or painted on it. Pallet boards can also be used, provided they are 3/4″ thick! The top can also be constructed out of tile!
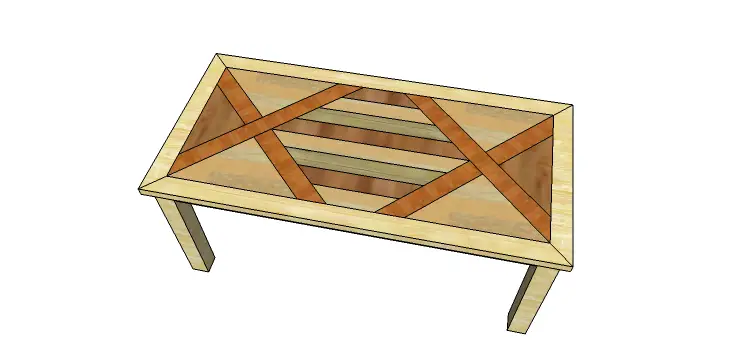
Finish as desired!
The DIY plans to build a Burlington dining table are fun, right? I think it is the top that will make the table a unique piece! Have any questions about the plans? Leave a comment below or contact me at cher {at} designsbystudioc {dot} com!
Originally posted 2014-08-28 08:00:38.

