The Perfect Table for a Small Space
Before the tree fell on the house, I had a massive dining table in the dining room. The table had four panels that were striped with stain, and it was one of my favorite pieces of furniture. Since we no longer have a dining room – or the table – we definitely need a new one. I created the DIY furniture plans to build a folding table as a solution to our lack of space, and still have a place to enjoy our meals.
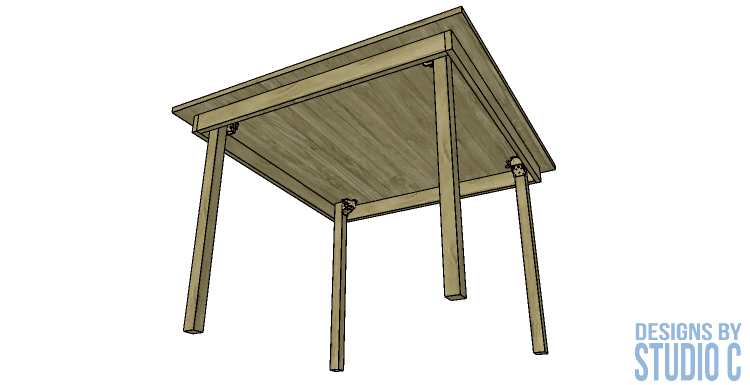
We were able to rescue one of the panels from the old table and based the top of the new table around it. The table will be a new piece of furniture to replace what was lost but with a bit of familiarity about it. In this plan, however, the top is just a plain slab that can be made with a piece of plywood, or by piecing solid boards together.
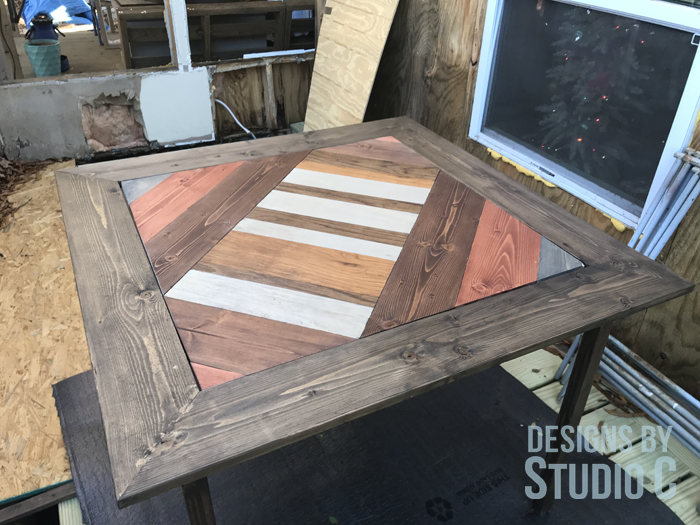
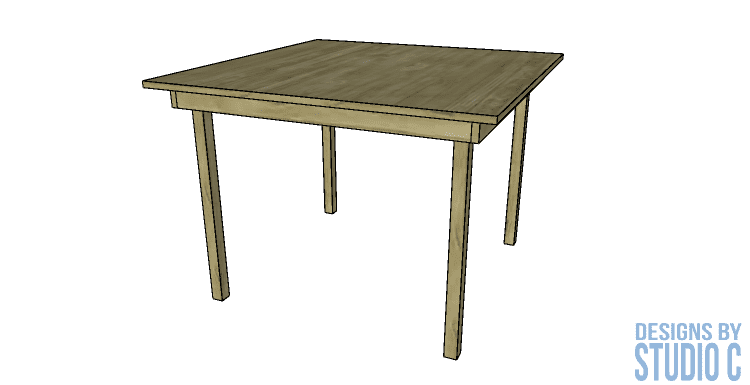
My table measures 40″ square and the plans can be adjusted up or down depending on personal preference.
Materials:
- 2″ screws
- 1″ angle brackets with 3/4″ screws (<– affiliate link!)
- Edge banding, optional (<– affiliate link!)
- Four Dining Table Legs (or cut your own using the lumber of your choice) (<– affiliate link!)
- Folding Leg Brackets, set of four (see how I had to stabilize my brackets at the end of this post) (<– affiliate link!)
- Wood Glue
- Sandpaper (100, 150, 220 grits)
- Finishing Supplies
Lumber:
- 2 – 1×3 at 6′
- 1 – 4′ x 4′ sheet of 3/4″ plywood
Cut List:
- 1 – 3/4″ plywood at 40″ x 40″ – Top
- 2 – 1×3 at 36″ – Aprons – Longer Aprons
- 2 – 1×3 at 34-1/2″ – Aprons – Shorter Aprons
- 4 – 2×2 at 29-1/4″ – Legs (if making your own)
Notes About the Project:
If using plywood for the top, edge banding will be applied to the exposed edges prior to assembly. I found that the table was a little too tall for us. I removed the legs and cut 2″ off each of them which made the table a perfect height for us. Start with the legs cut at 29-1/4″, then adjust as necessary!
Step One
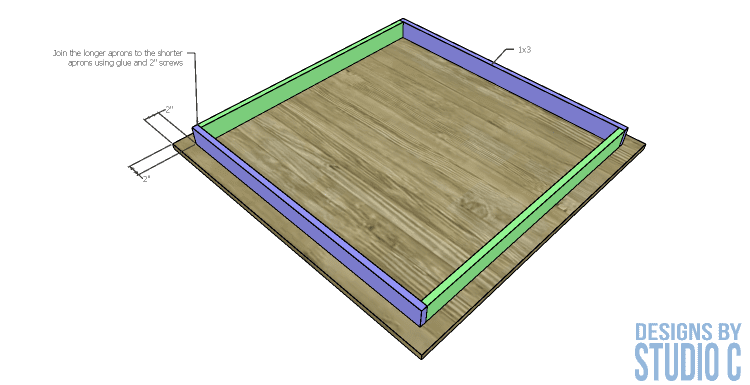
Cut the pieces for the top and aprons. Drill countersunk holes in the ends of the longer aprons, and assemble the aprons in a square using glue and 2″ screws.
Position the apron assembly on the underside of the table top, securing in place with the 1″ angle brackets and screws.
Step Two
Cut the pieces for the legs. It may be helpful to sand a bevel along each edge of the top of the legs to make folding easier. Install the brackets according to the manufacturer’s installation instructions. I installed mine so that each leg folded along an apron.
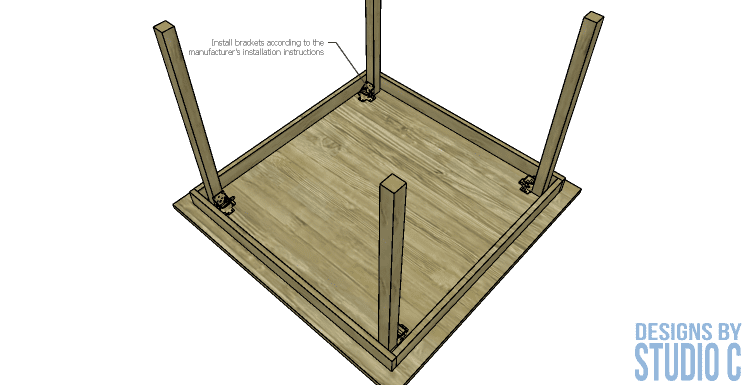
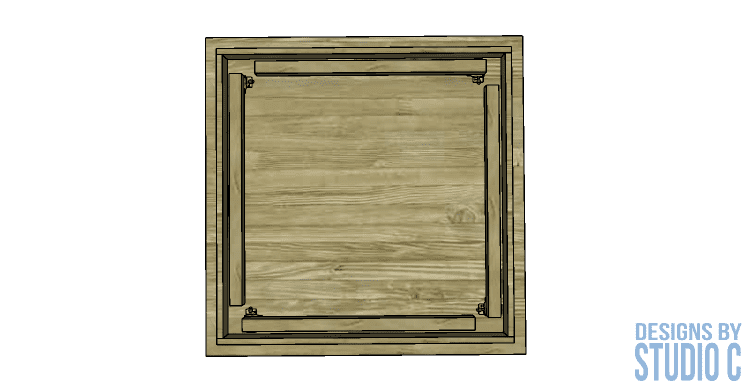
Finish the table as desired.
The folding brackets I purchased made the legs very wobbly. I had to add bracing (mitered pieces of wood approximately 6″ long) to the legs to stabilize them when they are open which greatly helps.
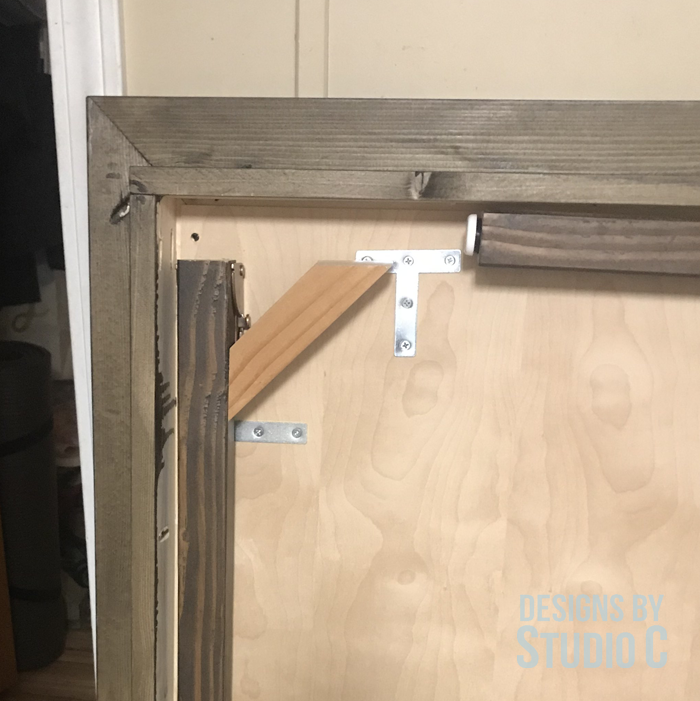
This table is a very easy build and is perfect for a small space or as an extra table for gatherings. Have questions about the DIY furniture plans to build a folding table? Leave a comment below!
Other “Folding” Projects:
Originally posted 2019-01-06 08:00:46.


1 Comment
Pingback: 25 Clever DIY Folding Table Ideas with Free Plans