
DIY Plans to Build a Natalie Chair
Build a Fabulous Piece of Seating
Have I mentioned that I love to build chairs? I’m sure I’ve mentioned it a hundred times before! This chair is so fantastically easy to build! The DIY plans to build a Natalie chair feature a very low back and kerf detail on the legs. This is the perfect chair for a dining room, a vanity, as a desk chair, or as extra seating in the living room! 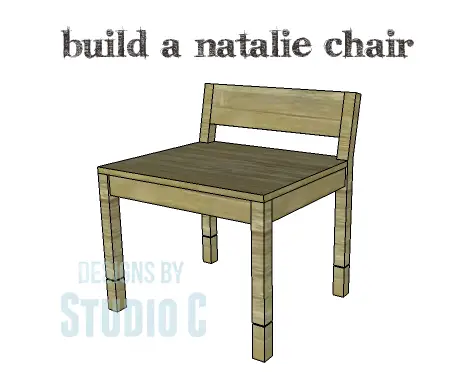
Materials:
- 1-1/4″ pocket hole screws (<– affiliate link!)
- 1-1/4″ brad nails
- Edge banding, optional
- Wood glue
- Sandpaper (100, 150, 220 grits)
- Finishing supplies (primer & paint, or stain, sealer)
Lumber:
- 1 – 1×3 at 8′
- 1 – 1×6 at 4′ or a scrap piece measuring 20″
- 1 – 2×2 at 4′ or two scrap pieces at 17-1/4″ each
- 1 – 2×4 at 6′
- 1 – 2′ x 2′ sheet of 3/4″ plywood
Cut List:
- 2 – 2×4 at 26″ – Back Legs
- 1 – 1×3 at 20″ – Back Stretcher
- 1 – 1×6 at 20″ – Upper Back Stretcher
- 2 – 2×2 at 17-1/4″ – Front Legs
- 1 – 1×3 at 20″ – Front Stretcher
- 2 – 1×3 at 17″ – Side Stretchers
- 1 – 1×3 at 18″ – Seat Support
- 1 – 3/4″ plywood at 20″ x 23″ – Seat
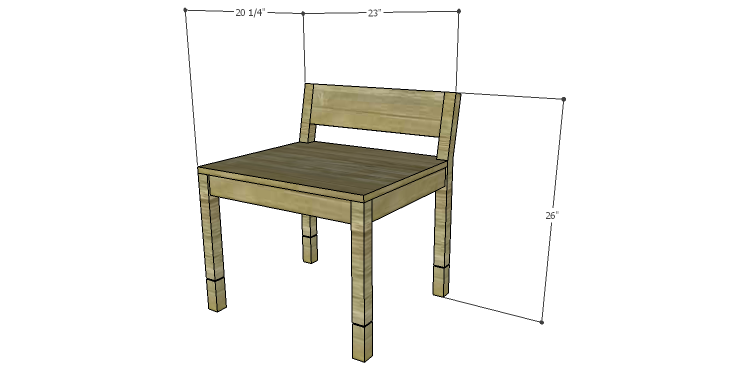 Click on the drawings for a larger view!
Step One
Cut the pieces of 2×4 to length for the back legs. Draw the back legs on the 2×4 as shown in the drawing, and cut out with a jigsaw or a bandsaw. Mark the position of the kerfs and cut them on the table saw. Lower the blade on the table saw to about 1/8″ to 1/4″ above the table. Set the rip fence for 4″ from the blade. Position the bottom of the leg on the rip fence and make a pass through the saw. This will cut a small groove in the lower edge of the leg. Repeat for all four sides. If the table on your table saw is long on the left of the blade, cutting the kerf in the back edge (the angled side) may be a problem and this kerf can be omitted. 
Step Two
Cut the pieces for the back stretcher and the upper back stretcher. With the pocket hole jig set for 3/4″ material, drill pocket holes in each end of each piece. Secure the pieces to the back legs using glue and 1-1/4″ pocket hole screws. The lower stretcher will be positioned 1/4″ back from the back face of the legs, and the pocket holes will face to the inside of the chair. The upper stretcher will be positioned flush with the front face of the legs, and the pocket holes will face to the back. 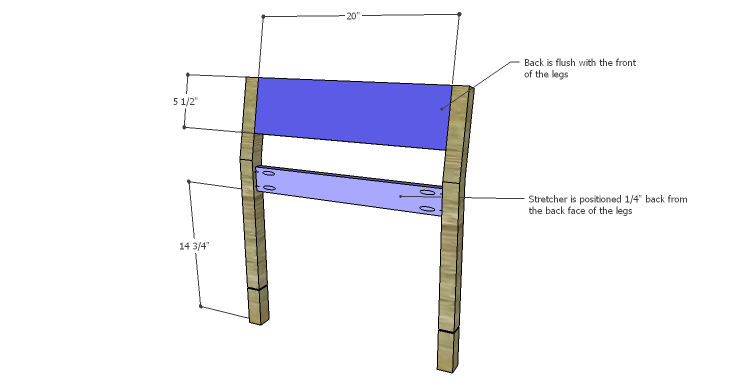
Step Three
Cut the pieces for the front frame and drill pocket holes in each end of the stretcher piece. Cut the kerfs in the legs as indicated in Step One. Secure the stretcher to the legs using glue and 1-1/4″ pocket hole screws. The stretcher will be positioned 1/4″ back from the front face of the legs. 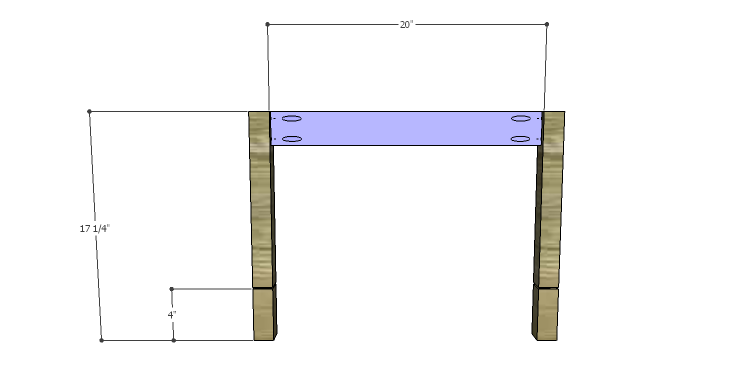
Step Four
Cut the pieces for the side stretchers and drill pocket holes in each end. Secure the stretchers to the legs using glue and 1-1/4″ pocket hole screws. The stretchers will be positioned 1/4″ back from the side faces of the legs. 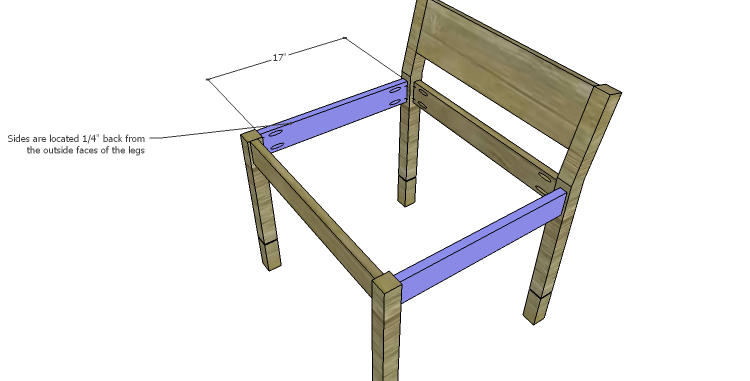
Step Five
Measure the distance between the front stretcher and the back stretcher at the center. Use this measurement to cut the piece for the center seat support, and drill pocket holes in each end. Secure the support to the front and back stretchers using glue and 1-1/4″ pocket hole screws. (I show a dimension here but measure before cutting just in case!) 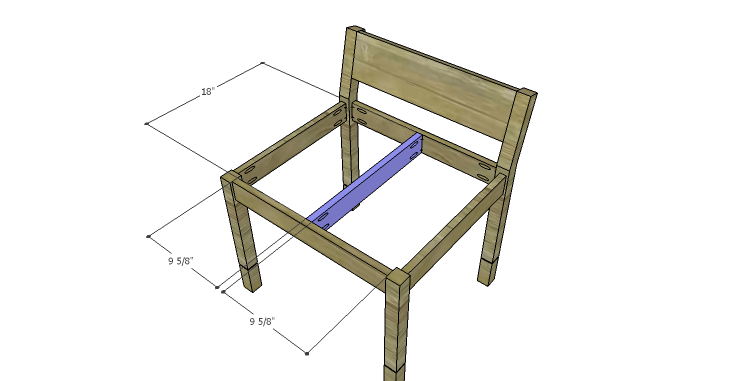
Step Six
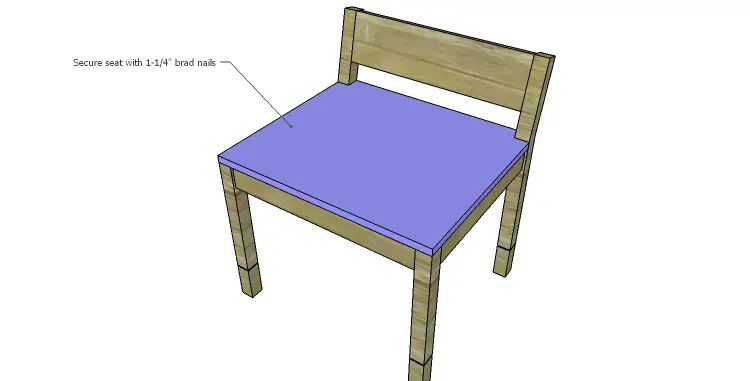
Cut the piece for the seat. Cut the notches using a jigsaw or a bandsaw. Position the seat on the frame and secure in place using glue and 1-1/4″ brad nails through the seat into the support, front and back stretchers, side stretchers, and the tops of the legs. 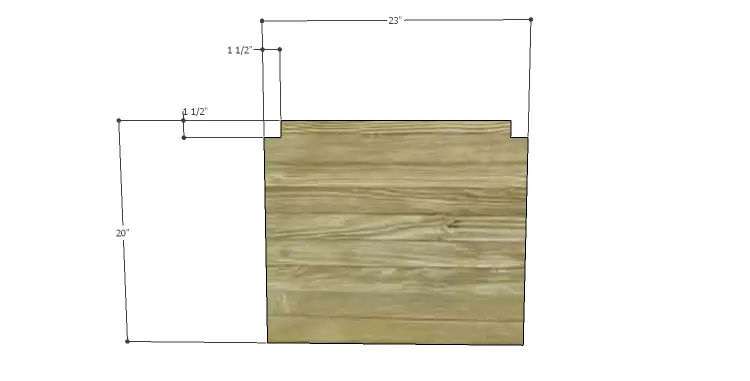
 Finish as desired. The height of the back of the chair can be adjusted easily – Cut a longer 2×4 at the finished height desired, then draw the leg on the 2×4 maintaining the lower dimensions shown in the drawing. In other words, the lower leg height will have to remain at 18″. Have any questions about the DIY plans to build a Natalie chair? Leave a comment below or contact me at cher {at} designsbystudioc {dot} com!
Originally posted 2014-08-27 08:00:34.
[…] Natalie Chair is a cute little chair with a low back and kerf detail on the lower end of the legs. This is the […]