Free DIY Woodworking Plans to Build a Criss-Cross Cabinet
Free DIY Woodworking Plans to Build a Criss-Cross Cabinet
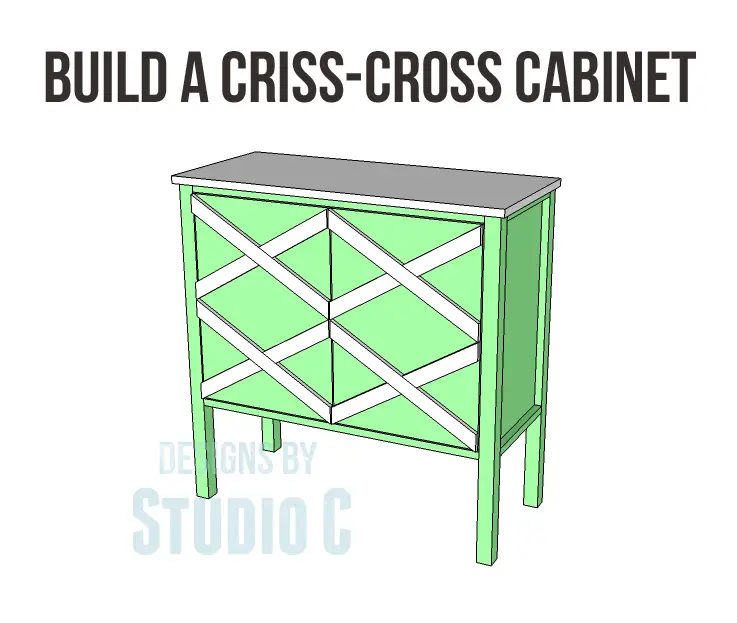
A few weeks ago, I posted plans for the Sherrilyn Side Table with criss-cross detailing on each of the three drawers. Today I’m sharing free DIY woodworking plans to build a Criss-Cross Cabinet, perfect for storage in the kiddos’ room, craft room, or just displayed proudly in an entryway!
Materials:
- 1-1/4″ pocket hole screws
- 1″ brad nails
- 1-1/4″ brad nails
- Edge Banding, optional
- 2 sets of hinges
- 2 cabinet pulls
- Finishing supplies
Lumber:
- 3 – 1×2 at 8′
- 2 – 2×2 at 6
- 4 – 1/2″ x 1-1/2″ craft boards (actual dimensions) at 4′
- 1 sheet of 3/4″ plywood’
Cut List:
- 4 – 2×2 at 33-1/4″ – Legs
- 4 – 1×2 at 11-1/2″ – Side Frames
- 2 – 3/4″ plywood at 11-1/2″ x 21-1/4″ – Side Panels
- 6 – 1×2 at 30″ – Back Frame, Front Stretchers, & Shelf Frame
- 1 – 3/4″ plywood at 21-1/4″ x 30″ – Back Panel
- 1 – 3/4″ plywood at 11-1/2″ x 30″ – Bottom
- 2 – 1×2 at 10-3/4″ – Shelf Frame
- 1 – 3/4″ plywood at 12-1/4″ x 30″ – Shelf
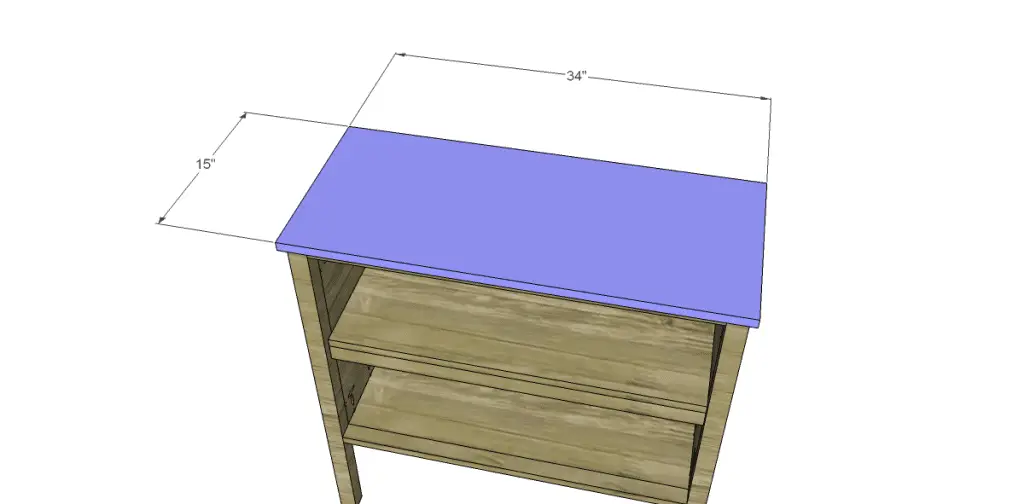
- 1 – 3/4″ plywood at 15″ x 34″ – Top
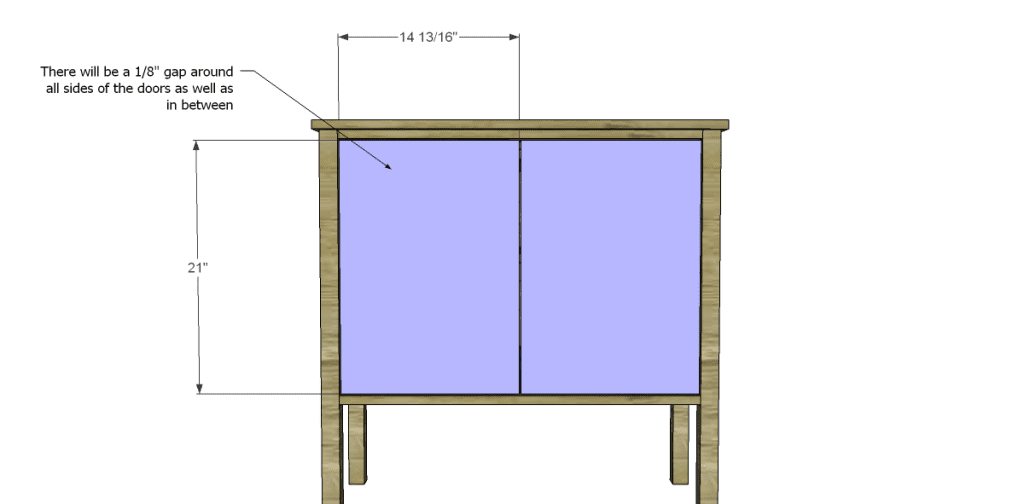
- 2 – 3/4″ plywood at 14-13/16″ x 21″ – Doors
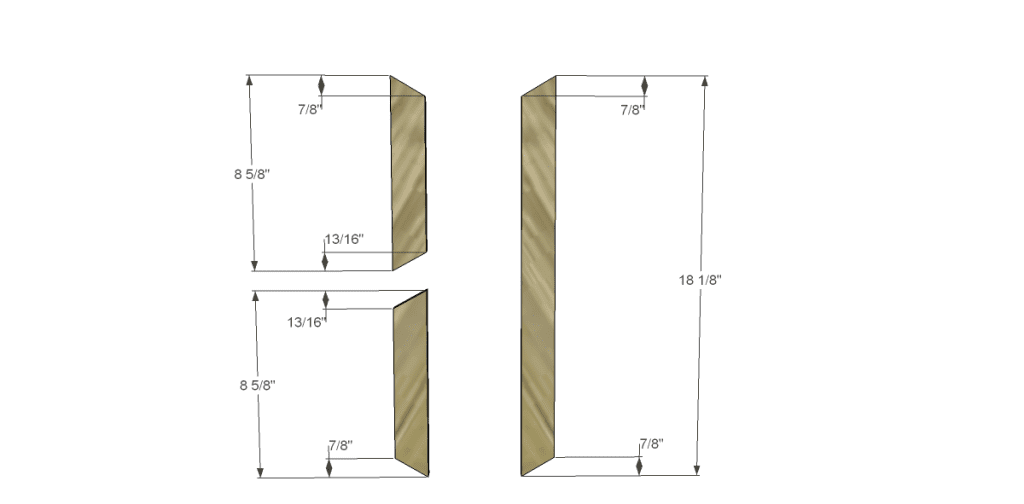
- 8 – 1/2″ x 1-1/2″ boards (actual dimensions) at 8-5/8″ – X Detail
- 4 – 1/2″ x 1-1/2″ boards (actual dimensions) at 18-1/8″ – X Detail
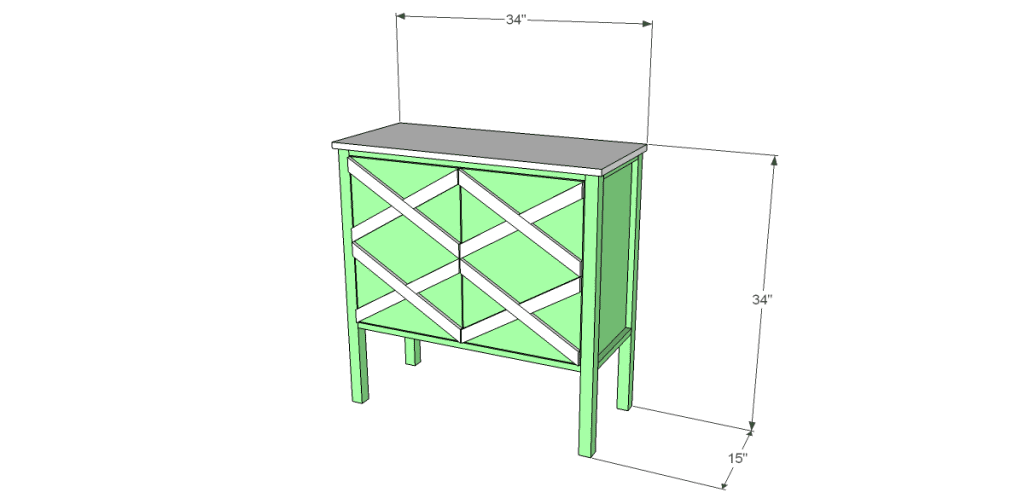
Click on the drawings for a larger view!
Step One
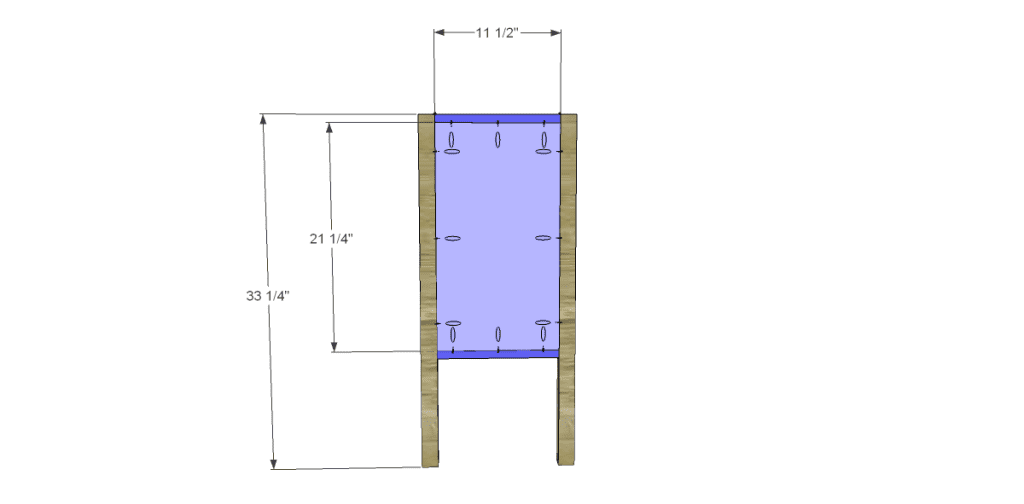
Cut the pieces for the legs, side frames, and side panels. Drill pocket holes in each end of the frame pieces as well as all four edges of the panels. Attach the frame pieces to the panels using glue and 1-1/4″ pocket hole screws. The back face of the panel will be flush with the back edge of the frame pieces. Attach the frame and panel pieces to the legs using glue and 1-1/4″ pocket hole screws.
Step Two
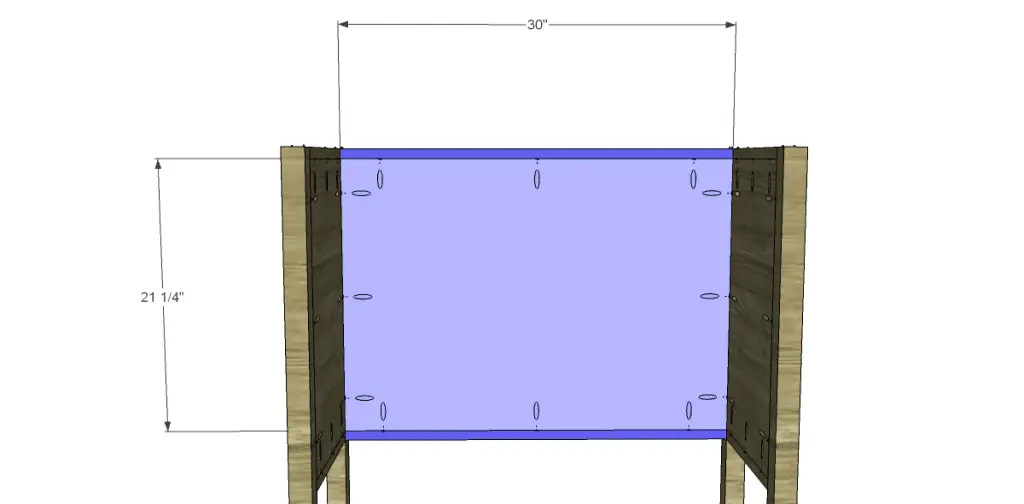
Cut the pieces for the back frame and panels. Drill pocket holes in each end of the frame pieces as well as all four edges of the panel. Attach the frame pieces to the panel using glue and 1-1/4″ pocket hole screws. The back face of the panel will be flush with the back edge of the frame pieces. Attach the frame and panel to the legs using glue and 1-1/4″ pocket hole screws.
Step Three
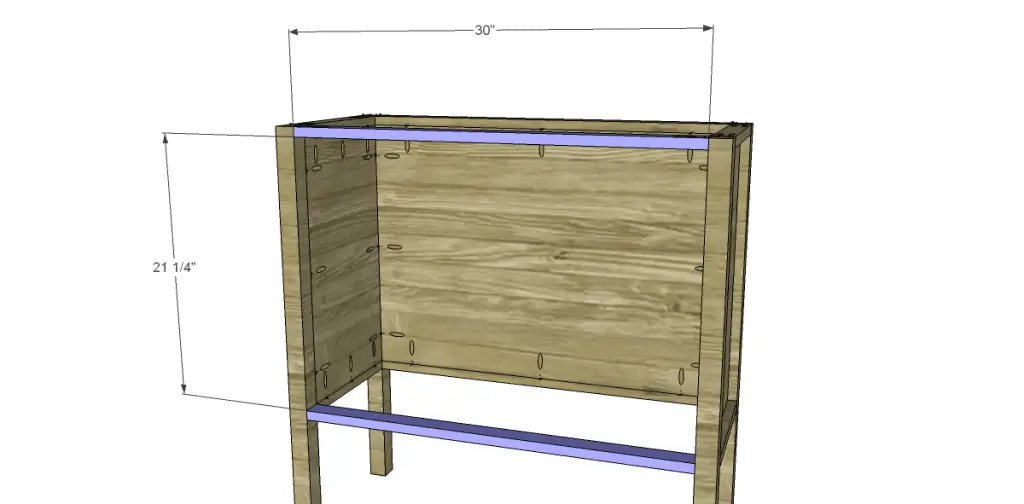
Cut the pieces for the stretchers and drill pocket holes in each end. Position as shown then secure using glue and 1-1/4″ pocket hole screws.
Step Four
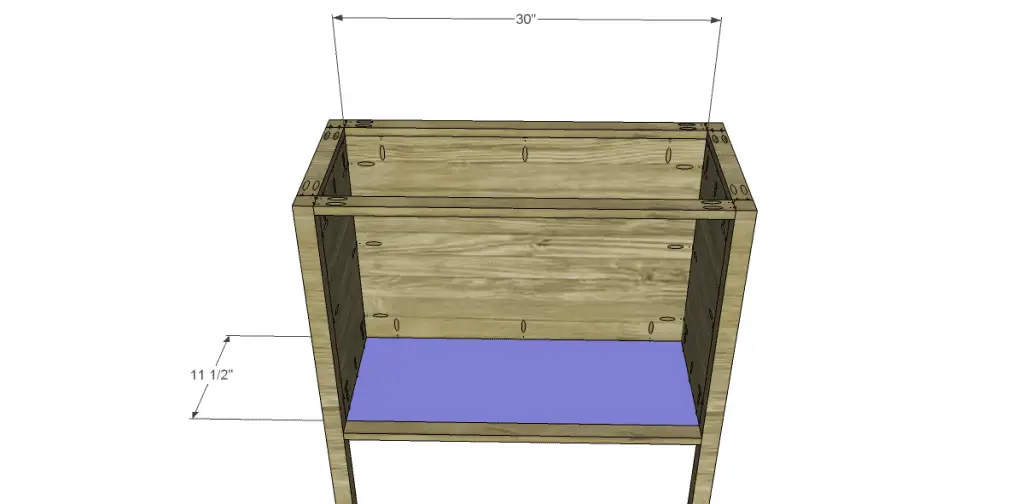
Cut the piece for the bottom and drill pocket holes in all four edges. Position as shown – the top face will be flush with the top of the lower stretcher – then secure using glue and 1-1/4″ pocket hole screws.
Step Five
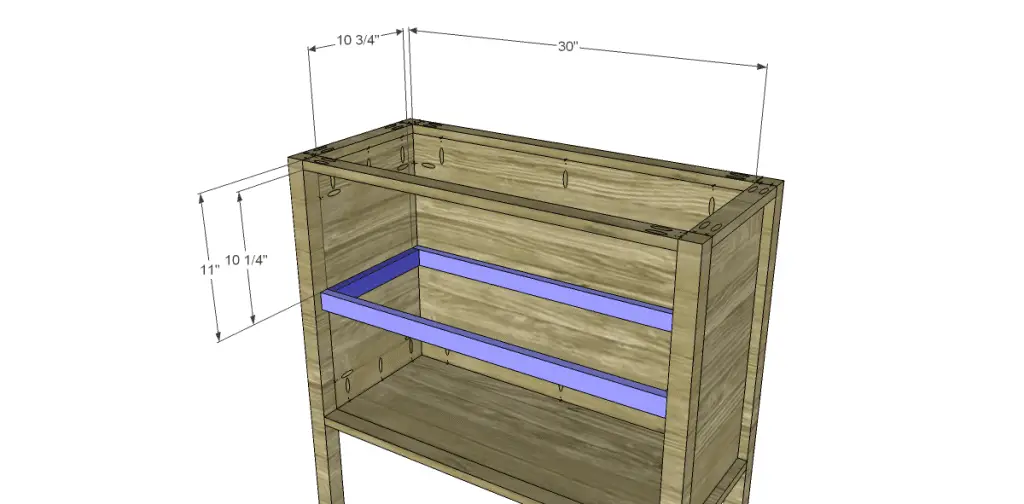
Cut the pieces for the shelf frame. Position the back piece as shown then secure using glue and 1-1/4″ brad nails. Add the side pieces next (securing in the same manner), then add the front frame piece securing it to the ends of the side pieces.
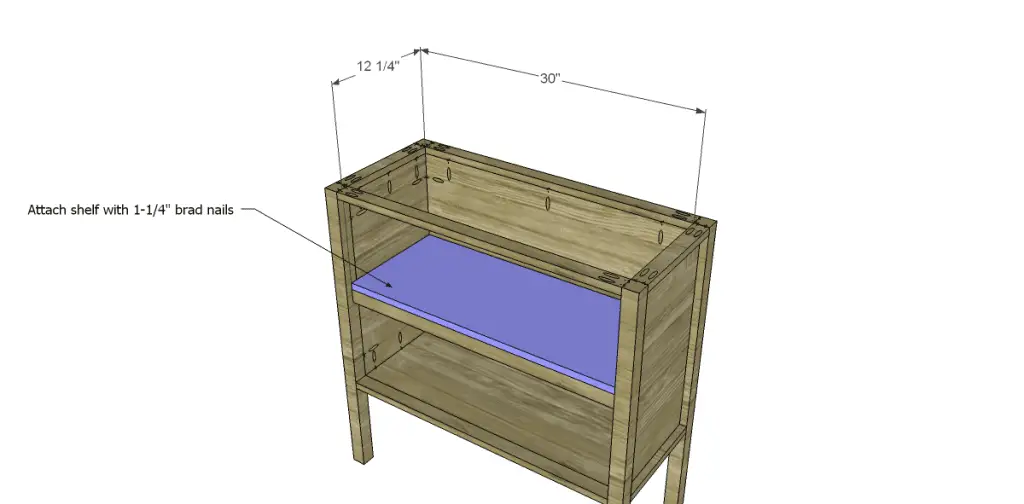
Cut the piece for the shelf. Secure the shelf to the frame using glue and 1-1/4″ brad nails.
Step Six
Cut the piece for the top. Position the piece so it overhangs the sides and front by 1/2″. Secure using glue and 1-1/4″ brad nails.
Step Seven
Cut the pieces for the doors. There will be a 1/8″ gap around all sides of the doors as well as in between them. Install the hinges.
Step Eight
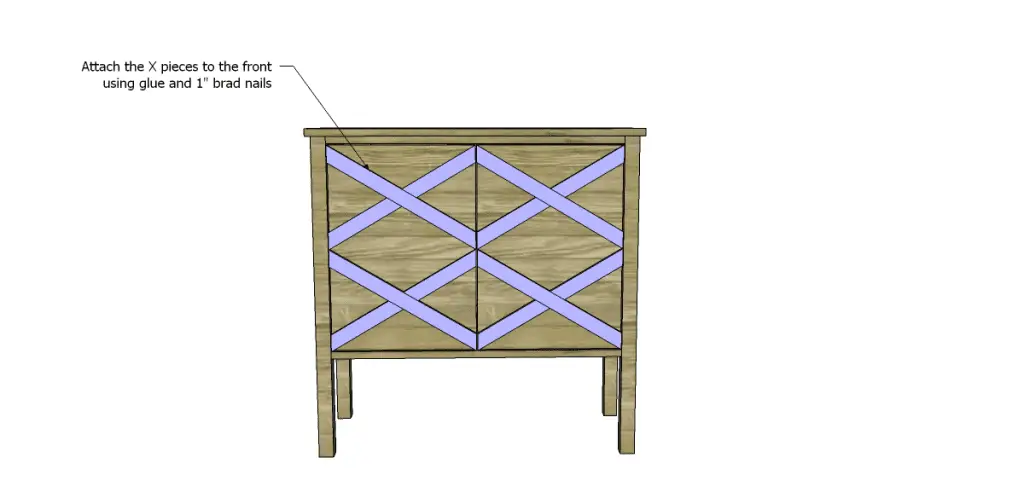
Cut the pieces for the X detail. The angles in the ends are NOT cut at 45 degrees. To mark the angles, draw a line on the board at the dimension shown. Draw another line from the corner of the board to the opposite side where the line is drawn. Cut the angle. Secure the X pieces to the doors as shown using glue and 1″ brad nails. Add cabinet pulls as desired!
Finish as desired!
These free DIY woodworking plans to build a Criss-Cross Cabinet match the Sherrilyn Side Table perfectly! These pieces would be fabulous in a bedroom!
Got a project you’ve completed using my plans? Share photos with me at cher {at} designsbystudioc {dot} com or designsbystudioc {at} gmail {dot} com. I would love to feature your build on DbSC!
Originally posted 2013-08-14 08:00:50.

