
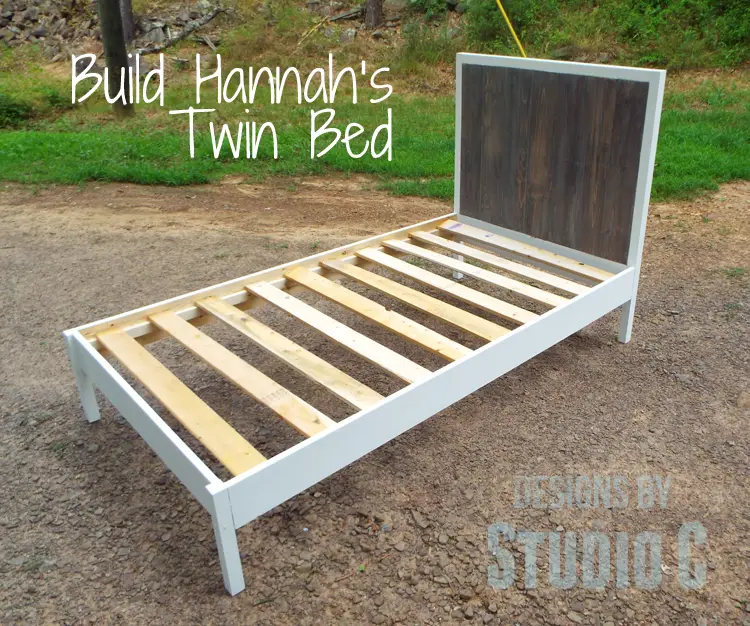
DIY Plans to Build Hannah’s Twin Bed
A Fabulous Modern Twin Bed That is Easy to Build!
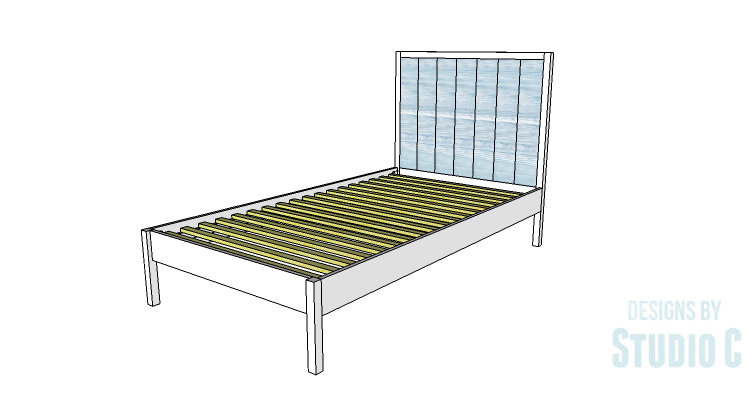
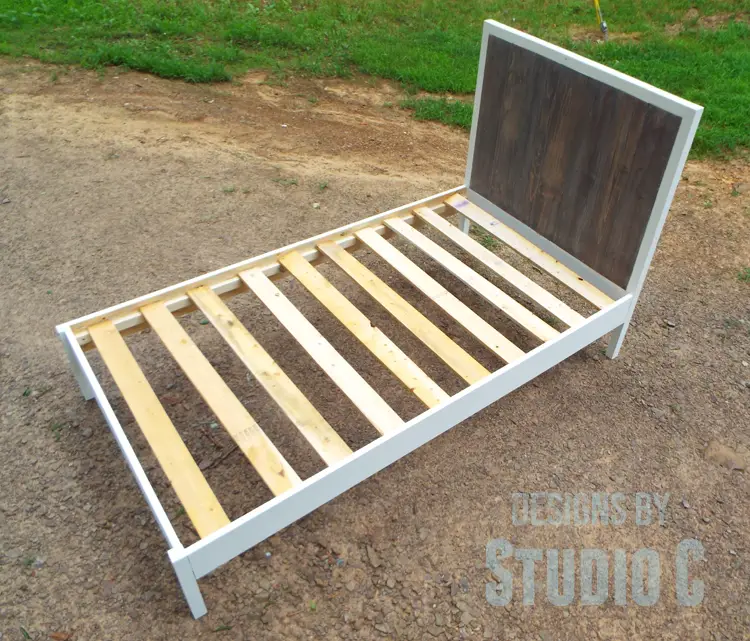
My daughter has been really wanting a new bed, and guess what? I was actually in the mood to build one, so I happily said yes! I found these awesome DIY plans to build Hannah’s Twin Bed, and it’s perfect because it has a planked headboard and a low footboard, just like she wanted. She didn’t want her blankets to bunch up at the end of the bed, so this design is perfect for her. The headboard planks are framed with 2×2 lumber, and the best part is that it’s a super affordable project that can be completed in just one weekend!
For this bed, we will not be using a foundation – she likes it that way!
Materials:
- 1-1/4″ pocket hole screws (<– affiliate link!)
- 2″ pocket hole screws
- 2-1/2″ pocket hole screws
- 1-1/2″ screws
- Wood glue
- Sandpaper (100, 150, 220 grits)
- Finishing supplies (primer & paint, or stain, sealer)
Lumber:
- 11 – 1×2 at 8′
- 1 – 1×6 at 4
- 5 – 1×6 at 8′
- 3 – 2×2 at 6′
Cut List:
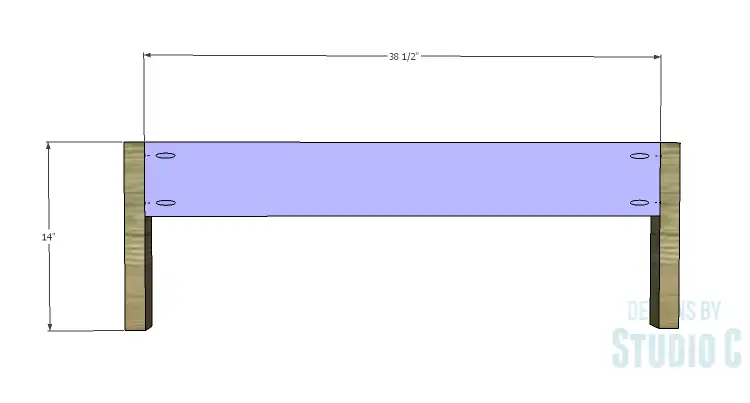
- 2 – 2×2 at 14″ – Footboard Legs
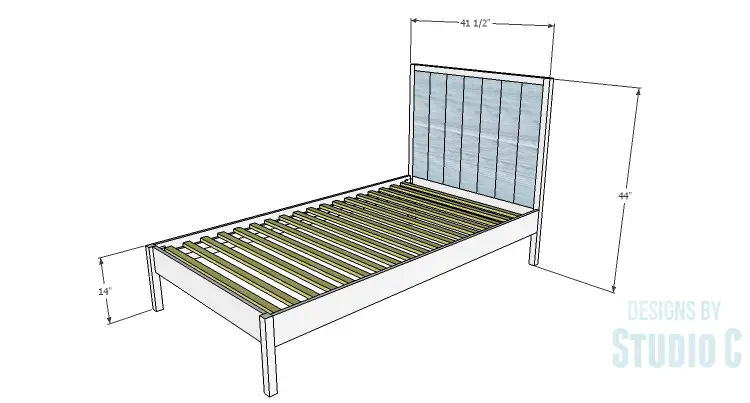
- 1 – 1×6 at 38-1/2″ – Footboard Panel
- 2 – 2×2 at 44″ – Headboard Legs
- 1 – 2×2 at 38-1/2″ – Headboard Frame
- 1 – 1×6 at 38-1/2″ – Headboard Frame
- 7 – 1×6 at 28-1/2″ – Headboard Planks
- 2 – 1×6 at 74″ – Side Rails
- 2 – 1×2 at 74″ – Slat Supports
- 18 – 1×2 at 40″ – Slats
Step One
Cut the pieces for the footboard. With the pocket hole jig set for 3/4″ material, drill pocket hole sin each end of the footboard panel. Secure the footboard to the legs using glue and 1-1/4″ pocket hole screws. The back face of the panel will be flush with the inside faces of the legs.
Step Two
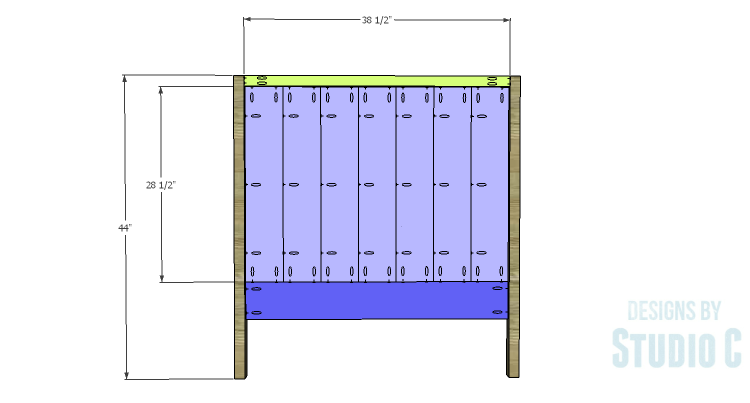
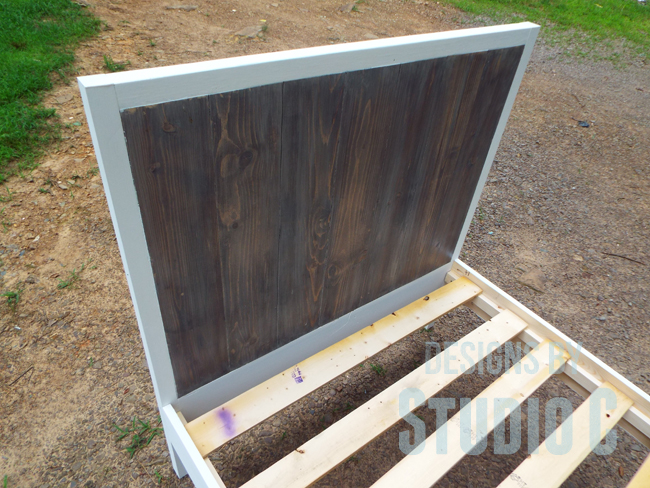
Cut the pieces for the headboard. Starting with the 1×6 plans, drill pocket holes in the pieces as shown in the drawing. Assemble the planks using glue and 1-1/4″ pocket hole screws.
Drill pocket holes in each end of the 1×6 piece for the headboard frame. Secure to the bottom edge of the planks using glue and 1-1/4″ pocket hole screws.
Set the pocket hole jig for 1-1/2″ material and drill pocket holes in each end of the 2×2 headboard frame piece. Secure this piece to the top edge of the planks using glue and 1-1/4″ pocket hole screws. The front face of the planks will be flush with the front edge of this framing piece.
Secure the entire assembly to the legs. Use 2-1/2″ pocket hole screws through the 2×2 piece into the legs and 1-1/4″ pocket hole screws through the planks and 1×6 headboard framing piece.
Step Three
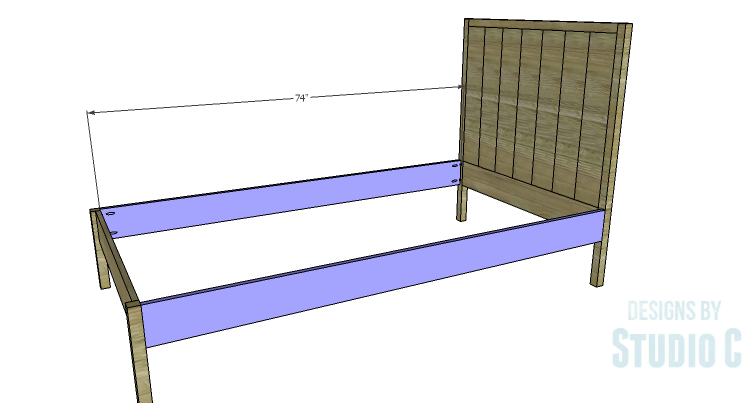
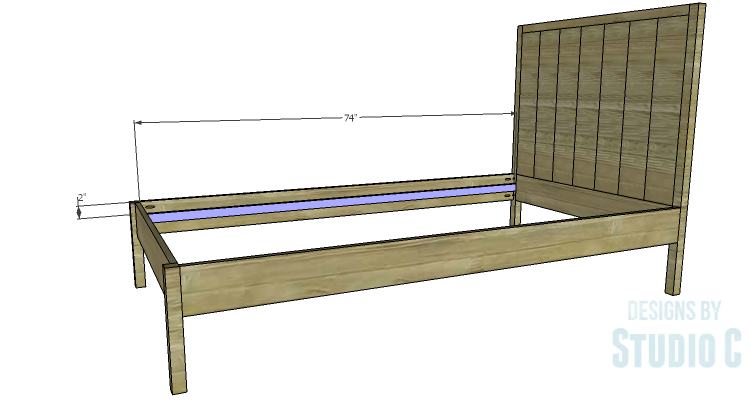
Cut the pieces for the side rails and the slat supports. Set the pocket hole jig for 3/4″ material and drill pocket holes in each end of each piece.
Secure the slat support to the inside of the side rails (the same side as the pocket holes) using glue and 1-1/2″ screws.
Secure the side rails to the headboard and footboard using 2″ pocket hole screws. DO NOT USE GLUE! Use care when installing the screws because if they are sunk too deep in the pocket hole, they may poke out of the side of the legs.
Step Four
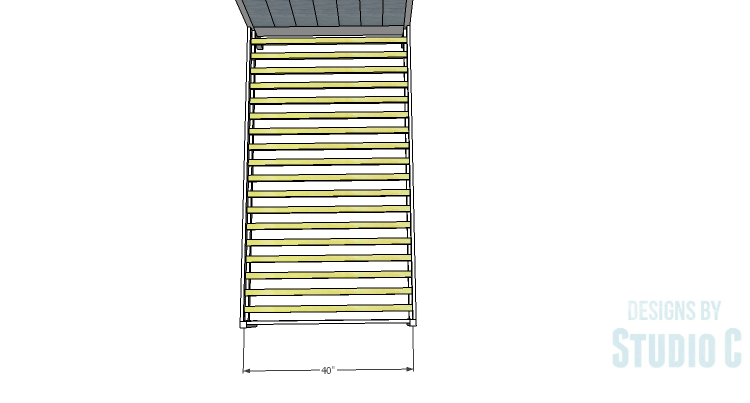
Cut the pieces for the slats. Secure the slats, evenly spaced, to the slat supports using 1-1/2″ screws. DO NOT USE GLUE!
Finish as desired.
I decided to finish the bed in white paint with grey stained planks. I stained the planks first, taping off the framing areas, then painted the rest of the bed.

The planks in the bed can be finished any way you choose! I considered stenciling the planks but decided I would let my daughter choose! Have any questions about the DIY plans to build Hannah’s Twin Bed? Leave a comment below.

[…] I built my daughter’s new bed, I promised to make more storage in her room, as well. The DIY plans to build Rolling Under-Bed […]
[…] I built a new bed for my daughter, I figured she might need a new nightstand to go along with it! The DIY plans to build […]
[…] bed would be perfect for a kid’s room or a guest room, and would make a perfect gift like the one I made for my daughter! Have any questions about the DIY plans to build a Delilah Twin Bed? Leave a comment […]
[…] I drove a brad nail through the center panel then hung Felipe on the nail. any type of artwork would be fabulous in the frame – a canvas, a wood sign or even a smaller frame with a sentimental photo. (The plans for the bed can be found here!) […]
[…] Bed free building plan.Build a farmhouse style twin bed using these free woodworking plans. This modern bed features a planked headboard with a low […]
[…] a farmhouse style twin bed using these free woodworking plans. This modern bed features a planked headboard with a low […]
[…] bed would be perfect for a kid’s room or a guest room, and would make a perfect gift like the one I made for my daughter! Have any questions about the DIY plans to build a Delilah Twin Bed? Leave a comment […]
[…] I built my daughter’s new bed, I promised to make more storage in her room, as well. The DIY plans to build Rolling Under-Bed […]
[…] my daughter asked for a new bed frame because she outgrew her old one, I was super-excited to build it for her! Little did I know that this bed would become the bane of […]