DIY Plans to Build a Delilah Twin Bed
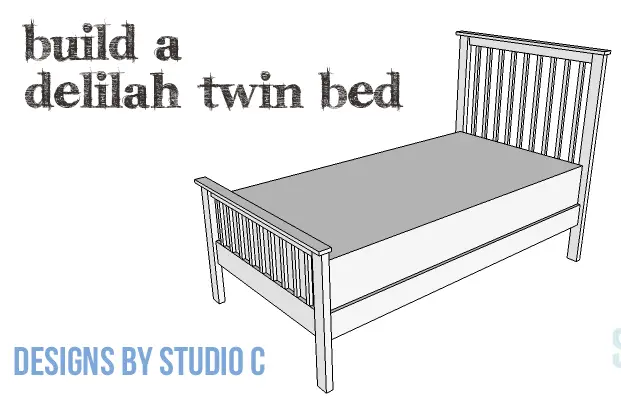
A Simple to Build Twin Bed
Hey there! If you’re new to woodworking or just looking for a fun and easy project, you’ll love this simple bed! It’s super easy to construct and the DIY plans use off-the-shelf boards with narrow pieces on the headboard and footboard. Sure, there are a lot of pocket holes to drill, but don’t worry – they’re a breeze to fill with a product like Dry-Dex (if you plan on painting the bed) or a wood filler. Give it a try and enjoy your new Delilah bed!
Materials:
- 1-1/4″ pocket hole screws (<– affiliate link!)
- 2″ pocket hole screws
- 1-3/4″ brad nails
- 1-1/4″ screws
- Wood glue
- Sandpaper (100, 150, 220 grits)
- Finishing supplies (primer & paint, or stain, sealer)
Lumber:
- 2 – 1×2 at 8′
- 9 – 1×3 at 8′
- 3 – 1×6 at 8′
- 1 – 1×12 at 4′
- 2 – 2×4 at 8′
Cut List:
- 2 – 2×4 (ripped to 2-3/4″ wide) at 52-1/2″ – Headboard Legs
- 2 – 1×3 at 38″ – Headboard & Footboard Framing
- 2 – 1×6 at 38″ – Headboard & Footboard Framing
- 2 – 1×3 at 45″ – Headboard & Footboard Top Trim
- 8 – 1″ strips (ripped from 1×12) at 34-1/2″ – Headboard Framing Spindles
- 2 – 2×4 (ripped to 2-3/4″ wide) at 28-1/2″ – Footboard Legs
- 8 – 1″ strips (ripped from 1×12) at 10-1/2″ – Footboard Framing Spindles
- 2 – 1×6 at 78″ – Side Rails
- 2 – 1×2 at 78″ – Side Rail Slat Support
- 13 – 1×3 at 40″ – Slats
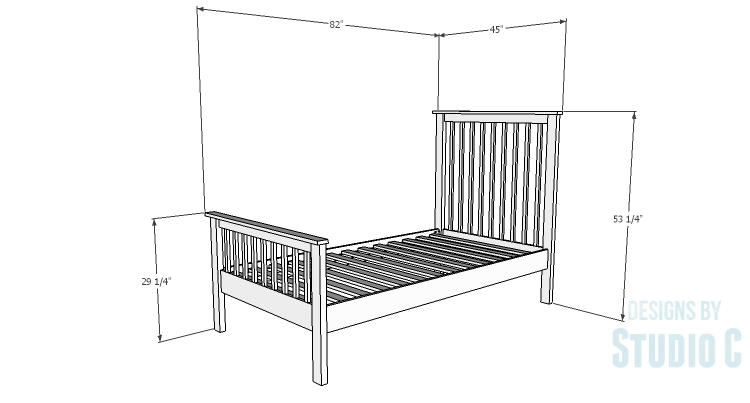
Click on the drawings for a larger view!
Step One
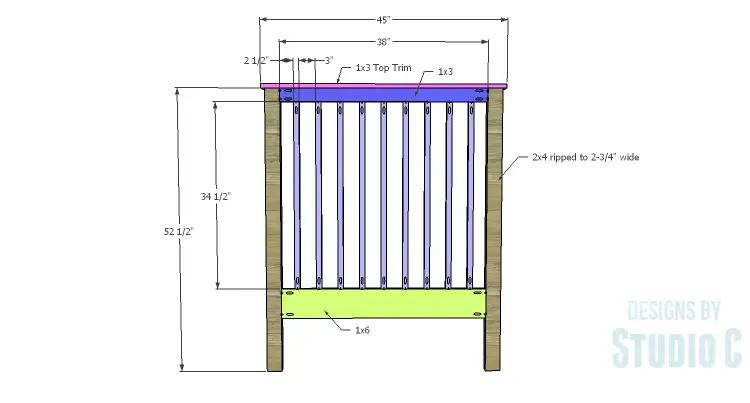
Cut the pieces for the headboard legs. The 2×4 pieces will be ripped to 2-3/4″ wide.
Cut the pieces for the headboard framing. For the framing spindles, cut the 1×12 into 1″ strips then cut them to length.
Set the pocket hole jig for 3/4″ material and drill pocket holes in each end of the framing pieces. Drill two pocket holes in each end of the 1×3 and 1×6 pieces, and one pocket hole in each end of the framing spindles. Assemble the headboard as shown using glue and 1-1/4″ pocket hole screws. The back face of the framing pieces will be flush with the back faces of the legs.
Cut the piece for the top trim. The back edge of the top trim will be flush with the back face of the framing and legs, and will overhang the sides by 3/4″. Secure the trim in place with glue and 1-3/4″ brad nails.
Step Two
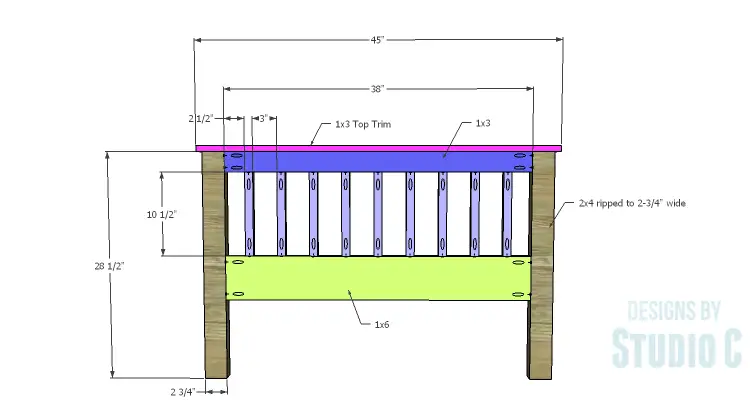
The footboard is constructed in exactly the same manner as the headboard – the legs and framing spindles are shorter!
Fill the pocket holes in the headboard and footboard with filler. Let the filler dry and then thoroughly sand.
Step Three
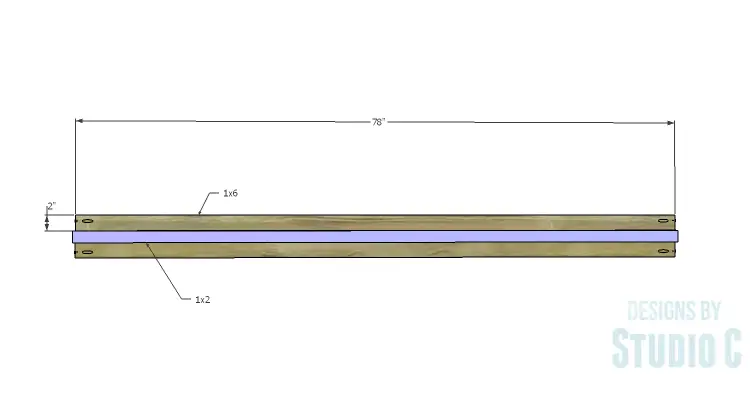
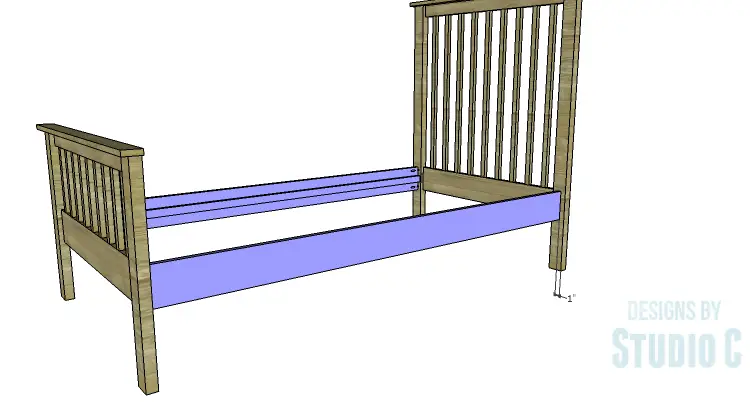
Cut the pieces for the side rails and the side rail slat supports. Drill pocket holes in each end of the side rails. Secure the slat support to the side rail as indicated in the drawing using glue and 1-1/4″ screws.
Secure the side rails to the headboard and footboard using 2″ pocket hole screws. DO NOT use glue – this way the bed can be disassembled if necessary. The outside face of the side rail is located 3/4″ back from the side edge of the legs.
Step Four
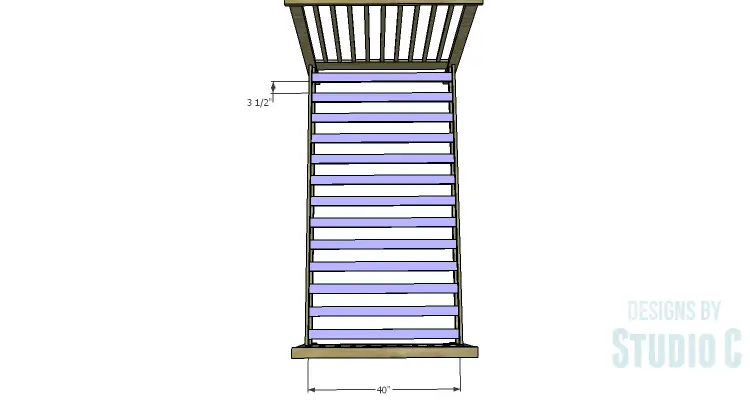
Cut the pieces for the slats. The slats are spaced approximately 3-1/2″ apart. Secure the slats to the slat supports using 1-1/4″ screws. DO NOT use glue.
Finish as desired.
This bed would be perfect for a kid’s room or a guest room, and would make a perfect gift like the one I made for my daughter! Have any questions about the DIY plans to build a Delilah Twin Bed? Leave a comment below!
Originally posted 2015-10-14 08:00:14.

