How to Build a Recycle Bin
Build an Awesome Container for Storing Recyclables!
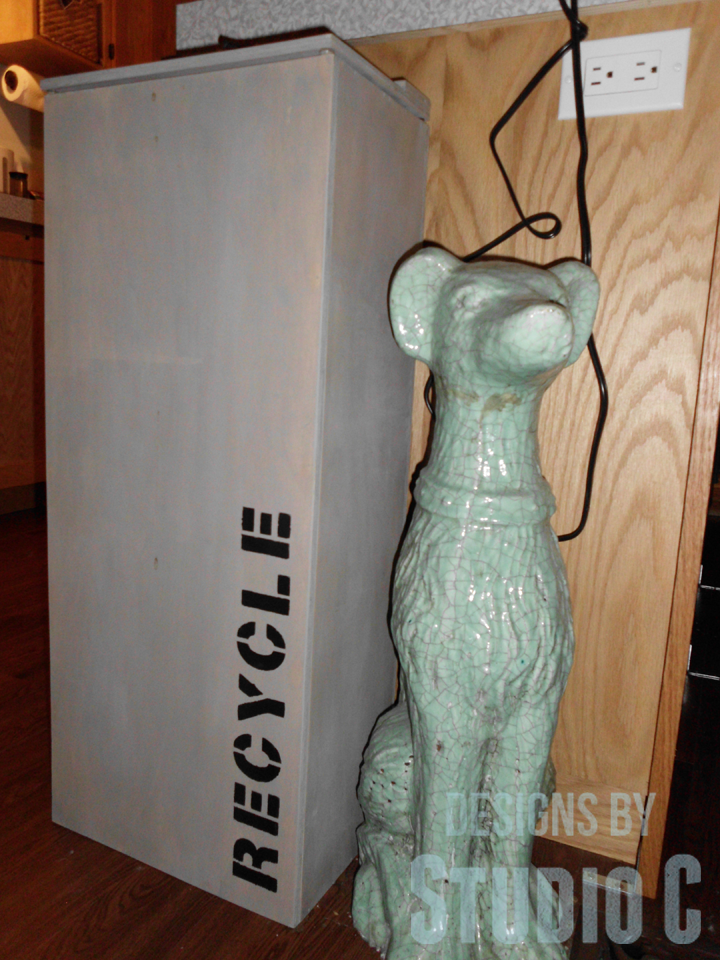
Hey there! I’m all about recycling, but I gotta admit, a big ol’ 5 gallon bucket with a lid just wasn’t cutting it in my kitchen. I wanted something a little more stylish, you know? So I came up with this awesome idea to use some 1/2″ plywood – and get this, it was actually a bonus from another project I was working on! I had ordered some walnut plywood and it came sheathed in two pieces of this stuff. Talk about luck! Anyway, with these plans, you can build your own custom recycle bin that fits your needs and your decor perfectly. No more eyesores in the kitchen!
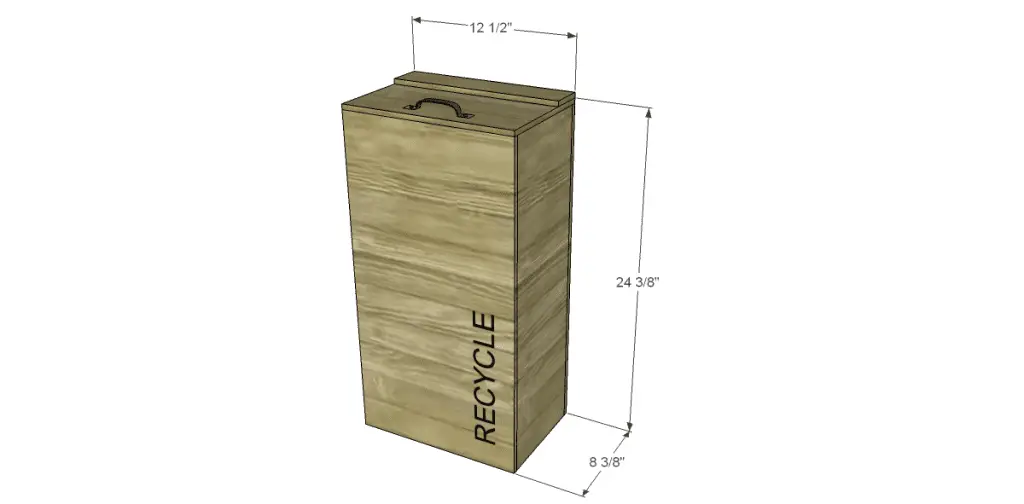
Materials:
- 1/2″ plywood
- Wood glue
- Brad nailer and 3/4″ brad nails
- Saw of your choice
- Square & Pencil
- One set of hinges (<– affiliate link!)
- One cabinet pull
- Paint or Stain
- Stencils and acrylic craft paint
Cut List:
- 1 – 1/2″ plywood at 7-5/8″ x 11-3/4″ – Bottom
- 2 – 1/2″ plywood at 7-5/8″ x 24″ – Sides
- 2 – 1/2″ plywood at 12-3/4″ x 24″ – Front & Back
- 1 – 1/2″ plywood at 2-1/2″ x 11-3/4″ – Inside Hinge Support
- 1 – 1/2″ plywood at 8-5/8″ x 12-3/4″ – Top
- 1 – 1/2″ plywood at 2-1/2″ x 12-3/4″ – Top Hinge Support
Step One
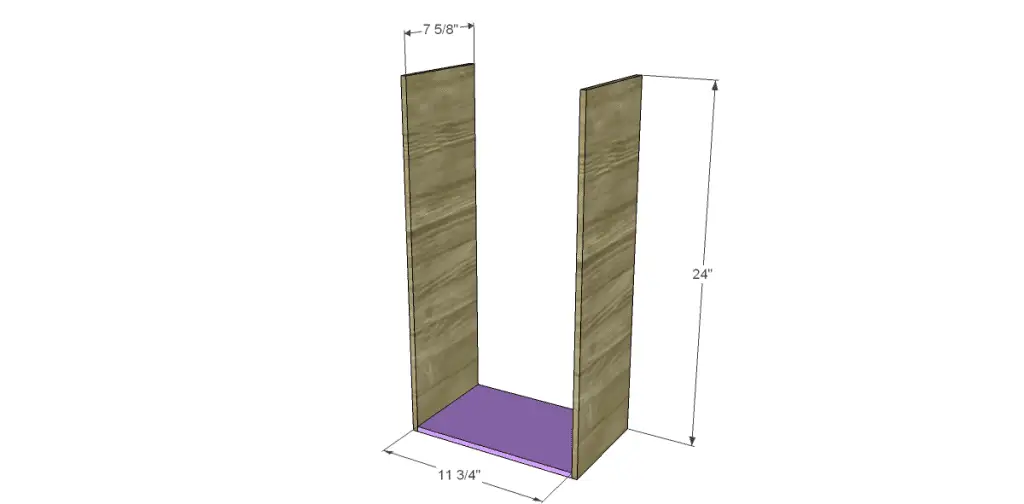
Cut the pieces for the bottom and the sides. Assemble as shown using glue and 1″ brad nails.
Step Two
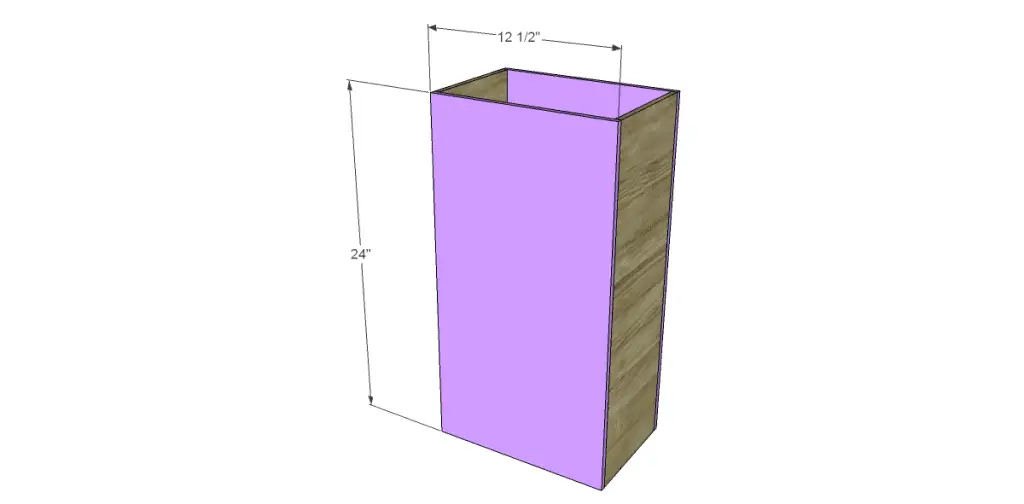
Cut the pieces for the front and back. Attach to the sides and bottom with glue and 1″ brad nails.
Step Three
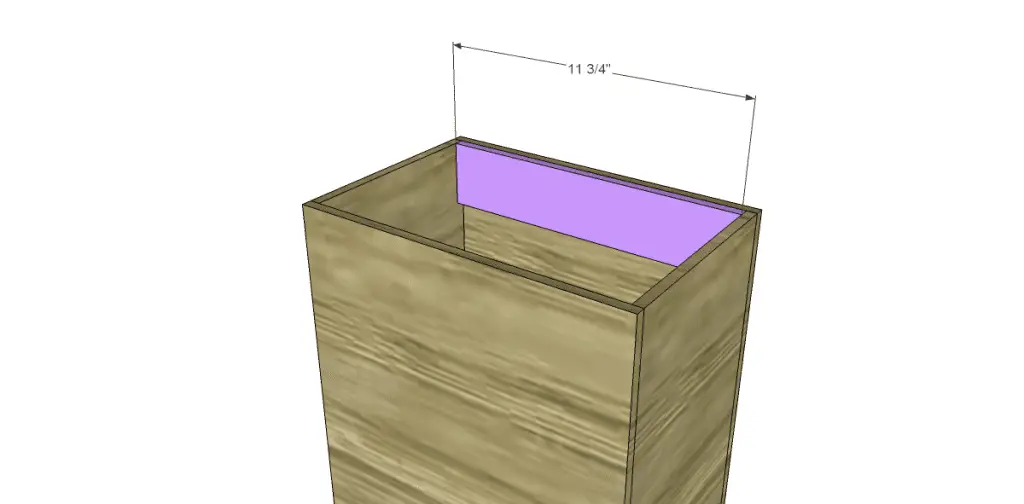
Since the plywood is thin, the screws for the hinges would go right through the wood so add a 2-1/2″ x 11-3/4″ piece to the inside back. Use glue and clamp until dry.
Step Four
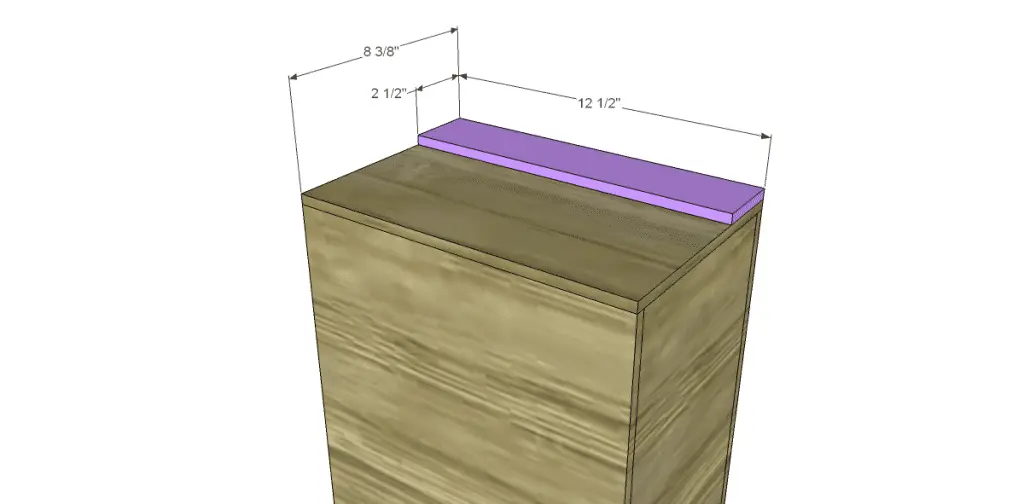
Cut the piece for the top and the top hinge support. Position the top hinge support then secure using glue and 3/4″ brad nails. Install the hinges on the cabinet, then on the lid. Add a cabinet pull if desired.
Finish as desired and stencil something cool on it! I stenciled the word RECYCLE on the front. It is so easy to build a recycle bin – the plans are perfect for all skill levels but if you get stuck, contact me at cher {at} designsbystudioc {dot} com and I would be happy to walk you through it!
Originally posted 2013-12-23 08:00:44.

