Build a Low-Slung Chair
Plans for an Outdoor Wooden Chair
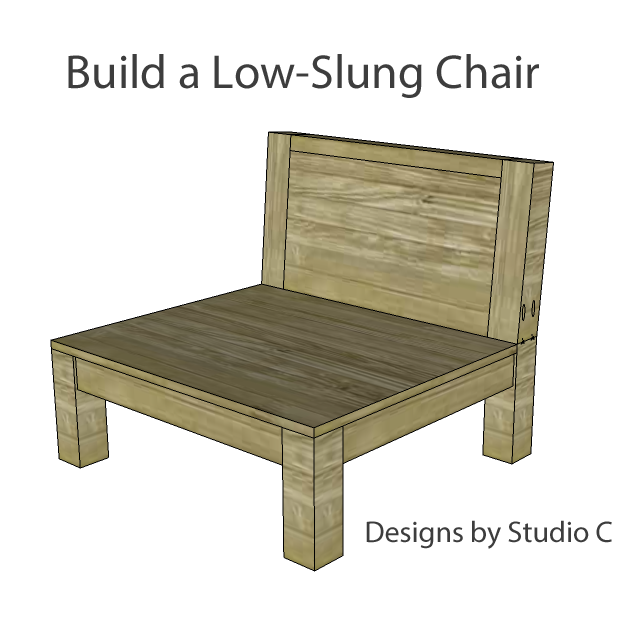
With Fall just around the corner, I have created the perfect plans to build a low slung chair for relaxing by the fire pit, outdoor movie night, or even as seating for a game room! If you are nervous about attempting to build a chair, don’t be… Chairs are one of the easiest pieces of furniture to construct and once you build your first one, you will be addicted – like me! The chair is designed to be constructed of straight off-the-shelf lumber. If it is going to be used and left outdoors, make sure the lumber is either chemically treated, sealed with spar varnish, or painted with exterior paint. This way the chair will last for many relaxing moments by the fire! A basic knowledge of sewing a straight line is helpful to construct pillows for the seat and back. In fact, using outdoor fabric for the covers, and stuffing made using recycled plastic bags would be the perfect cushioning! (See my post How to Make Outdoor Cushions Using Recycled Plastic Bags.) If you are a beginner, don’t be afraid to jump right in!
Materials:
-
- 1-1/2″ pocket hole screws for outdoor use (<– affiliate link!)
- 2-1/2″ pocket hole screws for outdoor use
- 1-1/4″ brad nails
- Wood glue
- Sandpaper (100, 150, 220 grits)
- Finishing supplies
Lumber:
- 2 – 2×4 at 8′
- 1 – 4×4 post at 8’**
Cut List:
- 2 – 4×4 posts at 10″ – Front Legs
- 2 – 4×4 posts at 10-3/4″ – Lower Back Legs
- 2 – 4×4 at 15″ – Upper Back Legs
- 3 – 2×4 at 24″ – Front & Back Stretchers
- 2 – 2×4 at 22″ – Side Stretchers
- 1 – 3/4″ plywood at 26-1/2″ x 30″ – Seat
- 1 – 3/4″ plywood at 13-1/2″ x 24″ – Back
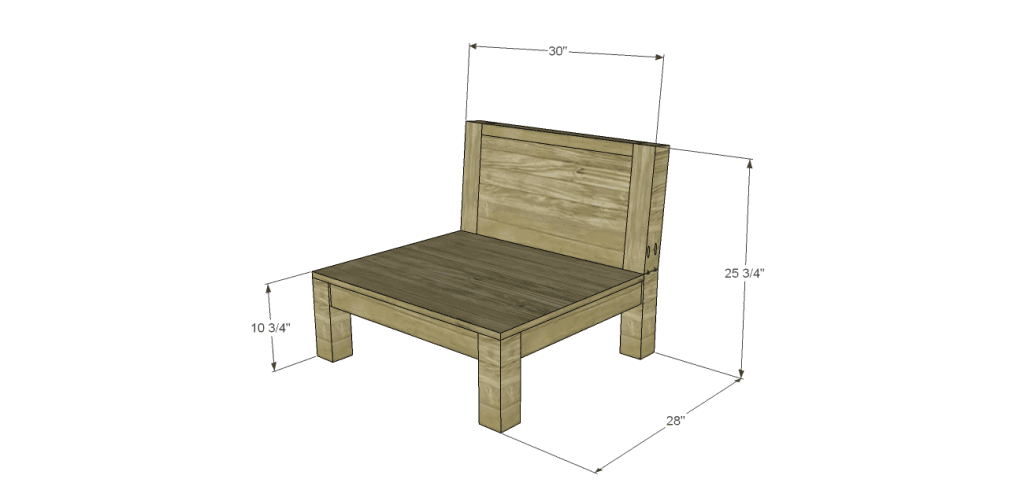
** 2 – 2x4s glued and screwed together face to face will also work. If using this method, the side stretchers will have to be lengthened by 1″.
Step One
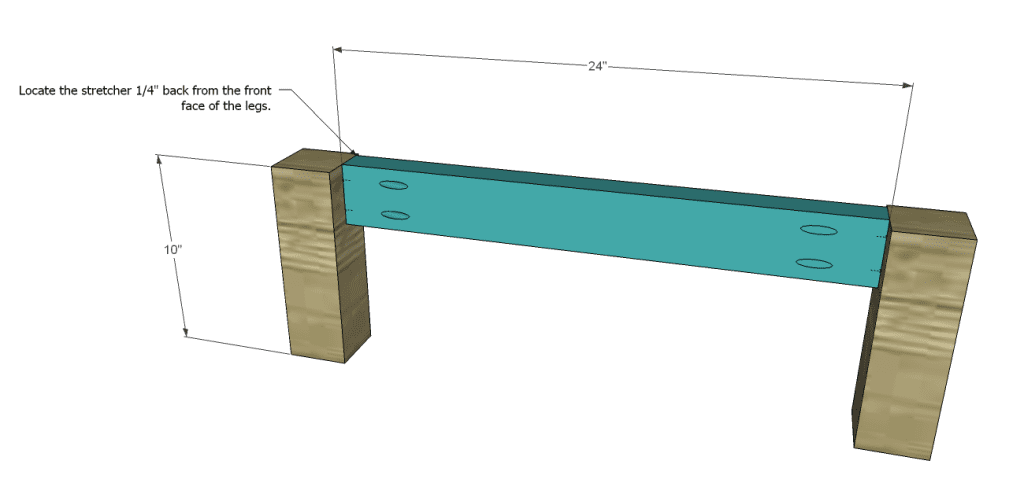
Cut the pieces for the front legs and stretcher. Set the pocket hole jig for drilling into 1-1/2″ material and drill pocket holes at each end of the stretcher. Secure to the legs using glue and 2-1/2″ pocket hole screws. Position the stretcher so that the front face is set back 1/4″ from the front face of the legs.
Step Two
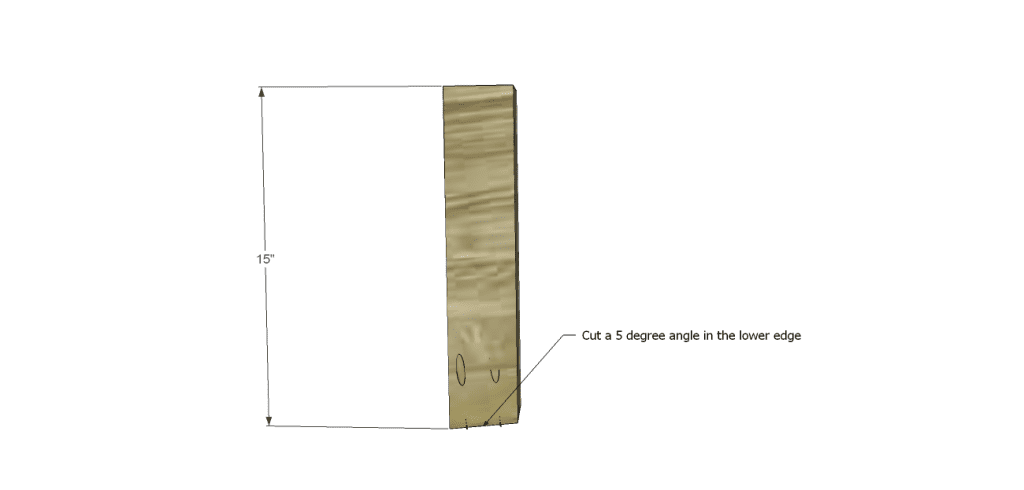
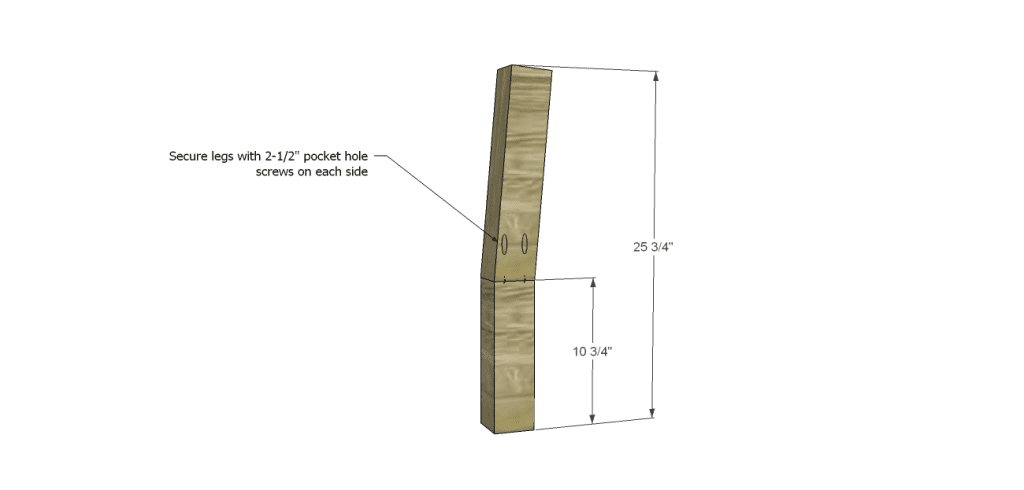
Cut the pieces for the upper and lower back legs. Cut a 5 degree angle in the lower edge of the upper back leg. Because the post is wider than a regular pocket hole jig allows for, drill pocket holes in each side of the angled portion of the legs (see the drawings). This will make the back extra sturdy so it doesn’t come apart when it is leaned on! Secure the upper and lower legs to each other using glue and 2-1/2″ pocket hole screws.
Step Three
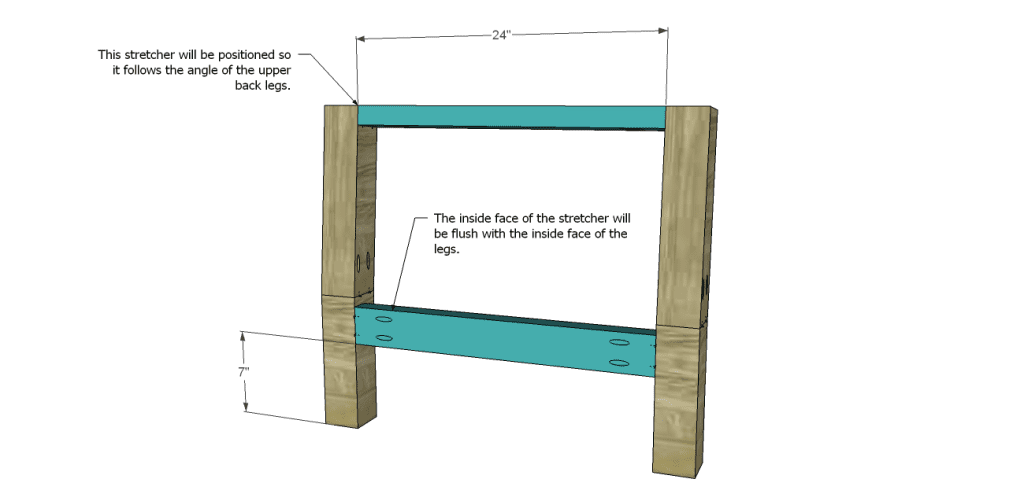
Cut the pieces for the back stretchers and drill pocket holes in each end of each piece. Secure to the legs as shown using glue and 2-1/2″ pocket hole screws.
Step Four
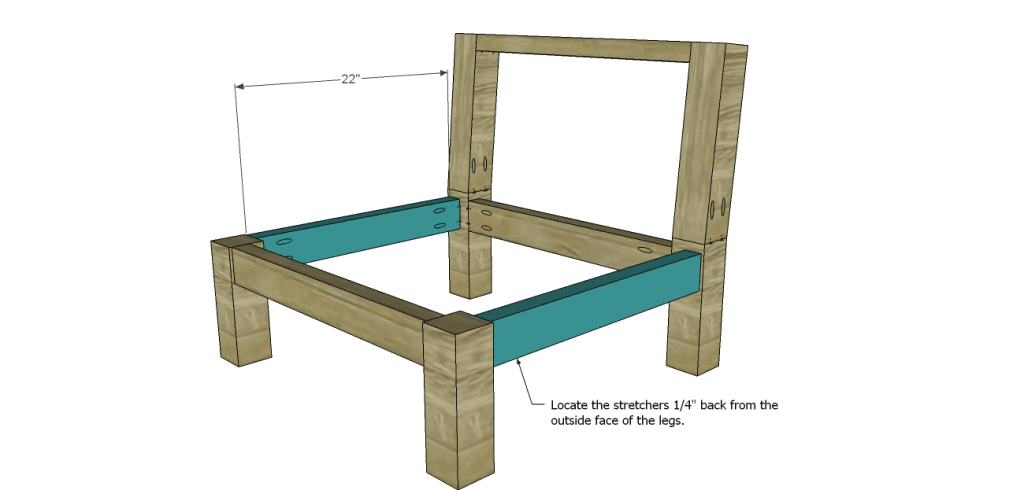
Cut the pieces for the side stretchers and drill pocket holes in each end of each piece. Secure to the legs as shown using glue and 2-1/2″ pocket hole screws. Position the stretchers so that the outside face is 1/4″ back from the outside face of the legs.
Step Five
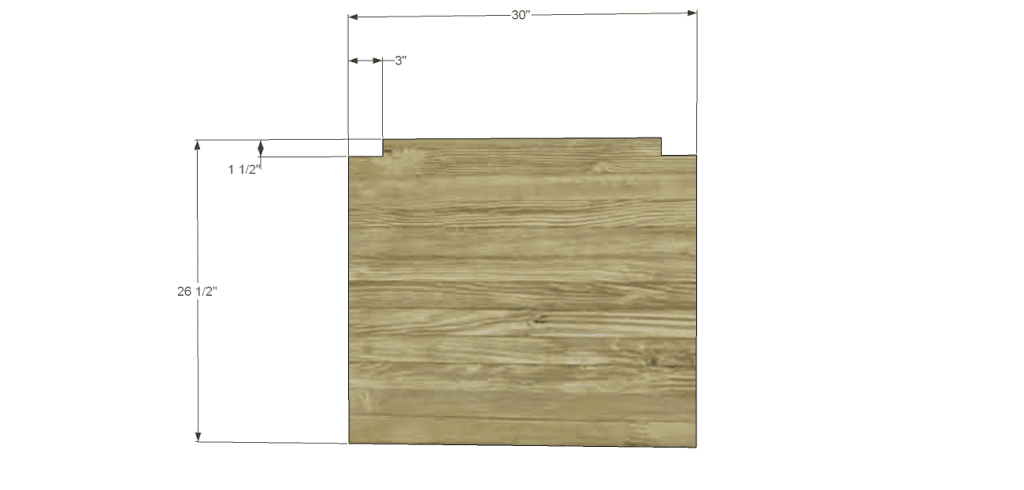
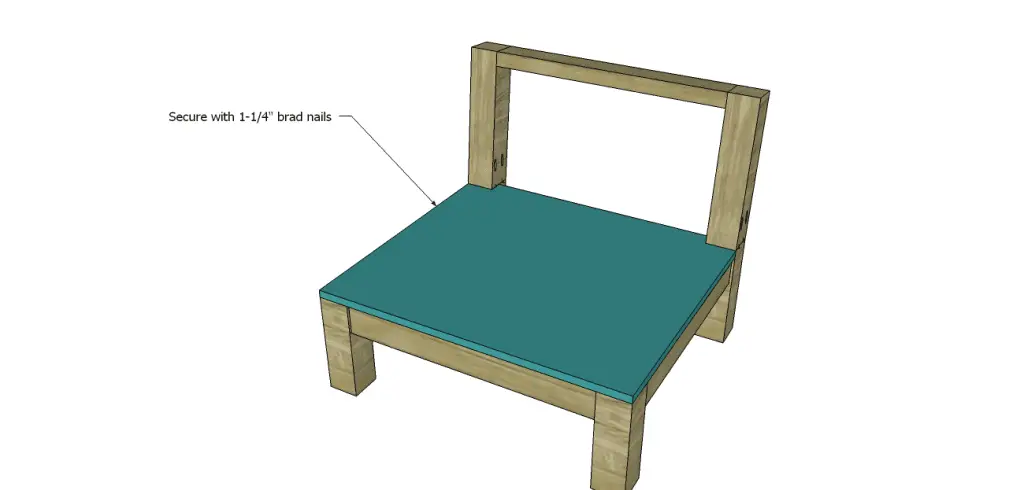
Cut the piece for the seat. Cut the notches using a jigsaw or a bandsaw, then attach to the seat frame using glue and 1-1/4″ brad nails.
Step Six
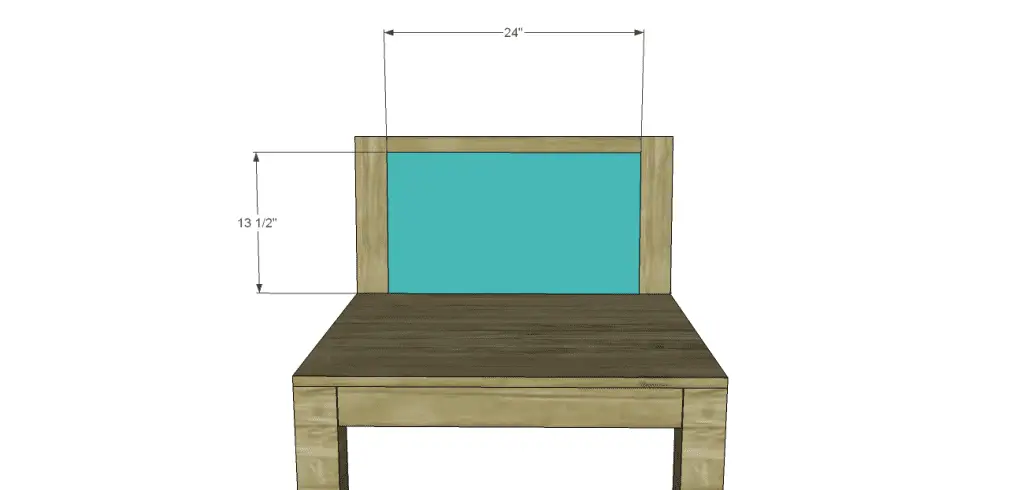
Cut the piece for the back. Set the pocket hole jig for 3/4″ material and drill pocket holes in all four edges. Insert the piece into the upper back on top of the seat then secure using glue and 1-1/2″ pocket hole screws. The front face of the back will be flush with the front face of the back legs.
Finish as desired. Sew a couple of pillows for the seat and back, and voila!! Awesome seating! Build one or build several… These plans to build a low-slung chair are just the ticket for indoor or outdoor use! I plan on building a few for myself! Any questions? Let me know at cher {at} designsbystudioc {dot} com!
Originally posted 2013-09-13 08:00:31.


I love this! I am going to forward the plans to my hubby! 🙂
I know, Evonne!! I want to build them to place around the fire pit we have between my house and my parents’ house! I’ll make a few extra so you and the fam can come visit! ; )
Your designs always make me want to build things… or rather have my husband build things for me. 🙂 I need to learn how to do this stuff myself!
Thank you, Kelly! It really is easy to learn to do and if you ever have questions or need help, let me know!
I’d love to build this using slatted panels for the seat due to rainy weather and making sure they last a long time! Is it possible for you to post info on that modification? Thank you!
You got it, great suggestion! Here is the link: http://designsbystudioc.com/diy-furniture-plans-build-low-slung-chair-slatted-seat/ 🙂
[…] Low Slung Chair free building plan.These low slung chairs are great for indoor or outdoor seating. Build them using these free step-by-step instructions. […]
[…] These low slung chairs are great for indoor or outdoor seating. Build them using these free step-by-step instructions. […]
[…] reader made a great suggestion for a modification to the original Low-Slung Chair plan… The modified DIY furniture plans to build a Low-Slung Chair has a slatted seat which will allow […]