Free Plans to Build a Farmhouse Chest
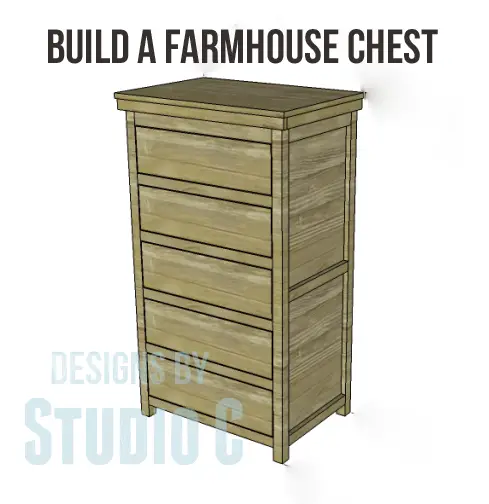
Earlier, I posted plans for the Farmhouse Cabinet and today, I’m posting the free plans to build a Farmhouse chest. This would be great “doubled” (omitting the side trim and changing the width of the top), as I mentioned in the post for the cabinet also. I may use both pieces when I remodel my craft storage… I really like them!
Materials:
- 1-1/4″ pocket hole screws
- 2-1/2″ pocket hole screws
- 1-1/4″ brad nails
- Edge banding (<– affiliate link!)
- 5 sets of 14″ drawer slides (<– affiliate link!)
- Cabinet pulls
- Finishing supplies
Lumber:
Materials are listed to build one chest
- 1 – 1×2 at 6′
- 5 – 2×2 at 8′
- 1 – 2×4 at 8′
- 2 sheet of 3/4″ plywood
Cut List:
- 4 – 2×2 at 47-1/4″ – Legs
- 2 – 2×4 at 15″ – Side Frames
- 4 – 2×2 at 15″ – Side Frames
- 4 – 3/4″ plywood at 15″ x 19-3/8″ – Side Panels
- 2 – 2×4 at 22-1/2″ – Back Frame & Front Stretchers
- 7 – 2×2 at 22-1/2″ – Back Frame & Front Stretchers
- 2 – 3/4″ plywood at 19-3/8″ x 22-1/2″ – Back Panels
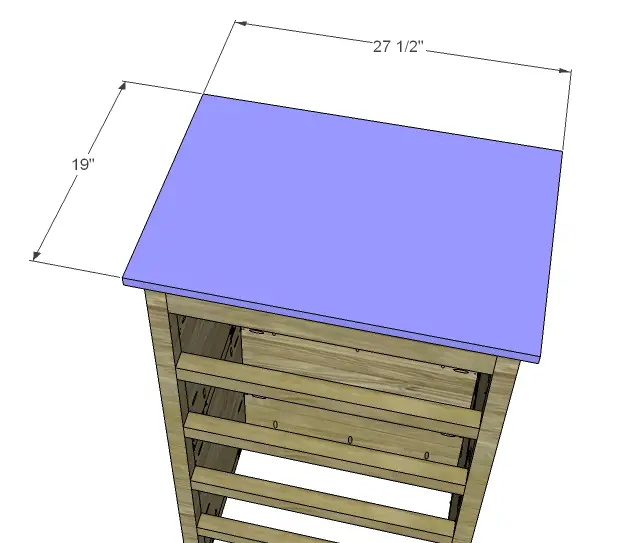
- 1 – 3/4″ plywood at 19″ x 27-1/2″ – Top
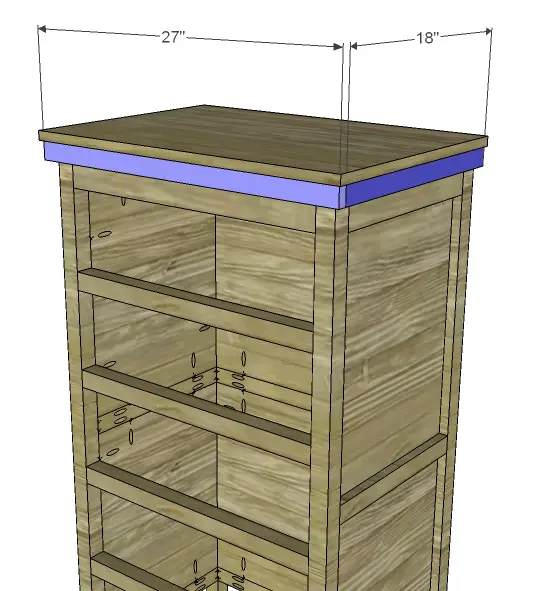
- 2 – 1×2 at 18″ – Top Side Trim
- 1 – 1×2 at 27″ – Top Front Trim
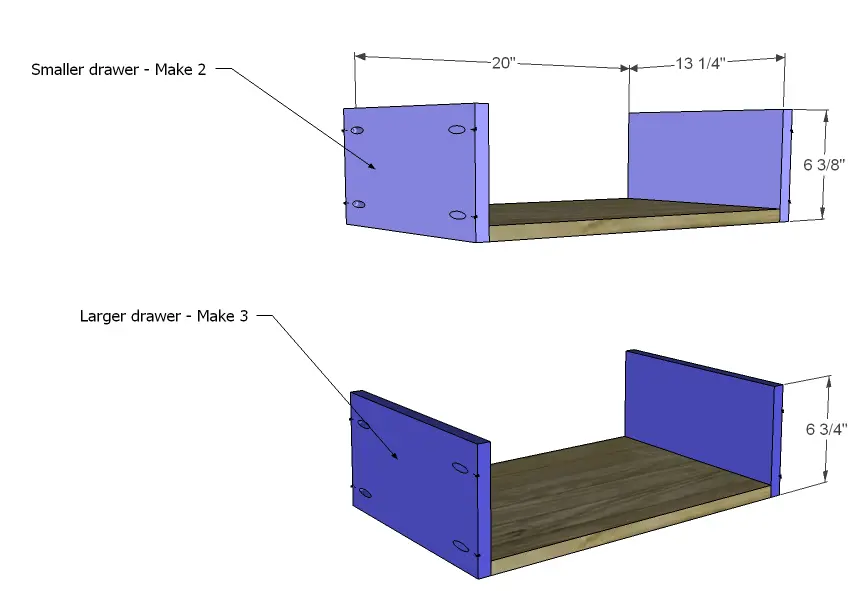
- 5 – 3/4″ plywood at 13-1/4″ x 20″ – Drawer Bottoms
- 4 – 3/4″ plywood at 6-3/8″ x 13-1/4″ – Smaller Drawer Sides
- 6 – 3/4″ plywood at 6-3/4″ x 13-1/4″ – Larger Drawer Sides
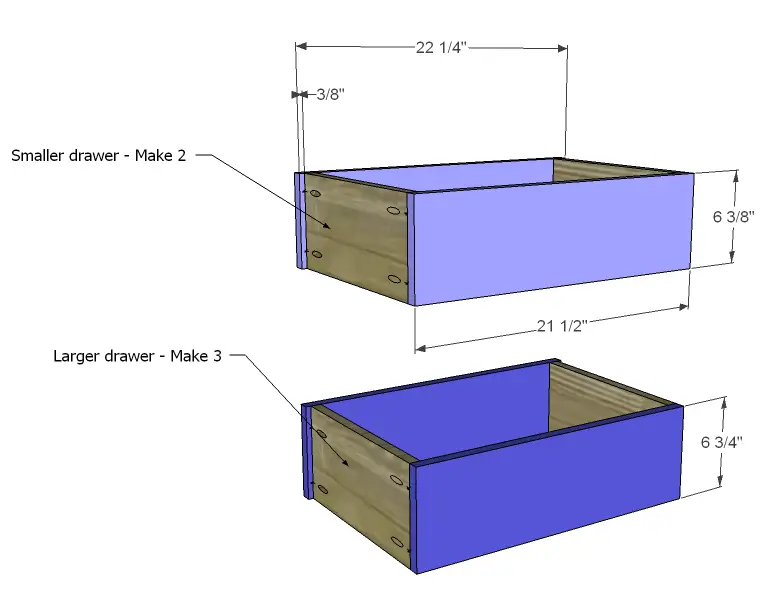
- 2 – 3/4″ plywood at 6-3/8″ x 21-1/2″ – Smaller Drawer Backs
- 2 – 3/4″ plywood at 6-3/8″ x 22-1/4″ – Smaller Drawer Fronts
- 3 – 3/4″ plywood at 6-3/4″ x 21-1/2″ – Larger Drawer Backs
- 3 – 3/4″ plywood at 6-3/4″ x 22-1/4″ – Larger Drawer Fronts
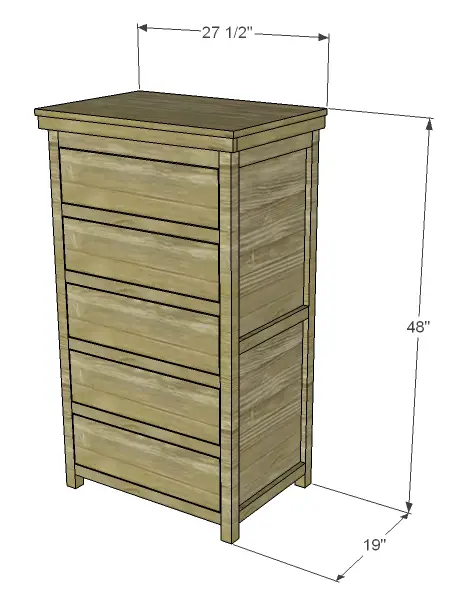
Click on the drawings for a larger view!
Step One
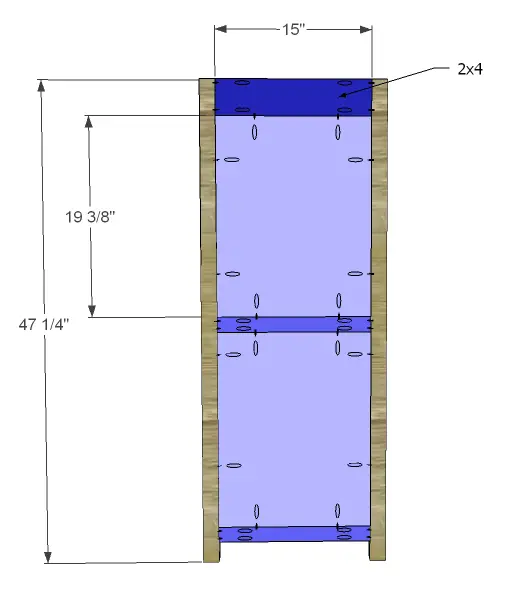
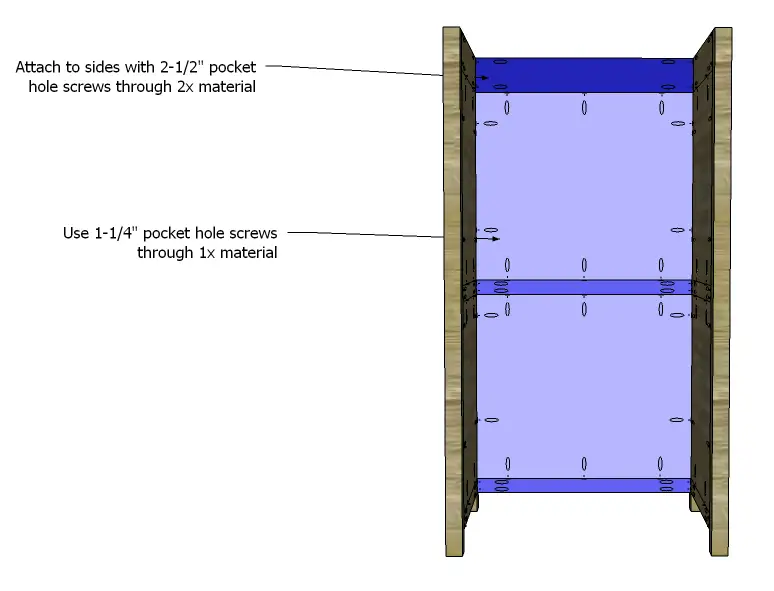
Cut the pieces for the legs, side frames, and side panels. Drill pocket holes in each end of the frame pieces as well as all four edges of the panels. Attach the frame pieces to the panels using glue and 1-1/4″ pocket hole screws. The back face of the panels will be flush with the back face of the frame pieces. Attach the legs to the side assembly using glue and 2-1/2″ pocket hole screws through the 2x material, and 1-1/4″ pocket hole screws through the 1x material.
Step Two
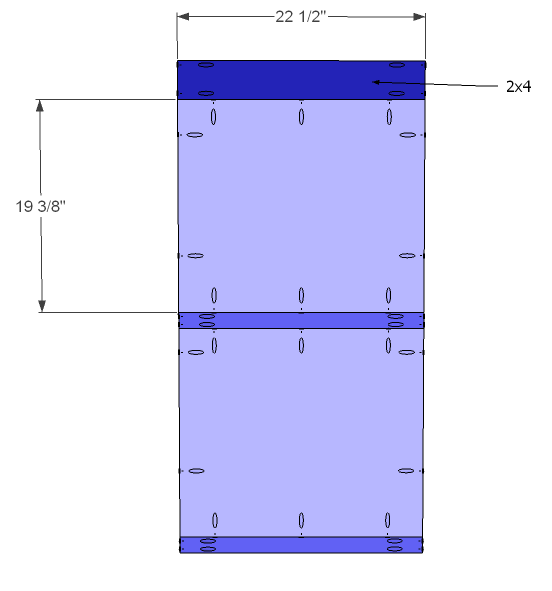
Cut the pieces for the back frames and back panels. Drill pocket holes in each end of the frame pieces as well as all four edges of the panels. Attach the frame pieces to the panels using glue and 1-1/4″ pocket hole screws. The back face of the panels will be flush with the back face of the frame pieces. Attach back assembly to the legs using glue and 2-1/2″ pocket hole screws through the 2x material, and 1-1/4″ pocket hole screws through the 1x material.
 Step Three
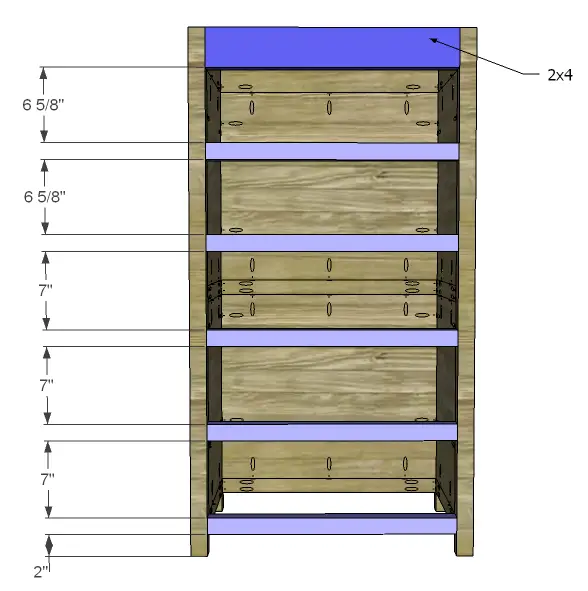
Cut the pieces for the front stretchers and drill pocket holes in each end. Attach as shown using glue and 2-1/2″ pocket hole screws.
Step Four
Cut the pieces for the top. The sides and front will overlap by 1″ while the back remains flush. Secure using glue and 1-1/4″ brad nails.
Cut the pieces for the trim. Attach the side pieces first using glue and 1-1/4″ brad nails, then attach the front in the same manner.
Step Five
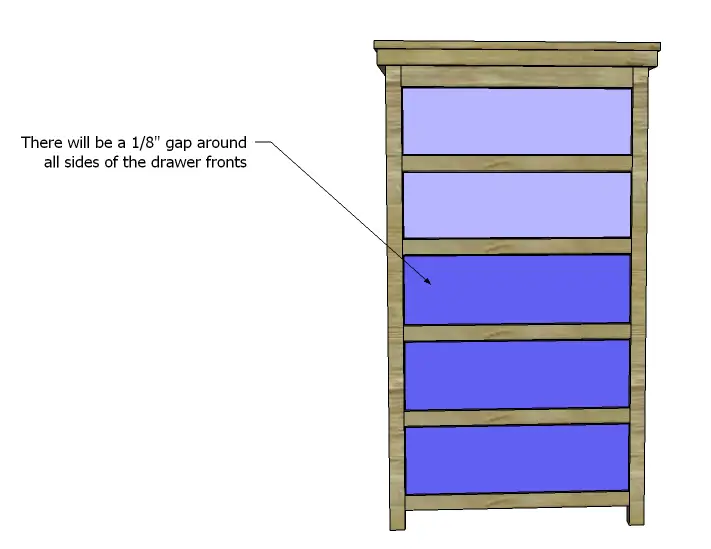
Cut the pieces for the drawers. Drill pocket holes in each end of the side pieces as well as all four edges of the bottom. Assemble as shown using glue and 1-1/4″ pocket hole screws. The fronts will overlap the drawer box by 3/8″ on each side.
Install the drawer slides according to the manufacturer’s instructions. See my post on how to install drawer slides. Make any necessary adjustments.
Finish as desired!
The piece constructed from the free plans to build a Farmhouse chest would be great in a kid’s room also, to organize clothes or maybe small toys, books, and games! Share your fabulous work with me… Send photos to cher {at} designsbystudioc {dot} com or designsbystudioc {at} gmail {dot} com. I would love to feature your work on DbSC!
Originally posted 2014-03-19 08:00:59.


Comments are closed.