An Easy to Build Console Table
Aaaah, the demilune table with its graceful curves and elegance can sometimes provide a challenge to build for woodworkers such as myself. The free plans to build a Demilune Console Table feature long legs and a drawer in the center to compliment the curved sides and top.
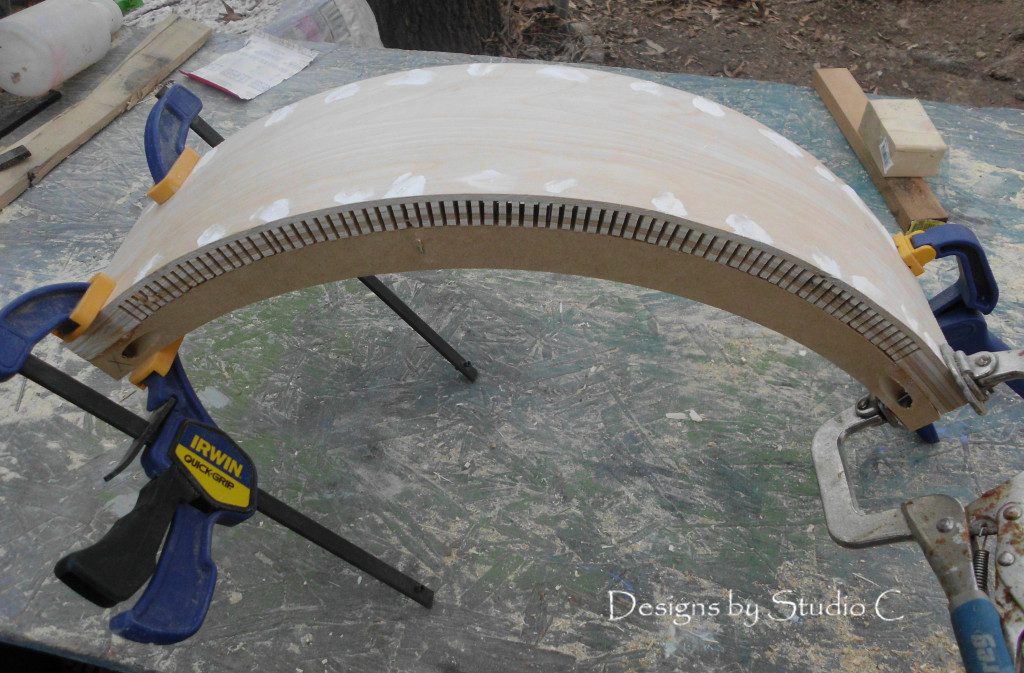
In all honesty, cutting the curved pieces for the sides is not difficult at all! I started building this table before I published the plans so that I could put them to a test. I have included photographs of the side pieces and the rest of the plans are pretty self explanatory but if you run into any problems, let me know at cher {at} designsbystudioc {dot} com. I am here to help!
But if you aren’t ready to take the leap into cutting a bazillion kerfs in a piece of plywood, I’ll be posting plans for a demilune table with straight side pieces later this week!
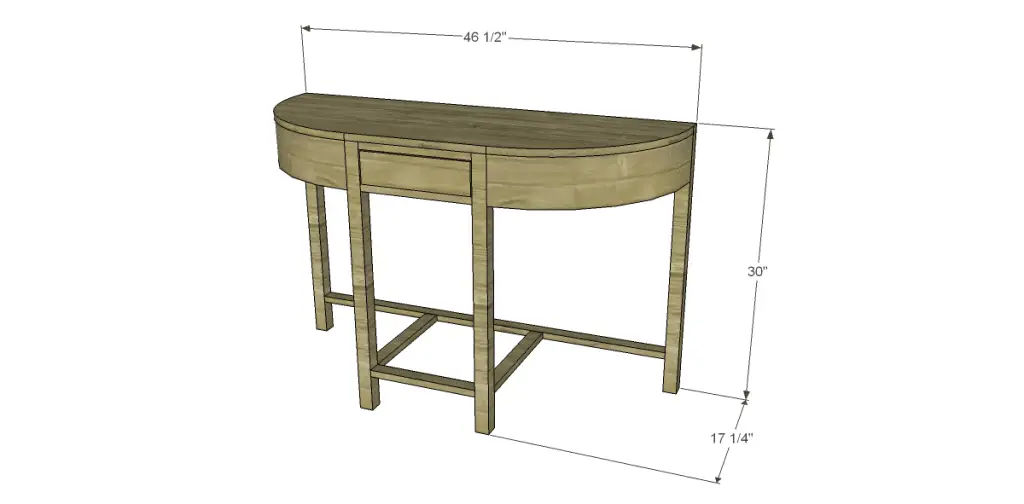
Materials:
- 1-1/4″ pocket hole screws
- 1-1/4″ brad nails
- One drawer pull
- Finishing supplies
Lumber:
- 2 – 1×2 at 6′
- 2 – 2×2 at 6′
- One sheet of 3/4″ plywood
Cut List:
- 4 – 2×2 at 29-1/4″ – Legs
- 4 – 3/4″ plywood arcs at 3/4″ wide (see notes below) – Nailing Strips
- 2 – 3/4″ plywood at 5″ x 23-1/2″ – Sides
- 1 – 3/4″ plywood at 5″ x 43-1/2″ – Back
- 3 – 1×2 at 12″ – Front & Lower Stretchers
- 1 – 1×2 at 43-1/2″ – Lower Back Stretcher
- 2 – 1×2 at 14-1/4″ – Side Lower Stretchers
- 2 – 3/4″ plywood at 5″ x 15″- Drawer Shelf
- 1 – 3/4″plywood at 12″ x 15″ – Drawer Shelf
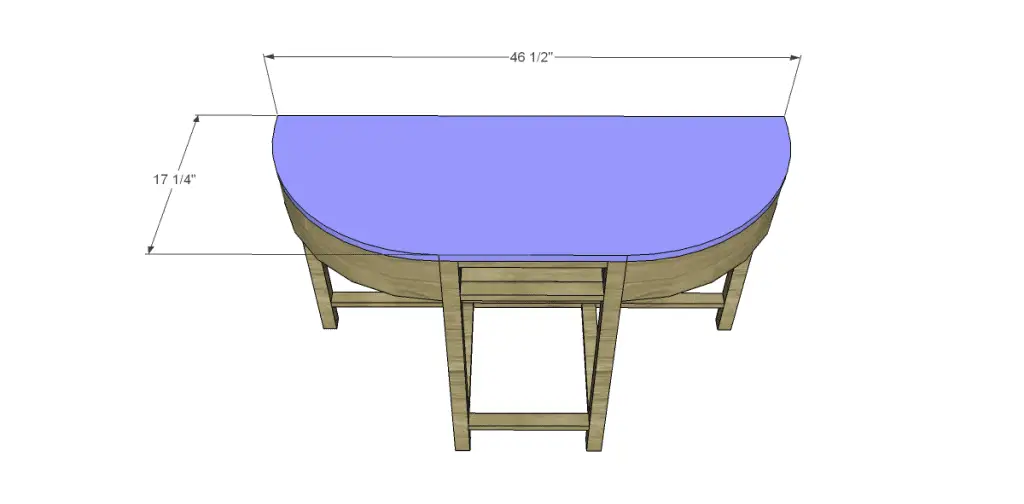
- 1 – 3/4″ plywood at 17-1/4″ x 46-1/2″ – Top (see notes below)
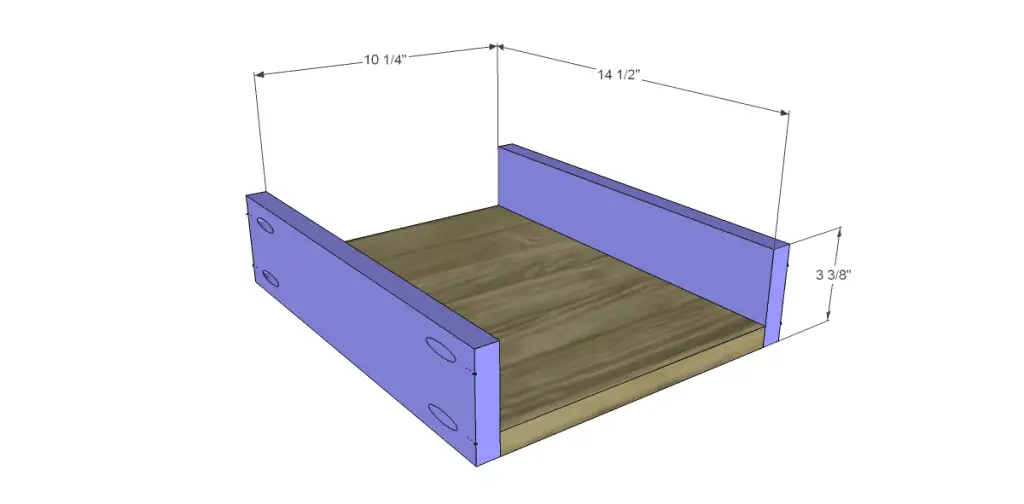
- 2 – 3/4″plywood at 3-3/8″ x 14-1/2″ – Drawer Sides
- 1 – 3/4″ plywood at 10-1/4″ x 14-1/2″ – Drawer Bottom
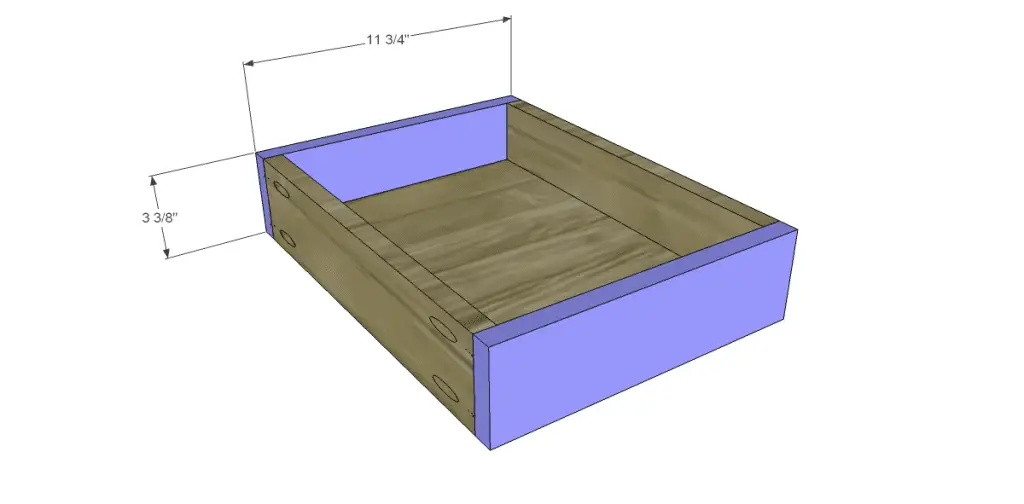
- 2 – 3/4″ plywood at 3-3/8″ x 11-3/4″ – Drawer Front & Back
Notes:
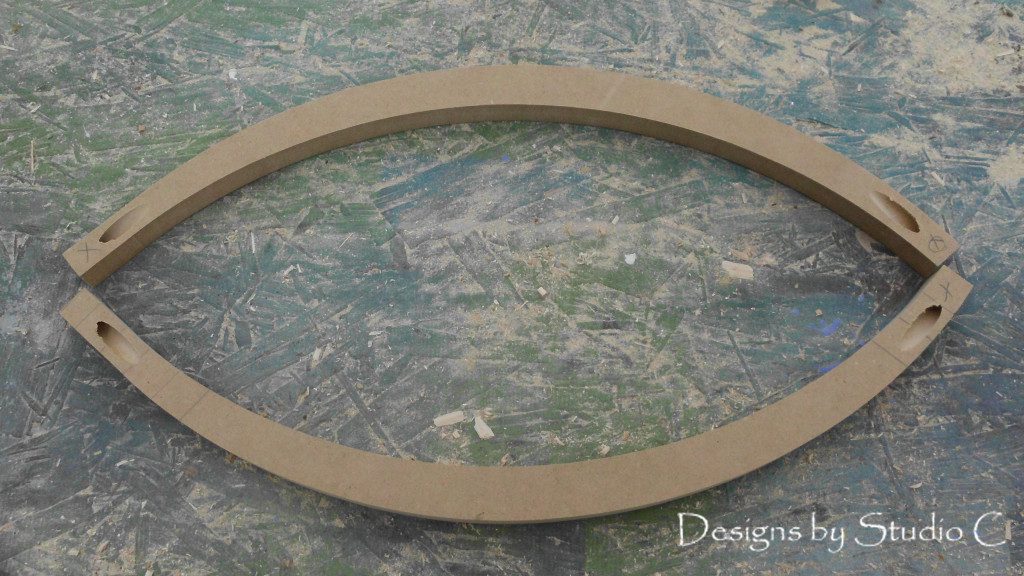
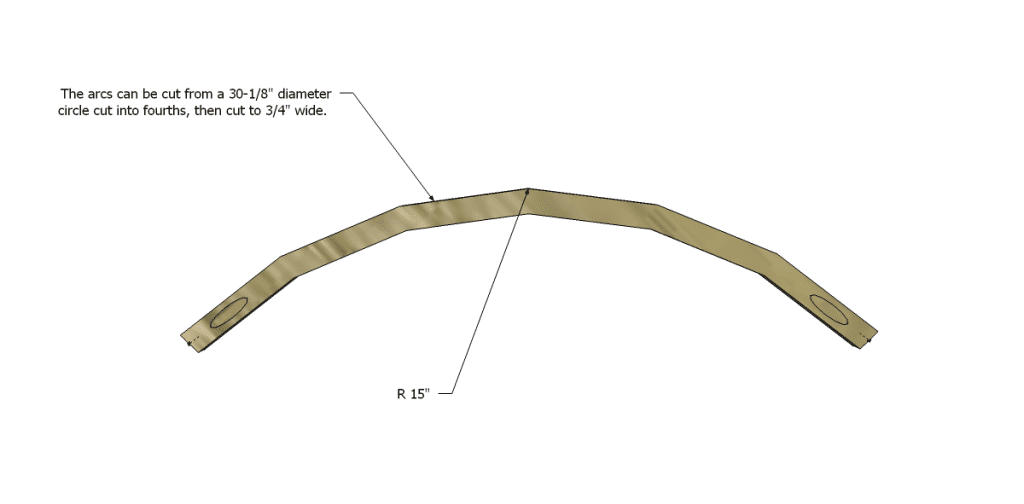
Arcs – I cut the arcs for my table using a band saw and a circle cutting jig. It may be easier to cut a piece of plywood at 30-1/2″ x 30-1/2″ and cut a 30-1/8″ diameter circle. Cut the circle into fourths, then offset the arc in the pieces by 3/4″ and cut out.
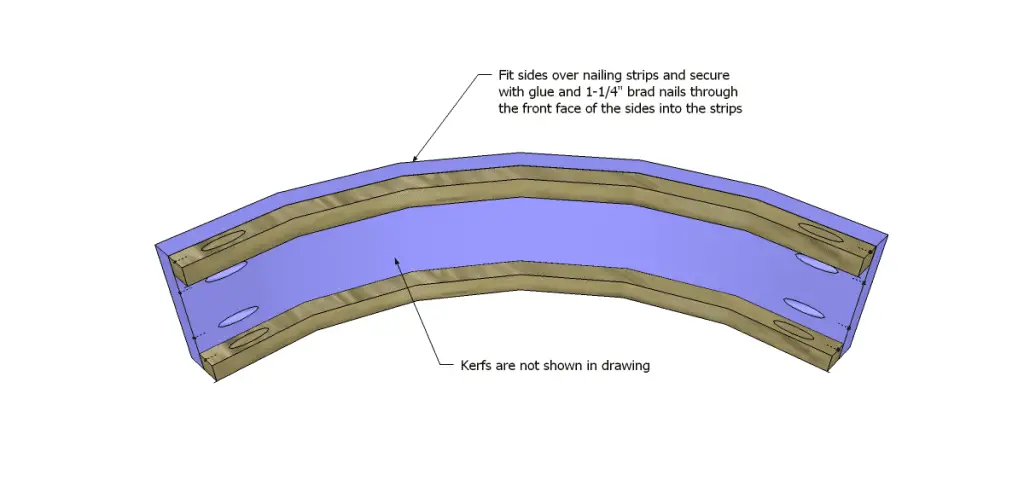
Sides – 1/8″ kerfs will be cut the entire length of each piece starting at approximately 2″ from the end, and ending 2″ from the other end. The kerfs will allow the plywood to bend around the arcs. Secure the sides to the arc nailing strips with glue and 1-1/4″ brad nails.
Top – Cut this piece last. Position the top on the cabinet and trace the line for the arcs at each side. Cut the arcs just to the outside of the line (not on the line).
Step One
Cut the pieces for the arcs. Drill one pocket hole in each end of each piece. (See photos also)
Step Two
Cut the pieces for the sides. The kerfs will be cut on the table saw. Set the table saw blade so that it will not cut through the very top ply of the plywood (see photo). Set the rip fence 2″ from the blade and run the piece through cutting the first kerf in the width of the piece. Move the rip fence in 1/4″ increments and continue cutting the kerfs down the length of the board stopping 2″ from the end. Drill pocket holes in each end leaving room for the nailing strips.
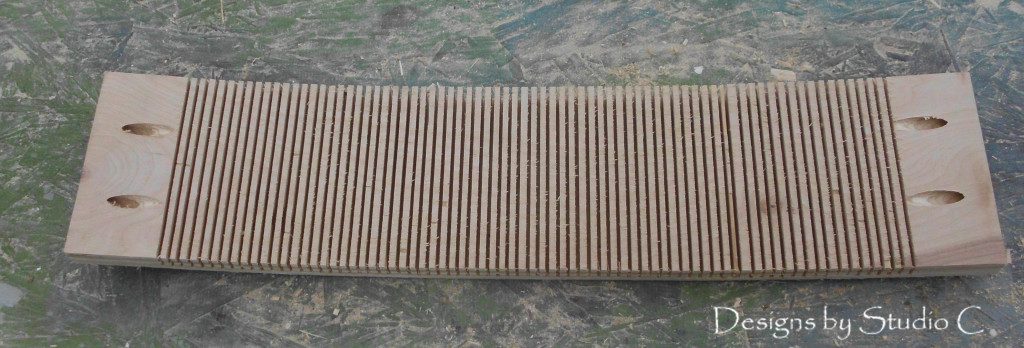
Bend the side pieces over the outside of the arcs and secure in place using glue and 1-1/4″ brad nails.
Step Three
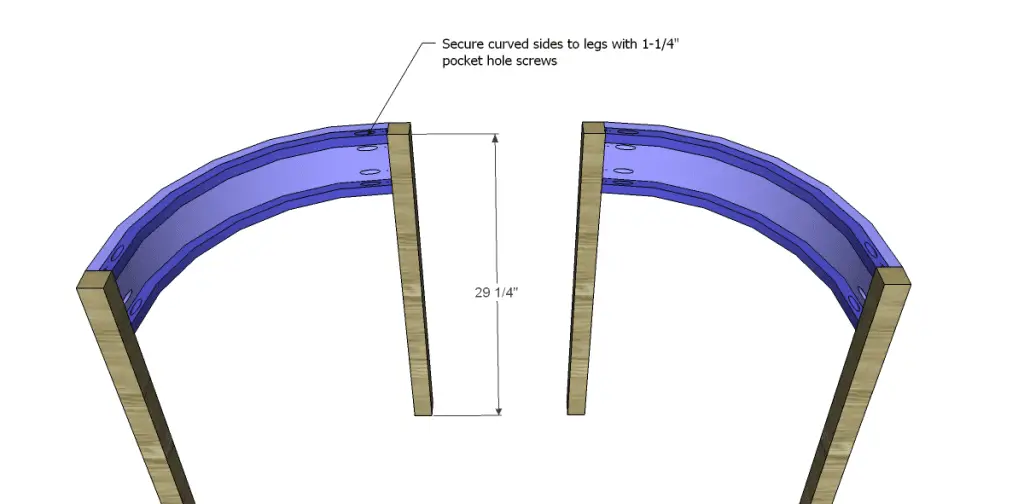
Secure the sides to the legs using glue and 1-1/4″ pocket hole screws. The outside face of the side aprons will be flush with the outside face of the legs.
Step Four
Cut the piece for the back apron and drill pocket holes in each end. Secure to the legs using glue and 1-1/4″ pocket hole screws.The outside face of the back will be flush with the outside face of the legs.
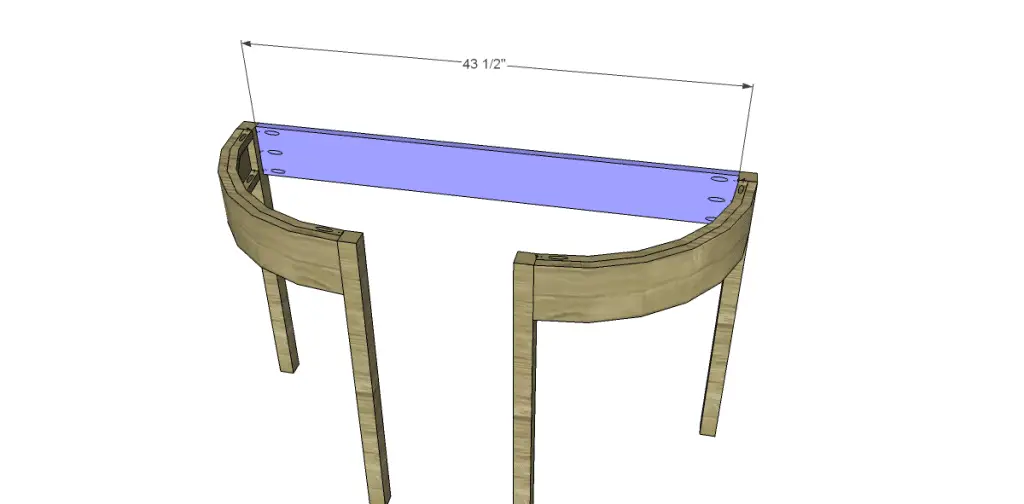
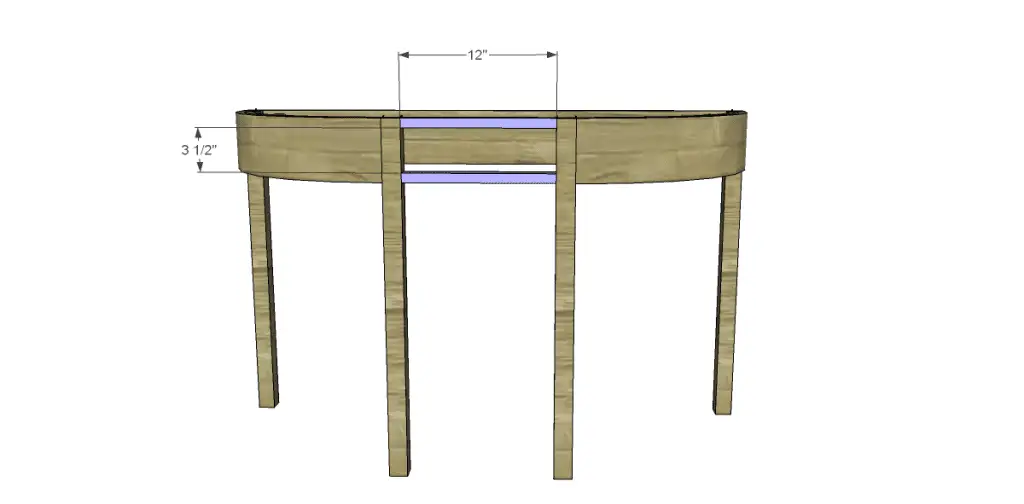
Cut the pieces for the front stretchers and drill pocket holes in each end. Attach as shown using glue and 1-1/4″ pocket hole screws.
Step Five
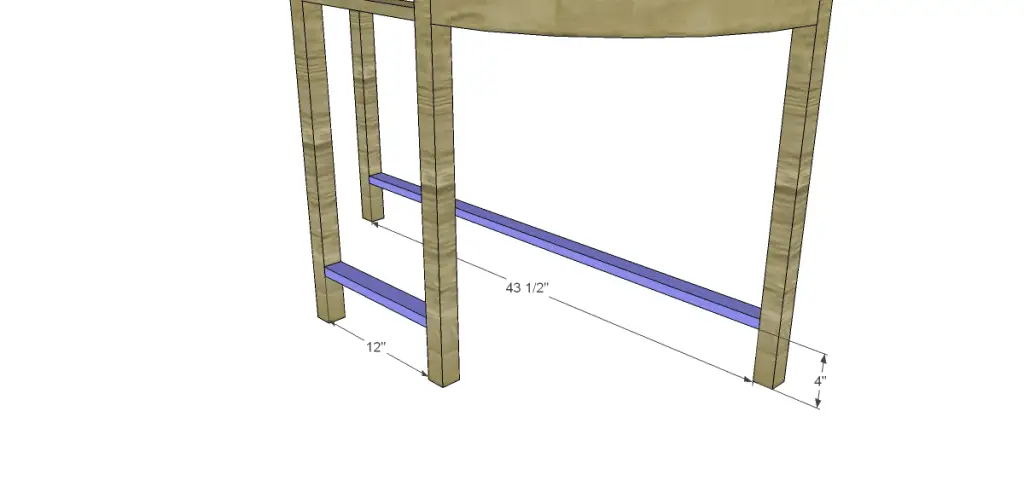
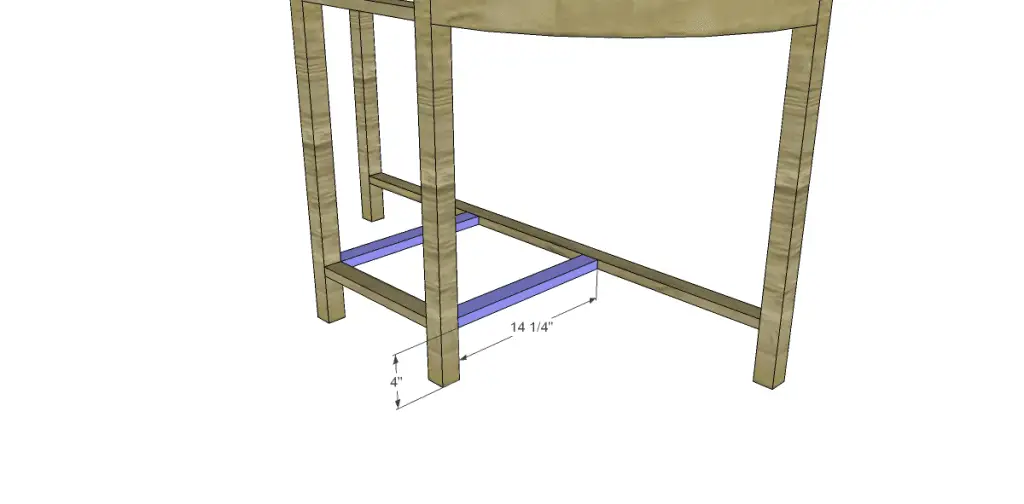
Cut the pieces for the lower stretchers and drill pocket holes in each end. Position as shown and secure using glue and 1-1/4″ pocket hole screws.
Step Six
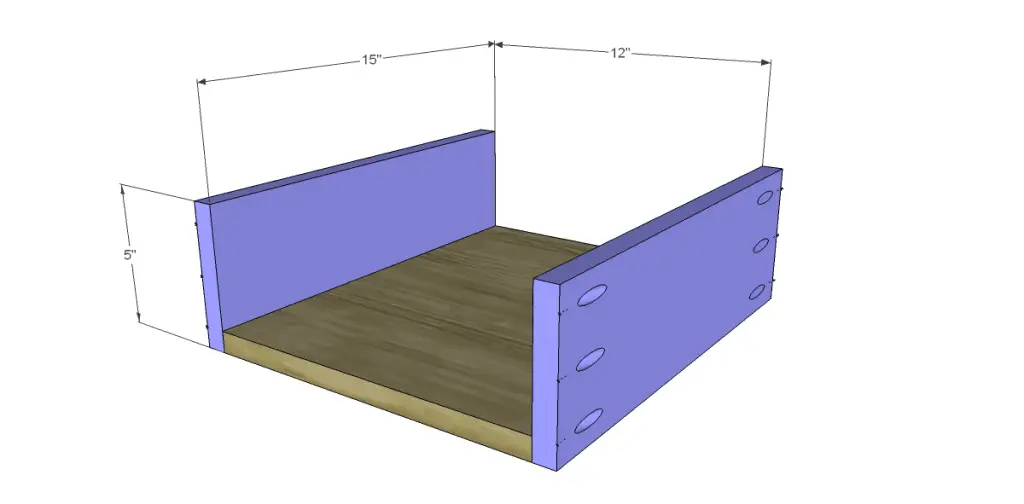
Cut the pieces for the drawer shelf. Drill pocket holes in each each end of the side pieces as well as all four sides of the bottom. Position the sides as shown and secure using glue and 1-1/4″ pocket hole screws.
Position the shelf inside the cabinet and secure using glue and 1-1/4″ pocket hole screws.
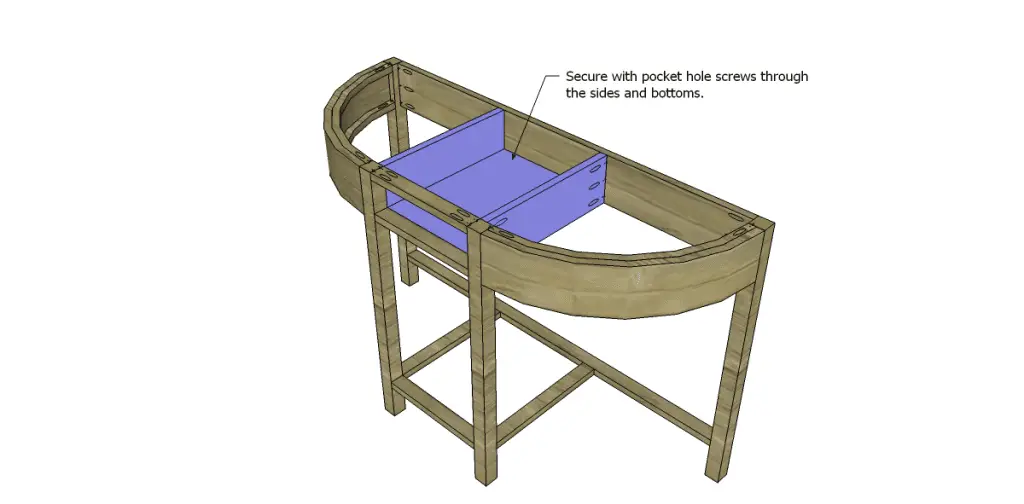
Step Seven
Cut the piece for the top as described in the notes. Secure the top to the cabinet with the back edges flush using glue and 1-1/4″ brad nails. Using a router with a flush cutting bit, trim the entire front edge of the top flush with the cabinet. This ensures the arcs are all identical!
Step Eight
Cut the pieces for the drawers. Drill pocket holes in each end of the side pieces as well as all four edges of the bottom. Assemble as shown using glue and 1-1/4″ pocket hole screws. Rub a coat of paste wax on the bottom of the drawer as well as the drawer shelf so that the drawer slides smoothly. Attach the drawer pull.
Finish as desired!
Have any questions about the free plans to build a Demilune Console Table? Leave a comment below!


Comments are closed.