Build a Hexagon Dining Table
An Easy to Build Table
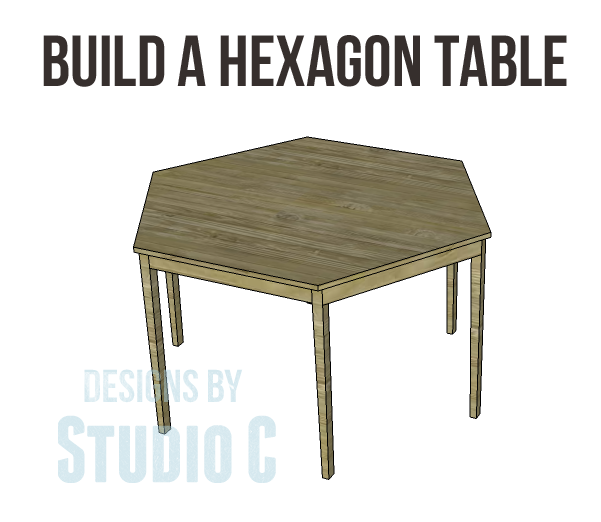
Here is a nifty table that doesn’t take up a lot of space yet you can seat more people… These free furniture plans to build a Hexagon Dining Table are simple to follow and won’t break your budget. Finished in a variety of options, this table will be a hit at the family dinner or even the next dinner party!
Materials:
- 1-1/4″ pocket hole screws
- 1-1/4″ brad nails
- Edge banding, optional (<– affiliate link!)
- Wood glue
- Sandpaper (100, 150, 220 grits)
- Finishing supplies (primer & paint, or stain, sealer)
Lumber:
- 4 – 1×3 at 8′
- 2 – 2×2 at 6′
- 1 sheet of 3/4″ plywood
Cut List:
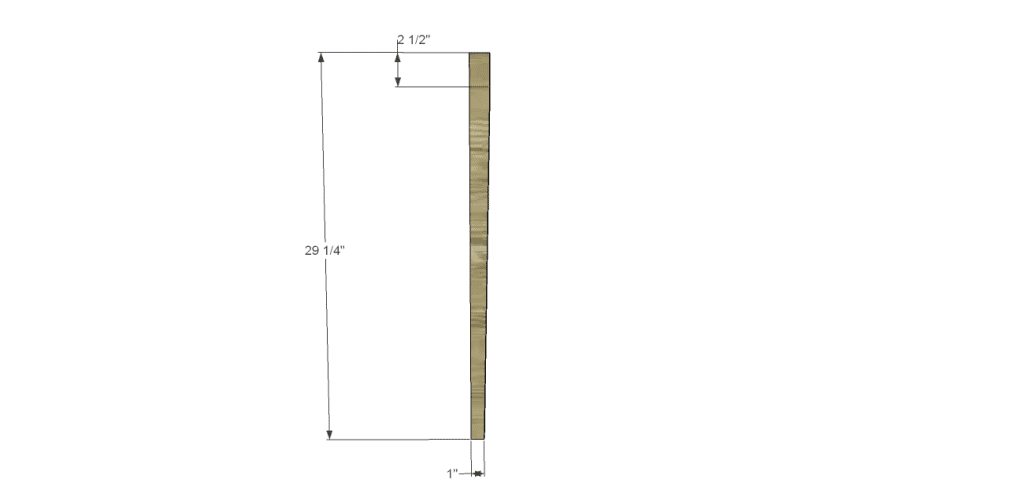
- 6 – 2×2 at 29-1/4″ – Legs
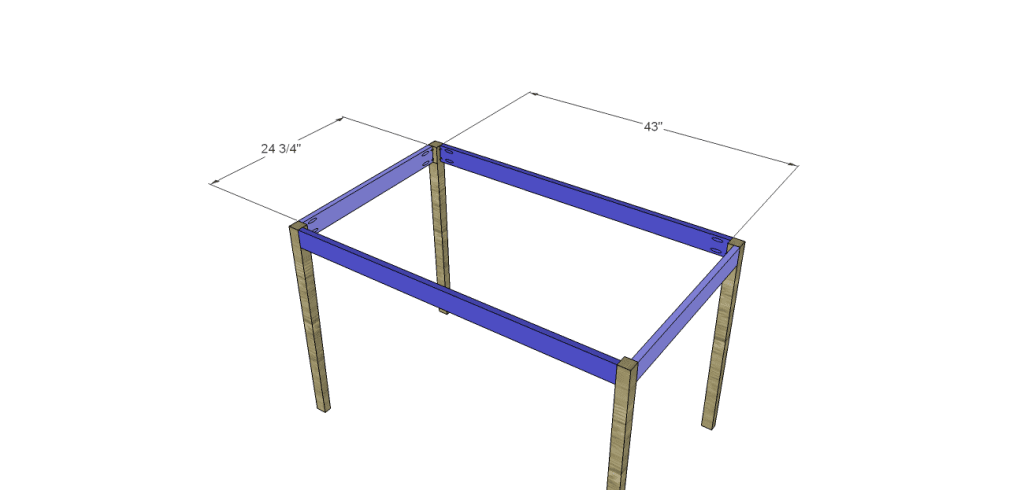
- 2 – 1×3 at 24-3/4″ – Aprons
- 2 – 1×3 at 43″ – Aprons
- 2 – 1×3 at 25-1/4″ – Top Supports
- 2 – 1×3 at 11-3/8″ – Stretchers
- 4 – 1×3 at 25-3/4″ – Angled Aprons
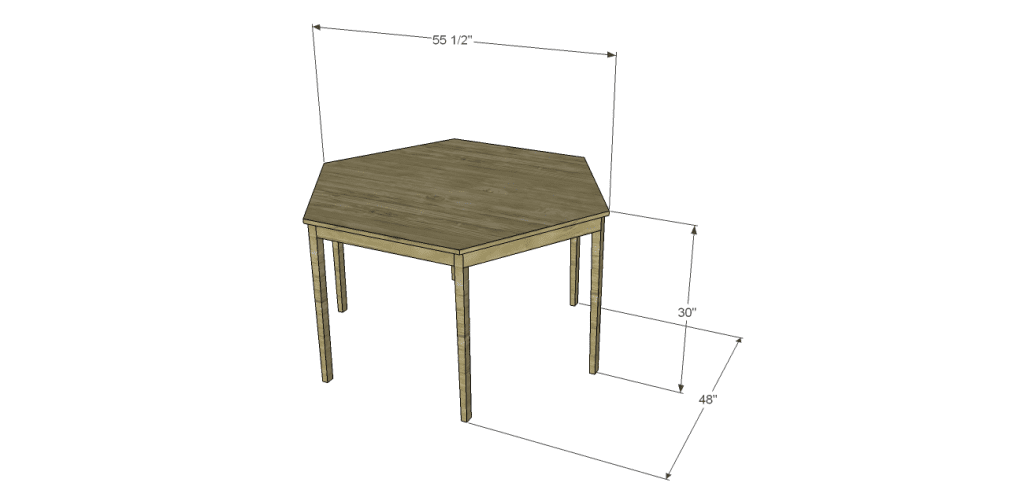
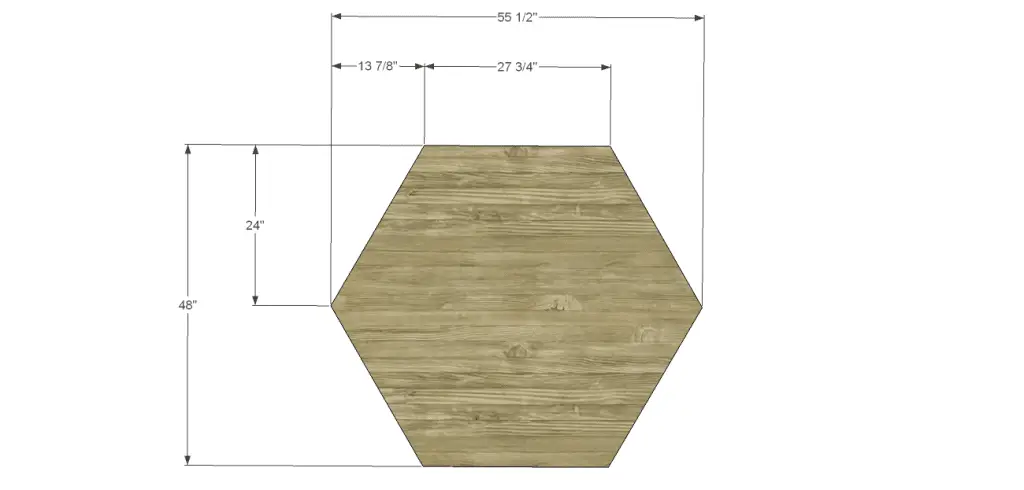
- 1 – 3/4″ plywood at 48″ x 55-1/2″ – Top
Notes:
Edge banding will be applied to the exposed edges of the plywood prior to assembly.
Step One
Cut the pieces for the legs. Cut the taper using a jigsaw, bandsaw, or tapering jig on the table saw.
Step Two
Cut the pieces for the aprons. With the pocket hole jig set for 3/4″ material, drill pocket holes in each end of the apron pieces. Assemble the table frame as shown – the tapers of the legs will face each other at the shorter sides – using glue and 1-1/4″ pocket hole screws. The outside face of each apron will be flush with the outside face of the legs.
Step Three
Cut the pieces for the center supports and drill pocket holes at each end. Secure to the longer stretchers using glue and 1-1/4″ pocket hole screws.
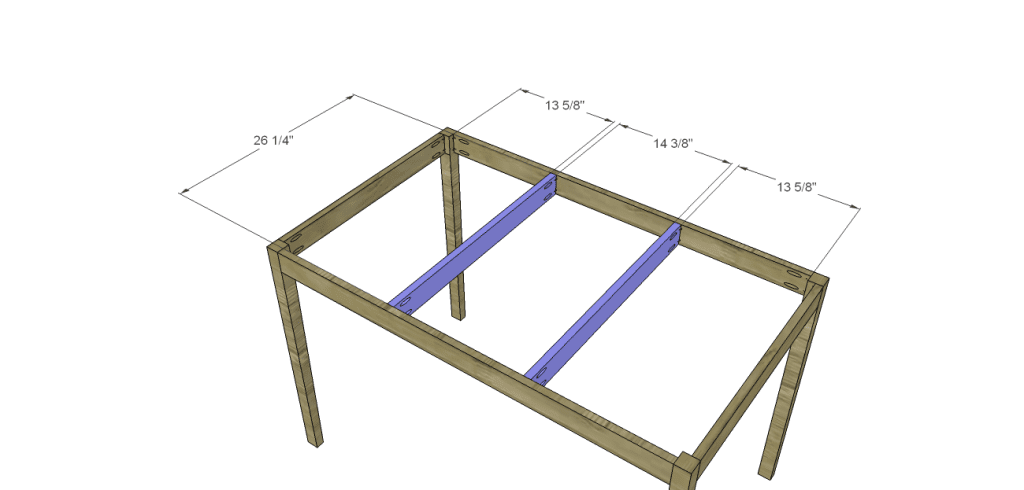
Step Four
Cut the pieces for the stretchers and drill pocket holes at each end. Secure the stretchers to the outside of the longer aprons as well as the two remaining legs using glue and 1-1/4″ pocket hole screws. The taper for the legs will face in toward the long stretchers.
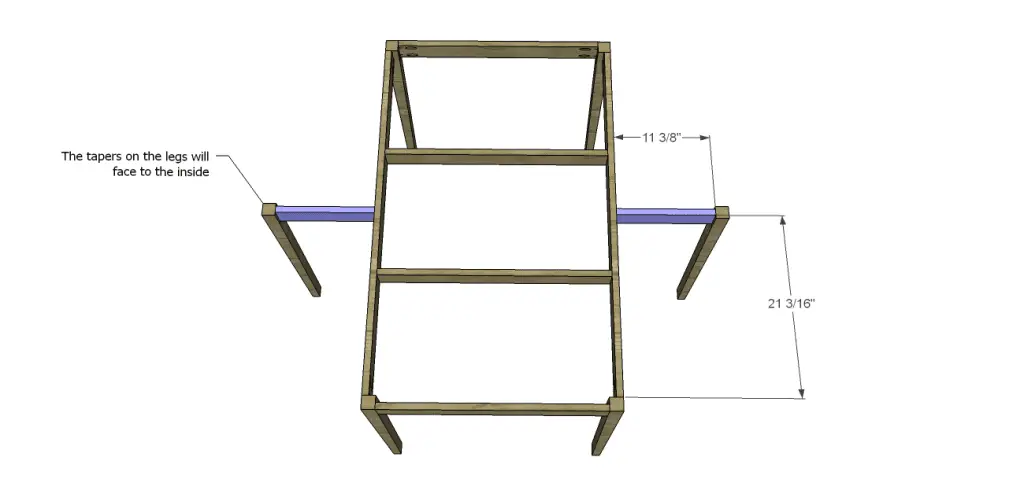
Step Five
Cut the pieces for the angled aprons. I have given the measurement as well as the degree for each angle. When attaching to the table frame, the 30 degree angled side will attach to the leg with the short stretcher and the 60 degree angled side will attach to the corner leg. Attach the aprons with glue and 1-1/4″ brad nails.
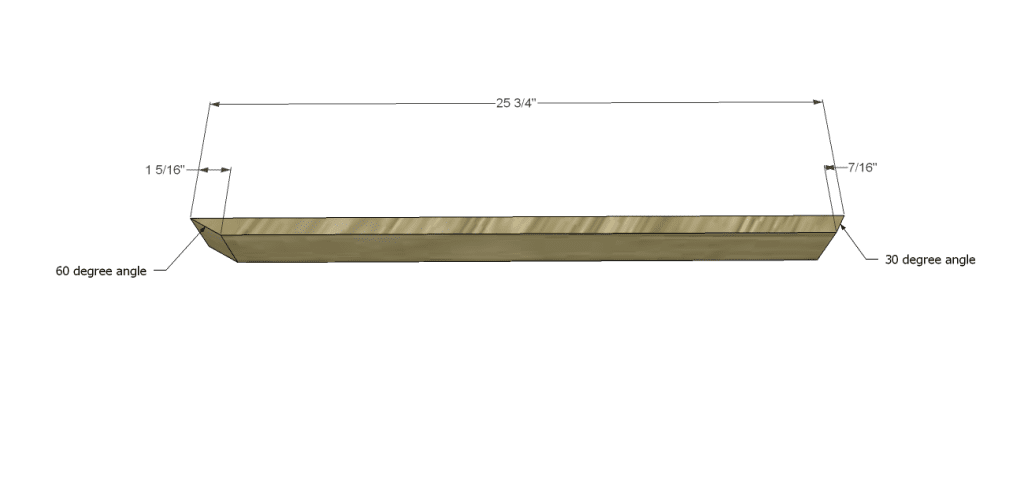
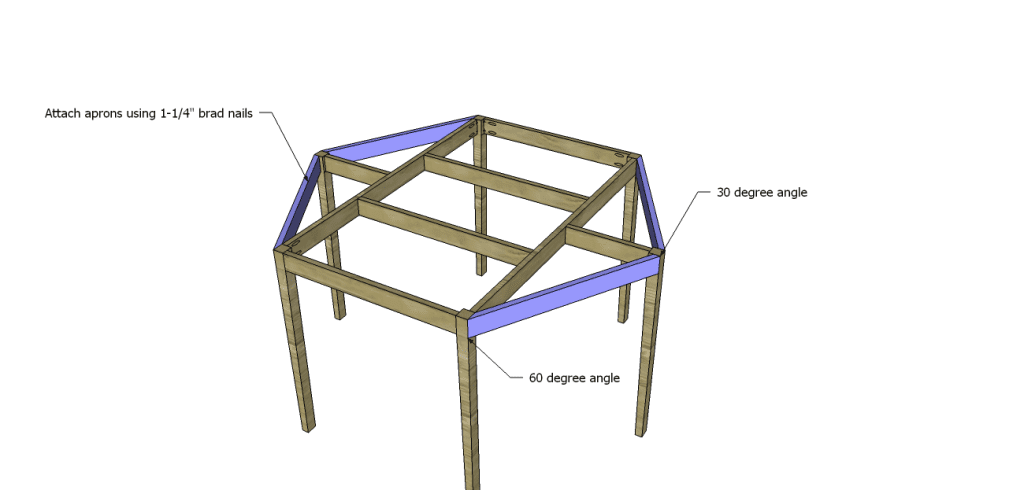
Step Six
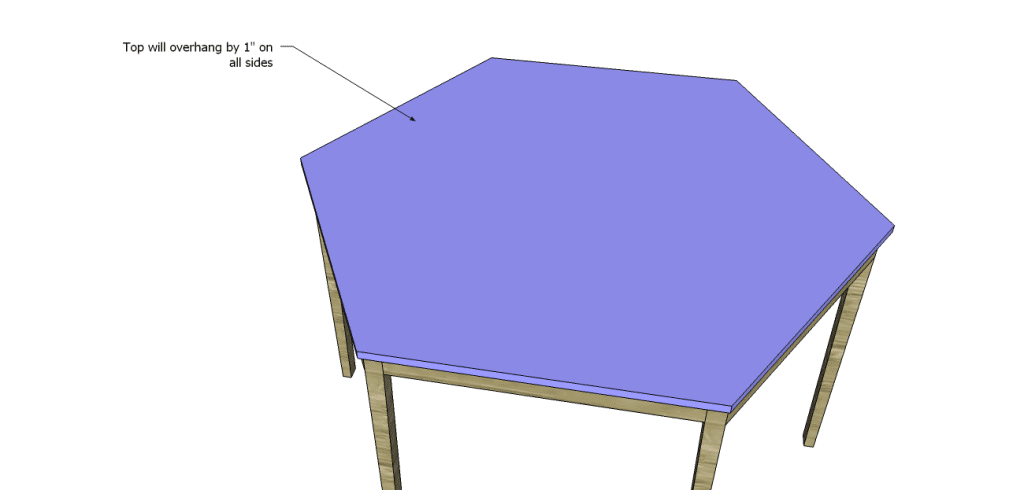
Cut the piece for the top. Spread glue along the top supports, the aprons, the stretchers, and the legs and position the top so that it overhangs by 1″ on all sides. Secure to the frame using glue and 1-1/4″ brad nails.
Finish as desired!
Have questions about the free furniture plans to build a Hexagon Dining Table? Leave a comment below!
Originally posted 2014-01-10 08:00:32.


Love this style. I have seen some hexagon shaped tables in my favorite decor store, Bombay and I remember it looking fabulous. Now I know how to make it! Excellent! Thanks Cher 🙂
Thank you, Vinma! I really love the way it looks, also!
This is a wonderful table Cher. So unusual. You little genius you. 🙂
Thank you, Elle! I really like it myself…
Nice table with lots of “leg” room…
This would have been the perfect table to seat my kids at opposite ends for meals and keep them from fighting!
Now that I see this, it makes me wonder, why you don’t see more hexagonal shaped tables?
Exactly! It is very different, isn’t it?
This looks fabulous! I love that it looks so sleek!
Thank you so much, Jessica!
[…] I shared plans for a regular hexagon table. Now, I am sharing free furniture plans to build an Elongated Hexagon Table. This table is perfect […]
[…] a Hexagon Table with Free Step-by-Step plans.Build this six-sided table for your dining room or kitchen using these free woodworking […]
[…] I shared plans for a regular hexagon table. Now, I am sharing free furniture plans to build an Elongated Hexagon Table. This table is perfect […]