
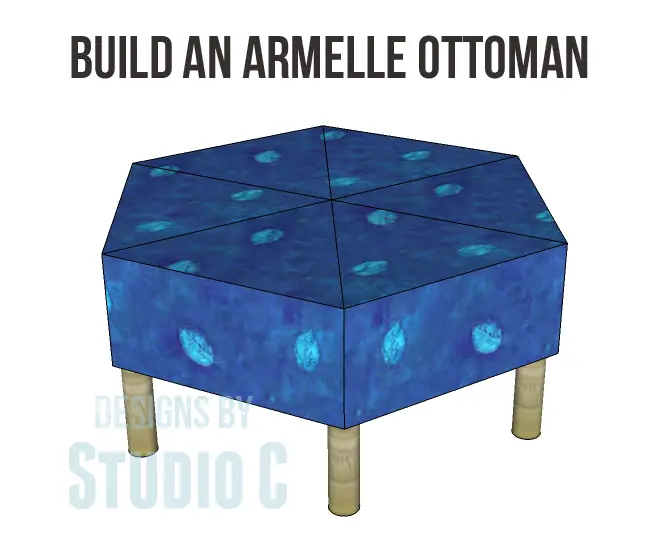
Build an Armelle Ottoman
A Fabulous DIY Upholstered Ottoman
I don’t have many plans for ottomans, especially for hexagon-shaped ottomans! The free DIY woodworking plans to build an Armelle ottoman are super-cool and I’ve even included plans for a pattern for the fabric cover, which requires basic sewing skills. If you can sew a straight line, you can sew this cover!
Materials:
- 1-1/4″ screws
- 3″ screws
- 1-1/4″ brad nails, optional
- 6 – 6″ furniture legs (<– affiliate link!)
- 3 yds. fabric – upholstery, drapery, or cotton duck
- 3 yds. craft batting (very thin)
- 3 yds. upholstery batting
- Stapler & staples
- Finishing supplies
Lumber:
- 1 sheet of 3/4″ plywood or MDF
Cut List:
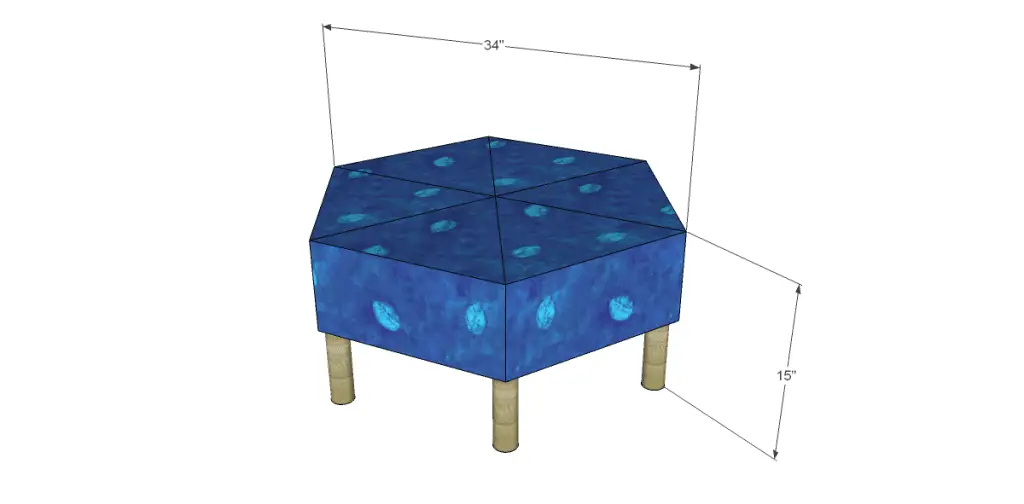
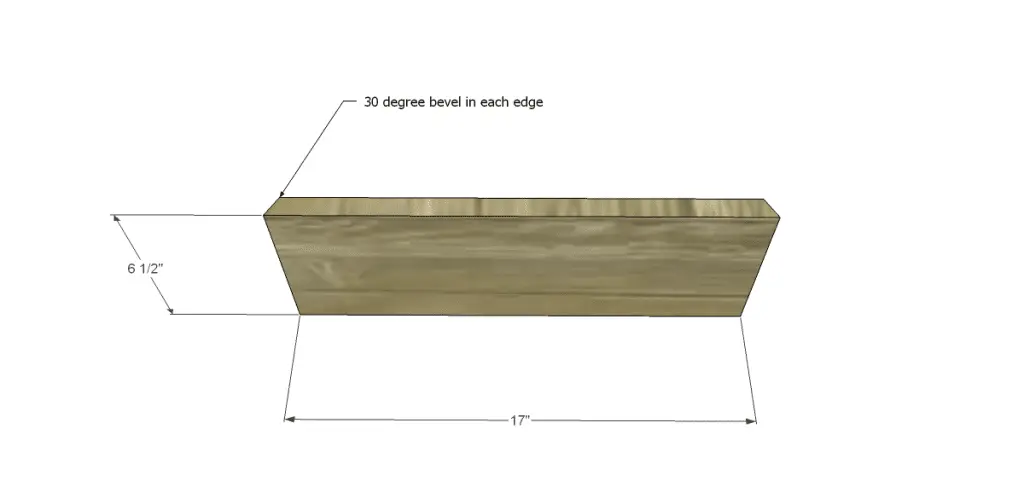
- 6 – 6-1/2″ x 17″ – Frame
- 2 – 3/4″ material at 34″ square
Click on the drawings for a larger view!
Step One
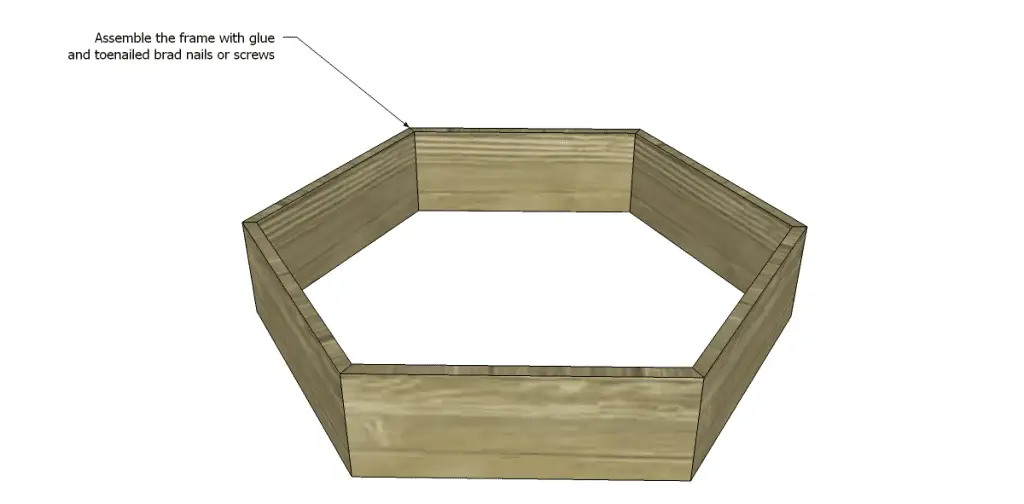
Cut the pieces for the frame. It may be easier to rip a strip off of the sheet of plywood at 6-1/2″ wide then cut each piece individually on a miter saw with a 30 degree bevel at each end. Secure the pieces together using glue and toenailed 1-1/4″ brad nails or screws.
 Step Two
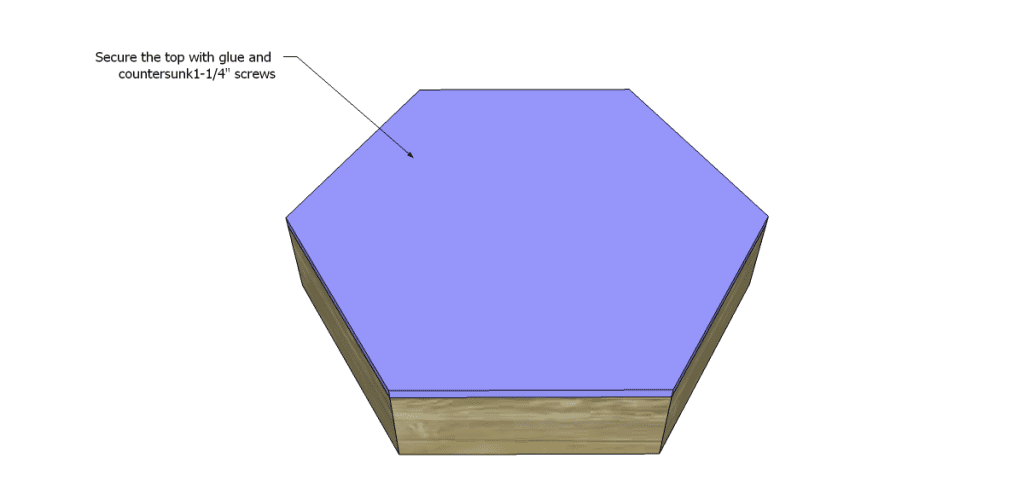
Cut the pieces for the top and bottom. Position the frame on the piece for the top and trace around the frame. Cut out the shape using a jigsaw. Secure the top to the frame using glue and 1-1/4″ countersunk screws.
Step Three
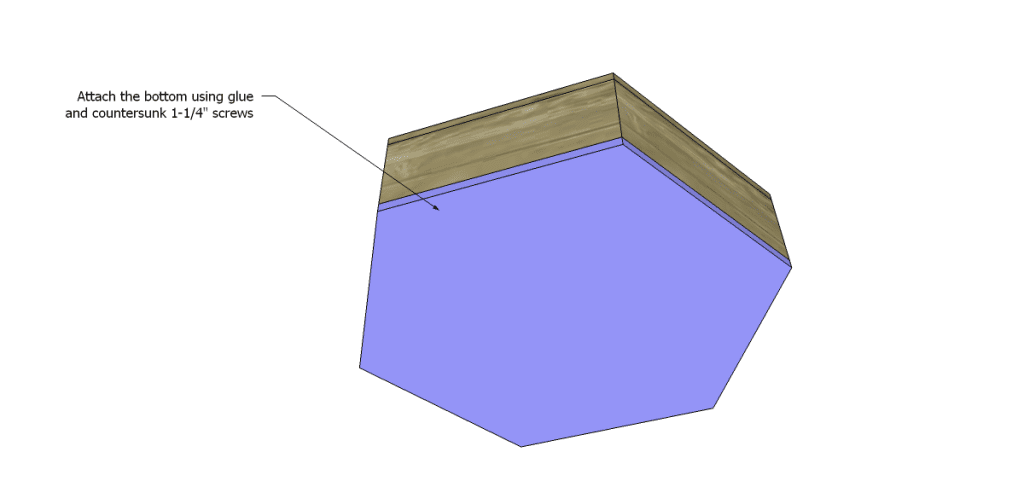
Cut out and secure the bottom piece in the same manner.
Step Four
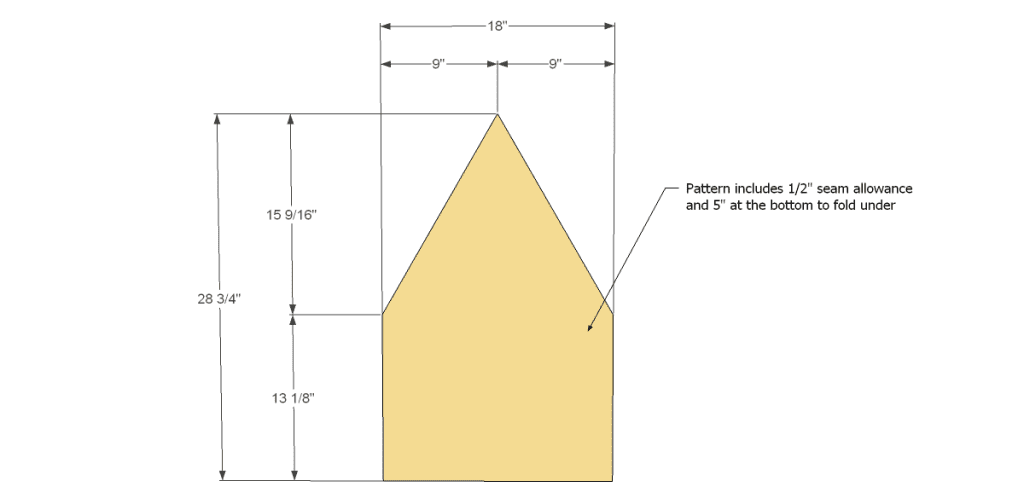
Create a pattern for the fabric as shown in the drawing. The pattern includes a 1/2″ seam allowance as well as 5″ to fold to the back and secure. Cut six pieces of fabric and six pieces of craft batting. Sandwich two pieces of fabric (right sides together) between two pieces of batting and sew along one angled edge continuing along the straight edge to create one portion of the cover. Continue layering the pieces all the way around until the cover is constructed. Set the cover aside.
Step Five
Using the upholstery batting, cut a strip to go around the sides of the ottoman and secure with staples. Cut a piece of batting for the top and secure with staples. Depending on the width of the batting, it may have to be pieced on the top. Carefully slide the fabric cover over the ottoman. It should be a snug fit. Secure the cover on the bottom with staples. Install the furniture leg plates according to the manufacturer’s instructions, then install the legs.
Drop me a line at cher {at} designsbystudioc {dot} com if you have any questions! Hope you enjoy the free DIY woodworking plans to build an Armelle ottoman!!
Originally posted 2013-07-19 08:00:47.
