Plans to Build a Long Outdoor Sofa
DIY Furniture Plans – New Plan for Outdoor Lounging
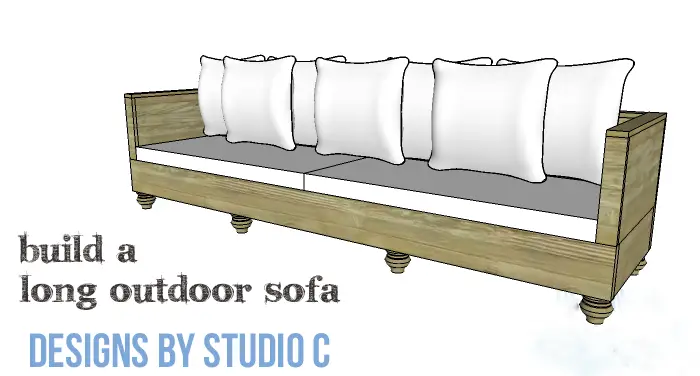
Hey there, friends! It’s that time of year again – time to start thinking about outdoor living! Who doesn’t love the idea of a comfy, cozy sofa to lounge on while enjoying the fresh air? Well, we’ve got just the thing for you – our DIY plans for a Long Outdoor Sofa! Don’t let the heavy appearance fool you – this sofa is actually super easy to build, with 1/4″ plywood panels on the sides and back. Plus, it’s designed to fit two 22″ x 48″ bench seat cushions, which you can easily find at most home improvement or retail stores. Add a few outdoor pillows and you’ll have the best seat in the house – or rather, outside of it! Happy building!
Materials:
- 2-1/2″ pocket hole screws (for outdoor use)
- 1-1/4″ brad nails (for outdoor use)
- 2″ brad nails (for outdoor use)
- 1-1/2″ screws (for outdoor use)
- 2-1/2″ screws (for outdoor use)
- 8 – 4″ bun feet with mounting plates and screws (<– affiliate link!)
- Wood glue (make sure it also rated for outdoor use)
- Sandpaper (100, 150, 220 grits)
- Finishing supplies (primer & paint, or stain, sealer)
Tools Needed:
- Miter saw or Circular saw
- Table saw
- Drill
- Pocket hole jig
- Pneumatic brad nailer with compressor
- Sander
Lumber:
All lumber (with the exception of the plywood) should be rated for exterior use
- 3 – 1×3 at 8′
- 6 – 1×6 at 10′
- 1 – 2×2 at 4′
- 4 – 2×3 (or 2×4) at 8′
- 1 – 2×8 at 8′
- 2 – 2×8 at 10′
- 1 – 4′ x 8′ sheet of 1/4″ plywood
Cut List:
- 2 – 2×8 at 101″ – Seat Frame
- 2 – 2×8 at 22-1/2″ – Seat Frame
- 2 – 2×8 (ripped to 6-1/2″ wide) at 22-1/2″ – Center Seat Supports
- 2 – 2×2 at 22-1/2″ – Outer Seat Supports
- 6 – 1×6 at 98″ – Seat Slats
- 8 – 2×2 at 3″ – Feet Supports
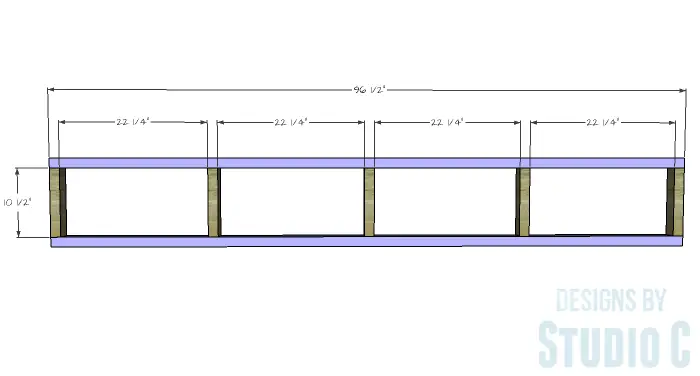
- 2 – 2×3 (ripped to 2″ wide) at 96-1/2″ – Back Frame
- 5 – 2×3 (ripped to 2″ wide) at 10-1/2″ – Back Frame
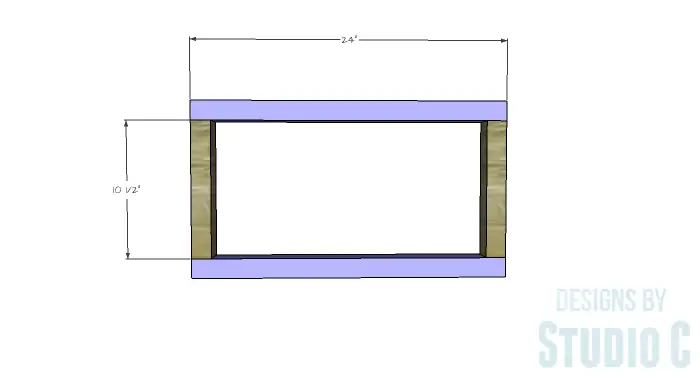
- 4 – 2×3 (ripped to 2″ wide) at 24″ – Arm Frame
- 4 – 2×3 (ripped to 2″ wide) at 10-1/2″ – Arm Frame
- 2 – 1/4″ plywood at 13-1/2″ x 96″ – Inner & Outer Back Panels
- 2 – 1/4″ plywood at 13-1/2″ x 24″ – Outer Arm Panel
- 2 – 1/4″ plywood at 13-1/2″ x 21-3/4″ – Inner Arm Panel
- 4 – 1×3 at 13-1/2″ – Front & Back Arm Trim
- 2 – 1×3 at 25-1/2″ – Upper Arm Trim
- 1 – 1×3 at 96″ – Upper Back Trim
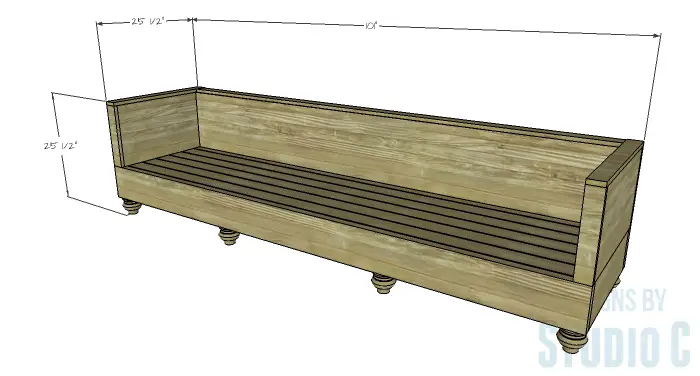
Click on the drawings for a larger view!
Notes about the project:
The plywood will not be rated for exterior use. Therefore, it will have to be sealed with exterior paint or stain and the seams (where the panels meet the upper trim, side, trim and seat of the sofa) can be sealed with clear silicone after finishing just to keep any moisture from getting to the edges.
Pressure treated wood can be painted or stained after it dries which can take anywhere from a couple of weeks to a month.
The bun feet will definitely have to be protected with exterior paint, stain or spar varnish.
If you cannot find 2-1/2″ pocket hole screws for outdoor use, I have successfully used exterior deck screws in pocket holes. The trick is to not sink them as deep as normal. Use plenty of glue and only drive the screws to pull the two pieces together.
Step One
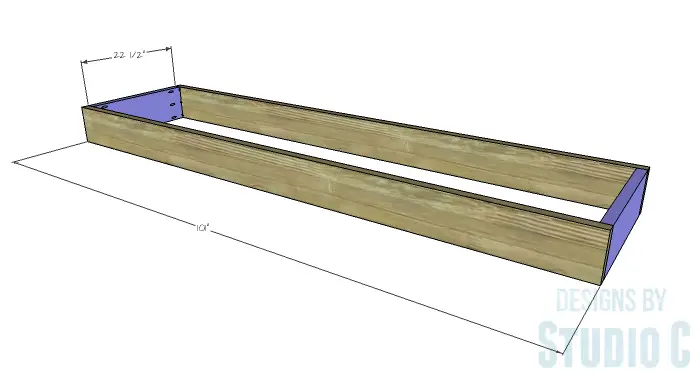
Cut the pieces for the sofa frame. With the pocket hole jig set for 1-1/2″ material, drill pocket holes in each end of the side frame pieces. Assemble the frame using glue and 2-1/2″ pocket hole screws.
Step Two
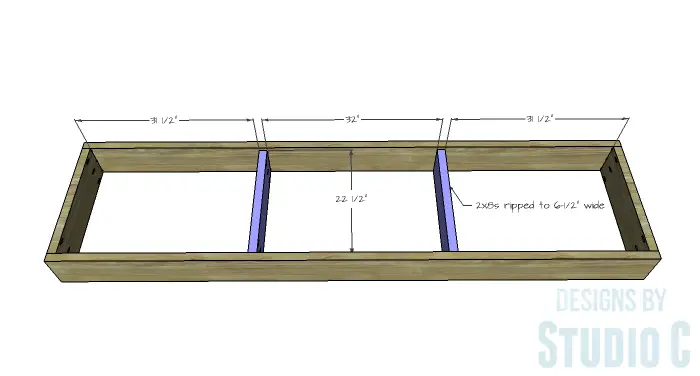
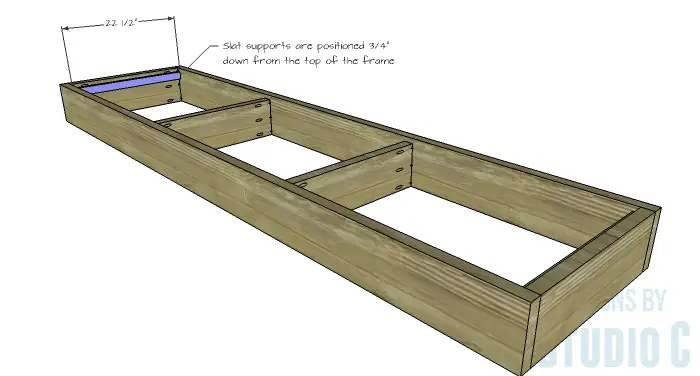
Cut the 2×8 pieces for the center seat supports and rip them to 6-1/2″ wide. Drill pocket holes in each end and secure them to the inside of the seat frame using glue and 2-1/2″ pocket hole screws. The bottom edges will be flush with the bottom edges of the seat frame leaving approximately 3/4″ at the top for the seat slats.
Step Three
Cut the 2×2 pieces for the outer seat supports. Secure them to the side pieces of the frame, positioning them 3/4″ down from the top of the frame, using glue and 2-1/2″ screws.
Step Four
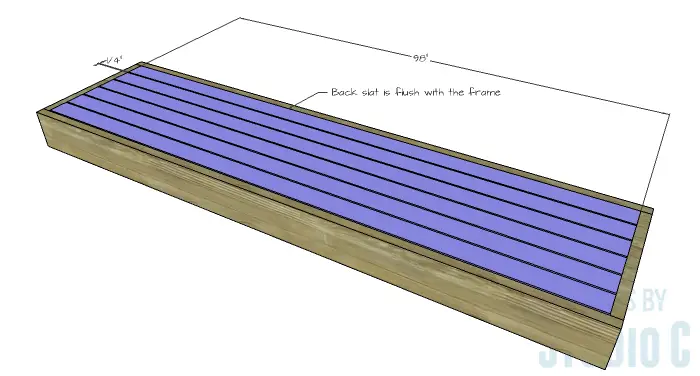
Cut the pieces for the seat slats. The rear seat slat will sit flush with the long end of the frame while the remaining slats will be spaced 1/4″ apart. Secure the slats using glue and 1-1/2″ screws.
Step Five
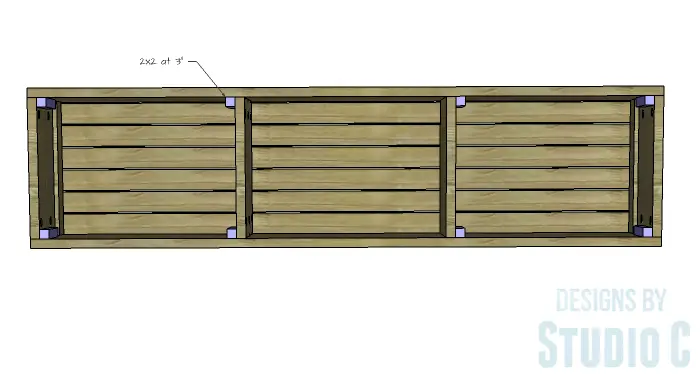
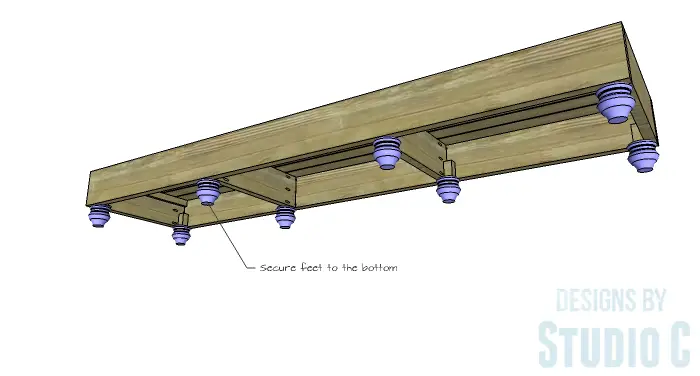
With help, flip the seat frame over. Cut the pieces for the feet supports. Secure the feet supports to the sides and center supports of the seat frame using glue and 2-1/2″ screws. The bottom of the supports will be flush with the bottom of the frame.
Install the mounting plates for the feet on the supports and the framing to which it is attached, then install the feet. Flip the frame back over so it is resting on the feet.
Step Six
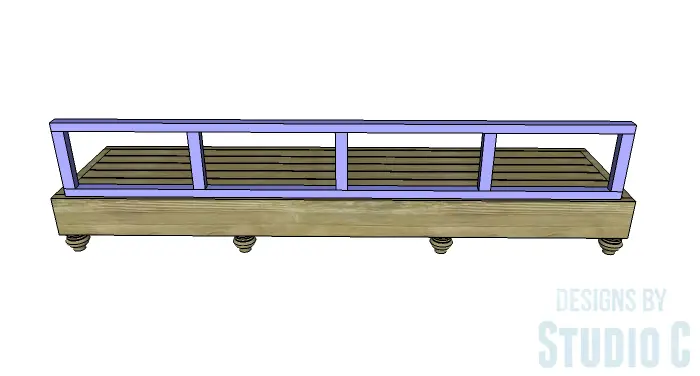
Cut the pieces for the back frame and drill pocket holes in each end of the shorter pieces. Assemble the frame using glue and 2-1/2″ pocket hole screws.
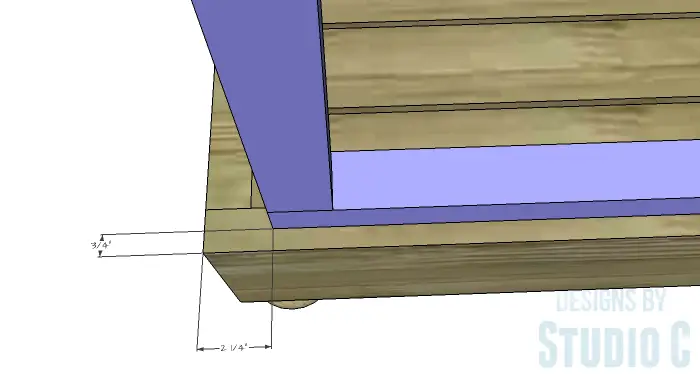
Once the frame is assembled, position it on the rear portion of the seat frame – 3/4″ in from the back edge and 2-1/4″ in from each side edge. The back frame will be secured to a portion of the back piece of the seat frame as well as to each center seat support. Pre-drill holes as necessary, then secure the back frame using glue and 2-1/2″ screws.
Step Seven
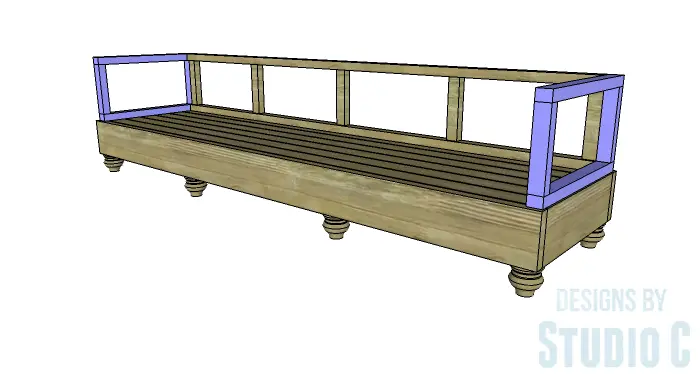
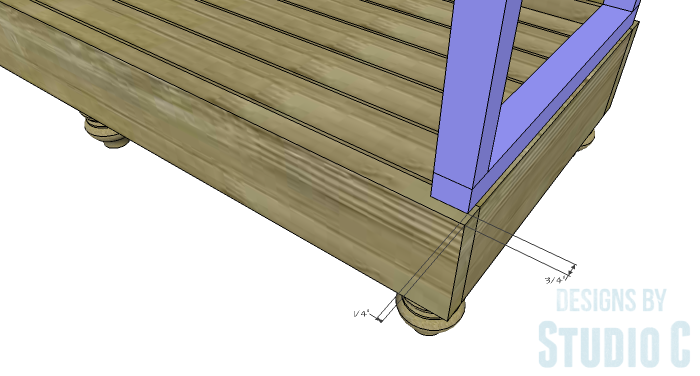
Cut the pieces for the arm frames and drill pocket holes in each end of the shorter pieces. Assemble the frames using glue and 2-1/2″ pocket hole screws.
The side frames will be positioned 1/4″ in from each side, and 3/4″ from the front and back. The arm frames will be secured mainly to the sides of the seat frames. Pre-drill holes as necessary, then secure the side frames using glue and 2-1/2″ screws. A couple of extra long screws can be used to secure the arm frames to the back frame.
Step Eight
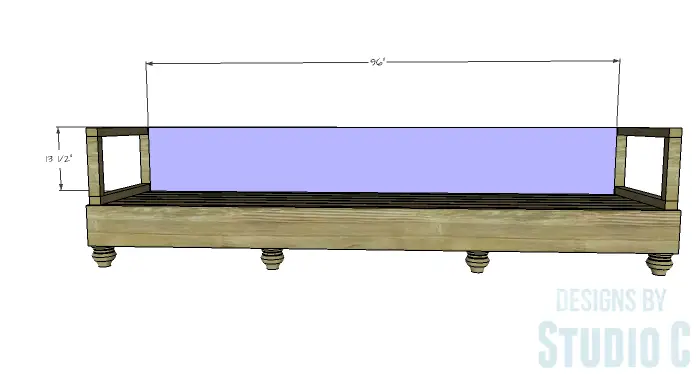
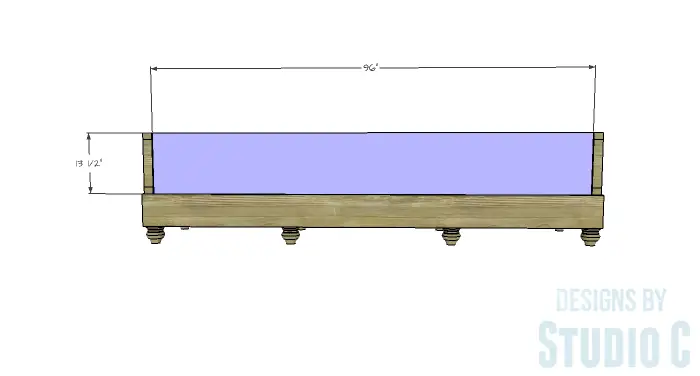
Cut the pieces for the inner and outer back panels. The inner back panel will fit between the arms and be secured to each of the framing pieces. Secure in place using glue and 1-1/4″ brad nails.
The back panel will also fit between the arm frames and be secured in the same manner as the front panel.
Step Nine
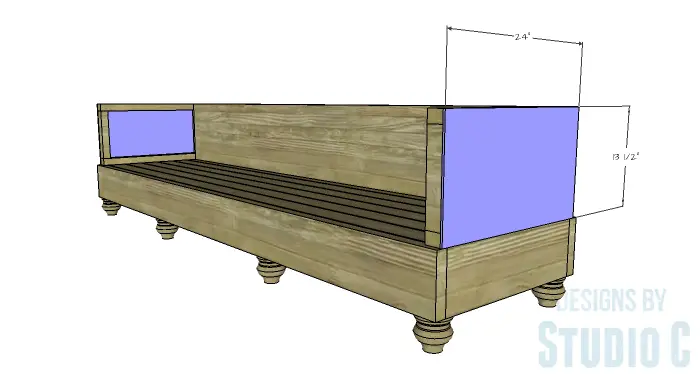
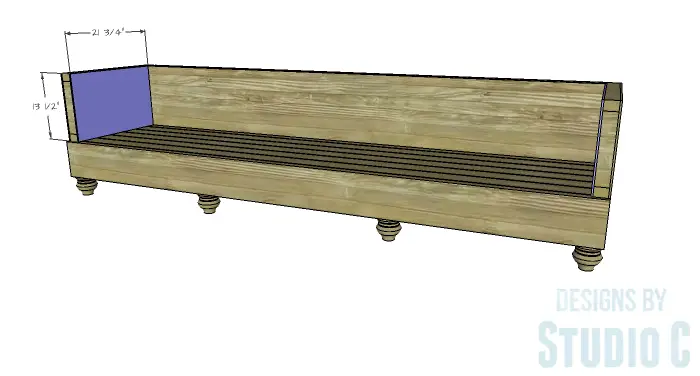
Cut the pieces for the arm panels. The outer arm panel will rest on the side edge of the seat frame and will cover the entire arm frame. Secure in place using glue and 1-1/4″ brad nails.
The inner arm panel will butt up against the inner back arm panel. Secure in place using glue and 1-1/4″ brad nails.
Step Ten
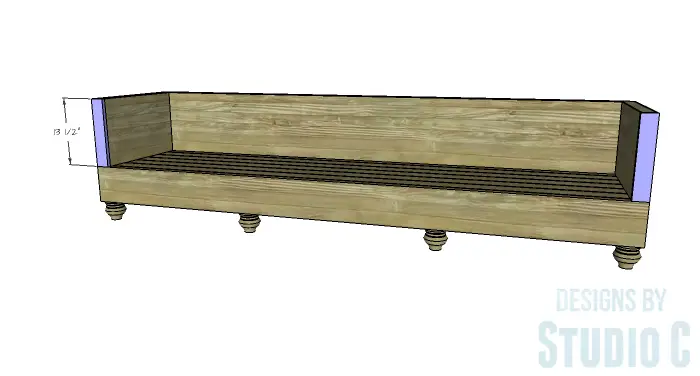
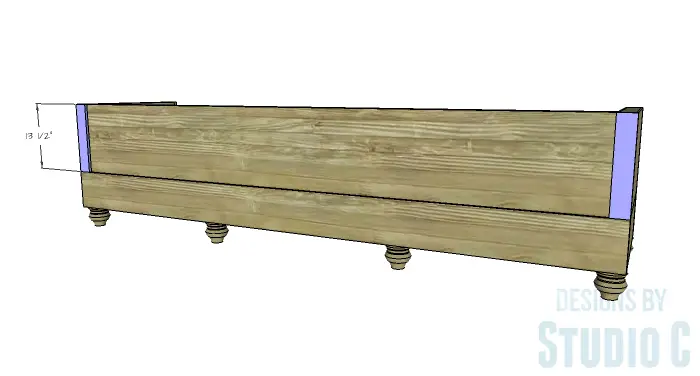
Cut the pieces for the front and back arm trim, as will as the upper trim. Secure the front and back arm trim first, using glue and 2″ brad nails. The side edges of the trim will be flush with the inner and outer arm panels. The outer face of the front trim piece will be flush with the front of the seat frame. The outer face of the back arm trim piece will be flush with the back of the seat frame, and one side of each piece will butt up against the outer back panel.
Position the upper arm trim pieces on top of the arm frame, securing in place using glue and 2″ brad nails. Position the upper back trim between the arms on top of the back frame and secure in place using glue and 2″ brad nails.
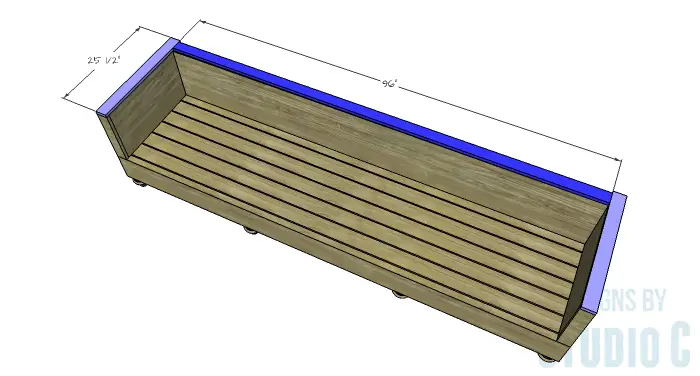
Finish the sofa as desired.
As mentioned above, the sofa will accommodate two 22″ x 48″ bench seat cushions or you can always follow this tutorial to make your own with the outdoor fabric of your choice! Have any questions about the DIY furniture plans to build a Long Outdoor Sofa? Let me know by leaving a comment below!
Originally posted 2016-05-02 08:00:02.


[…] Yourself a Long Outdoor SofaBuild a long outdoor sofa using these free step-by-step woodworking […]