Build a Roland Media Stand
How to Build a Rustic Media Stand with Storage
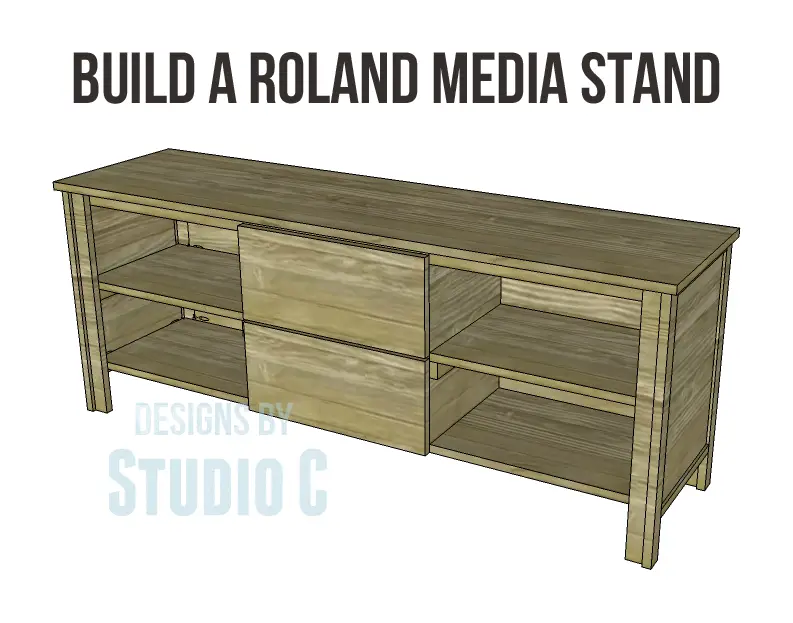
There can never be too many media stand options, can there? I’ve got a few more up my sleeve while I build up the collection! Today, I’m sharing free DIY woodworking plans to build a Roland Media Stand with shelves on either side, plus two roomy drawers in the center. It is an easy build (I only provide easy plans, right?) and is inexpensive!
Materials:
- 1-1/4″ pocket hole screws
- 1-1/4″ brad nails
- 2 drawer pulls
- Edge banding, optional (<– affiliate link!)
- Finishing supplies
Lumber:
- 4 – 1×2 at 8′
- 2 – 1×8 at 8′
- 2 sheets of 3/4″ plywood
Cut List:
- 8 – 1×2 at 22-3/4″ – Legs
- 4 – 1×2 at 13-1/4″ – Side Frames
- 2 – 3/4″ plywood at 13-1/4″ x 17-1/2″ – Side Panels
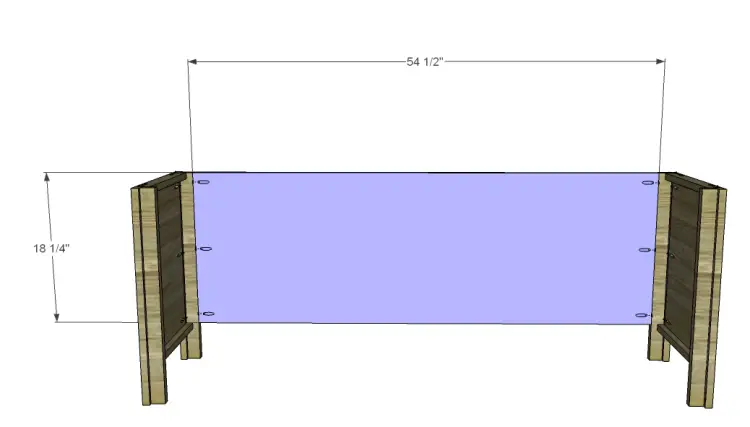
- 1 – 3/4″ plywood at 18-1/4″ x 54-1/2″ – Back
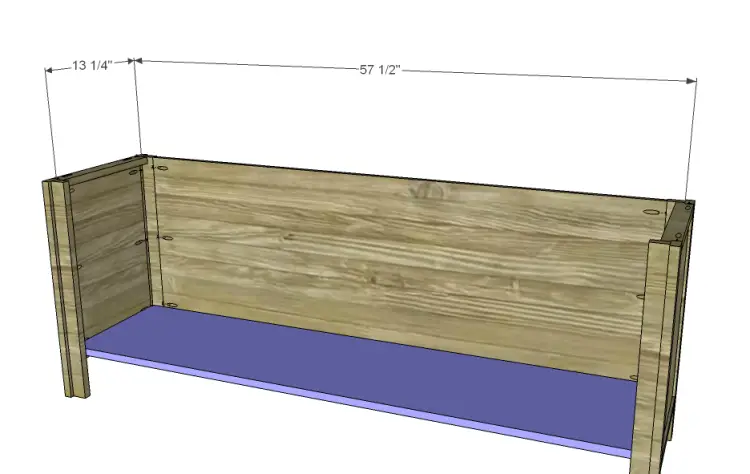
- 1 – 3/4″ plywood at 13-1/4″ x 57-1/2″ – Bottom
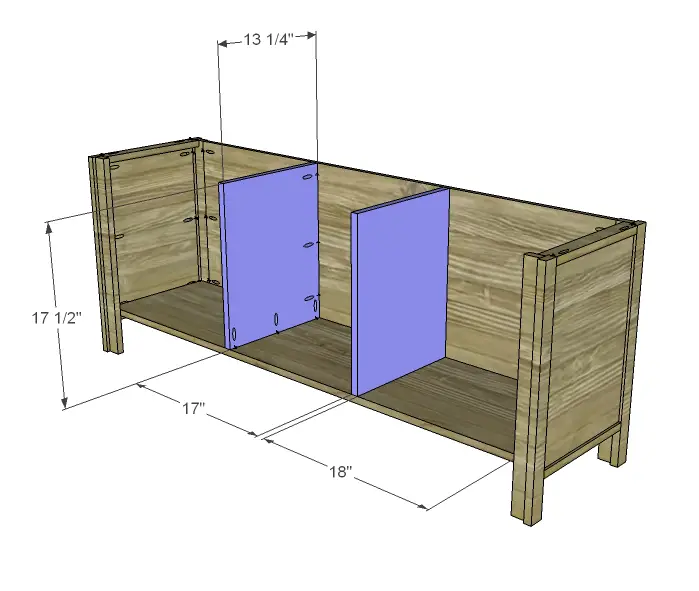
- 2 – 3/4″ plywood at 13-1/4″ x 17-1/2″- Dividers
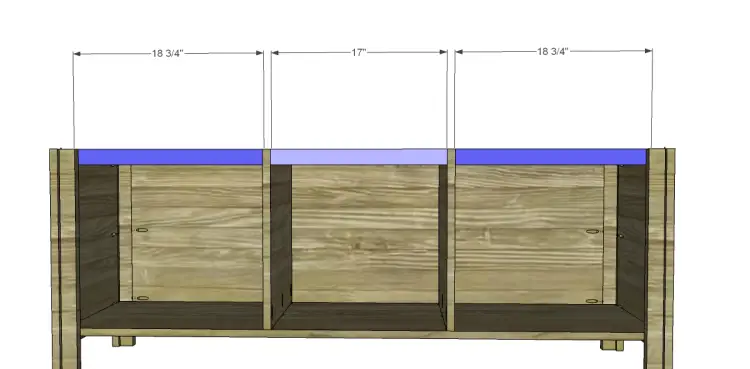
- 1 – 1×2 at 17″ – Center Stretcher
- 2 – 1×2 at 18-3/4″ – Stretchers
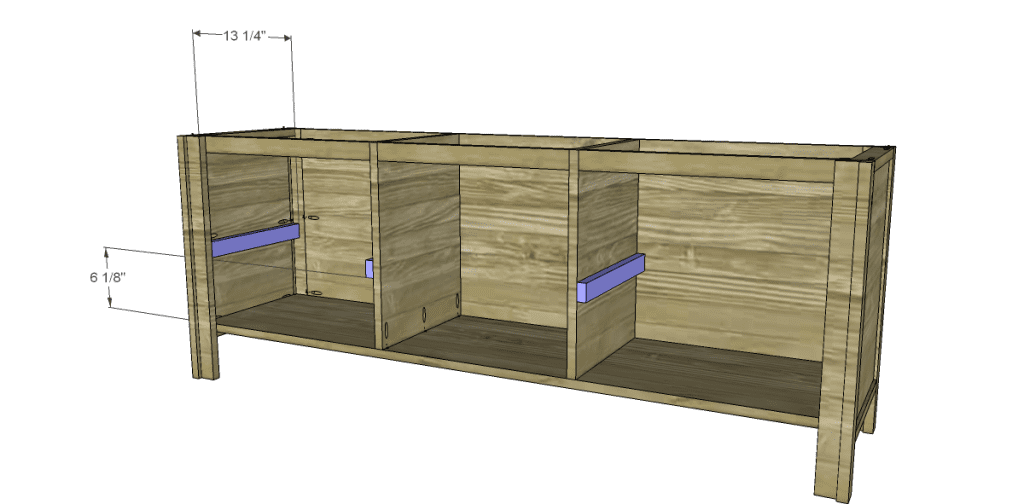
- 4 – 1×2 at 13-1/4″ – Shelf Supports
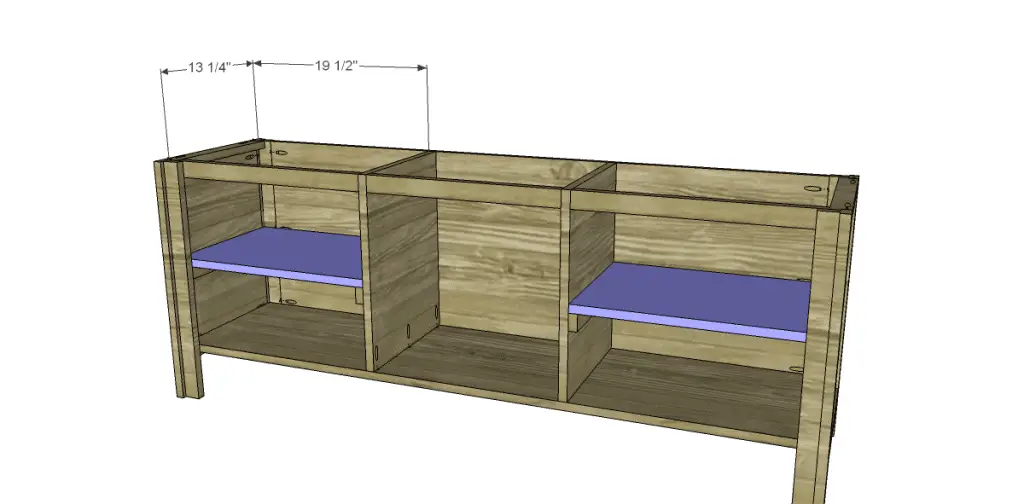
- 2 – 3/4″ plywood at 13-1/4″ x 19-1/2″ – Shelves
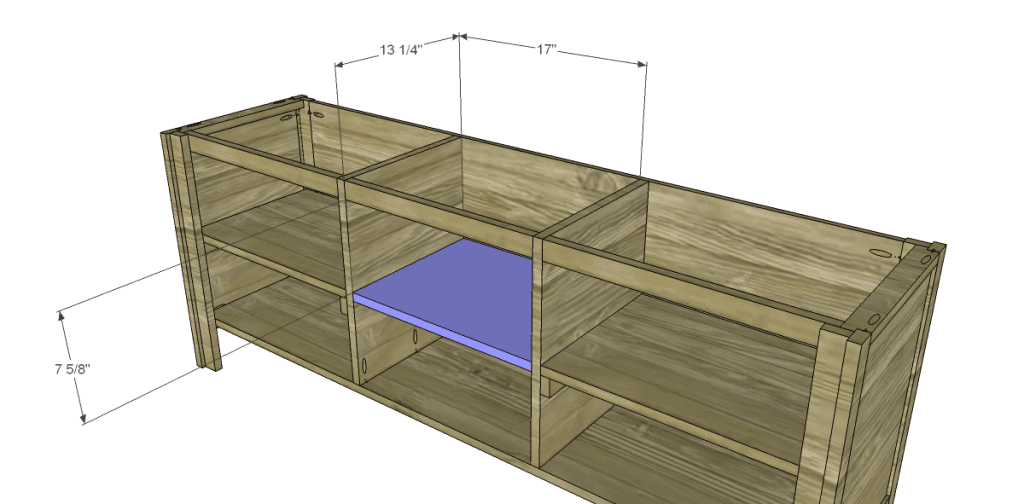
- 1 – 3/4″ plywood at 13-1/4″ x 17″ – Drawer Divider
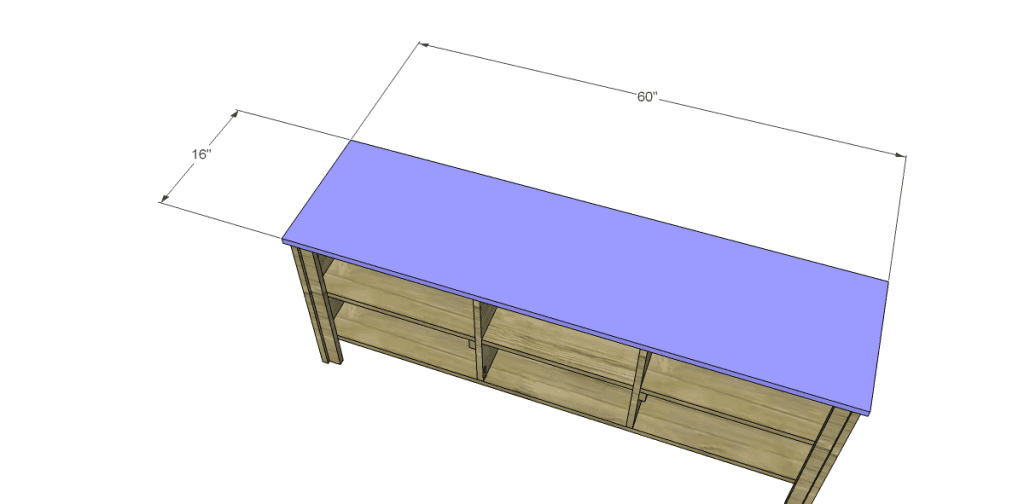
- 1 – 3/4″ plywood at 16″ x 60″ – Top
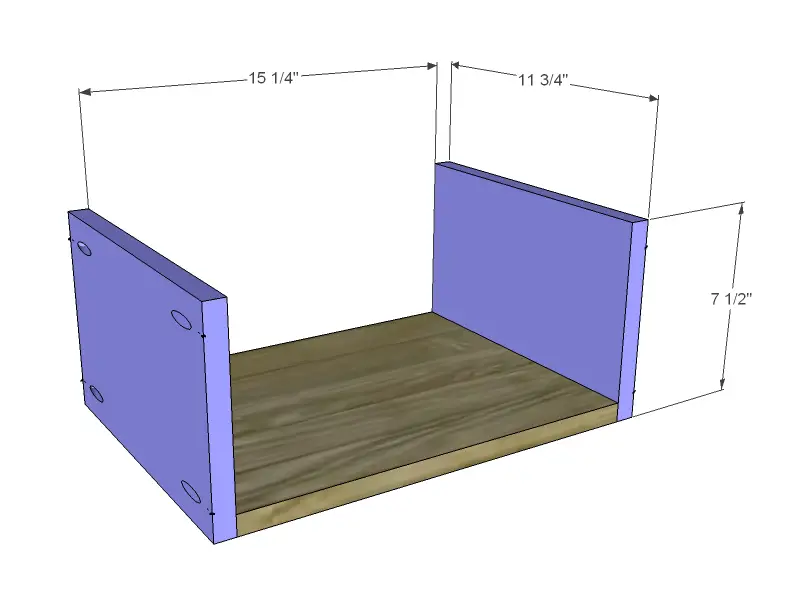
- 2 – 3/4″ plywood at 11-3/4″ x 15-1/4″ – Drawer Bottoms
- 4 – 1×8 at 11-3/4″ – Drawer Sides
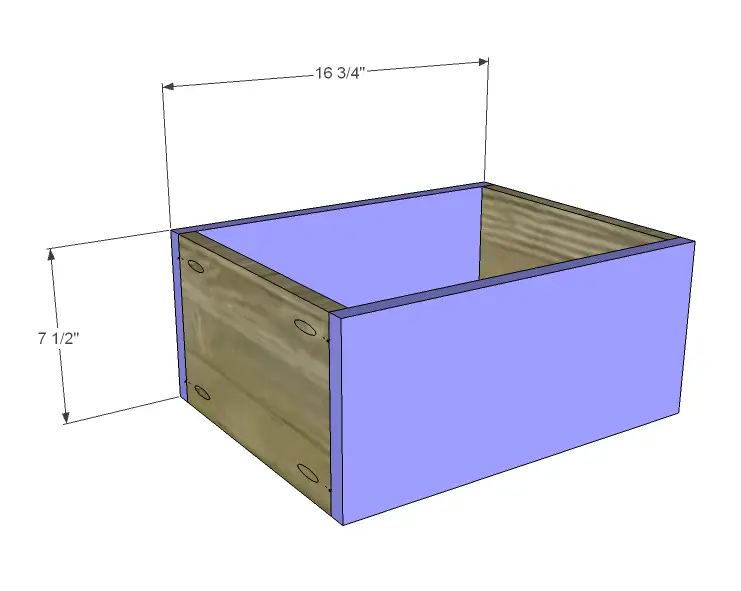
- 4 – 1×8 at 16-3/4″ – Drawer Box Fronts & Back
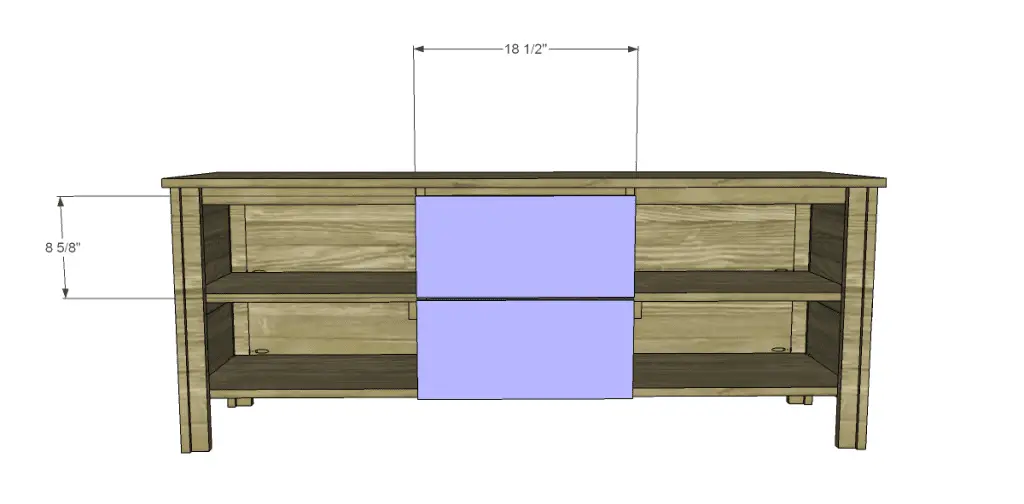
- 2 – 3/4″ plywood at 8-5/8″ x 18-1/2″ – Drawer Fronts
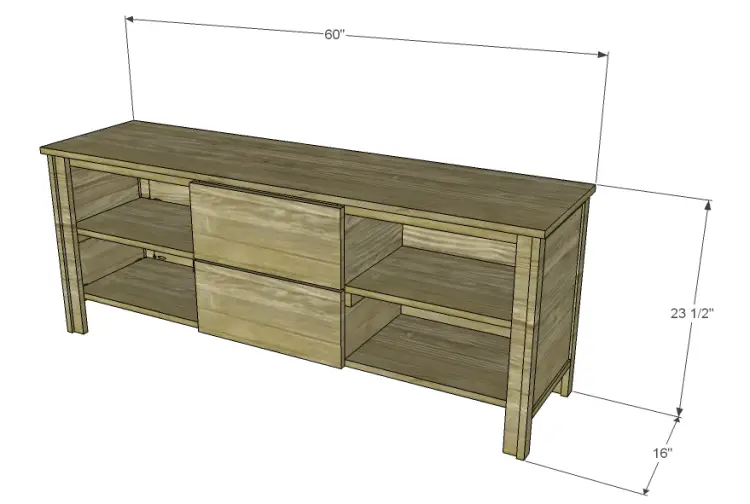
Step One
Edge banding will be applied to the exposed edges of the plywood before assembly.
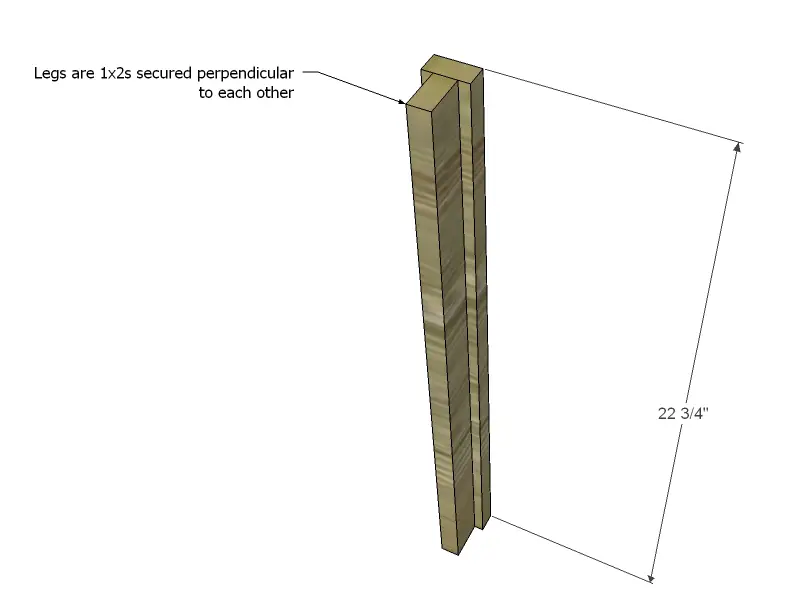
Cut the pieces for the legs. For each leg, position one 1×2 perpendicular to another 1×2 then secure using glue and 1-1/4″ brad nails.
Step Two
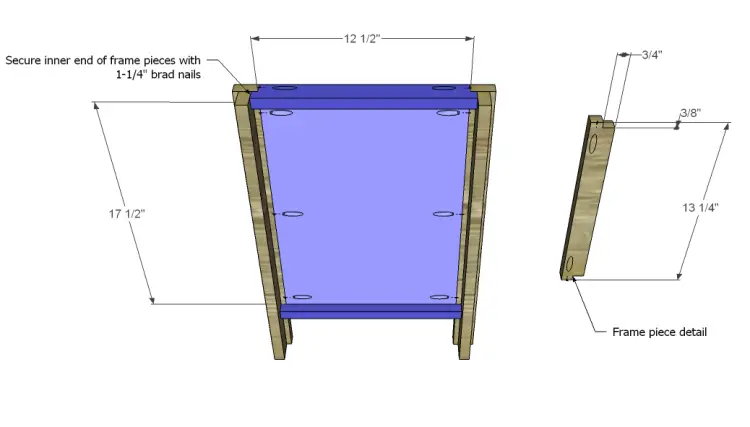
Cut the pieces for the side panels and the frame. Cut the notches in each end of the frame pieces and drill a pocket hole as shown. Drill pocket holes in the longer side edges of each panel. Position a frame piece at each end of the panel (the shorter notched edge of the frame piece will be flush with the front face of the panel) then secure using glue and 1-1/4″ brad nails.
Attach the panel assembly to the legs as shown using glue and 1-1/4″ pocket hole screws.
Step Three
Cut the piece for the back and drill pocket holes in each shorter edge. Attach to the legs of the side panels using glue and 1-1/4″ pocket hole screws.
Step Four
Cut the piece for the bottom and drill pocket hole along one long edge. The bottom piece will actually rest on the lower side frame pieces (with the edge with pocket holes facing the back) then will be secured with glue and 1-1/4″ brad nails. Secure the back edge using glue and 1-1/4″ pocket hole screws from the underside.
Step Five
Cut the pieces for the dividers. Drill pocket holes in one short edge and one long edge. There will be a left and a right so that the pocket holes will face into the drawer section and won’t have to be filled. Secure as shown using glue and 1-1/4″ pocket hole screws.
Step Six
Cut the pieces for the stretchers and drill pocket holes in each end. Secure to the legs and dividers as shown using glue and 1-1/4″ pocket hole screws.
Step Seven
Cut the pieces for the shelf supports. Secure to the side panels and dividers using glue and 1-1/4″ brad nails.
Cut the pieces for the shelves. Secure to the shelf supports using glue and 1-1/4″ brad nails.
Step Eight
Cut the piece for the drawer divider. Drill pocket holes in each side as well as the back edge. Position as shown, then secure using glue and 1-1/4″ pocket hole screws.
Step Nine
Cut the piece for the top. Position on the cabinet with 1/2″ overlapping the front and sides. Secure with glue and 1-1/4″ brad nails.
Step Ten
Cut the pieces for the drawer boxes. Drill pocket holes in each end of the sides, as well as all four edges of the bottom. Assemble as shown using glue and 1-1/4″ pocket hole screws.
Step Eleven
Cut the pieces for the drawer fronts. Mark the position for the drawer pulls and drill the holes for the hardware. Take a look at this easy tutorial on securing drawer fronts. The drawer fronts will have a 1/4″ gap between them.
Finish as desired! Since there are no drawer slides, rub a coat of paste wax on the bottom of the drawer as well as the shelves where the drawers will sit. This will allow the drawers the slide freely.
Build the best media stand on the block with the free DIY woodworking plans to build a Roland Media Stand! It can be finished in any way you choose – stained, painted, distressed, or left au naturel! Have questions? Let me know at cher {at} designsbystudioc {dot} com!
Originally posted 2013-07-31 08:00:39.


[…] a media stand with shelves on either side, plus two center drawers for hidden storage using these free […]