Build a Shiro Media Console
A Modern Media Stand Inspired by a Catalog Retailer
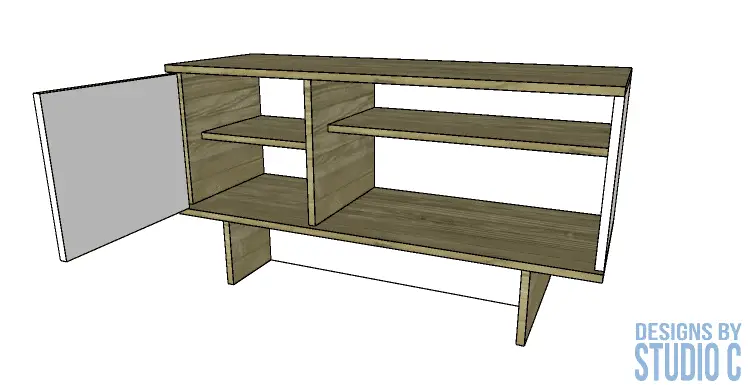
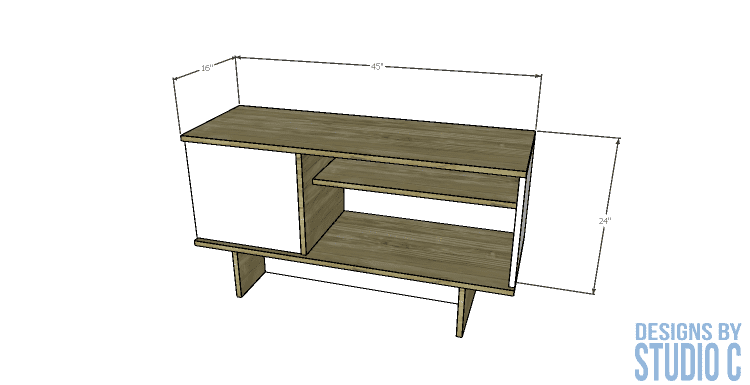
This DIY media console is inspired by the Shiro Media Console from Urban Outfitters. This media console has a sort of Asian vibe going on, and is super easy to build! The free DIY plans to build the Shiro media console feature a door with a shelf behind it, a longer open shelf and a minimalist look. The door is installed with concealed hinges and will sport a plain handle or knob. It is assembled with pocket hole screws but can also be assembled with regular countersunk screws.
Materials:
- 1-1/4” Pocket Hole Screws
- 1″ Brad Nails
- 2” Brad Nails
- Edge Banding, Optional (<– affiliate link!)
- One set of Concealed Hinges (<– affiliate link!)
- One Drawer Knob or Handle
- Wood Glue
- Sandpaper (80, 120, 220 grits)
- Finishing Supplies
Lumber:
- 1 – 2’x4′ sheet of 1/4″ plywood
- 2 – 4’x8’ sheets of 3/4” plywood
Cut List:
- 2 – 3/4″ plywood at 7-1/2″ x 16″ – Base
- 1 – 3/4″ plywood at 7-1/2″ x 31-1/2″ – Base
- 1 – 3/4″ plywood at 16″ x 45″ – Bottom
- 1 – 3/4″ plywood at 14-1/2″ x 15″ – Console Left Side (see drawings)
- 2 – 3/4″ plywood at 15-1/4″ x 15″ – Console Center Divider and Right Side
- 1 – 3/4″ plywood at 12″ x 27-1/4″ – Long Shelf
- 1 – 3/4″ plywood at 12″ x 15-1/2″ – Short Shelf
- 1 – 3/4″ plywood at 16″ x 45″ – Top
- 1 – 1/4″ plywood at 15-3/4″ x 44-1/4″ – Back
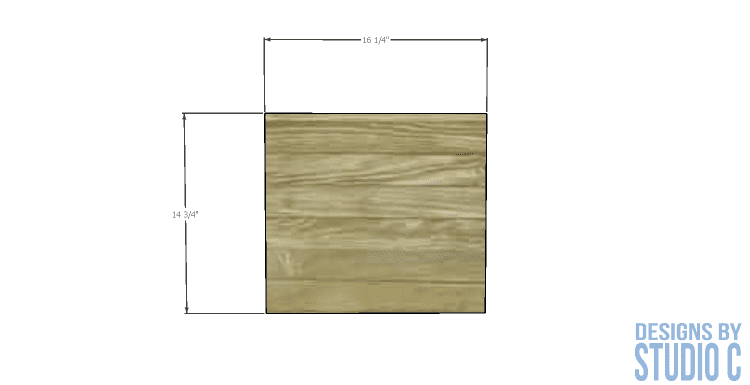
- 1 – 3/4″ plywood at 14-3/4″ x 16-1/4″ – Door
Notes about the Project:
Edge banding will be applied to the exposed edges of the plywood prior to assembly.
Step One
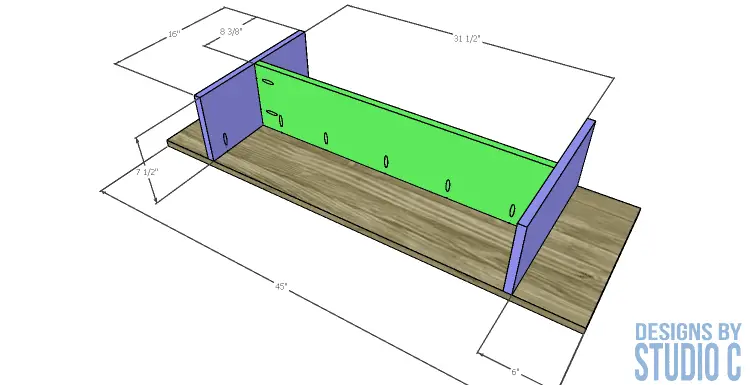
Cut the pieces for the base and bottom. With the pocket hole jig set for 3/4″ material, drill pocket holes in each end and one long edge of the longer base piece. Drill pocket holes along one long edge of the shorter base pieces. Secure the shorter base pieces to the longer base piece using glue and 1-1/4″ pocket hole screws.
Position the base assembly on the bottom piece as shown in the drawing. Secure the base to the bottom using glue and 1-1/4″ pocket hole screws.
Step Two
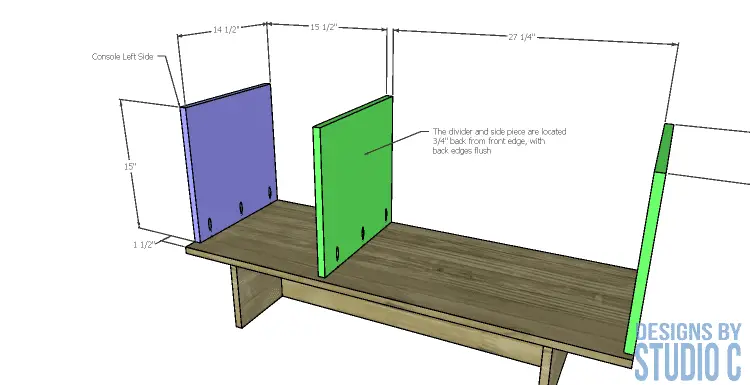
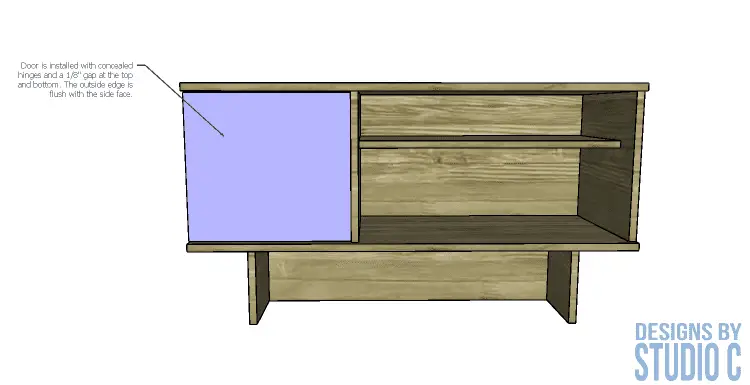
Cut the pieces for the sides and dividers. The left side piece is intentionally shorter, and the door overlays the front edge. Drill pocket holes in the lower edge of each piece. Position the piece on the top face of the bottom piece with the back edges flush, and secure in place using glue and 1-1/4″ pocket hole screws.
Step Three
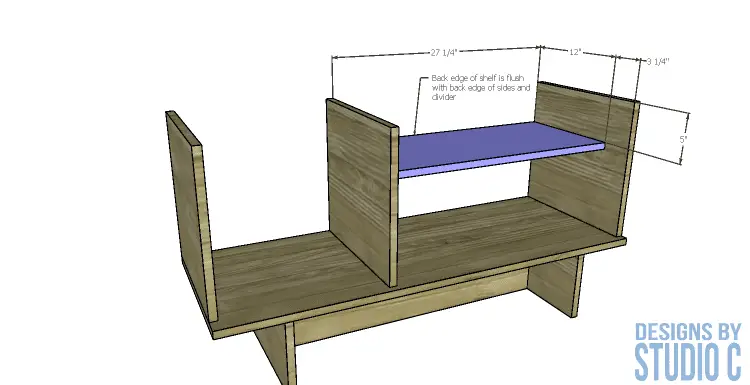
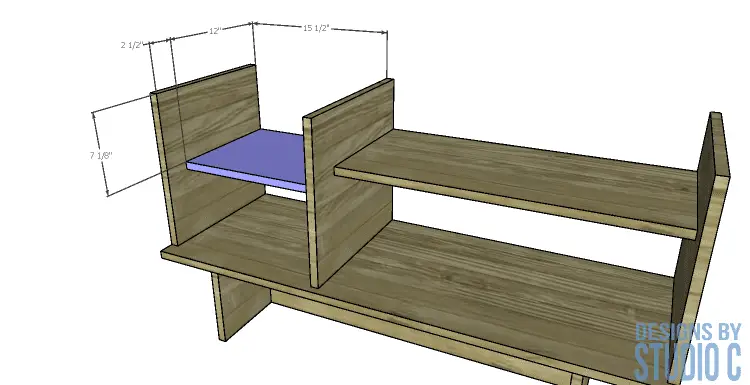
Cut the pieces for the shelves and drill pocket holes in each end. Secure the shelves (installing the longer shelf first) using glue and 1-1/4″ pocket hole screws.
Step Four
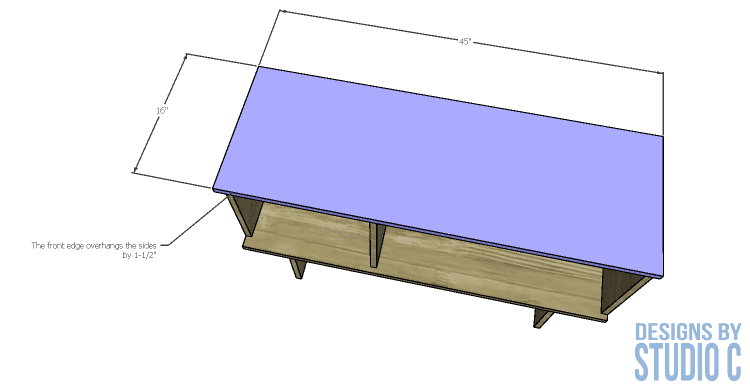
Cut the piece for the top. Secure the top to the sides and dividers, with the back edges flush, using glue and 2″ brad nails through the top.
Step Five
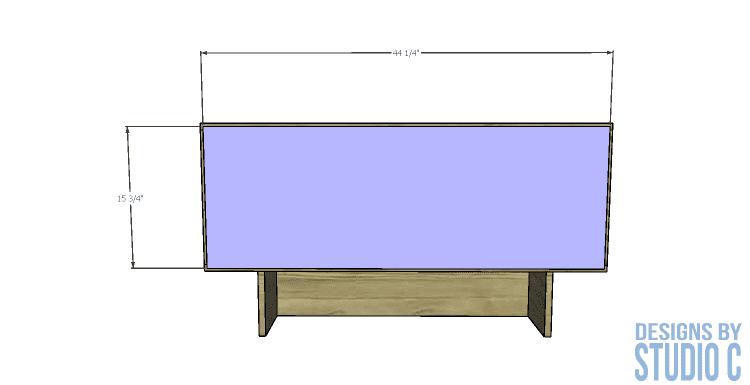
Cut the piece for the back. Center the back over the open area of the console securing in place with 1″ brad nails.
Step Six
Cut the piece for the door. Install the concealed hinges according to the manufacturer’s installation instructions. (A concealed hinge jig is really helpful! – affiliate link) The door is located so that the outside edge is flush with the side face. There will be a 1/8″ gap at the top and the bottom of the door in the opening. Install the knob or handle on the door.
Finish as desired!
This media console can be finished in a variety of ways, and will look great in any room! Have any questions about the free DIY plans to build a UO inspired Shiro media console? Leave a comment below!

