
An Easy to Make Knock-Off Lamp Inspired by Pottery Barn
Hey there! Making lamps from scratch is actually super easy! I recently came across this awesome lamp in a catalog and thought it would be a breeze to recreate using parts from the local hardware store (I’ve even included some affiliate links for easy ordering if you prefer shopping from home!).
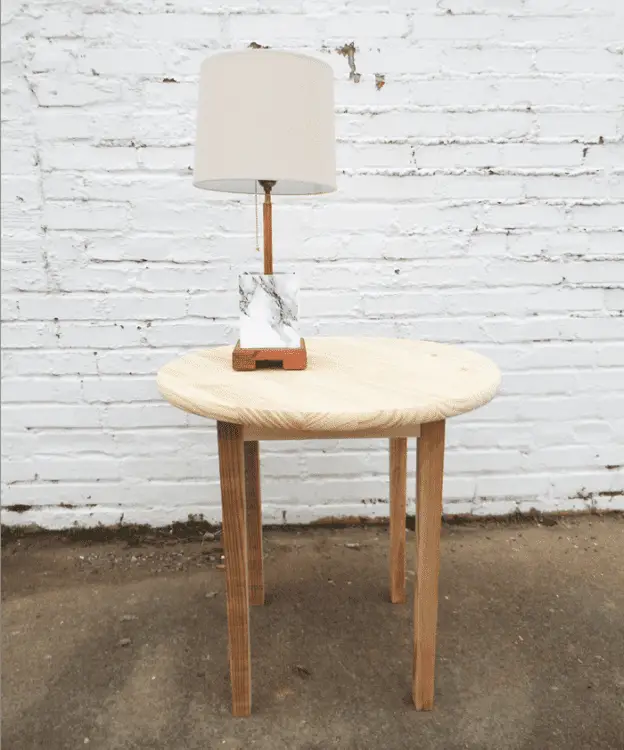
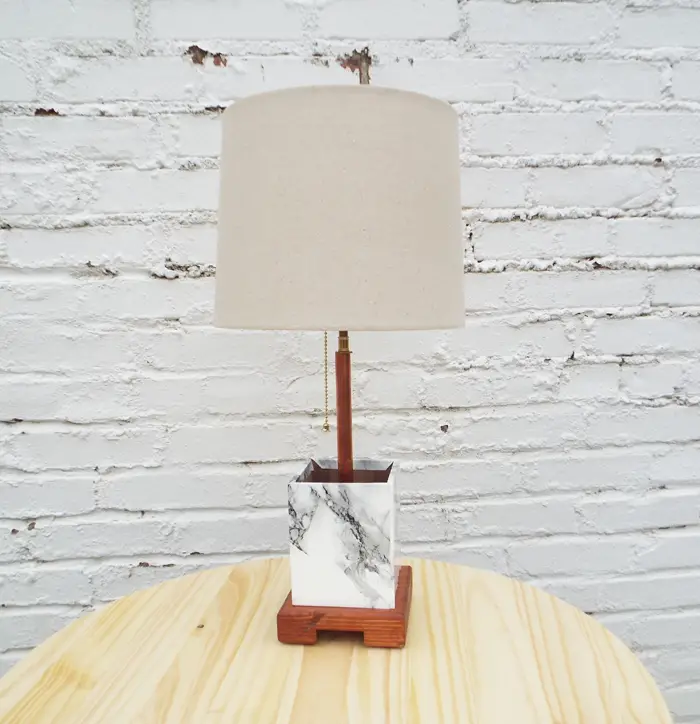
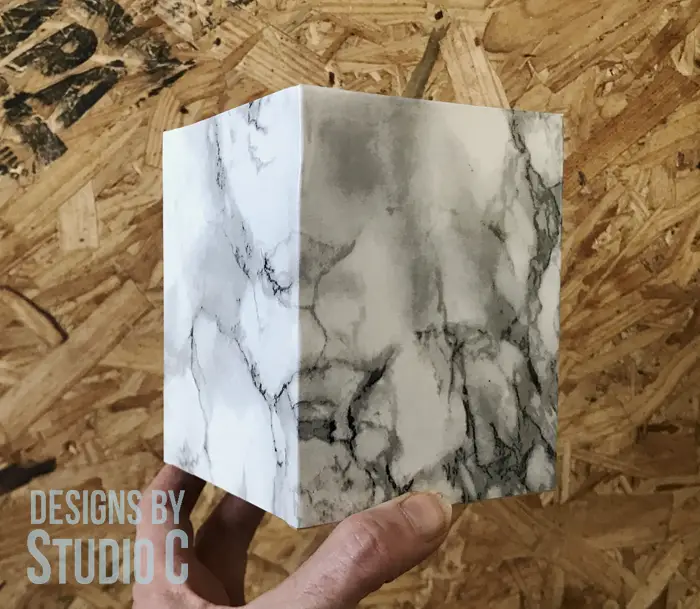
The lamp I’m talking about is the DIY Pottery Barn inspired Naya storage cup lamp. It’s got this cool cup attached to it where you can store all your pens, pencils, scissors, and whatnot. The cup is covered in marbled self-adhesive paper and sits on a square base.
To make the lamp, I used a lamp pipe as the center post, which I put inside a piece of copper tubing. At the top, there’s a pull-chain socket for easy use. And guess what? I found the perfect shade for just $5 at my local Target!
So, if you’re up for a fun and budget-friendly project, I highly recommend giving this lamp a try. Trust me, it’s a piece of cake to put together!
Materials:
- 1/8-IP Lamp Pipe at 12″ (<– affiliate link!)
- 3 – 1/8-IP Hex nuts (or knurled nuts) (<– affiliate link!)
- 3 – Washers with 3/8″ opening (spray painted, if desired)
- 1/2″ copper pipe at 10-1/2″
- Pipe cutter
- Lamp socket (<– affiliate link!)
- Lamp cord with plug (<– affiliate link!)
- Phillips screwdriver
- Lamp shade
- Fast-drying adhesive (such as DAP® Weldwood Instant Adhesive) (<– affiliate link!)
- Marbled self-adhesive paper (<– affiliate link!)
- Sandpaper
- Finishing supplies
Lumber:
- Scrap pieces of 1/4″ plywood
- Scrap piece of 1×6 at 12″
Step One
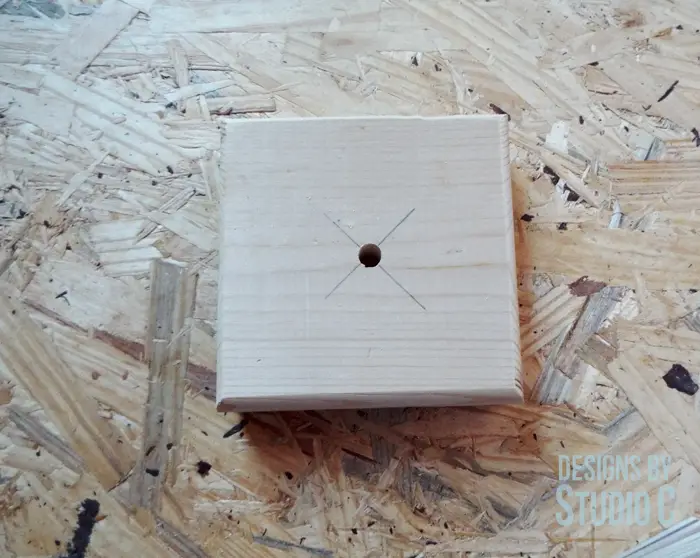
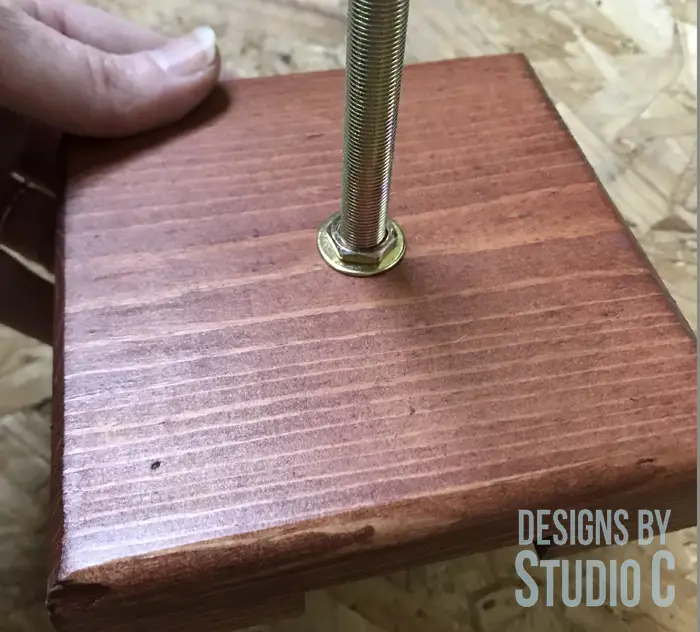
Cut a piece of 1×6 at 5-1/2″. Draw a diagonal line from corner to corner to mark the center of the piece. Drill a 3/8″ hole at the center of the X all the way through the board.
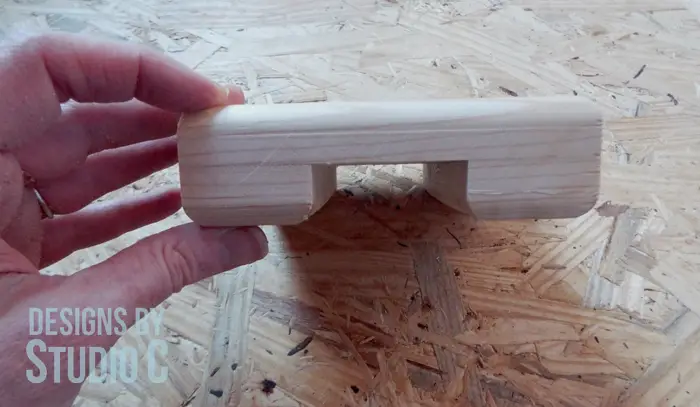
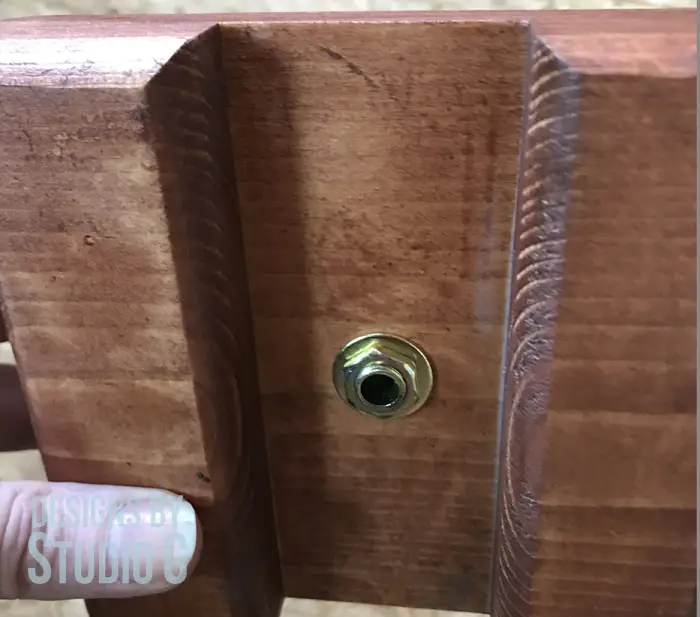
Cut two pieces at 1-1/2″ wide from the remaining 1×6. Secure them to the bottom of the larger 1×6 piece using glue and clamp until dry. Use a router with a roundover bit around the top and bottom edges of the base piece. A chamfer bit can also be used, or the edges can just be sanded.
Finish the base as desired… I used stain and sealer.
Step Two
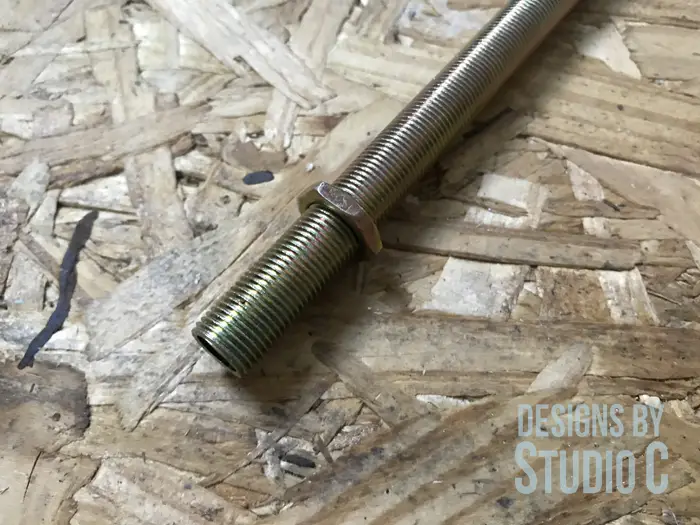
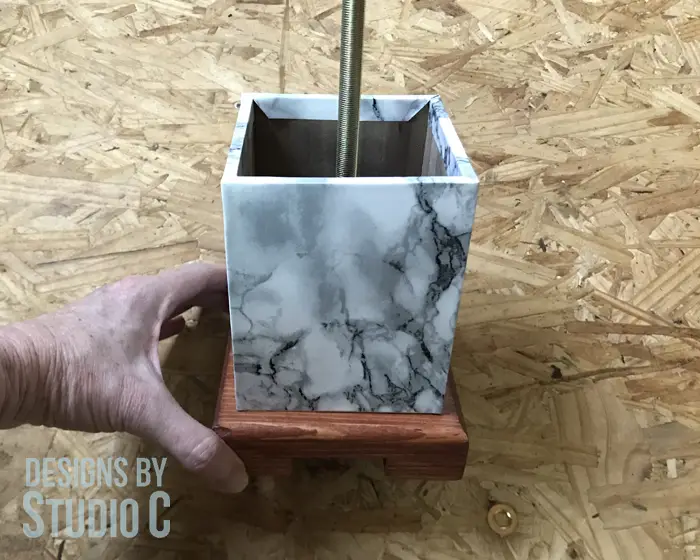
Thread a hex nut on the 12″ lamp pipe about 1″ from one end. Add a washer and thread the pipe through the hole in the top of the base. On the underside, add another washer, then another hex nut and tighten it down.
Step Three
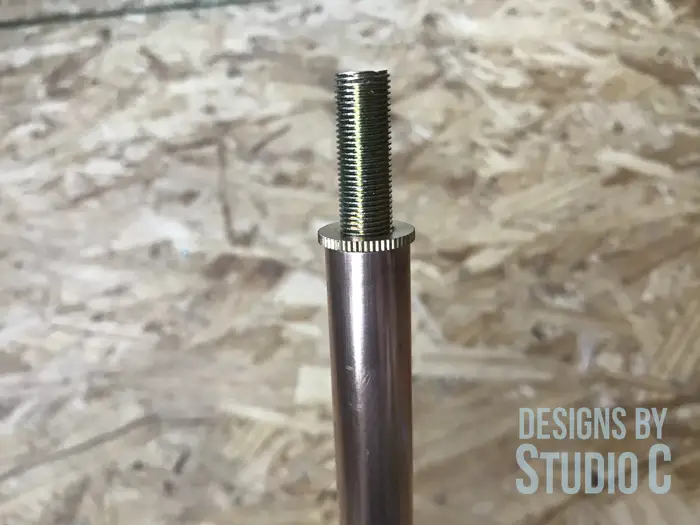
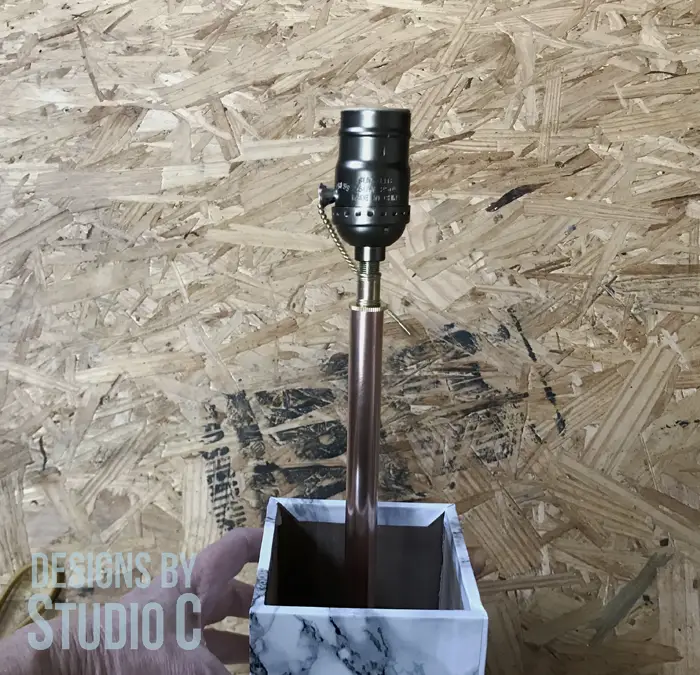
Cut the piece of copper pipe and thread it over the lamp pipe. Secure it in place with another washer and the remaining hex nut or knurled nut at the top.
Step Four
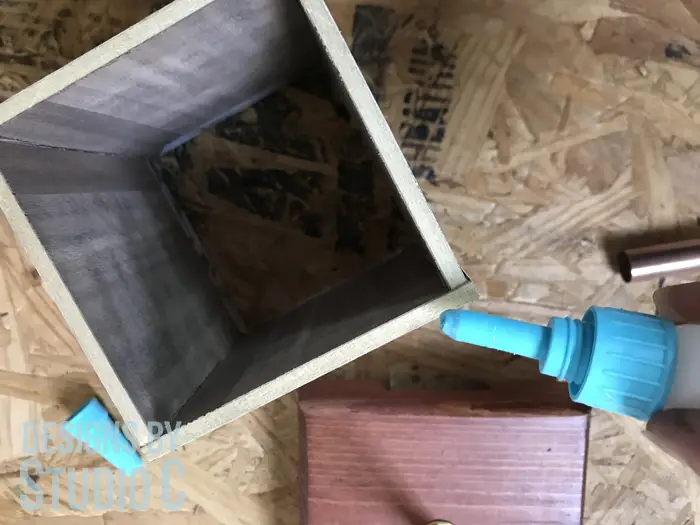
Cut the pieces for the pencil cup from the 1/4″ plywood: 2 pieces at 3-3/4″ wide x 5″ tall and 2 pieces at 4″ wide x 5″ tall. Use the adhesive to glue the pieces together to form a tube. Cover the tube with the self-adhesive paper, then glue the tube to the base centered over the pipe.
Step Five
I’ve created a tutorial on how to replace a lamp socket. The same instructions work for installing a brand new socket, as well.
Lamp socket assemblies generally consist of three pieces – the cap (the bottom part), the shell (covers the socket with a cardboard insert) and the socket. Thread the cap on the pipe nipple. Thread the lamp cord through the bottom of the lamp pipe, and through the bottom cap of the socket. Tie an underwriter’s knot in the ends of the wire (This takes the stress off of the wire in case it gets pulled.)
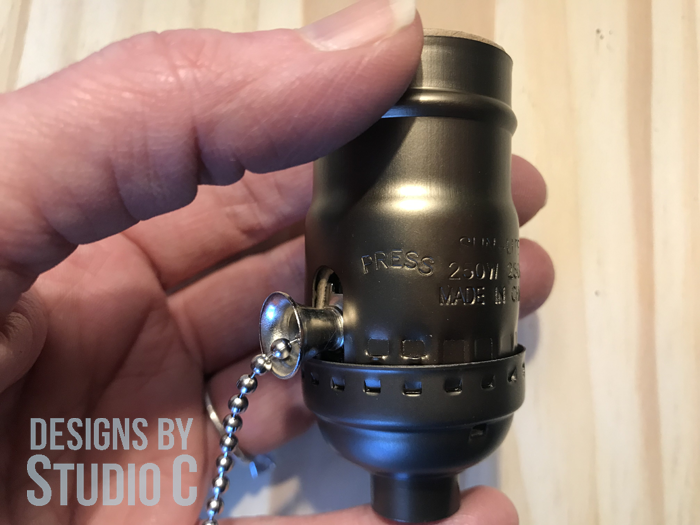
Loosen the screws on the lamp socket with a Phillips screwdriver. The cord consists of two wires – one is smooth and one is ribbed. The ribbed wire will loop over the chrome (silver) screw and the smooth wire will loop over the brass screw. Tighten the screws to sandwich the wires.
Place the shell over the socket and snap it into the cap.
Screw a light bulb into the socket to test it… Then add the lamp shade.
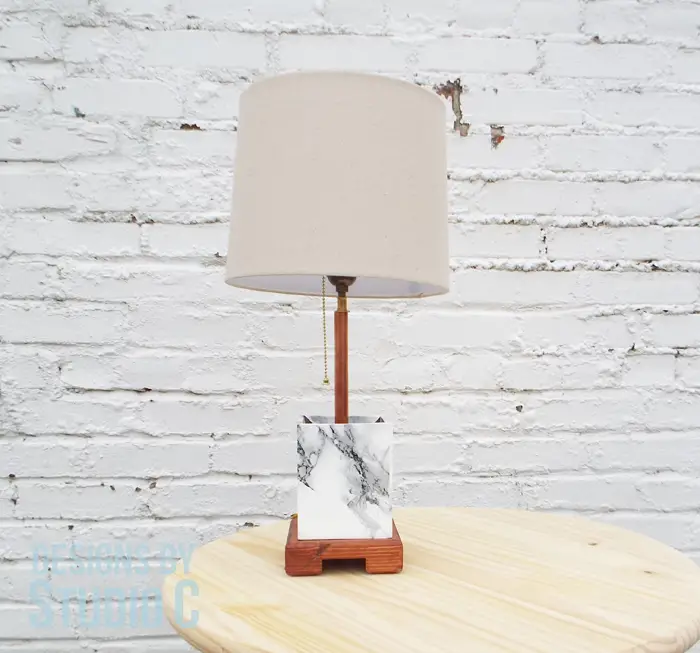
This lamp will be a great addition to our entryway in our small front room! It is the perfect size for ambient lighting, and will do dual duty keeping pens plus a pair of scissors handy! Have questions about the DIY Pottery Barn inspired Naya storage cup lamp? Leave a comment below!
Here are a couple of other great plans to make lamps:
Originally posted 2019-03-10 08:00:04.


Comments are closed.