DIY Plans to Build a Rustic Cantilevered Desk Lamp
An Easy to Build Lamp for Any Space
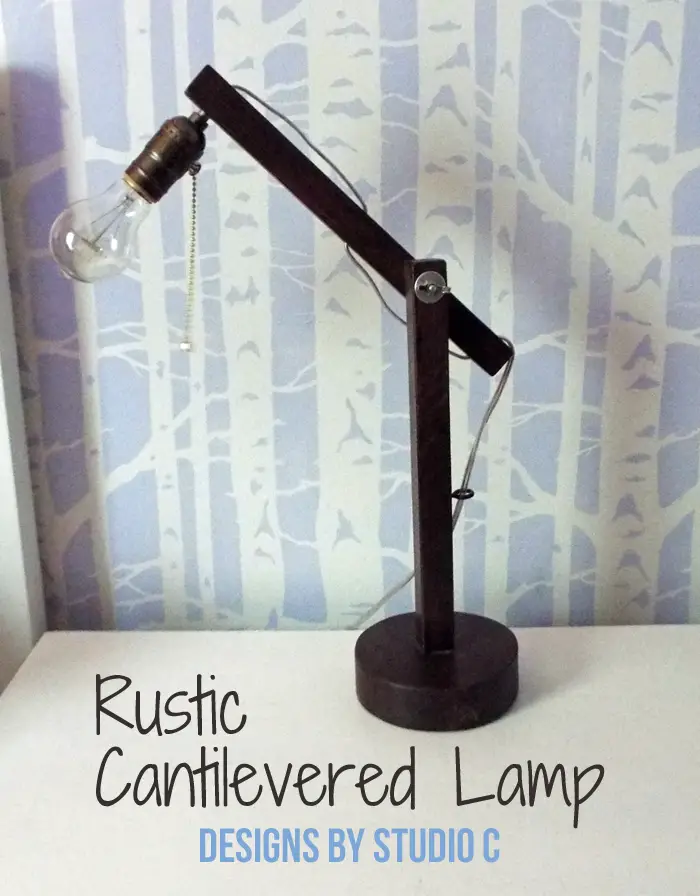
This is definitely one of the easiest projects to build – ever! The DIY plans to build a Rustic Cantilevered Lamp use square dowels and a scrap of 2×6 with a few lamp parts to create a stunning desk lamp in a sort of rustic Craftsman style. The supplies are super easy to come by (and inexpensive), and this lamp can be completed in a few hours!
Materials:
- 1 – 3″ screw
- Wood Glue
- Sandpaper (100, 150, 220 grits)
- Finishing supplies (primer & paint, or stain, sealer)
- 1 – Eye Screw
- 1 – #8-32 piece of threaded rod at 2-3/4″ long
- 2 – 1″ Fender Washers
- 2 – #8-32 wing nuts
- 1 – 1/8″ IP Lamp Pipe Nipple at 1-1/2″ long
- Lamp Socket with a Pull-Chain (<– affiliate link!)
- Lamp Cord with Plug
Lumber:
- 1 – 1″ square dowel at 2′
- 1 – scrap of 2×6 at 5-1/2″ long (either left square or cut in a circle)
Cut List:
- 2 – 1″ square dowels at 12″
Click on the drawings for a larger view!
Step One
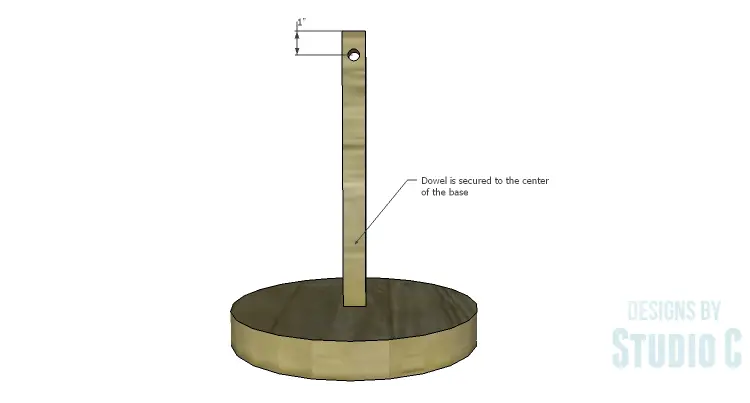
Cut the piece for the base and mark the center. Drill a countersunk hole through the center. The base can be left square or cut into a circle. The base on my lamp is smaller and would work better if it were bigger. I will need to use a product like Museum Putty to secure it to the desk or table to keep it from tipping over.
Step Two
Cut the two 1″ square dowel pieces. In one of the pieces, drill a 3/8″ diameter hole located 1″ down on center from one end of the dowel. Drill a 1/8″ pilot hole in the center of the end opposite the 3/8″ hole. Secure the dowel to the base with glue and the 3″ screw.
Step Two
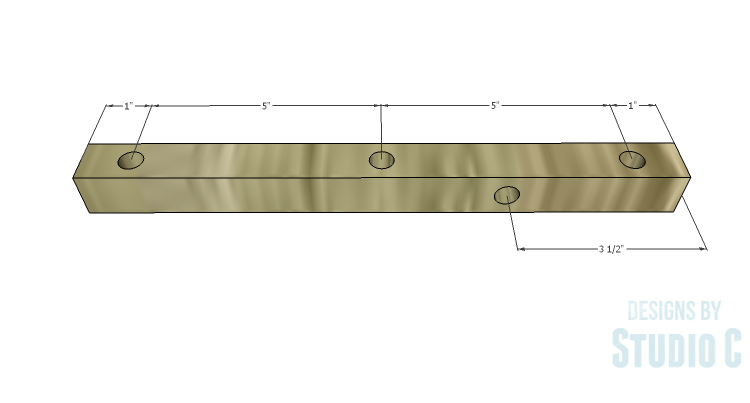
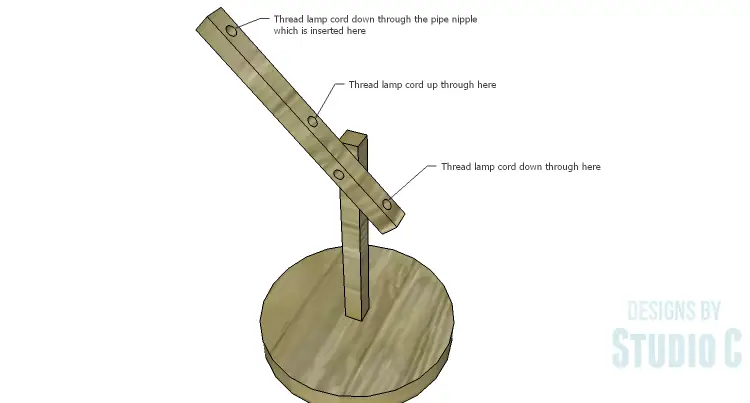
For the other dowel piece, drill three 3/8″ diameter holes – two at 1″ in from each end, and one at the center. Turn the dowel on the side and drill another 3/8″ hole 3-1/2″ from one end. See the drawing for more detail.
Step Three
Finish the pieces as desired. I used a stain/sealer in one, applying three coats, then lightly sanded with 320 grit sandpaper.
Step Four
Add the eye bolt to the back of the dowel attached to the base.
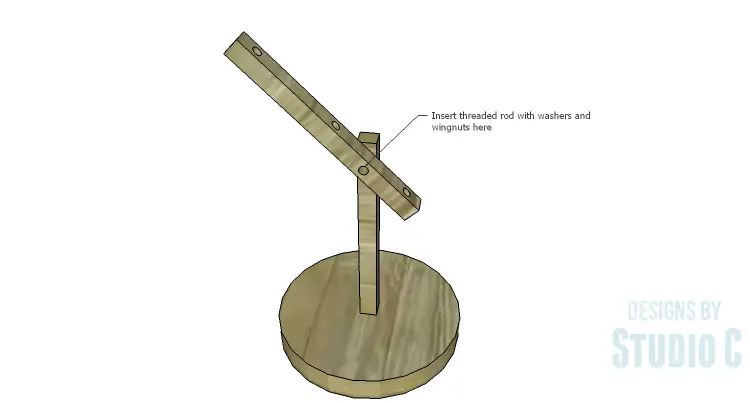
Add one of the wingnuts to the threaded rod followed by a fender washer. Slide the threaded rod through the hole in the top of the base then through the single hole located in the side of the other dowel piece. Add the remaining washer and nut, and tighten.
Step Five
Thread the lamp pipe nipple through the hole at the end of the upper dowel piece. The threaded pipe should fit snugly enough that a lamp pipe nipple will not be needed – it can be used if desired.
Thread the lamp cord up through the eye bolt, down through the first hole in the upper dowel, up through the center hole in the dowel, then down through the pipe nipple. Wire the socket according to the manufacturer’s installation instructions.
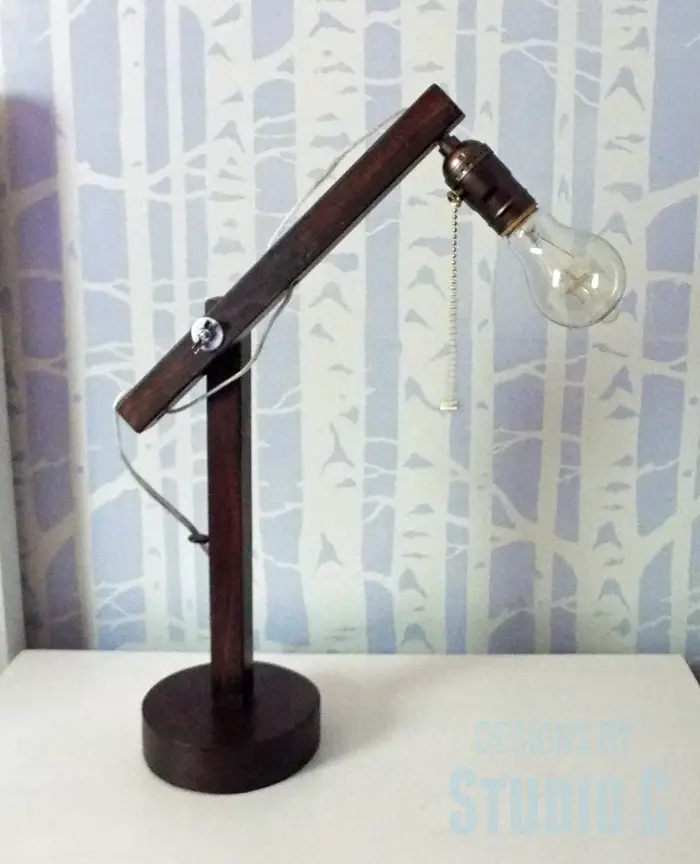
I added an Edison bulb to keep with the sort of rustic look. The upper dowel piece can be adjusted by loosening the wing nuts to move the piece up and down.
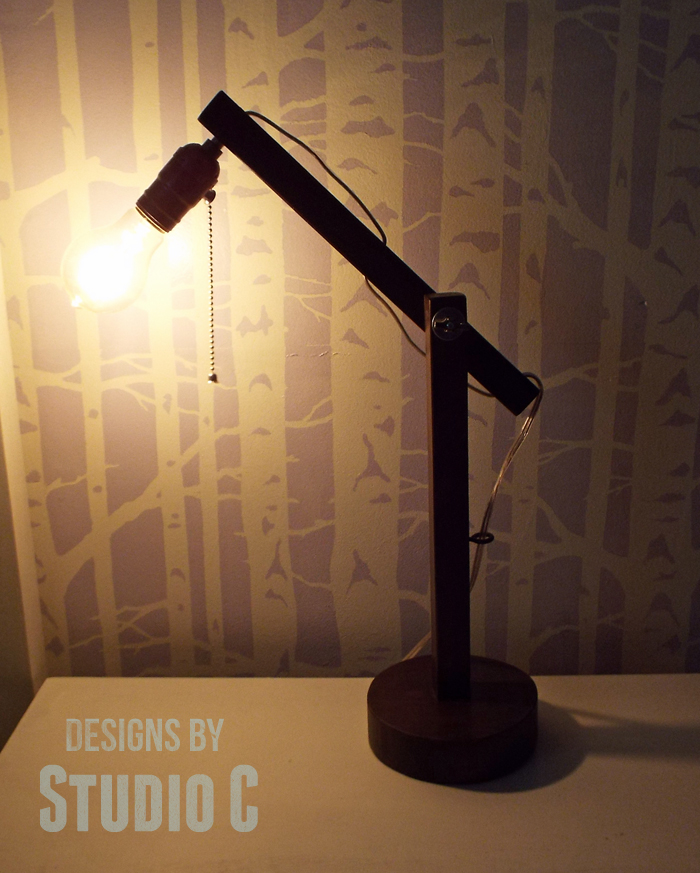
Have any questions about the DIY plans to build a Rustic Cantilevered Desk Lamp? Leave a comment below!
Originally posted 2015-10-28 08:00:29.


[…] Lamp for Any Space […]
[…] addition to natural light, proper artificial lighting is essential in your home office. Choose task lighting that provides adequate illumination for your work area, such as a desk lamp with adjustable […]