

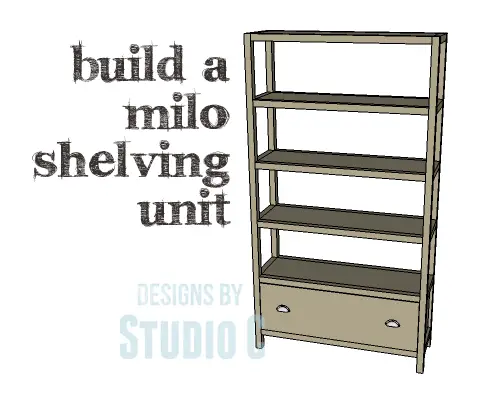
A Beautiful Shelving Unit with a Drawer at the Bottom
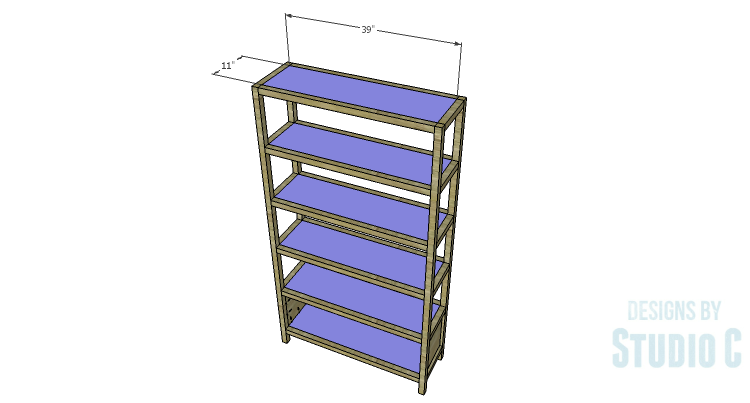
If you love the look of open shelving, then this shelving unit is for you! The DIY plans to build a Milo Shelving Unit feature five open shelves with a large drawer at the bottom. The plans are super-easy to construct and is perfect for all skill levels. The shelving unit can be completed in a weekend!
Materials:
- 1-1/4” pocket hole screws (<– affiliate link!)
- 2-1/2” pocket hole screws
- Cabinet pulls
- Wood glue
- Sandpaper (100, 150, 220 grits)
- Finishing supplies (primer & paint, or stain, sealer)
- Paste Wax
Lumber:
- 11 – 2×2 at 8′
- 1 – 4′ x 4′ sheet of ¾” plywood
- 1 – 4′ x 8′ sheet of ¾” plywood
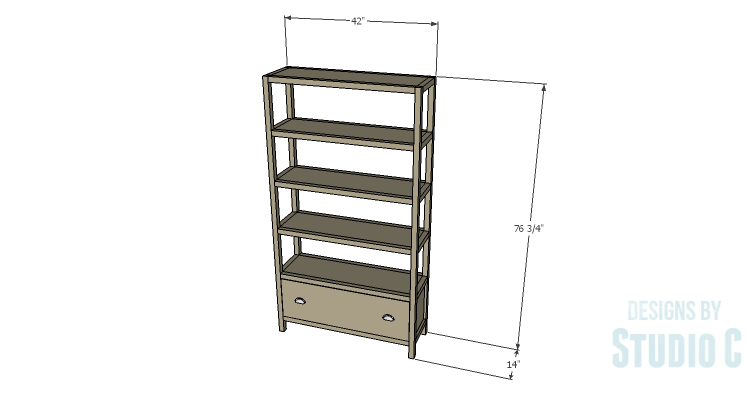
Cut List:
- 4 – 2×2 at 76-3/4” – Legs
- 12 – 2×2 at 11” – Side Framing
- 2 – ¾” plywood at 11” x 12-3/4” – Side Panels
- 12 – 2×2 at 39” – Front & Back Stretchers
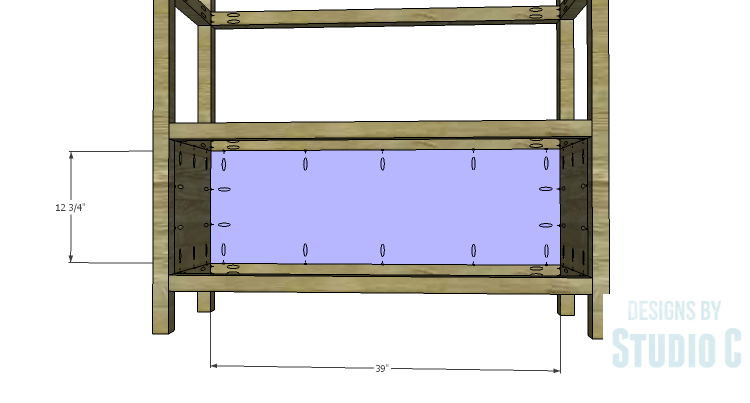
- 1 – ¾” plywood at 12-3/4” x 39” – Back Panel
- 6 – ¾” plywood at 11” x 39” – Shelves
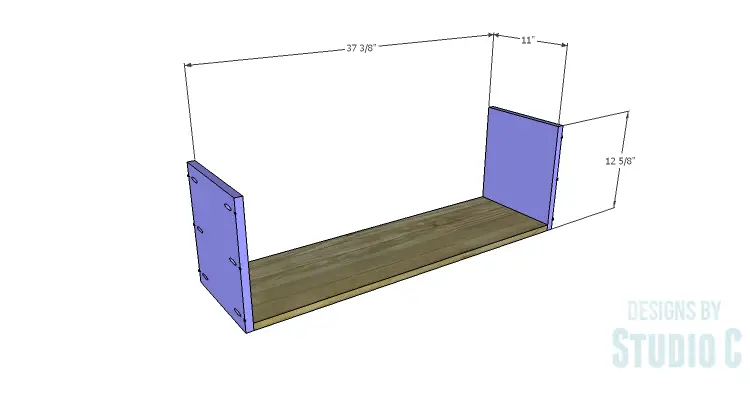
- 1 – ¾” plywood at 11” x 37-3/8” – Drawer Box Bottom
- 2 – ¾” plywood at 11” x 12-5/8” – Drawer Box Sides
- 2 – ¾” plywood at 11” x 38-7/8” – Drawer Box Front & Back
Click on the drawings for a larger view!
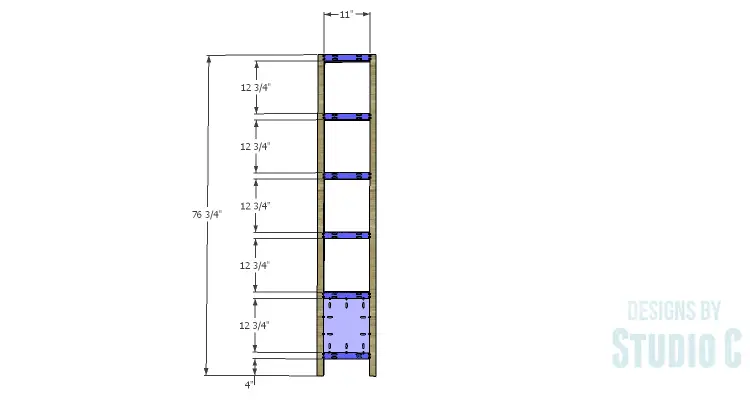
Step One
Cut the pieces for the legs, the side framing, and the side panels. With the pocket hole jig set for 1-1/2” material, drill pocket holes in each end of the 2×2 pieces. Secure the 2x2s to the legs using glue and 2-1/2” pocket hole screws.
Set the pocket hole jig for ¾” material and drill pocket holes in all four edges of the panels. Secure the panels to the legs and framing pieces using glue and 1-1/4” pocket hole screws. The back face of the plywood will be flush with the back face of the legs and framing.
Step Two
Cut the pieces for the stretchers. Set the pocket hole jig for 1-1/2” material and drill pocket holes in each end of the 2×2 pieces. Secure the 2×2 back framing piece to the legs using glue and 2-1/2” pocket hole screws.
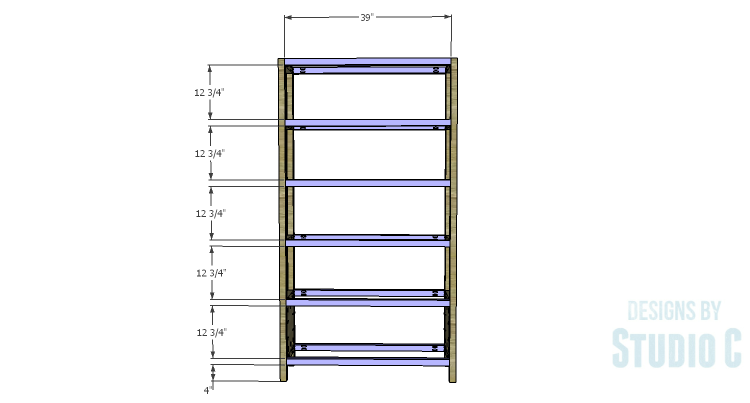
Step Three
Cut the piece for the back . Set the pocket hole jig for 3/4″ material and drill pocket holes in all four edges. Secure the panel to the legs and stretchers using glue and 1-1/4” pocket hole screws. The back face of the plywood will be flush with the back face of the legs and framing.
Step Four
Cut the pieces for the shelving and drill pocket holes in all four edges of each piece. Secure the shelves to the stretchers using glue and 1-1/4″ pocket hole screws. The top face of the shelves will be flush with the top edge of each of the corresponding stretchers.
Step Five
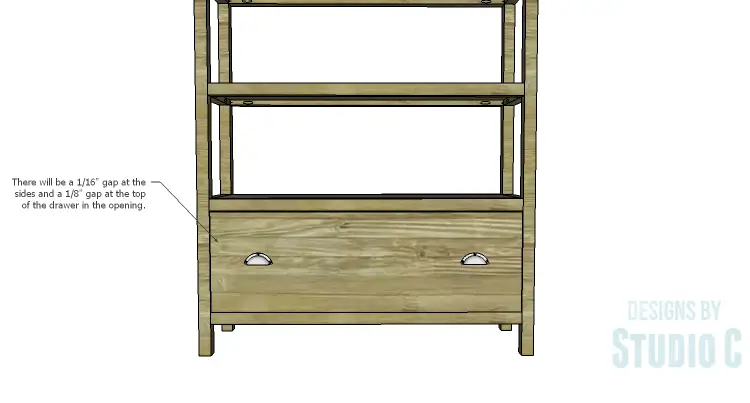
Cut the pieces for the drawer. Drill pocket holes in all four edges of the bottom as well as each end of the sides. Secure the sides to the bottom using glue and 1-1/4” pocket hole screws, then secure the drawer front and back. There will be a 1/16” gap at the sides of the drawer and a 1/8” gap at the top of the drawer in the opening.

Finish as desired, then apply a coat of paste wax to the bottom and sides of the drawers to help them slide smoothly in the openings.
This is a shelving unit that will be perfect in any room – it would be a great place to showcase trophies in the family room, to store books and toys in a kid’s room, or as fabric storage in a craft room! have any questions about the DIY plans to build a Milo Shelving Unit? Leave a comment below!


Comments are closed.