
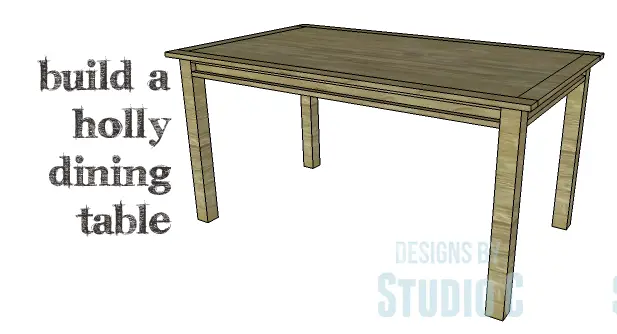
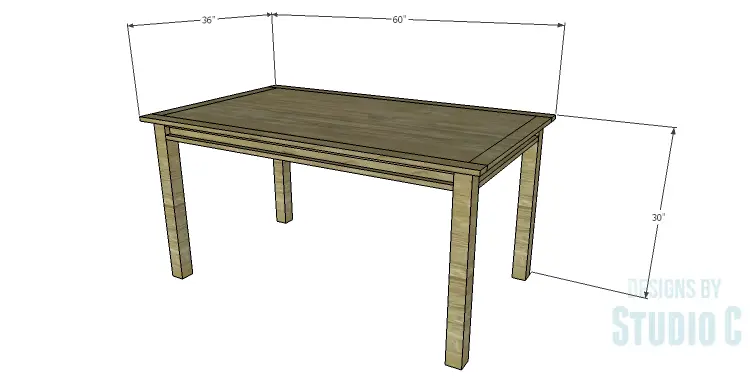
A Beautiful and Simple to Build Dining Table
Is it time for a new dining table? Take a look at this one… The DIY plans to build a Holly Dining Table feature inset aprons and a plywood top with solid wood edges. The legs are constructed out of 3×3 posts and the aprons use straight off-the-shelf lumber. This is a super-easy project that can be completed in a weekend!
Materials:
- 1-1/4″ pocket hole screws (<– affiliate link)
- 2″ pocket hole screws
- 1-1/2″ brad nails (<– affiliate link)
- Wood glue
- Sandpaper (100, 150, 220 grits)
- Finishing supplies (primer & paint, or stain, sealer)
Lumber:
- 6 – 1×3 at 8′
- 2 – 2×2 at 8′
- 1 – 2×3 at 6′
- 4 – 3×3 posts at 3′
- 1 – 4′ x 8′ sheet of 3/4″ plywood
Cut List:
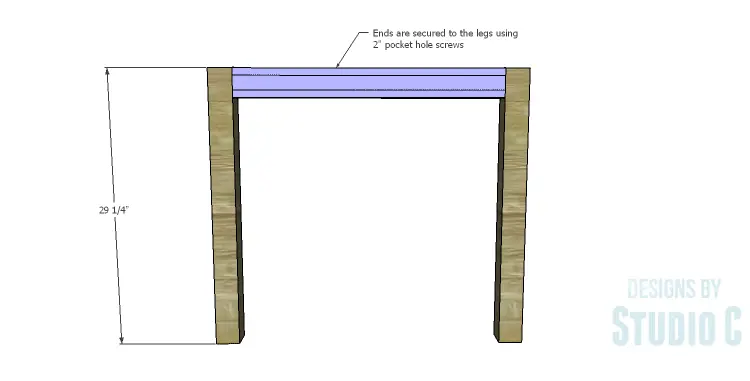
- 4 – 3×3 at 29-1/4″ – Legs
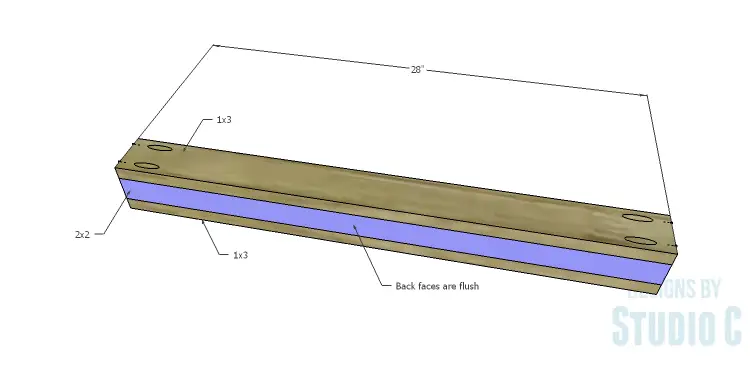
- 4 – 1×3 at 28″ – End Apron Assembly
- 2 – 2×2 at 28″ – End Apron Assembly
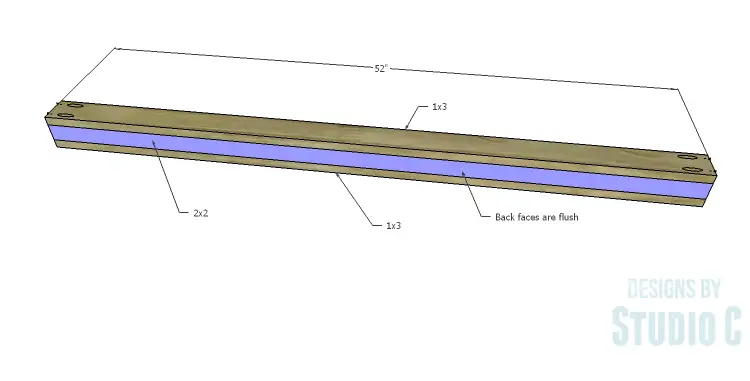
- 4 – 1×3 at 52″ – Side Apron Assembly
- 2 – 2×2 at 52″ – Side Apron Assembly
- 2 – 2×3 at 28″ – Top Supports
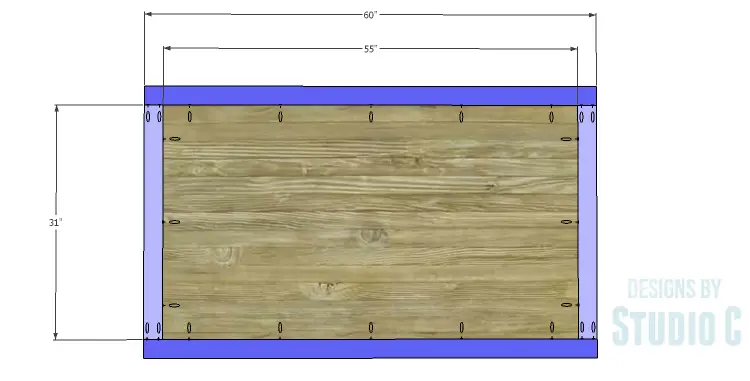
- 1 – 3/4″ plywood at 31″ x 55″ – Top Panel
- 2 – 1×3 at 31″ – Top End Trim
- 2 – 1×3 at 60″ – Top Side Trim
Click on the drawings for a larger view!
Step One
Cut the pieces for the end apron assembly. With the pocket hole jig set for 3/4″ material, drill pocket holes in each end of the 1×3 pieces. Spread glue on one face of the 2×2 and position a 1×3 on top of it with the pocket holes facing up. Clamp in place then secure with 1-1/2″ brad nails. The back face of the 2×2 will be flush with the back edge of the 1×3.
Spread glue on the opposite face of the 2×2 and position the other 1×3 of it with the pocket holes facing up. Clamp in place then secure with 1-1/2″ brad nails. Again, the back face of the 2×2 will be flush with the back edge of the 1×3 making all three pieces flush on one side.
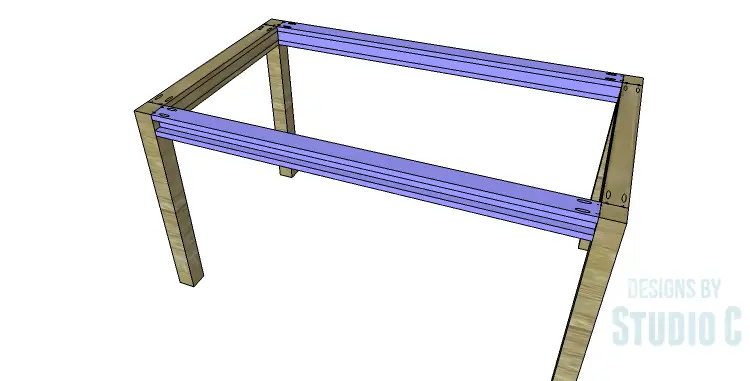
Secure the end assembly to the legs using glue and 2″ pocket hole screws.
Step Two
Cut the pieces for the side assemblies – gluing clamping, and securing with 1-1/2″ brad nails in the same manner as the end assemblies.
Secure the side assemblies to the legs using glue and 2″ pocket hole screws.
Step Three
Cut the pieces for the top supports. Set the pocket hole jig for 1-1/2″ material and drill pocket holes in each end. Drill the pocket holes close together in the center of each end so that the pocket hole screws will go into the 2×2 portion of the side assemblies. Secure the supports to the side assemblies using glue and 2″ pocket hole screws.

Step Four
Cut the pieces for the top and the top trim. Set the pocket hole jig for 3/4″ material and drill pocket holes in all four edges of the plywood panel as well as each end of the shorter trim pieces. Secure the end trim pieces to the top panel using glue and 1-1/4″ pocket hole screws. Secure the side trim pieces to the panel and end trim pieces using glue and 1-1/4″ pocket hole screws.
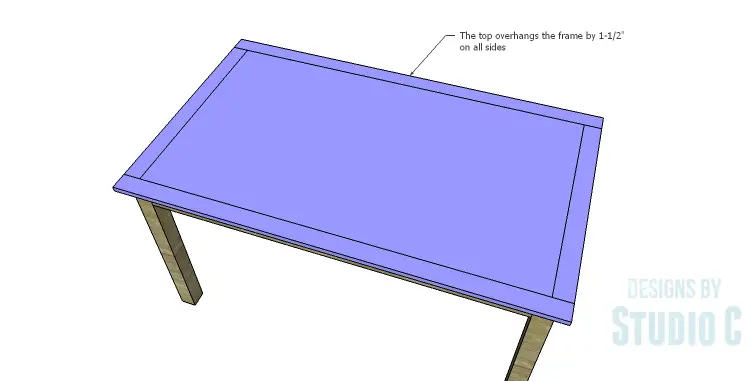
Spread glue on the top of the frame (the legs, the ends, the sides, and the supports) then position the top on the frame so that 1-1/2″ overhangs on all sides. Secure in place using glue and 1-1/2″ brad nails.
Finish as desired.
Not only is this table easily customizable to make it larger or smaller, it is the perfect plan for those new to woodworking! The DIY plans to build a Holly Dining Table are very simple and the table will look great in any finish! Have any questions about the plans? Leave a comment below!
Originally posted 2014-12-23 08:00:07.


Comments are closed.