
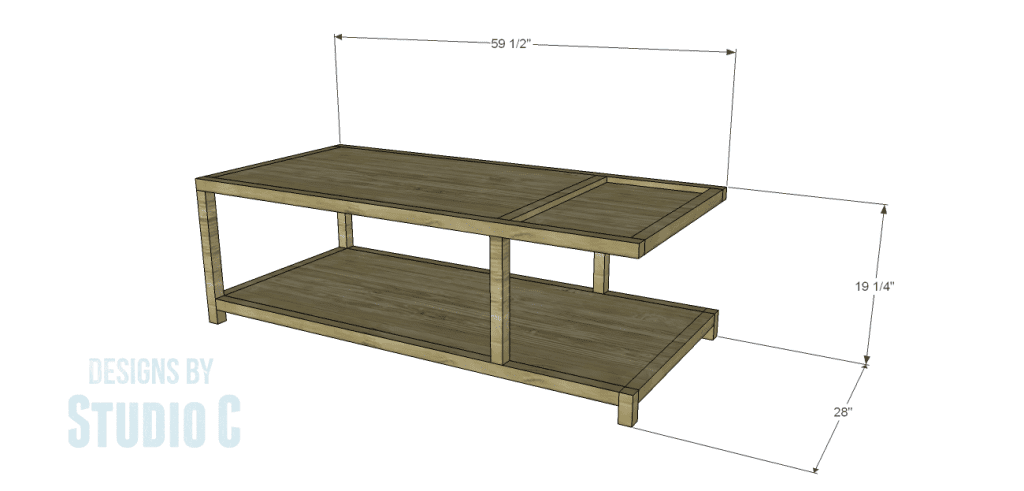
An Ultra-Modern and Fabulous Coffee Table
Wow, this coffee table is absolutely amazing! If you’re looking for a fun DIY project, you’ve got to check out the plans to build the Bernard Coffee Table. It’s got a lower shelf and the legs are slightly off set on one side, which adds a cool touch. The best part is the top shelf, which has this awesome inset “tray” that gives the table a truly one-of-a-kind look! Plus, it’s a rectangular wooden coffee table that’s super easy to build. You can finish it in just one weekend. Trust me, you won’t find anything else like it!

Materials:
- 1-1/4” pocket hole screws (<– affiliate link!)
- 2-1/2” pocket hole screws
- Wood glue
- Sandpaper (100, 150, 220 grits)
- Finishing supplies (primer & paint, or stain, sealer)
Lumber:
- 6 – 2×2 at 8’
- 1 half sheet of ¾” plywood
- 1 full sheet of ¾” plywood
Cut List:
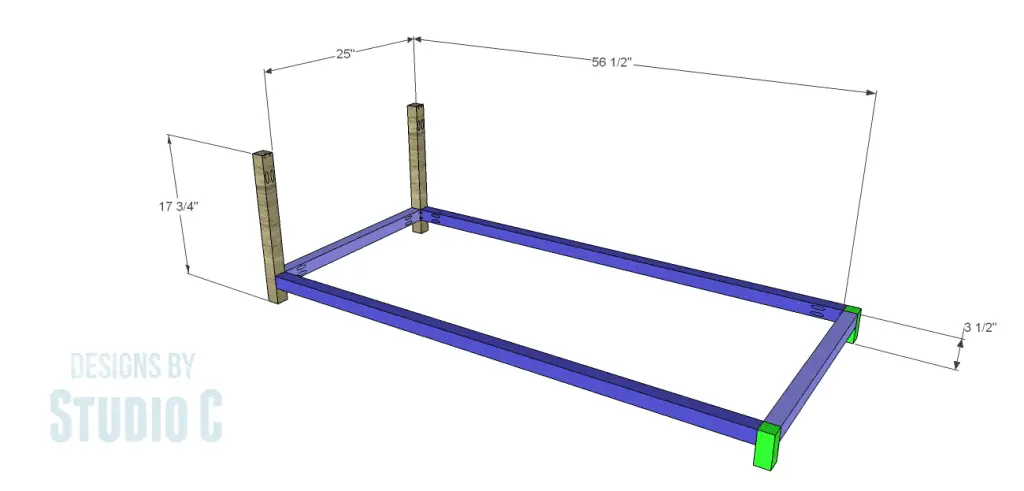
- 2 – 2×2 at 3-1/2” – Shorter Legs
- 2 – 2×2 at 17-1/4” – Taller Legs
- 2 – 2×2 at 25” – Lower Frame
- 2 – 2×2 at 56-1/2” – Lower Frame
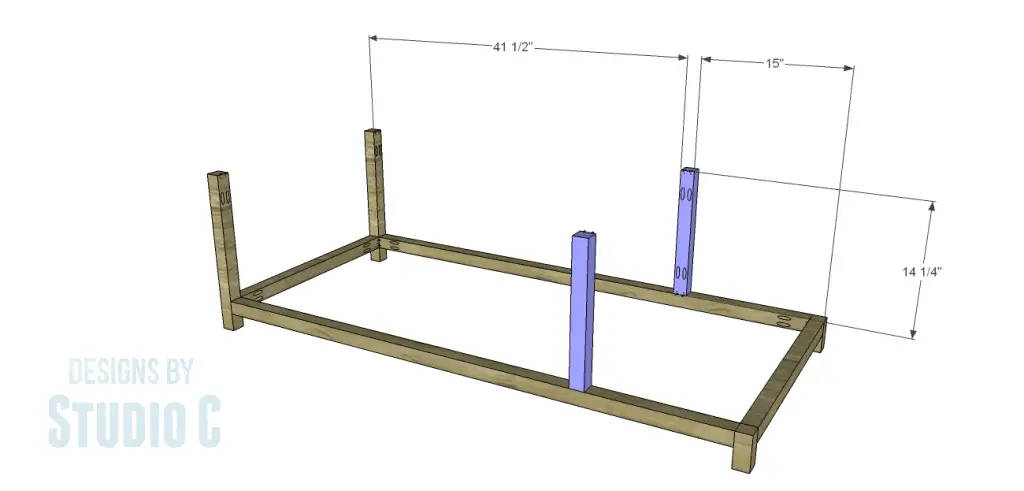
- 2 – 2×2 at 14-1/4” – Top Supports
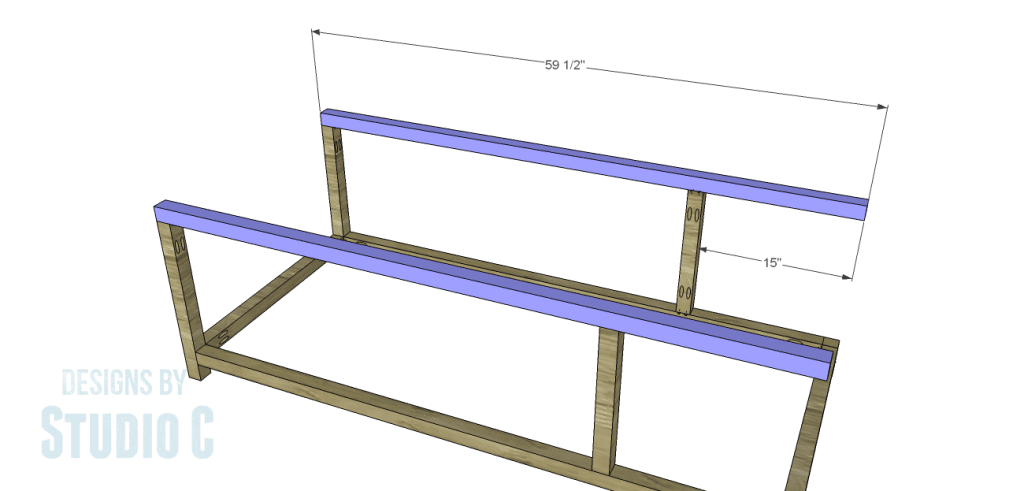
- 2 – 2×2 at 59-1/2” – Upper Frame
- 3 – 2×2 at 25” – Upper Stretchers
- 1 – ¾” plywood at 25” x 56-1/2” – Lower Shelf
- 1 – ¾” plywood at 25” x 41-1/2” – Top
- 1 – ¾” plywood at 13-1/2” x 25” – Inset Shelf
Step One
Cut the pieces for the shorter legs, the taller legs, and the lower frame. With the pocket hole jig set for 1-1/2” material, drill pocket holes in each end of the frame pieces as well as the top end of the taller legs. Assemble the frame as shown using glue and 2-1/2” pocket hole screws.
Step Two
Cut the pieces for the top supports and drill pocket holes in each end. Secure to the lower frame at the dimensions indicated in the drawing using glue and 2-1/2” pocket hole screws.
Step Three
Cut the pieces for the upper frame. Secure to the taller legs and top supports using glue and 2-1/2” pocket hole screws.
Step Four
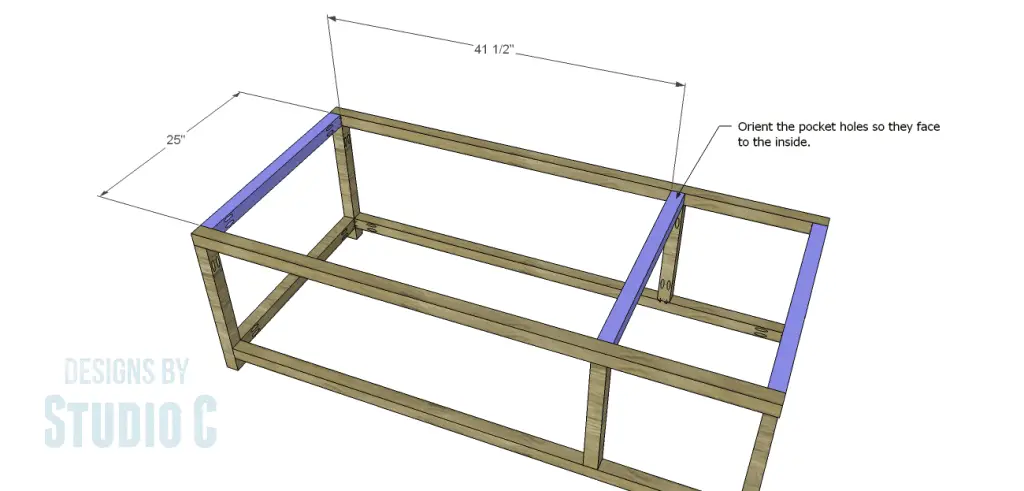
Cut the pieces for the upper stretchers and drill pocket holes in each end. Orient the pocket holes so they face to the inside of the frame (or down – so they won’t have to be filled), then secure using glue and 2-1/2” pocket hole screws.
Step Five
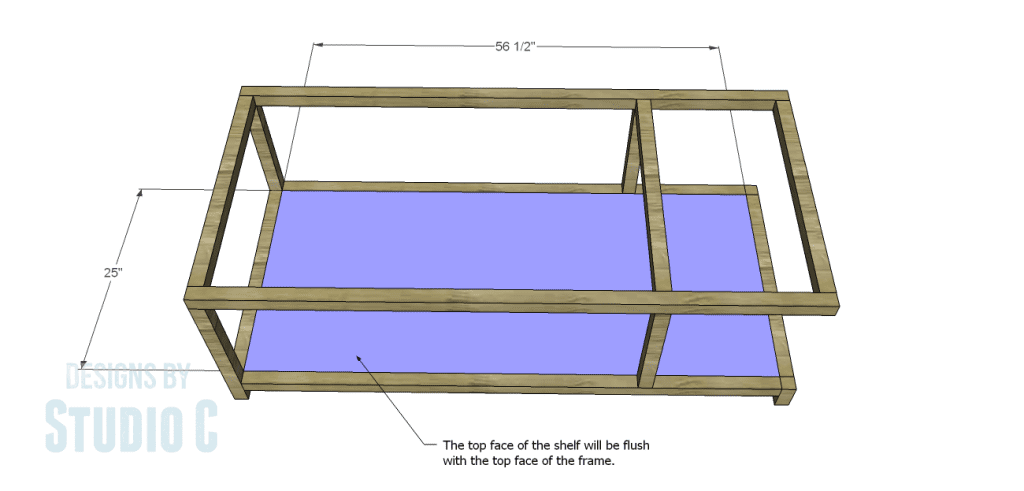
Cut the piece for the shelf. With the pocket hole jig set for ¾” material, drill pocket holes in all four edges of the shelf. Secure to the frame using glue and 1-1/4” pocket hole screws. The top face of the shelf will be flush with the top face of the frame.
Step Six
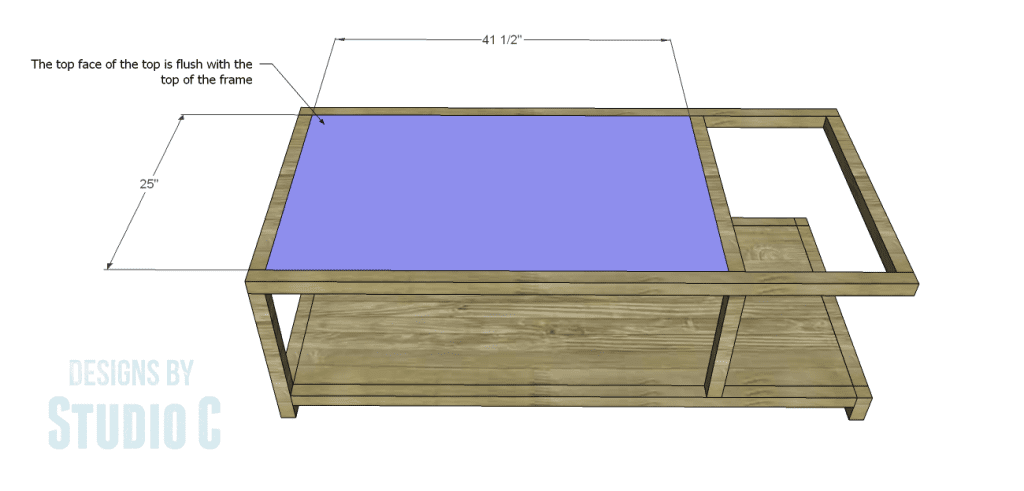
Cut the piece for the top and drill pocket holes in all four edges. Secure to the frame as shown using glue and 1-1/4” pocket hole screws. The top face of the top will be flush with the top face of the frame.
Step Seven
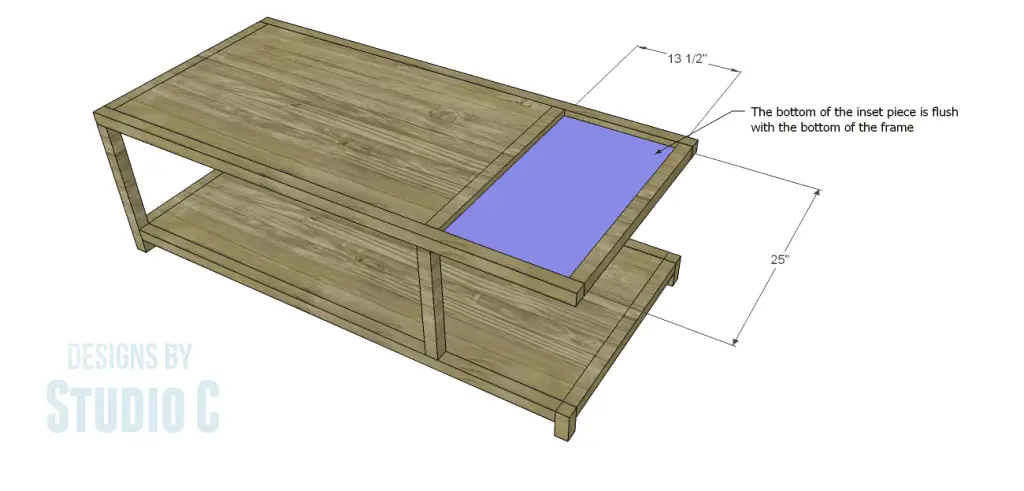
Cut the piece for the inset shelf and drill pocket holes in all four edges. Secure to the frame as shown using glue and 1-1/4” pocket hole screws. The bottom face of the shelf will be flush with the bottom face of the frame.
Fill the holes and finish as desired.
This table would look awesome with any finish whether it is a dark stain or a high gloss paint! Have any questions about the DIY plans to build a Bernard Coffee Table? Leave a comment below!
Originally posted 2015-06-24 08:00:43.


Comments are closed.