Build an Etagere Bookcase
Craft Your Perfect Book Display: DIY Etagere Bookcase Building Guide
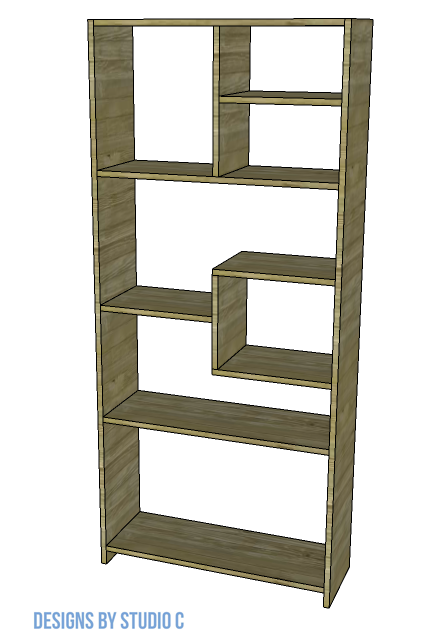
Looking for a simple yet stunning addition to your home decor? Look no further than the plans to build the Etagere bookcase! This easy-to-build piece uses readily available lumber to create a visually pleasing furniture item that will elevate any room in your home. Whether you’re a DIY pro or just getting started with furniture building, the Etagere bookcase is the perfect choice. So why wait? Get started on your own DIY bookshelf today and enjoy the beauty and functionality it brings to your home!
Materials:
- 1-1/4″ pocket hole screws OR
- 2-1/2″ screws (<– affiliate link!)
- Wood glue
- Sandpaper (80,120, 220 grits)
- Finishing supplies
Lumber:
- 5 – 1×12 at 8′
Cut List:
- 2 – 1×12 at 72″ – Outer Frame
- 2 – 1×12 at 30-1/2″ – Outer Frame
- 1 – 1×12 at 30-1/2″ – Shelf 1
- 1 – 1×12 at 15-1/4″ – Shelf 2
- 1 – 1×12 at 12″ – Shelf 3
- 2 – 1×12 at 15-1/4″ – Shelf 4
- 1 – 1×12 at 30-1/2″ – Shelf 5
- 1 – 1×12 at 17-1/4″ – Shelf 6
- 1 – 1×12 at 14-1/2″ – Shelf 7
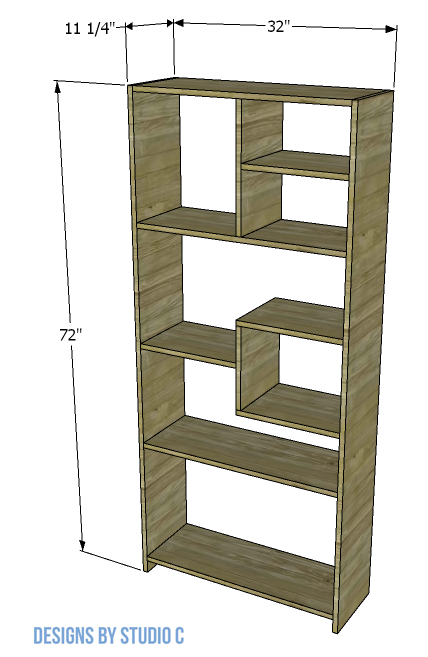
Notes About the Project:
- The bookcase is assembled using pocket hole screws where pocket holes will be drilled into the ends of each shelf piece as well as the top and bottom of the outer frame OR by using 2-1/2″ countersunk screws from the outside of each corresponding piece.
- Sand all pieces prior to assembly to make finishing easier.
- The look of the Etagere bookcase can be changed by using wider plywood boards or narrower lumber!
- Always secure the bookcase to the wall using an angle bracket and a screw into a wall stud.
Step One
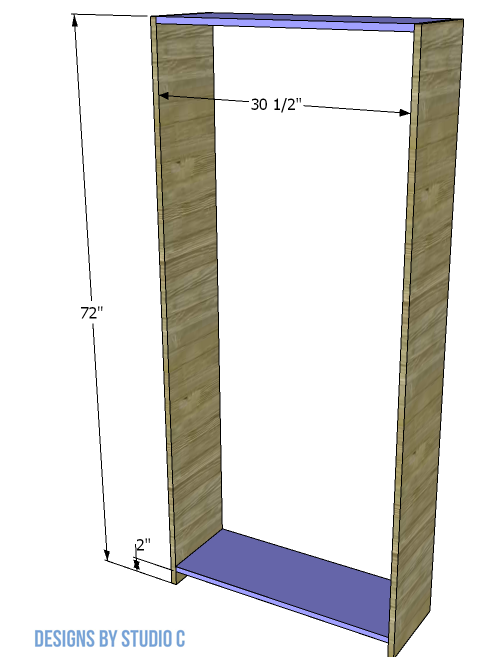
Cut the pieces for the outer frame. If using pocket holes, drill pocket holes in each end of the shorter pieces, and assemble the frame using glue and 1-1/4″ pocket hole screws. If using countersunk screws, mark the position of the screws on the outside faces of the longer pieces, and pre-drill the holes. Assemble the frame using glue and 2-1/2″ screws.
Step Two
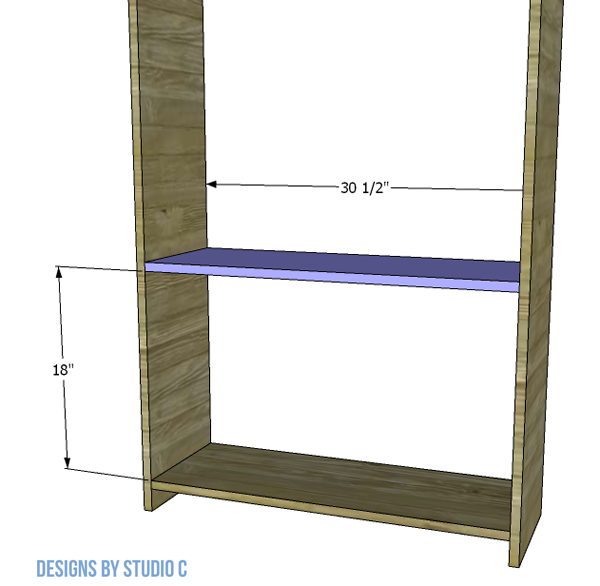
Cut the piece for Shelf 1, and install as shown in the drawing using either pocket holes and pocket hole screws, or countersunk screws.
Step Three
Cut the piece for Shelf 2, and install as shown in the drawing using either pocket holes and pocket hole screws, or countersunk screws.
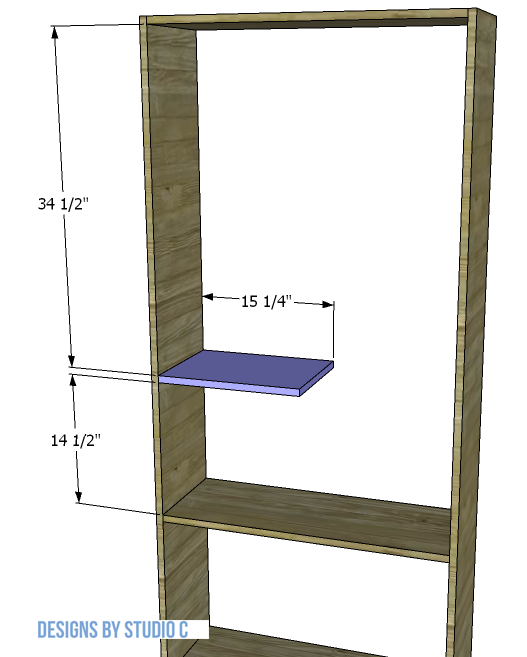
Step Four
Cut the piece for Shelf 3, and install as shown in the drawing centering the piece on the edge of Shelf 2 using either pocket holes and pocket hole screws, or countersunk screws.
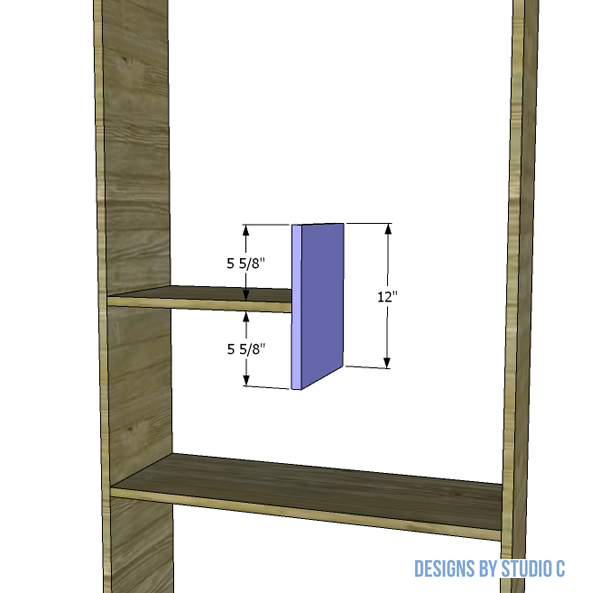
Step Five
Cut the pieces for Shelf 4, and install as shown in the drawing using either pocket holes and pocket hole screws, or countersunk screws.
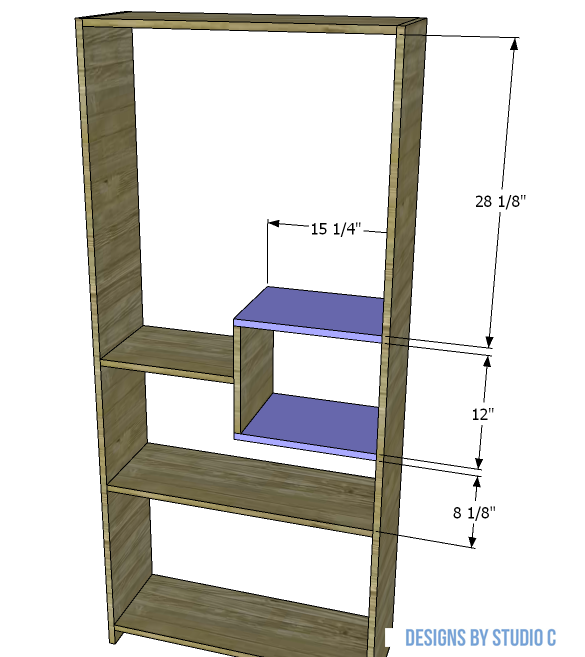
Step Six
Cut the piece for Shelf 5, and install as shown in the drawing using either pocket holes and pocket hole screws, or countersunk screws.
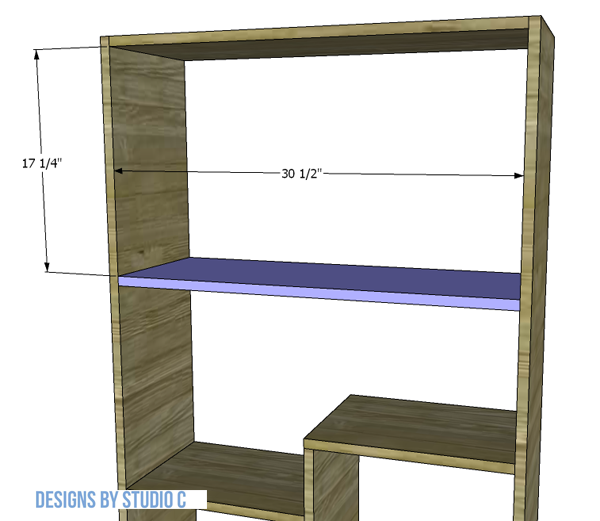
Step Seven
Cut the piece for Shelf 6, and install as shown in the drawing using either pocket holes and pocket hole screws, or countersunk screws.
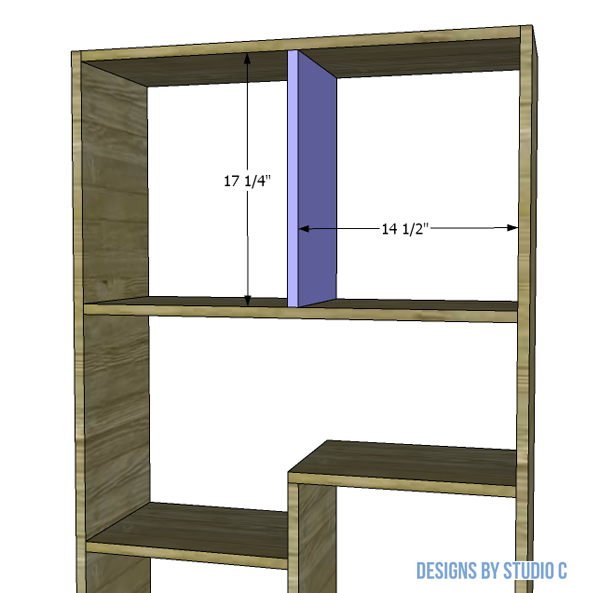
Step Eight
Cut the piece for Shelf 7, and install as shown in the drawing centering the piece on Shelf 6 using either pocket holes and pocket hole screws, or countersunk screws.
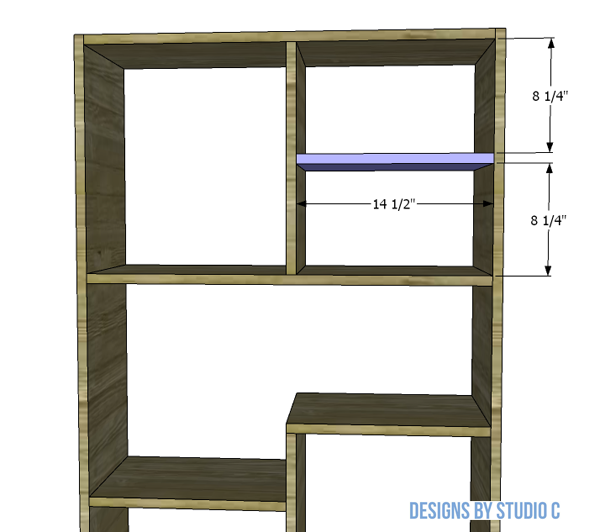
That’s all there is to it! If you’re looking for a fun weekend project, the Etagere bookcase plans are perfect for you! Don’t worry about your skill level, these plans are suitable for anyone. If you have any questions about the plans, feel free to leave a comment below and we’ll be happy to help!

