An Easy to Build Dining Table
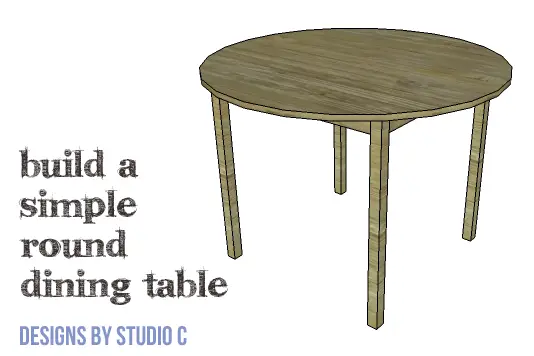
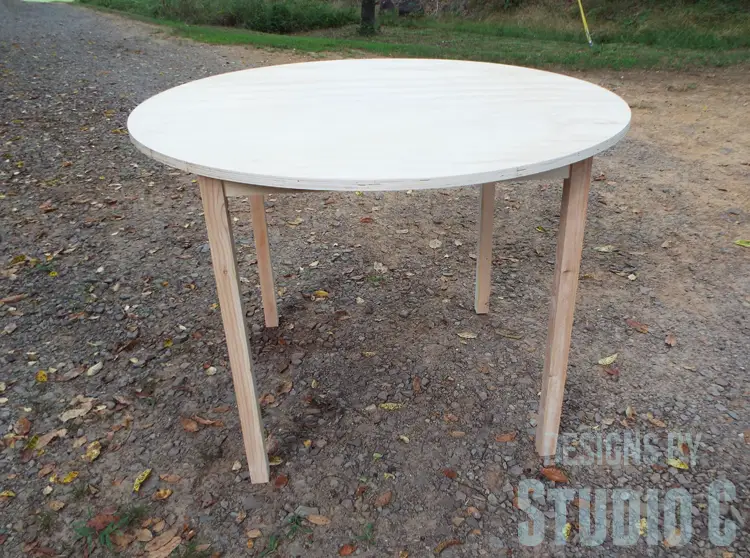
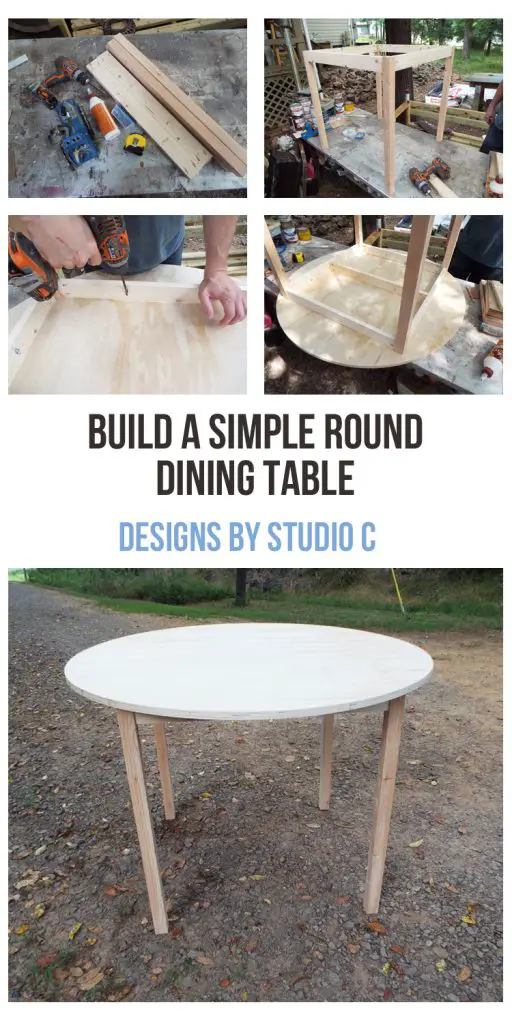
This is the easiest round table you will ever build – I promise! I was asked to build four of these for the break room at work and was able to knock them out over two days while taking my time. Seriously! The DIY plans to build a Simple Round Dining Table feature a round plywood top (which can also be constructed out of planked boards for a rustic look), 1×3 aprons and 2×2 legs. The top can be cut with a jigsaw (if you have super-stellar jigsaw skills – I don’t) or it can be cut using a large jig on a bandsaw. The size can also be adjusted for a larger diameter but I wouldn’t recommend going any smaller. The length of the aprons will have to be adjusted and if they are too close together, a chair won’t fit between them!
Materials:
- 1-1/4″ pocket hole screws (<– affiliate link!)
- Edge banding, if desired (<– affiliate link!)
- Wood glue
- Sandpaper (100, 150, 220 grits)
- Finishing supplies (primer & paint, or stain, sealer)
Tools needed:
- Miter saw or circular saw
- Jigsaw or bandsaw with circle cutting jig
- Drill
- Pocket hole jig
- Sander
Lumber:
- 1 – 4′ x 4′ sheet of 3/4″ plywood
- 2 – 2×2 at 6′
- 2 – 1×3 at 6′
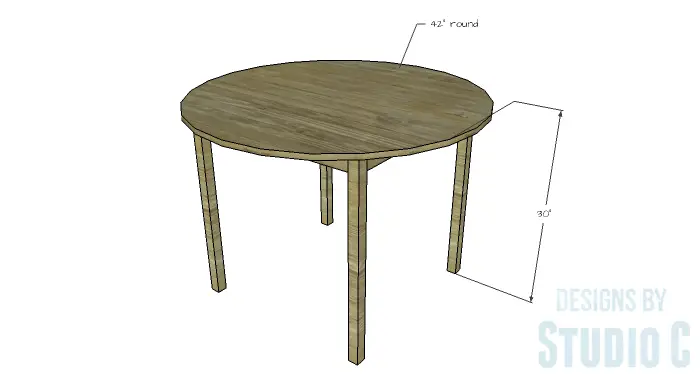
Cut List (for a 42″ round table):
- 4 – 2×2 at 29-1/4″ – Legs
- 4 – 1×3 at 25″ – Aprons
- 1 – 1×3 at 26-1/8″ – Center Support
- 1 – 3/4″ plywood at 42″ round
Notes about the project:
For my table legs, I ripped 2x4s down to 2×2. This, to me, is easier and results in straighter legs. At the end of the post, I will include a cut list chart for wider tables. Also, sand the pieces and apply edge banding to the edges of the table prior to assembly.
Step One
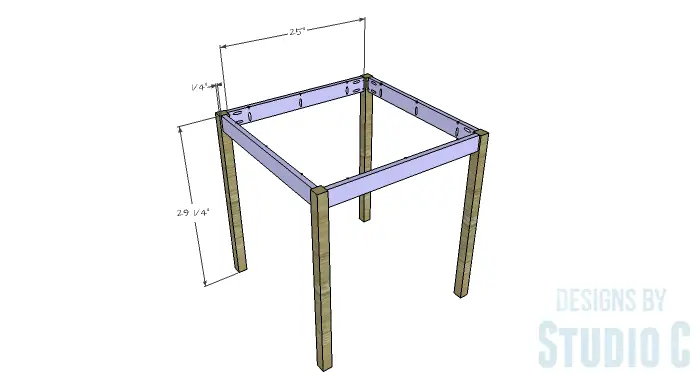
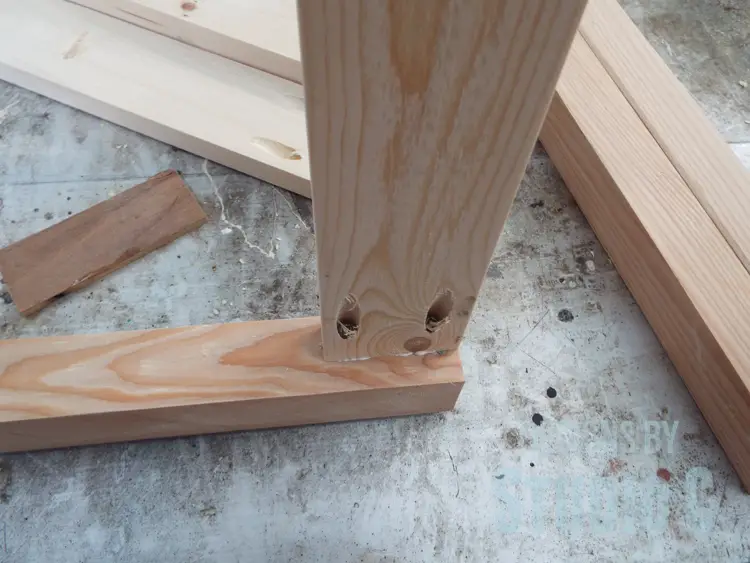
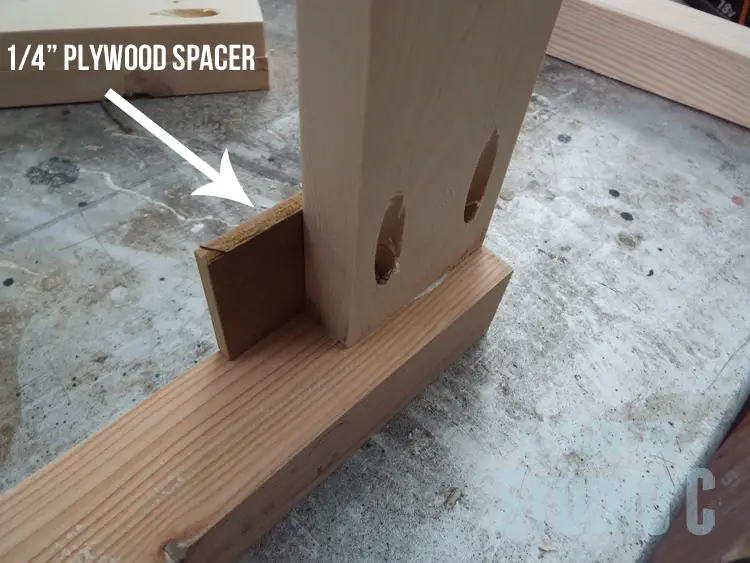
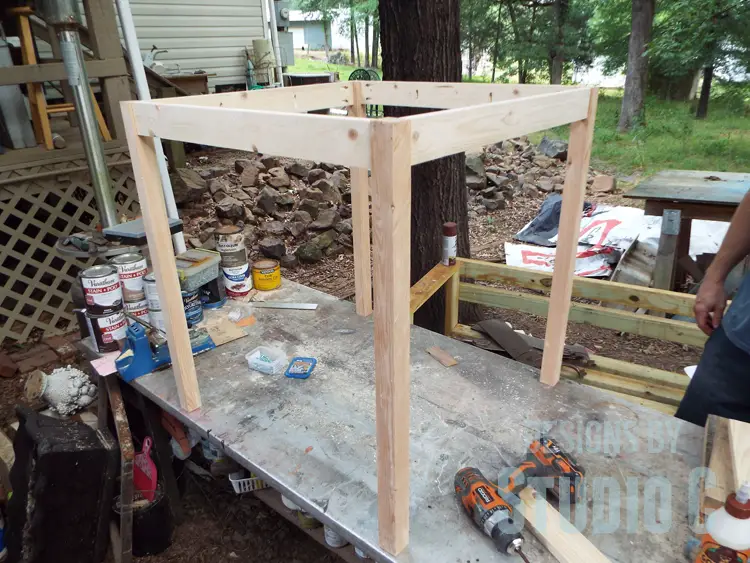
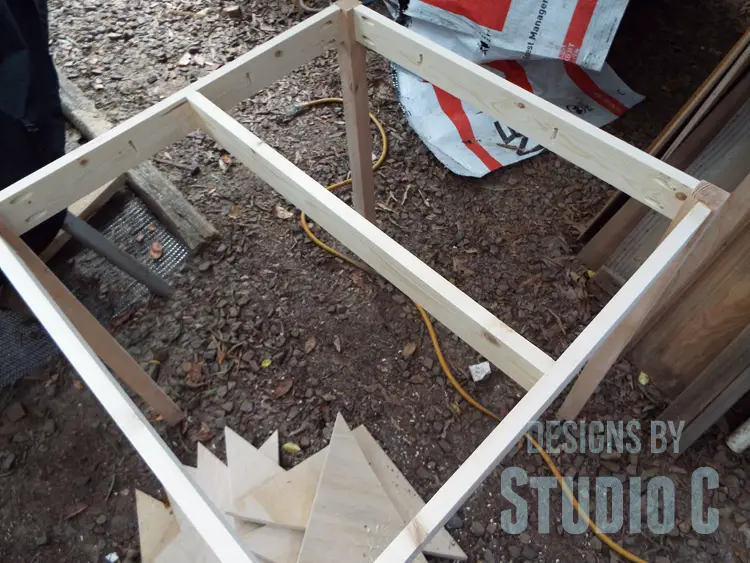
Cut the pieces for the legs and aprons. With the pocket hole jig set for 3/4″ material, drill pocket holes in each end of the apron pieces, as well as one long end of each piece to attach the top. Secure the aprons to the legs using glue and 1-1/4″ pocket hole screws locating the aprons 1/4″ back from the outside faces of the legs. A scrap piece of 1/4″ plywood makes an excellent spacer!
Step Two
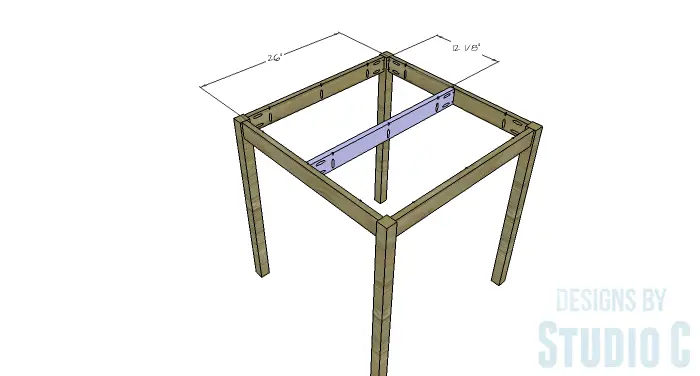
Cut the piece for the center support. Drill pocket holes in each end as well as one long edge to attach the top. Secure the support to the center of two opposite aprons using glue and 1-1/4″ pocket hole screws.
Step Three
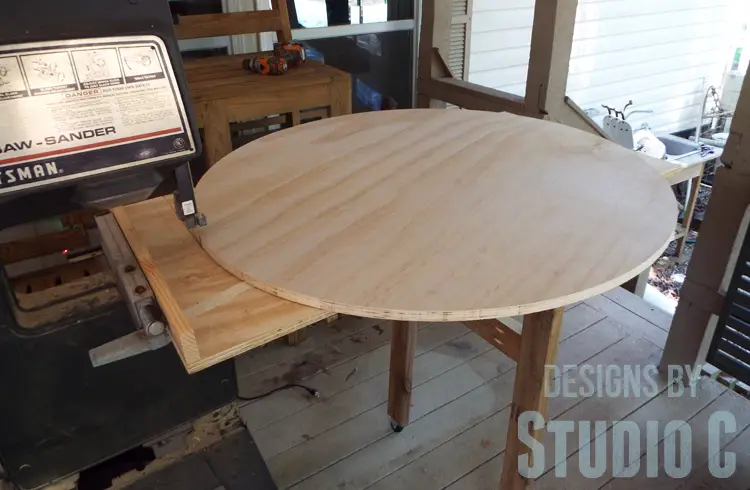
Cut the piece for the top. Draw a diagonal lines across the plywood piece to mark the center. Using a string, pushpin and pencil, draw the circle on the plywood, then cut out with a jigsaw. If using a bandsaw and a circle cutting jig, drill a 1/8″ hole at the center of the plywood piece. Cut the corners off with a jigsaw so that the piece resembles a hexagon shape, then cut the top on the jig.
Step Four
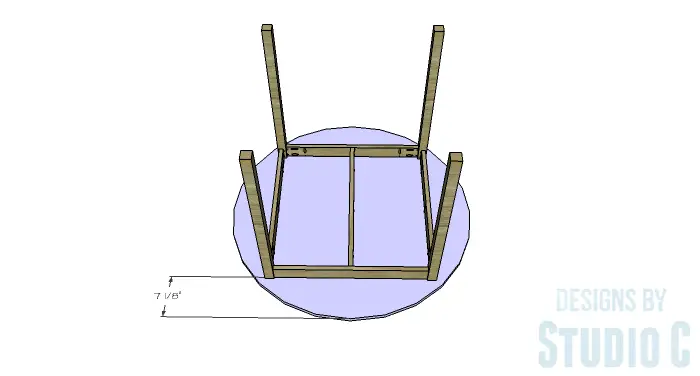
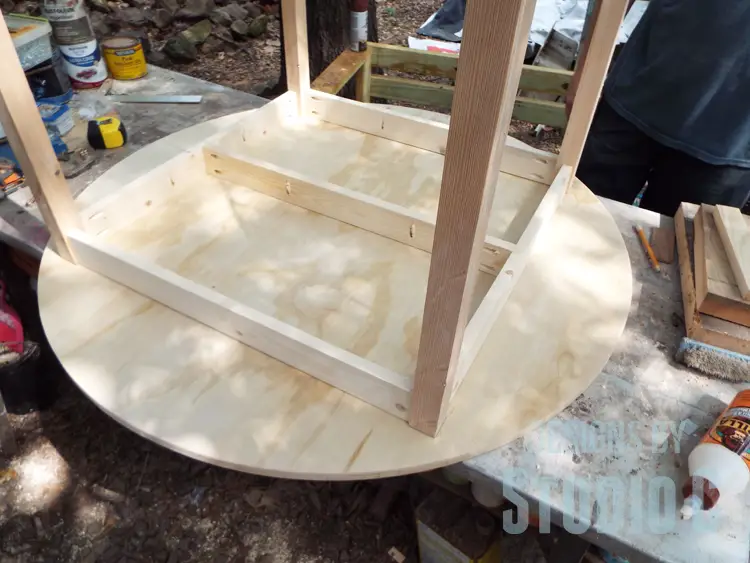
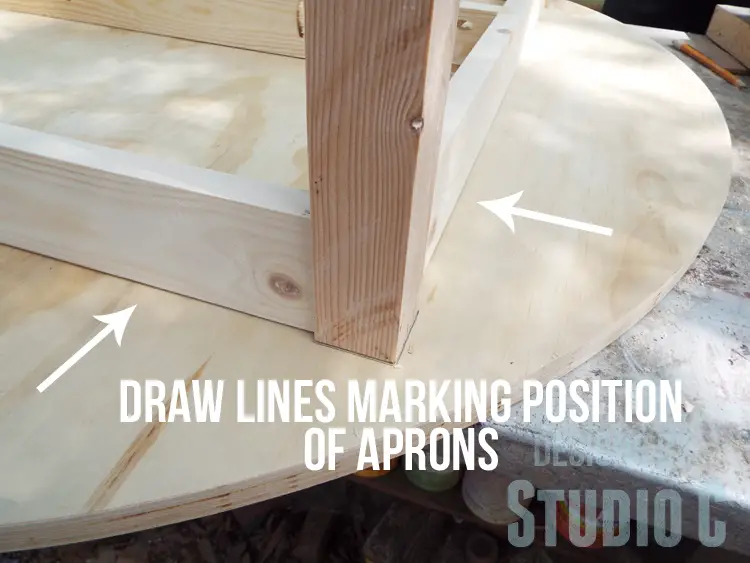
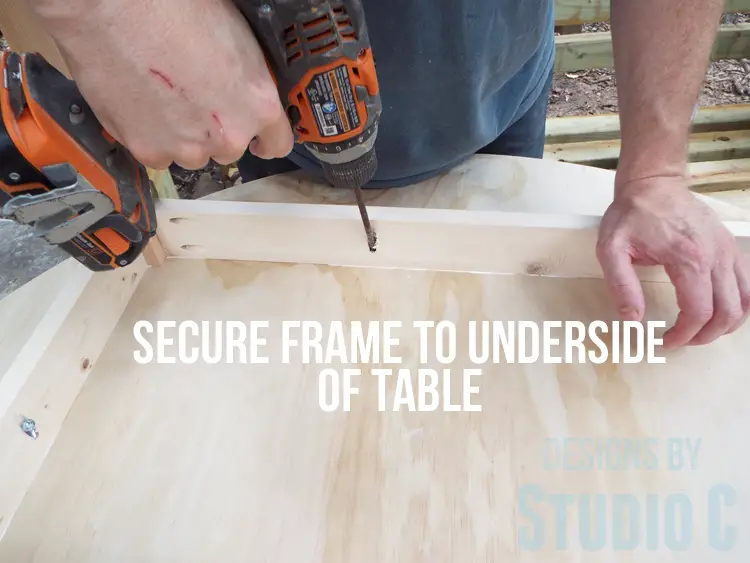
Lay the top face down on a flat surface then position the leg frame on top of it. Center the frame. I found that the top will overhang the frame at 7-1/8″ at the widest point. Draw lines on the top along the aprons to mark the position. Apply glue to the top of the legs, aprons and center support then position the leg frame on the top. Secure in place using 1-1/4″ pocket hole screws.
Finish as desired.
If using a different diameter for the top, the length of the aprons and center support will have to be adjusted accordingly:
- 43″ top = 26″ aprons, 27-1/8″ support
- 44″ top = 27″ aprons, 28-1/8″ support
- 45″ top = 28″ aprons, 29-1/8″ support
- 46″ top = 29″ aprons, 30-1/8″ support
- 47″ top = 30″ aprons, 31-1/8″ support
- 48″ top = 31″ aprons, 32-1/8″ support
This super-simple table will look great with any finish. If using planks for the top, they will be assembled using pocket hole screws then cut in a circle in the same manner as plywood. Here are a few other options similar to the DIY plans to build a simple round dining table:
Have any questions about the DIY plans to build a Simple Round Dining Table? Leave a comment below!
Originally posted 2016-06-27 08:00:33.

1 Comment
Pingback: DIY Wall Sign with Scrappy Moulding | Designs by Studio C