Build a Round Shelf Coffee Table
An Ultra-Modern Coffee Table with Storage
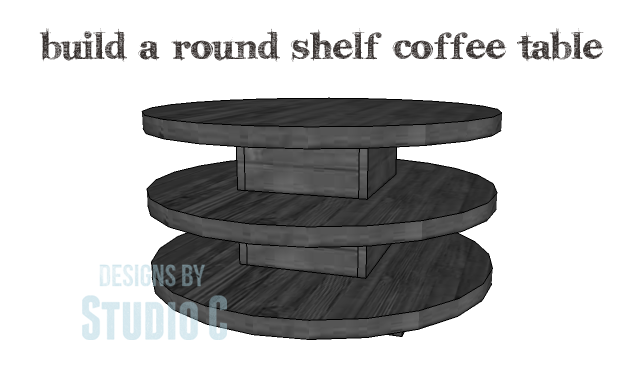
Hey there! This piece is seriously awesome and would look super sleek with the perfect finish… Maybe black lacquer? And the best part is, you can save some money by using MDF or plywood to build the table, whichever you prefer. The DIY plans for this Round Shelf Coffee Table are incredibly easy to follow, and it can totally transform your living space from boring to amazing in no time!
Materials:
- 1-1/4″ pocket hole screws (<– affiliate link!)
- 3″ screws
- 1-1/4″ brad nails
- 1″ Edge banding (if using plywood)
- 2″ Edge banding (if using plywood)
- Edge banding cutter (if using plywood)
- Dry Dex (if using MDF)
- Wood glue
- Sandpaper (100, 150, 220 grits)
- Finishing supplies (primer & paint, or stain, sealer)
Lumber:
- 3 sheets of 3/4″ plywood or MDF
Cut List:
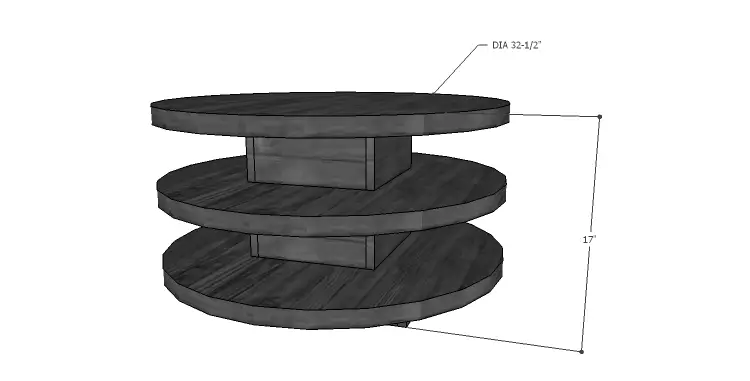
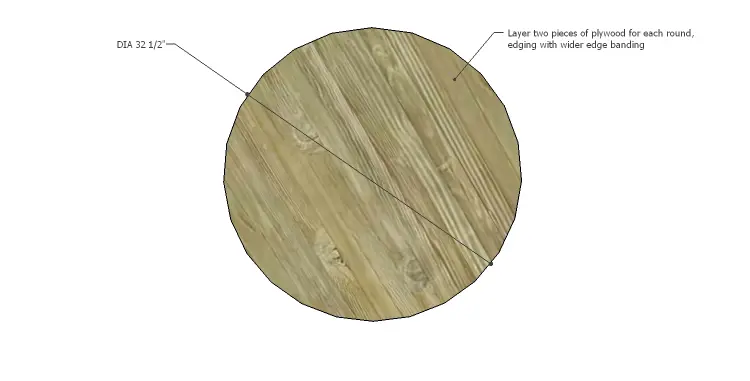
- 6 – 32-1/2″ diameter circles – Rounds
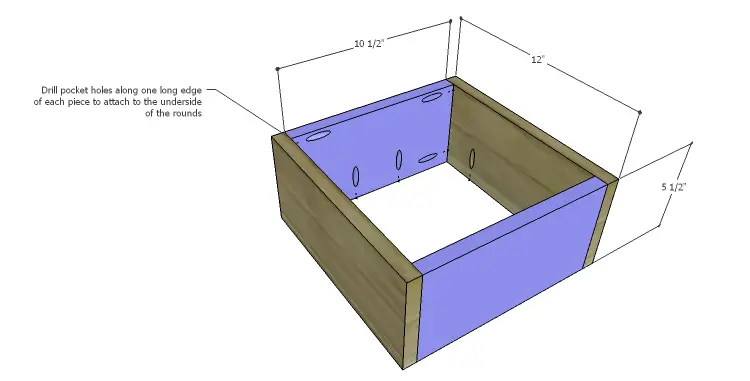
- 4 – 3/4″ material at 5-1/2″ x 10-1/2″ – Upper & Middle Frames
- 4 – 3/4″ material at 5-1/2″ x 12″ – Upper & Middle Frames
- 3 – 3/4″ material at 1-1/2″ x 18-1/2″ – Lower Frame
- 2 – 3/4″ material at 1-1/2″ x 20″ – Lower Frame
Step One
If using plywood, edge banding will be applied to the exposed edges of the 3/4″ plywood prior to assembly.
Cut the circles out of the 3/4″ material using a jigsaw or bandsaw. Laminate two circles together for each “shelf” by spreading glue on the face of one circle and positioning another circle on top. Wiggle the top piece to create suction, then secure the pieces together using 1-1/4″ brad nails.
Step Two
Cut the pieces for the upper and middle frames. With the pocket hole jig set for 3/4″ material, drill pocket holes in each end of the shorter pieces, as well as one long edge of each piece. Assemble the frames using glue an 1-1/4″ pocket hole screws.
Step Three
Cut the pieces for the lower frame and drill pocket holes in each end of the shorter pieces as well as one long edge of each piece. Assemble the lower frame using glue and 1-1/4″ pocket hole screws.
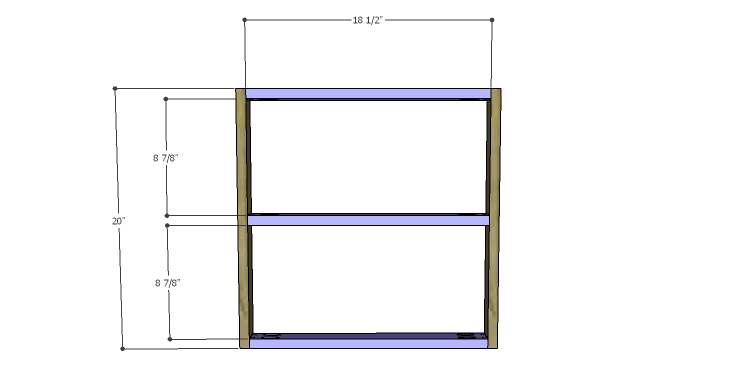
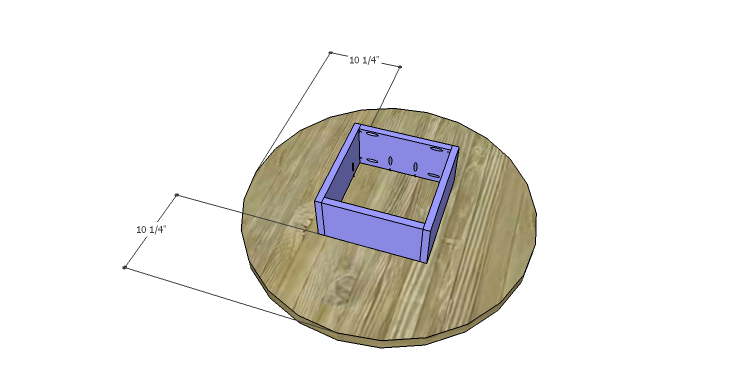
Step Four
Lay the first round on a flat work surface. Position one of the 5-1/2″ frames on the round as indicated in the drawing. Secure the frame to the round using glue and 1-1/4″ pocket hole screws.
Step Five
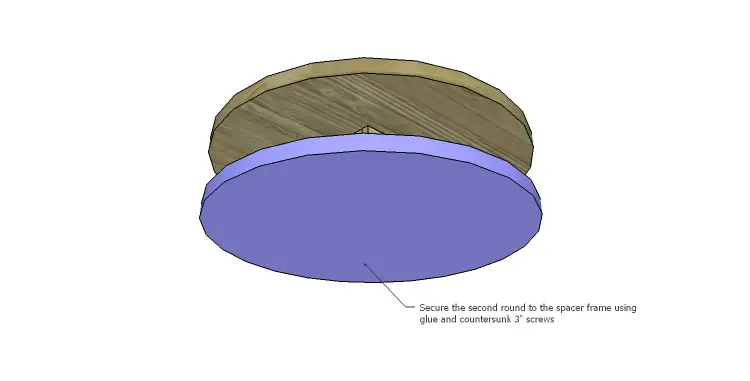
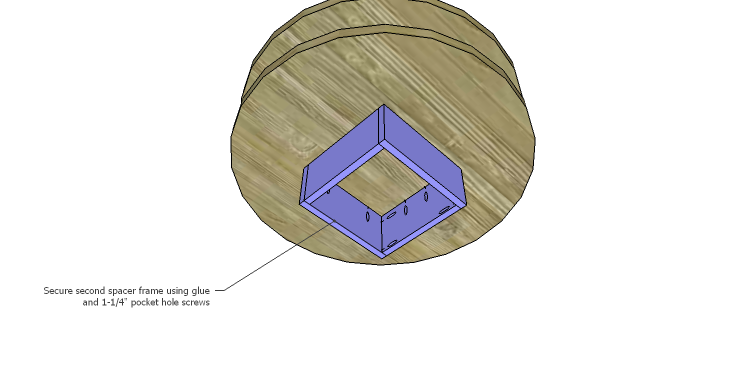
Lay the second round on a flat surface and mark the position of the frame on the underside. This will make it easier to drive the screws in the right place – through the underside of the top into the frame above! Spread glue on the first frame, then position the second round on top of it as indicated in the drawing. Drive 3″ screws through the top into the frame locating the screws so that the pocket hole screws that will be driven through the next frame will not interfere.
Position the second frame on the second round and secure in place using glue and 1-1/4″ pocket hole screws.
Step Six
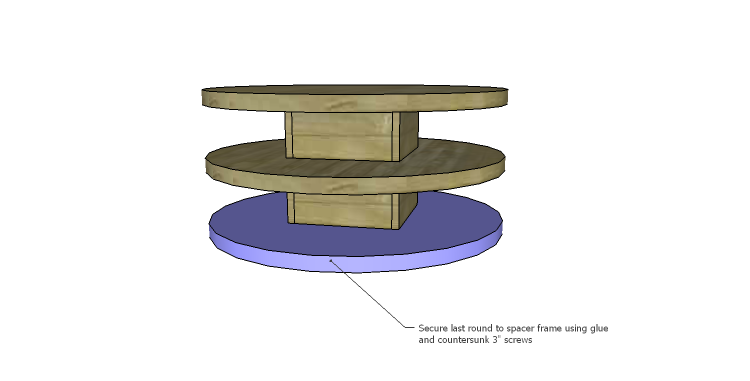
Lay the third round on a flat surface and mark the position of the frame on the underside. Spread glue on the second frame, then position the third round on top of it as indicated in the drawing. Drive 3″ screws through the top into the frame locating the screws so that the pocket hole screws that will be driven through the next frame will not interfere.
Step Seven
Position the base frame on the underside of the third round as indicated in the drawing. Secure in place using glue and 1-1/4″ pocket hole screws.
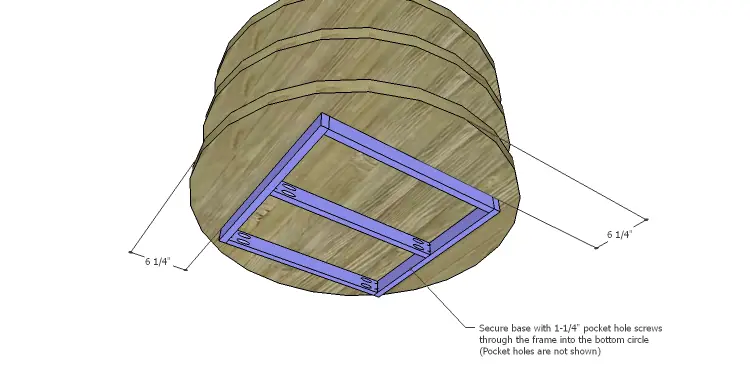
If using MDF, fill the edges of the rounds using Dry Dex to hide the seams. Finish the table as desired.
This is such a neat piece and I love that it has so much storage! The table would also look great with a dark stain and a stenciled or glue-resist pattern on the top… Have any questions about the DIY plans to build a Round Shelf Coffee Table? Leave a comment below or contact me at cher {at} designsbystudioc {dot} com.


[…] An Ultra-Modern Coffee Table with Storage […]
[…] Round Shelf Coffee Table […]
[…] Round Shelf Coffee Table […]