DIY Bath Vanity Plan with a Built-In Clothes Hamper
A Custom Bath Vanity for My Own Home!
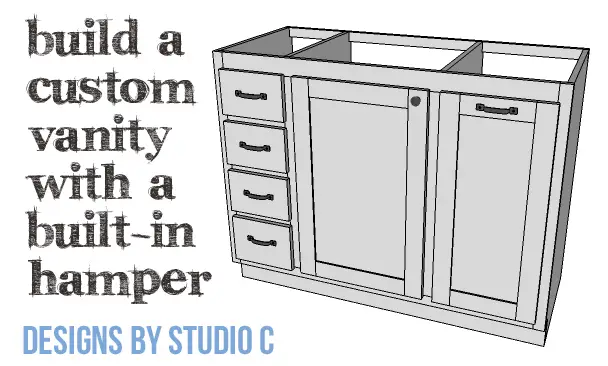
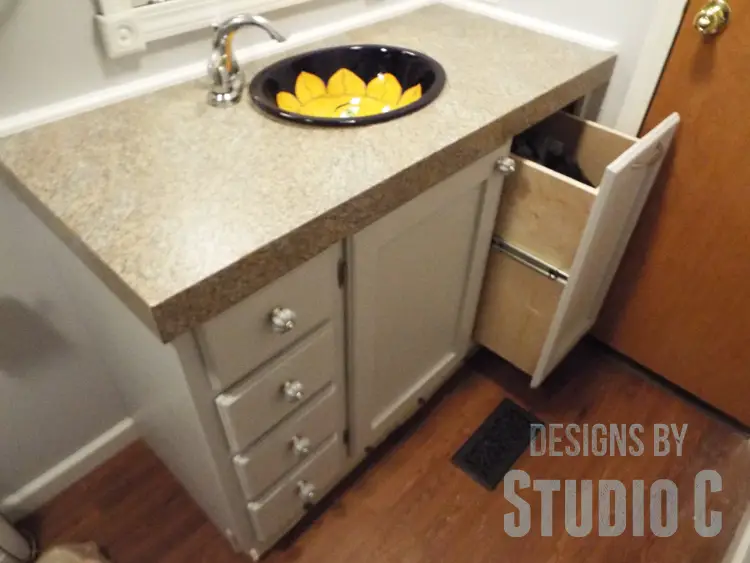
My kids and I are very tall and the existing vanities in the bathrooms in our home seem to be so short! Since the kids are getting older, I figured it was time for a bath makeover with a new (and taller) vanity. Their bathroom is quite small so something ultra fancy wouldn’t work. I created this DIY custom bathroom vanity plan with a built-in clothes hamper, four drawers, and a shelf in the middle.
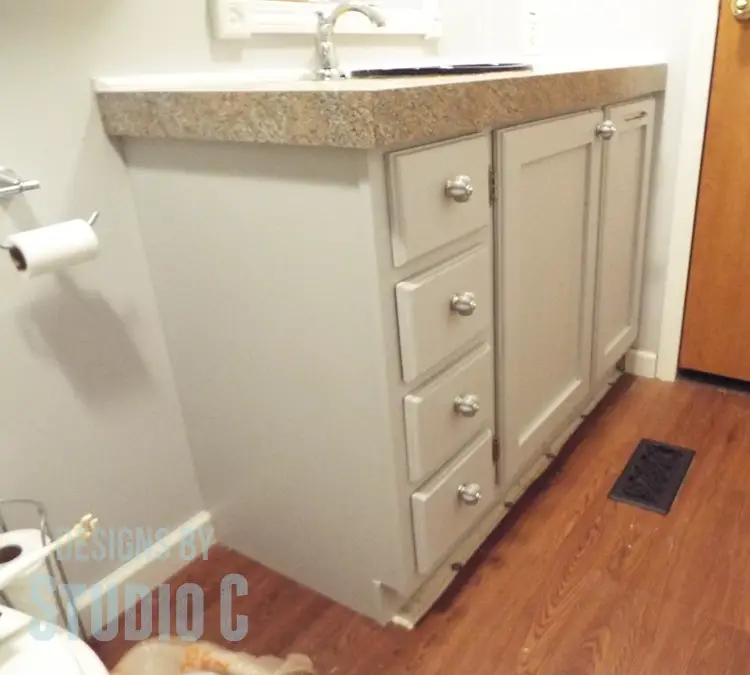
The old vanity was truly cheap… It was constructed of thin furring strips, 1/4″ plywood, and 1/2″ MDF with no shelving or drawers. Space is definitely at a minimum in this bathroom! I did not change the overall size of the vanity and was able to use the existing countertop (which I built several years ago) while creating a bit more storage space!
The cabinet has a face frame on the front (so no edge banding will be required for the plywood edges), and overlay drawer fronts and doors. The hamper is based on a hidden trash can I built for my kitchen – I just replaced the bottom with peg board for ventilation.
Materials:
- 1″ pocket hole screws (<– affiliate link!)
- 1-1/4″ pocket hole screws (<– affiliate link!)
- 1-1/4″ screws
- 1-1/4″ brad nails
- 1-3/4″ brad nails
- 4 sets of 18″ drawer slides (<– affiliate link!)
- 1 set of 20″ drawer slides (the ball-bearing type) (<– affiliate link!)
- 1 set of hinges (<– affiliate link!)
- Cabinet pulls
- Wood glue
- Sandpaper (100, 150, 220 grits)
- Finishing supplies (primer & paint, or stain, sealer)
Lumber:
- 4 – 1×2 at 8′
- 1 – 1×3 at 4′
- 1 – 1×3 at 6′
- 1 – 1×8 at 4′
- 2 – 4′ x 8′ sheets of plywood
Cut List:
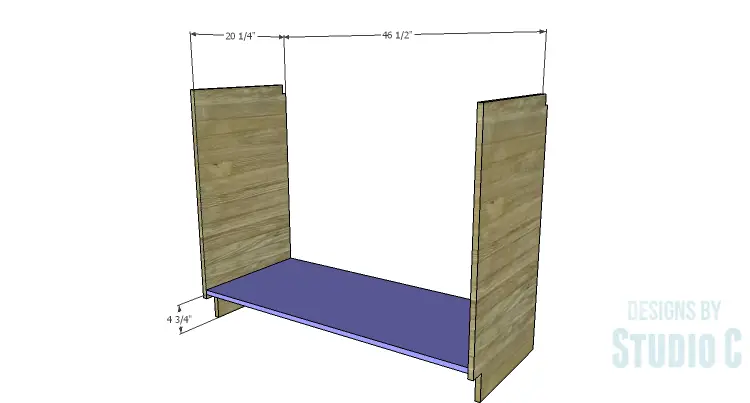
- 2 – 3/4″ plywood at 20-1/4″ x 35-1/4″ – Sides
- 1 – 3/4″ plywood at 20-1/4″ x 46-1/2″ – Bottom
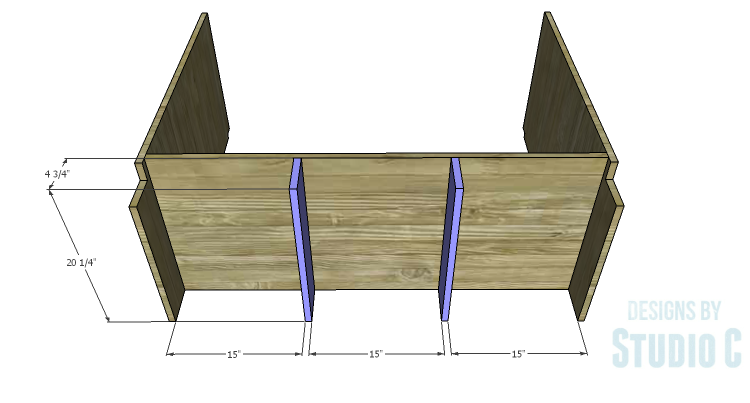
- 2 – 3/4″ plywood at 4″ x 20-1/4″ – Bottom Supports
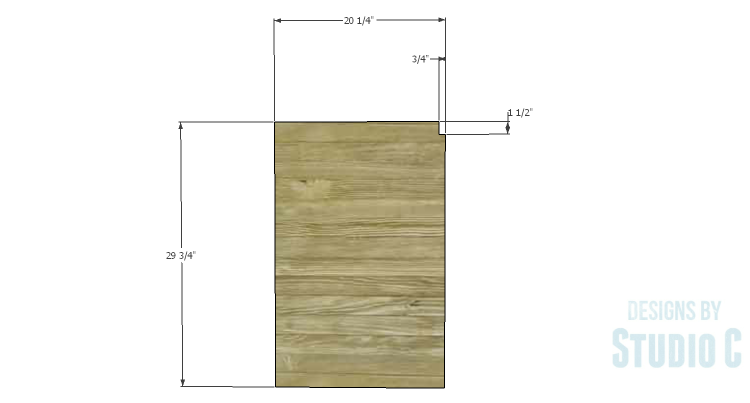
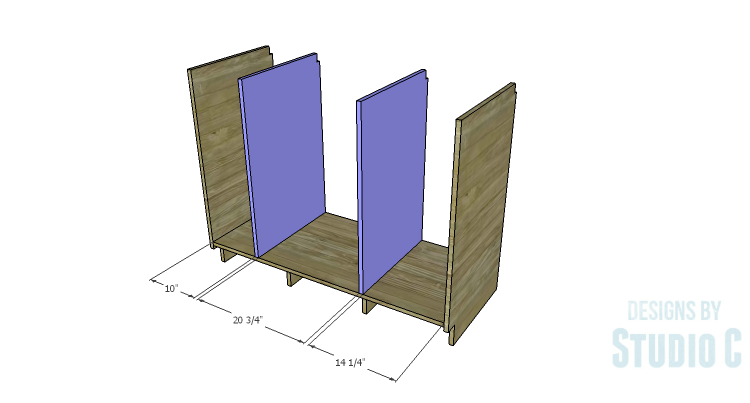
- 2 – 3/4″ plywood at 20-1/4″ x 29-3/4″ – Dividers
- 1 – 1×2 at 48″ – Back Support
- 1 – 3/4″ plywood at 4″ x 48″ – Kick Plate
- 2 – 1×2 at 20-1/4″ – Shelf Supports
- 1 – 3/4″ plywood at 20-1/4″ x 20-3/4″ (or cut to fit) – Shelf
- 5 – 1×2 at 20-1/4″ – Drawer Slide Spacers
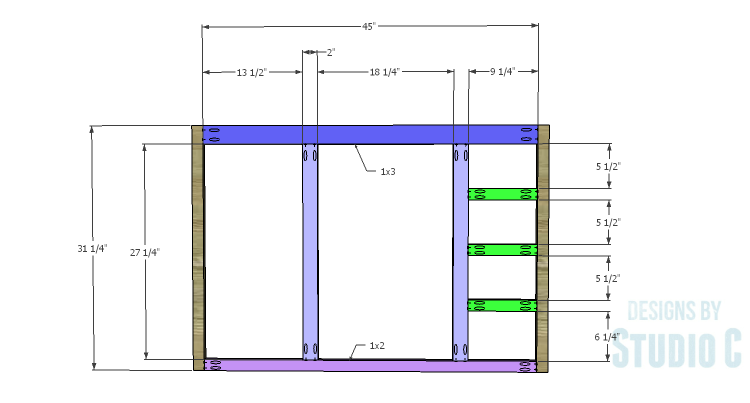
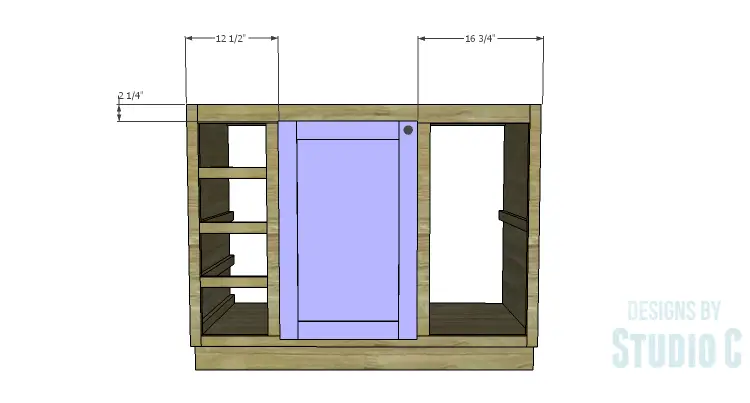
- 2 – 1×2 at 31-1/4″ – Face Frame (shown in Brown)
- 1 – 1×3 at 45″ – Face Frame (shown in Dark Blue)
- 1 – 1×2 at 45″ – Face Frame (shown in Purple)
- 2 – 1×3 (ripped to 2″ wide) at 27-1/4″ – Face Frame (shown in Light Blue)
- 3 – 1×2 at 9-1/4″ – Face Frame (shown in Green)
- 8 – 3/4″ plywood at 5″ x 6-3/4″ – Drawer Box Front & Back
- 8 – 3/4″ plywood at 5″ x 18″ – Drawer Box Sides
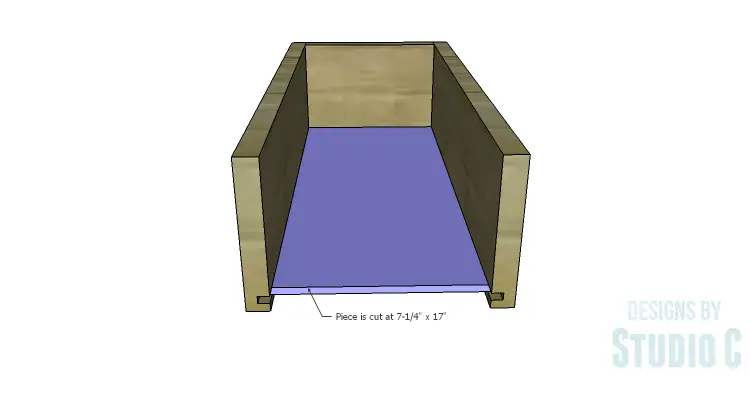
- 4 – 1/4″ plywood at 7-1/4″ x 17″ – Drawer Box Bottom
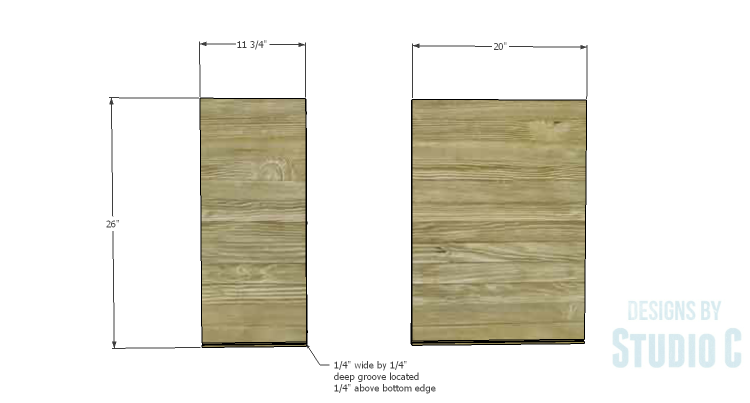
- 2 – 3/4″ plywood at 11-3/4″ x 26″ – Hamper Front & Back
- 2 – 3/4″ plywood at 20″ x 26″ – Hamper Sides
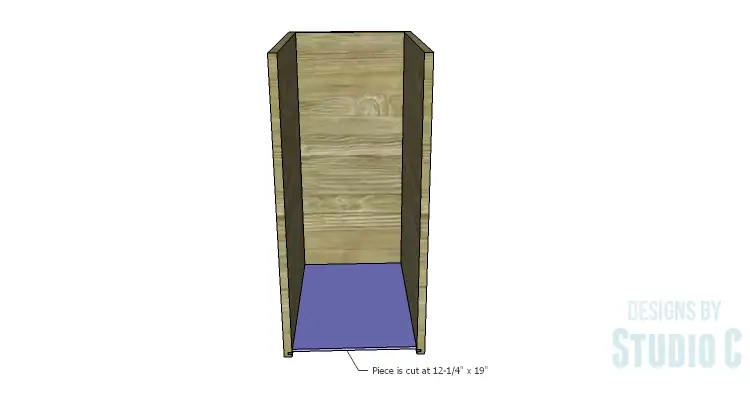
- 1 – 1/4″ pegboard or plywood at 12-1/4″ x 19″ – Hamper Box Bottom
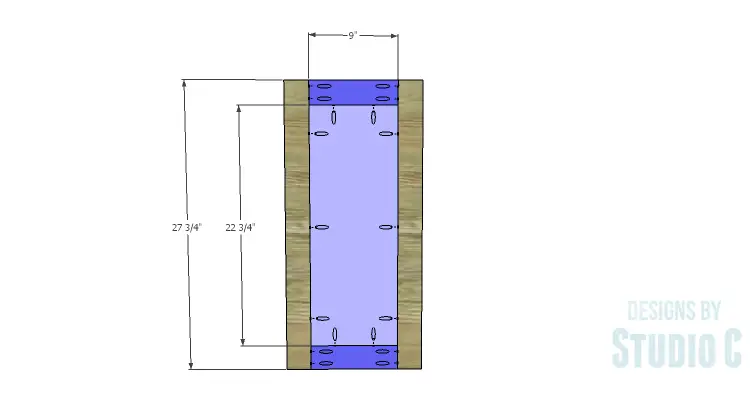
- 4 – 1×3 at 27-3/4″ – Door & Hamper Door Stiles
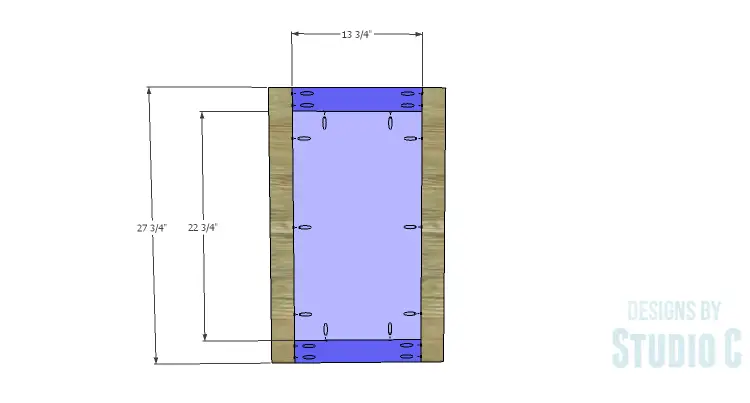
- 2 – 1×3 at 13-3/4″ – Door Rails
- 2 – 1×3 at 9″ – Hamper Door Rails
- 1 – 1/2″ plywood at 13-3/4″ x 22-3/4″ – Door Panel
- 1 – 1/4″ plywood at 9″ x 22-3/4″ – Hamper Door Panel
- 3 – 1×8 (ripped to 6″ wide) at 9-3/4″ – Drawer Fronts
- 1 – 1×8 (ripped to 6-3/4″ wide) at 9-3/4″ – Lower Drawer Front
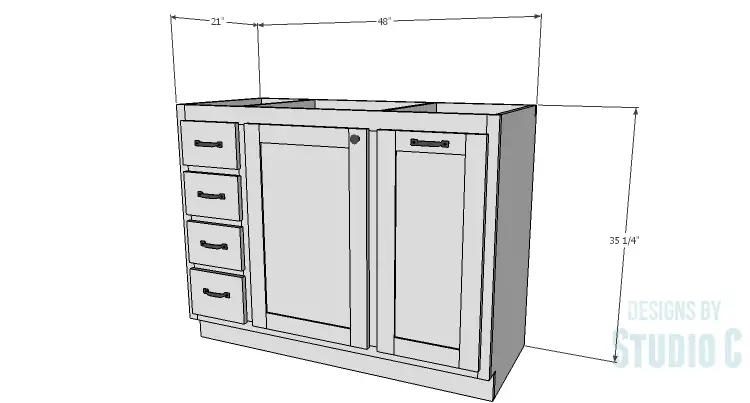
Step One
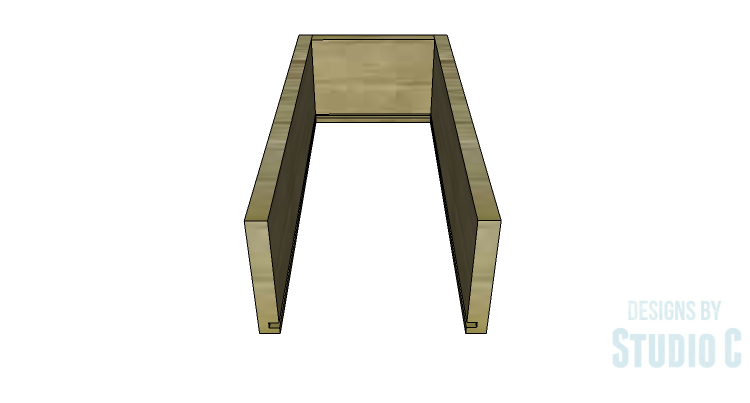
Cut the pieces for the sides. Cut the notches using a jigsaw.

Step Two
Cut the pieces for the bottom. With the pocket hole jig set for 3/4″ material, drill pocket holes in each shorter edge. Secure the bottom to the sides as shown in the drawing using glue and 1-1/4″ pocket hole screws.
Step Three
Cut the pieces for the bottom supports and drill pocket holes in one long edge of each piece. Secure to the underside of the bottom using glue and 1-1/4″ pocket hole screws.
Step Four
Cut the pieces for the dividers and cut the notches with a jigsaw. Drill pocket holes in the lower edge. Secure the dividers to the bottom using glue and 1-1/4″ pocket hole screws.
Step Five
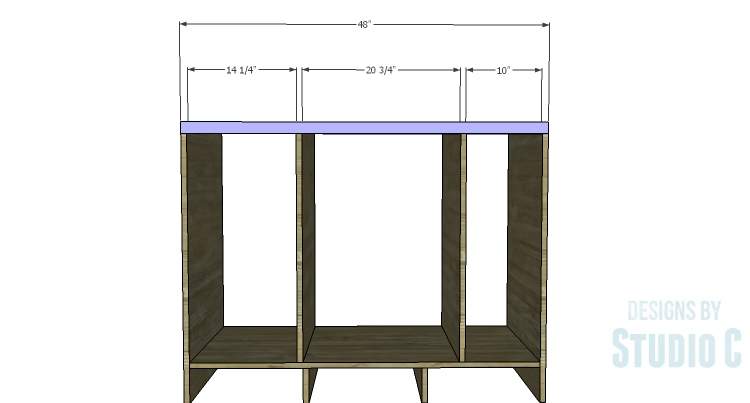
Cut the piece for the back support. Secure to the sides and dividers using countersunk 1-1/2″ screws.
Step Six
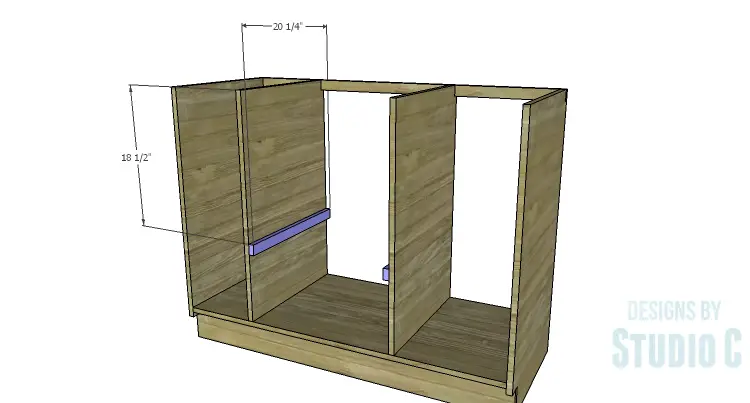
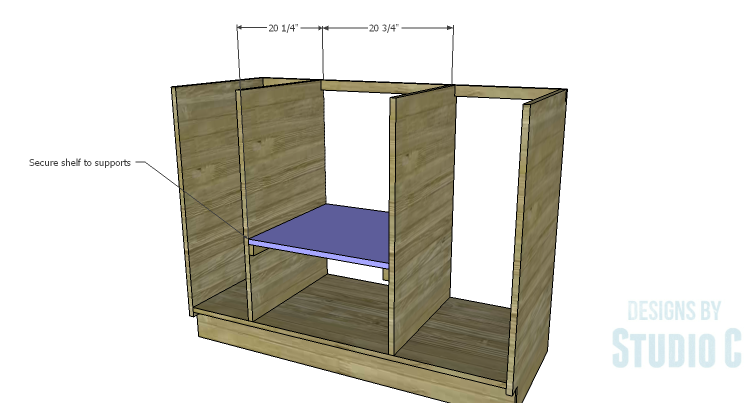
Cut the pieces for the shelf supports. The location may depend on the depth of the sink bowl, measure first to make sure! Secure the supports using glue and 1-1/4″ brad nails.
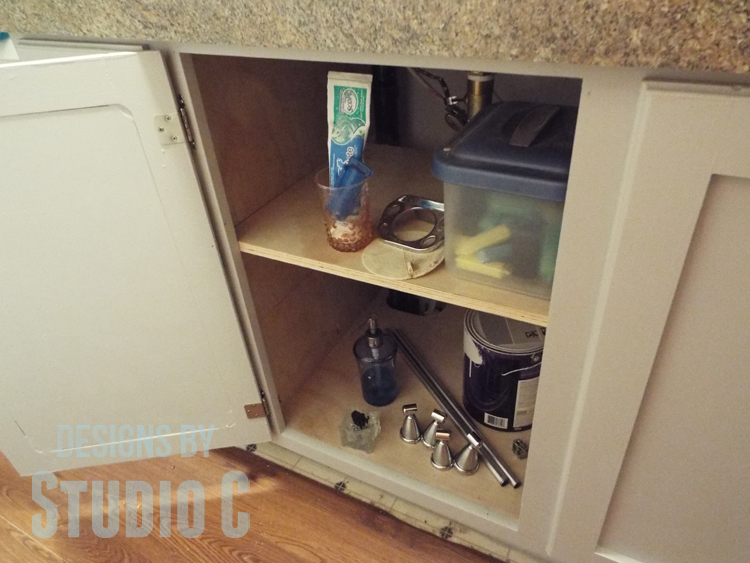
Cut the piece for the shelf. Again, this will depend on the location of the drain vent and the water lines. My water lines are PEX and do not bend very easily so I had to cut the shelf short to allow for the water lines – I didn’t want them to bend at the wrong point (a compression valve shut-off) and create a leak!
Step Seven
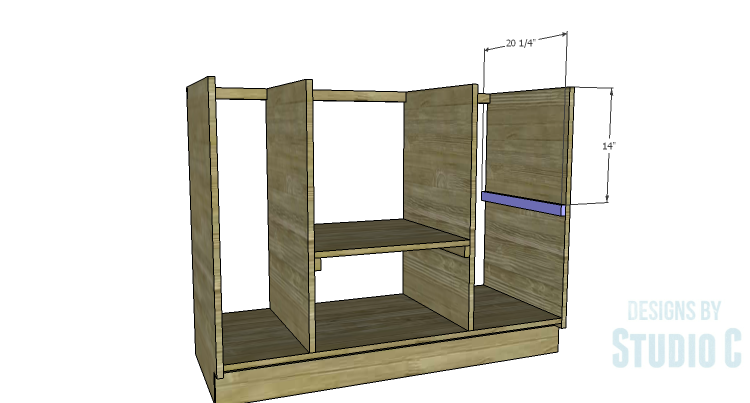
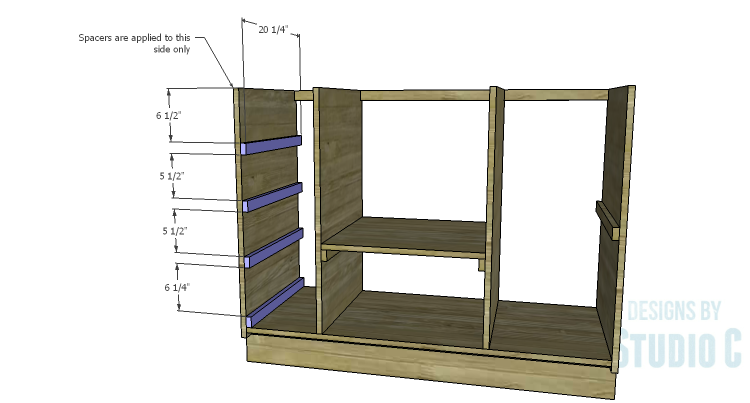
Cut the pieces for the drawer slide spacers. These are necessary because of the face frame. Secure the spacers as shown in the drawings using glue and 1-1/4″ brad nails.
Step Eight
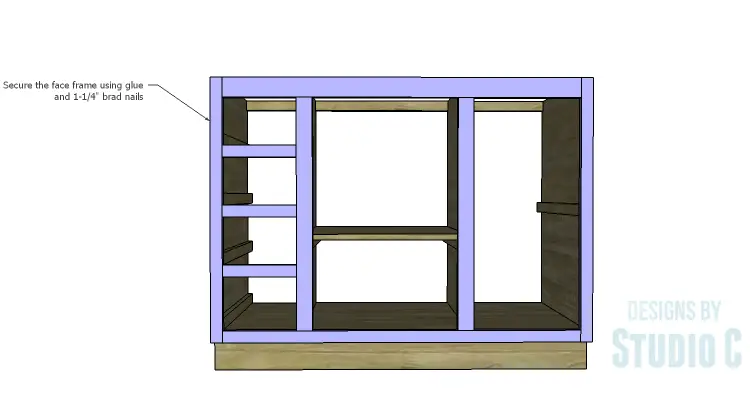
Cut the pieces for the face frame. Drill pocket holes where indicated. Secure the face frame to the front of the cabinet using glue and 1-3/4″ brad nails.
Step Nine
Cut the pieces for the hamper. Cut the groove in the bottom edge of each piece at 1/4″ wide by 1/4″ deep using a table saw or a router and a straight bit. Set the pocket hole jig for 3/4″ material and drill pocket holes in each end of the drawer box sides on the opposite side as the groove. Make sure that the pocket holes will not interfere with the groove. Secure the sides to the back using glue and 1-1/4″ pocket hole screws.
Step Ten
Cut the piece for the drawer bottom. Slide the bottom into the grooves in the sides and back. The piece should fit snugly but not too tight.
Step Eleven
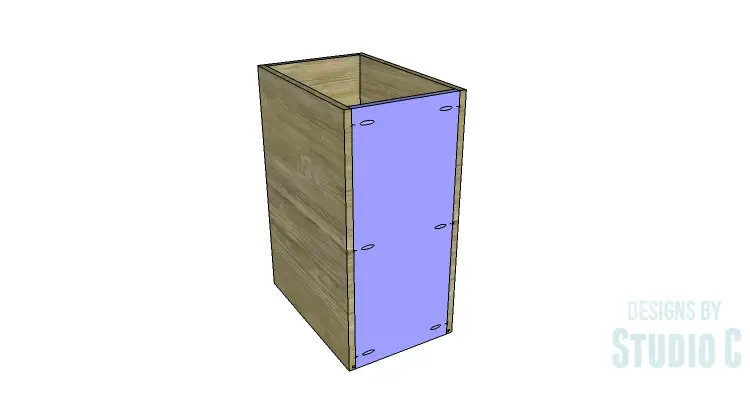
Insert the front edge of the drawer box bottom into the groove on the drawer box front. Secure the drawer box sides to the drawer box front using glue and 1-1/4″ pocket hole screws.
Install the 20″ drawer slides according to the manufacturer’s installation instructions positioning them as indicated in the drawings.
Step Twelve
Cut the pieces for the door and the hamper door. Drill pocket holes in each end of the rail pieces. Assemble the frames using glue and 1-1/4″ pocket hole screws.
Cut the pieces for the door panel and hamper door panel. Set the pocket hole jig for 1/2″ material and drill pocket holes in all four edges. Secure the panels to the corresponding frames using glue and 1″ pocket hole screws. The back face of the panels will be flush with the back face of the frames.
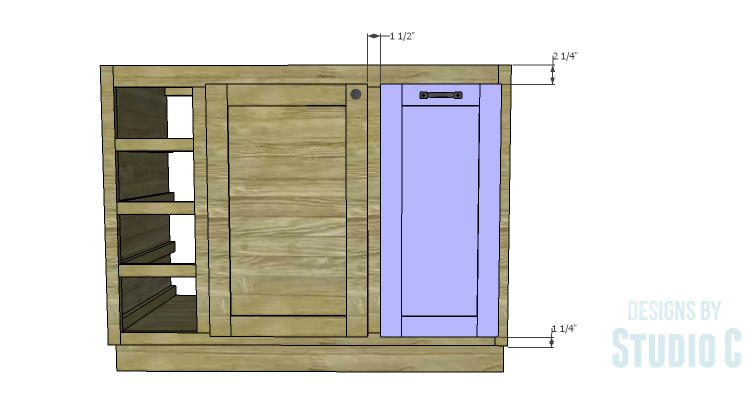
Install the hinges on the door, then install the door on the cabinet as indicated in the drawing.
The hamper door will be secured to the hamper box. Position the hamper door, then secure in place with 1-1/4″ brad nails through the frame. Open the hamper and secure the frame from the inside with 1-1/4″ screws through the box into the frame.
Step Thirteen
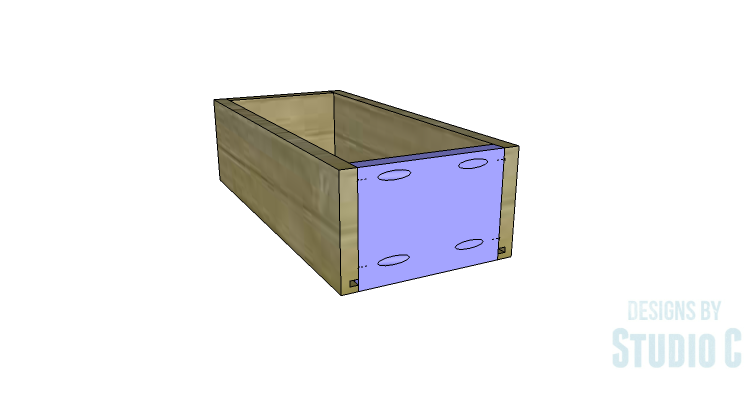
Cut the pieces for the drawer box sides, front, and back. Cut the groove in the bottom edge of each piece at 1/4″ wide by 1/4″ deep using a table saw or a router and a straight bit. Set the pocket hole jig for 3/4″ material and drill pocket holes in each end of the drawer box sides on the opposite side as the groove. Make sure that the pocket holes will not interfere with the groove. Secure the sides to the back using glue and 1-1/4″ pocket hole screws.
Step Fourteen
Cut the piece for the drawer bottom. Slide the bottom into the grooves in the sides and back. The piece should fit snugly but not too tight.
Step Fifteen
Insert the front edge of the drawer box bottom into the groove on the drawer box front. Secure the drawer box sides to the drawer box front using glue and 1-1/4″ pocket hole screws.
Install the drawer slides according to the manufacturer’s installation instructions positioning them as indicated in the drawings.
Step Sixteen
Cut the pieces for the drawer fronts. Position them as shown in the drawing, securing in place with 1-1/4″ brad nails. Open the drawers and secure from the inside with 1-1/4″ screws through the box into the frame.
Install the kickplate securing with 1-1/4″ brad nails.
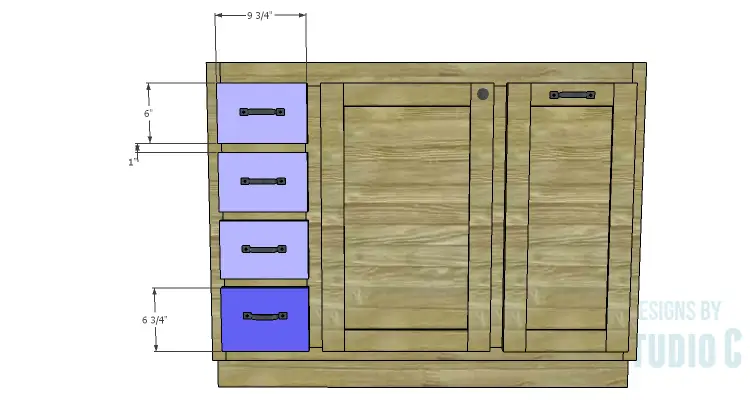
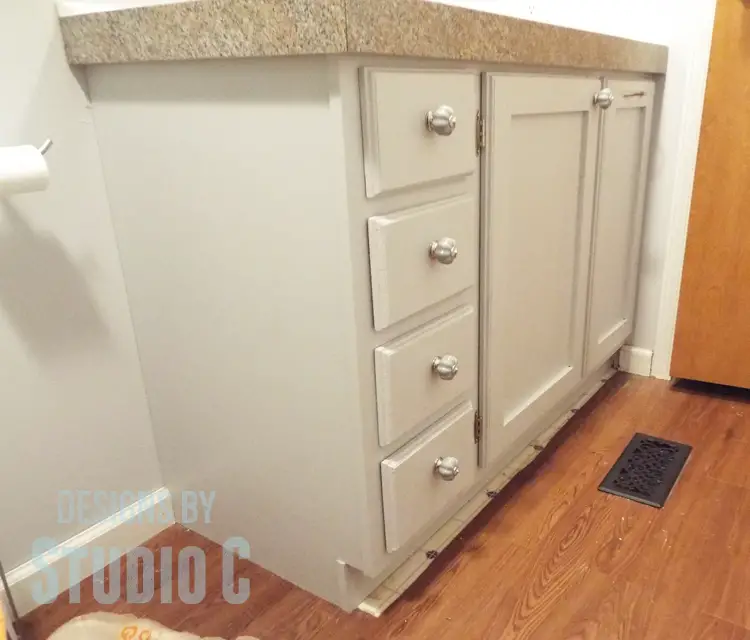
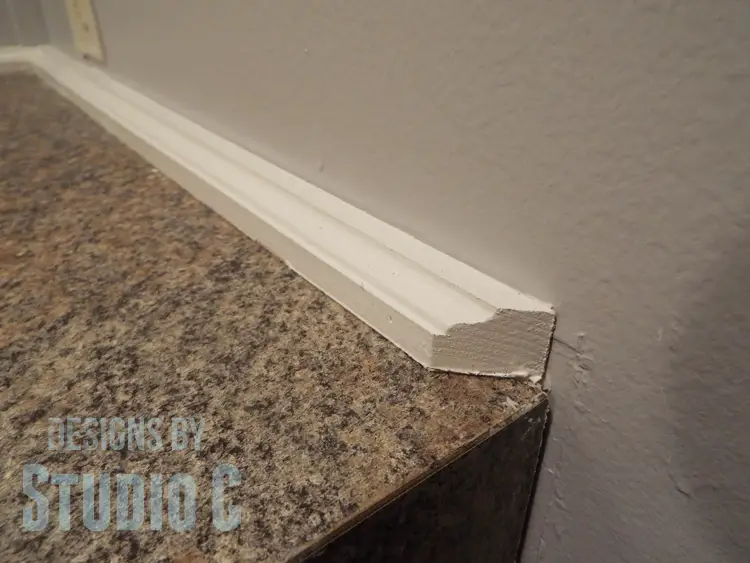
Finish the vanity as desired and add the top. I painted the vanity and used the original top. I also cut my own trim to apply to the countertop against the wall!
This vanity is really easy to build and for more vanity inspiration, here are other bath vanity plans to build:
Have any questions about the DIY bath vanity plan with a built-in clothes hamper? Leave a comment below!
Originally posted 2015-09-03 08:00:24.

