An Easy to Build Media Stand Using One Sheet of Plywood
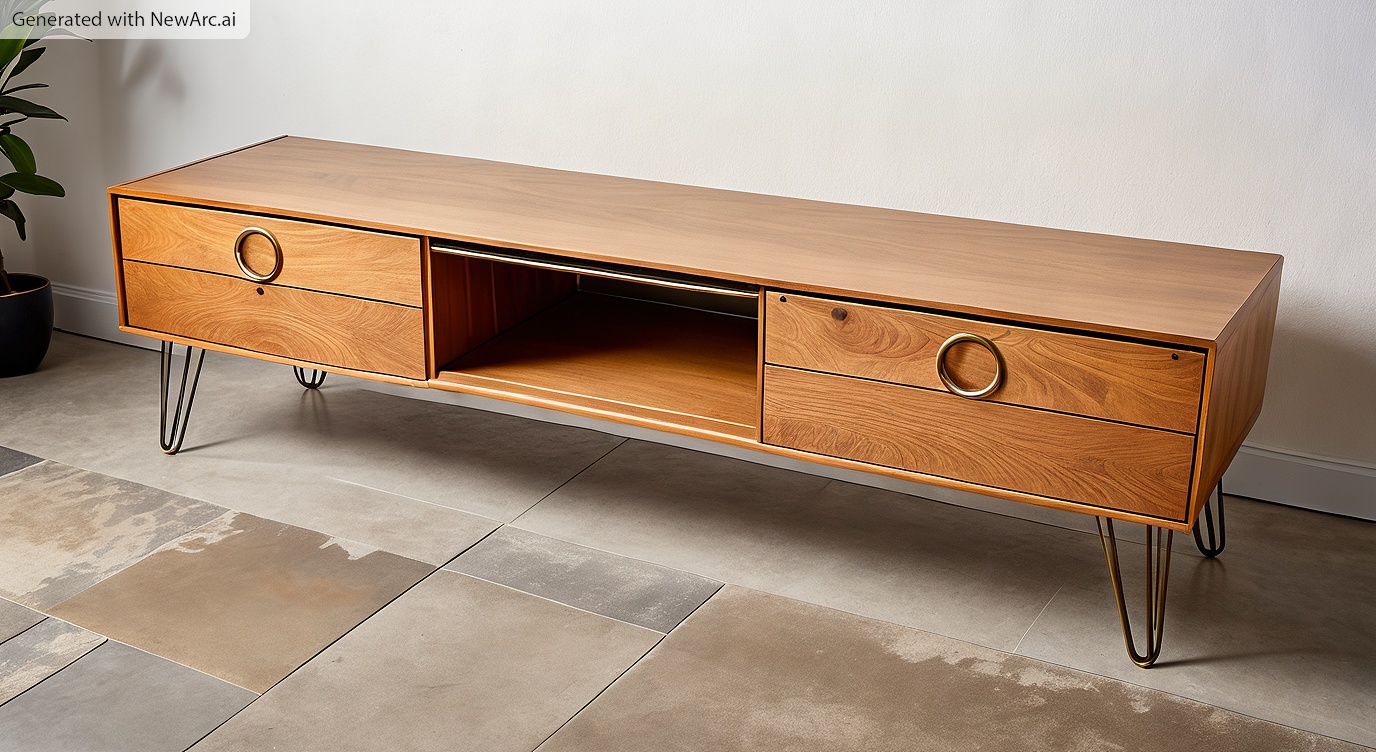
Yep, the title is correct… This super simple media stand can be constructed with only ONE sheet of plywood (with the exception of the drawer fronts and the drawer bottom, of course)! The plans to build a simple media stand are suitable for all skills levels, and use minimal tools and supplies. The media stand has a center cubby and a drawer on each side, and rests on short hairpin legs.
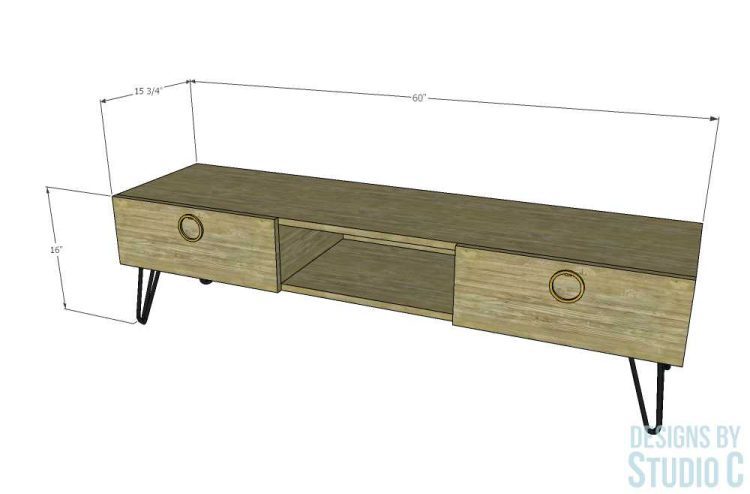
Supplies:
- 1-1/2″ brad nails
- 2″ brad nails
- Edge banding (<– affiliate link!)
- Two sets of 14″ drawer slides
- One set of 8″ hairpin legs (<– affiliate link!)
- 3/4″ screws
- Two drawer handles
- Wood glue
- Sandpaper (80, 120, 220 grits)
- Finishing supplies (stain and sealer or paint)
Lumber:
- 1 – 1×10 at 4′
- 1 – 4′ x 8′ sheet of 3/4″ plywood
- 1 – 2′ x 4′ sheet of 1/4″ plywood
Cut List:
- 2 – 3/4″ plywood at 15″ x 60″ – Top & Bottom
- 4 – 3/4″ plywood at 6-1/2″ x 15″ – Dividers
- 1 – 3/4″ plywood at 6-1/2″ x 19″ – Cubby Back
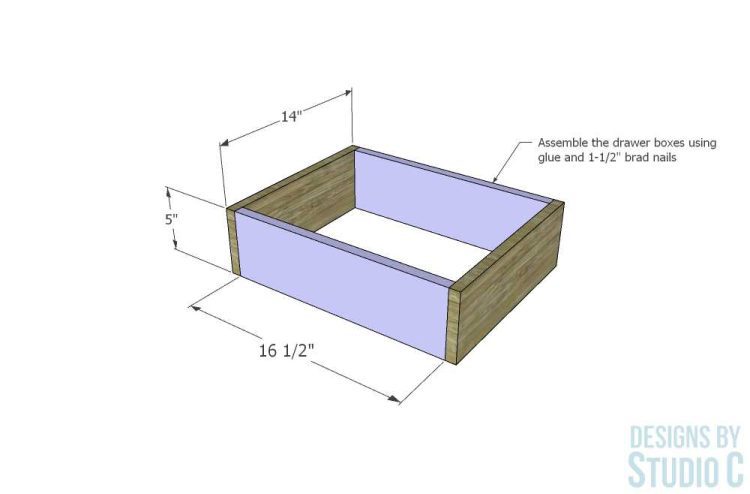
- 4 – 3/4″ plywood at 5″ x 14″ – Drawer Box Sides
- 4 – 3/4″ plywood at 5″ x 16-1/2″ – Drawer Box Front & Back
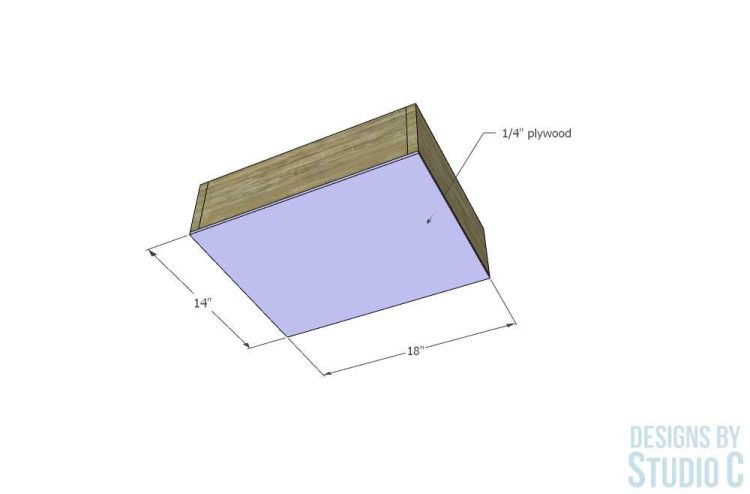
- 2 – 1/4″ plywood at 14″ x 18″ – Drawer Box Bottom
-
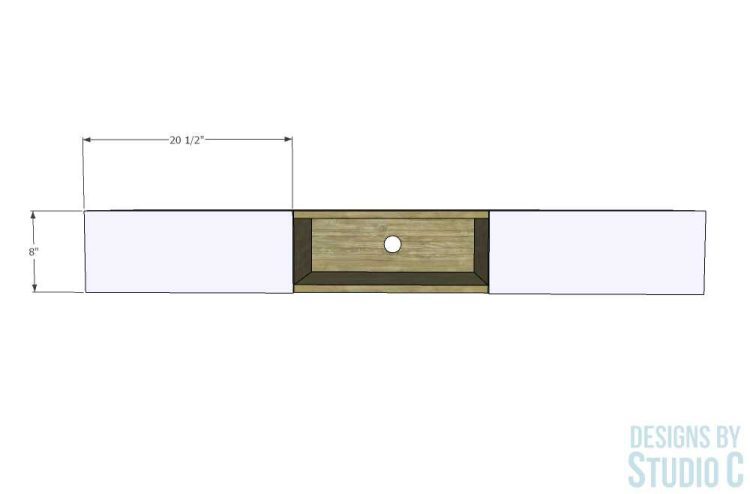
2 – 1×10 (ripped to 8″ wide) at 20-1/2″ – Drawer Fronts
Notes About the Project:
- Edge banding will be applied to the exposed edges of the plywood prior to assembly
- The back of the stand is open where the drawers are located but can be covered with 1/4″ plywood, pieces of decorative paper or corrugated board
- Sand all pieces prior to assembly
Other Plans to Build a Simple Media Stand:
The fastest and easiest way to get the most out of the sheet of plywood is to cut it into strips – cut two strips at 15″ wide. These two strips will yield the top, bottom, dividers and the cubby back. The remaining pieces for the drawer boxes can be cut from the remaining strip. The drawer fronts can also be cut from the remaining strip, if desired.
Step One
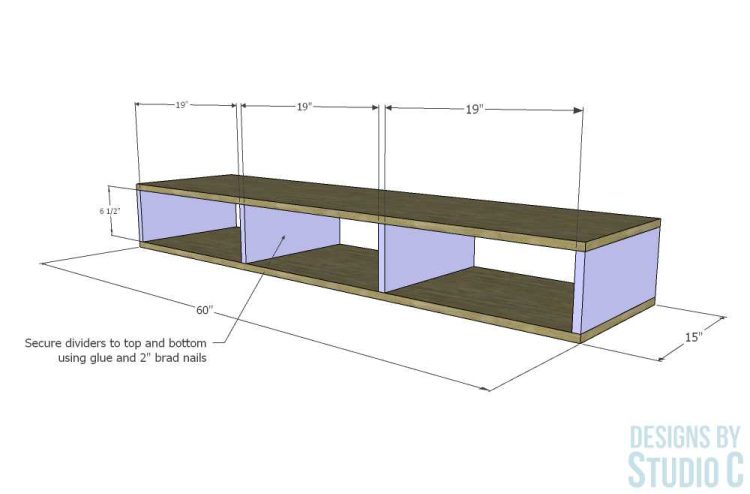
Cut the pieces for the top, bottom and dividers. Assemble the case, as shown in the drawing, using glue and 2″ brad nails.
Step Two
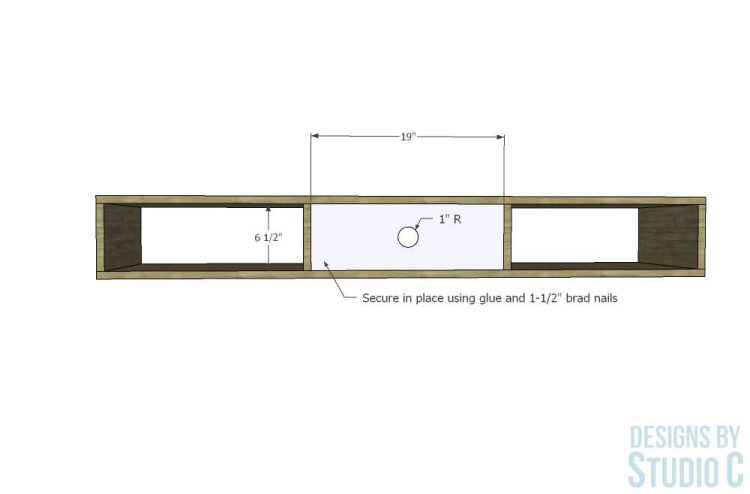
Cut the piece for the cubby back. Use a 2″ hole saw to cut a hole for electronics cords, if desired. Insert the piece in the center back of the case securing in place using glue and 1-1/2″ brad nails.
Step Three
Install the drawer slides in the case and measure the distance between them before cutting the pieces for the drawer boxes. Sometimes, due to human error, the boxes can be a little wide or short. Measure first, then cut the pieces for the front, back and the sides. Assemble the boxes, as shown, using glue and 1-1/2″ brad nails. (This tutorial on installing drawer slides is a great help if you’ve never done it before!)
Cut the pieces for the drawer box bottoms and secure them using glue and 1-1/2″ brad nails.
Step Four
Cut the pieces for the drawer fronts and secure them to the drawer boxes. (Here is a tutorial on installing drawer fronts that is helpful, as well!)
Step Five
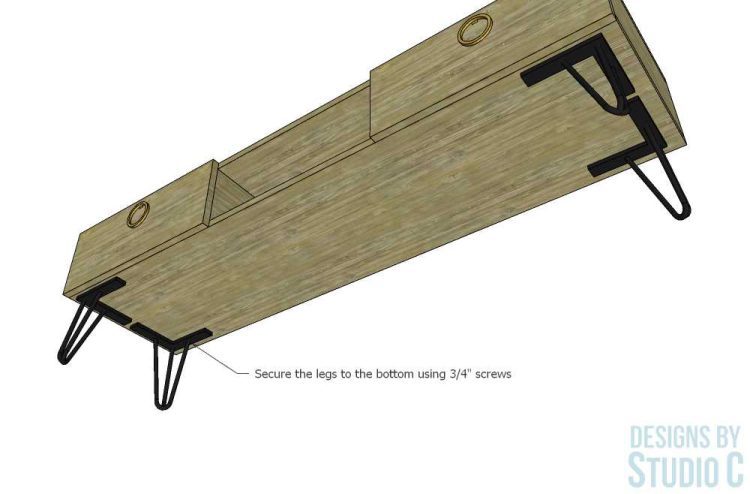
Finish as desired. Install the legs on the bottom of the case approximately 1-1/2″ from the edges of the case. Use 3/4″ screws so they won’t poke through the surface of the bottom!
This media stand is really easy to build and definitely budget friendly! Do you have questions on the plans to build a simple media stand? Leave a comment below!
Originally posted 2021-07-19 08:00:19.


Comments are closed.