DIY Plans to Build a Delvigne Media Cabinet
A Media Cabinet with Open Shelving and Two Drawers
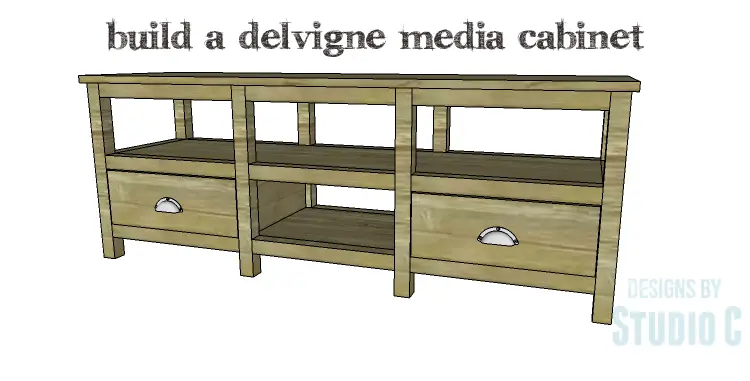
Hey there! So, here’s the deal for today: we’ve got this awesome plan for a media cabinet that’s all about simplicity. It’s called the Delvigne Media Cabinet, and let me tell you, it’s pretty neat.
This cabinet has some cool features, like open upper shelving, an open center shelf, and not one, but two drawers. And the best part? It’s super easy to build! You won’t have to break the bank either, because we’re using regular, off-the-shelf lumber. Plus, you can totally finish it in just one weekend!
So, if you’re up for a fun DIY project, this media cabinet is definitely worth checking out. Trust me, you won’t regret it!
Materials:
- 1-1/4″ pocket hole screws (<– affiliate link!)
- 2-1/2″ pocket hole screws
- 1-1/4″ brad nails
- Edge banding, optional
- Cabinet Pulls
- Wood glue
- Sandpaper (100, 150, 220 grits)
- Finishing supplies (primer & paint, or stain, sealer)
- Paste Wax
Lumber:
- 6 – 2×2 at 8′
- 1 – 2′ x 4′ sheet of 3/4″ plywood
- 1 – 4′ x 8′ sheet of 3/4″ plywood
Cut List:
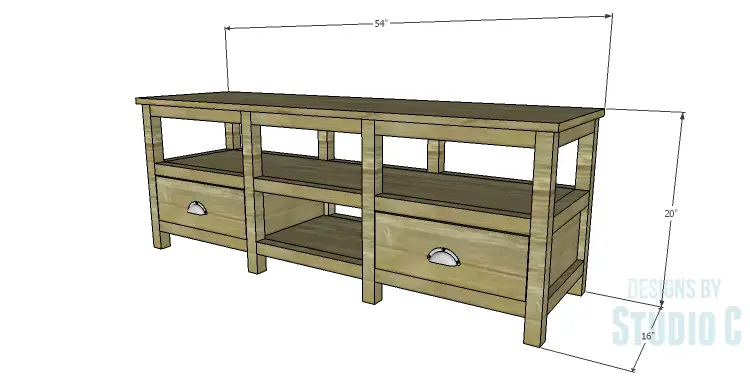
- 8 – 2×2 at 19-1/4″ – Legs
- 6 – 2×2 at 12-1/2″ – Side Framing
- 2 – 3/4″ plywood at 6-1/8″ x 12-1/2″ – Side Panels
- 12 – 2×2 at 16″ – Stretchers
- 6 – 2×2 at 15″ – Stretchers
- 2 – 2×2 at 12-1/2″ – Top Supports
- 2 – 3/4″ plywood at 6-1/8″ x 16″ – Back Panels
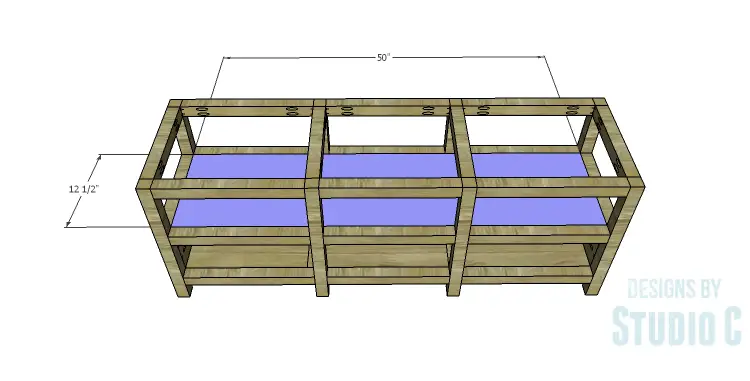
- 2 – 3/4″ plywood at 12-1/2″ x 50″ – Upper & Lower Shelves
- 2 – 3/4″ plywood at 6-7/8″ x 12-1/2″ – Lower Shelf Dividers
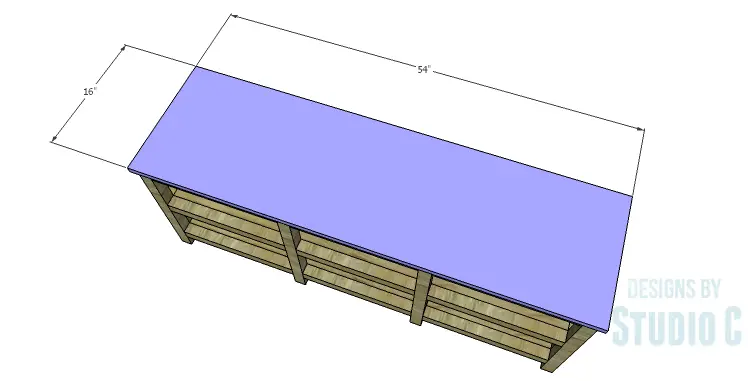
- 1 – 3/4″ plywood at 16″ x 54″ – Top
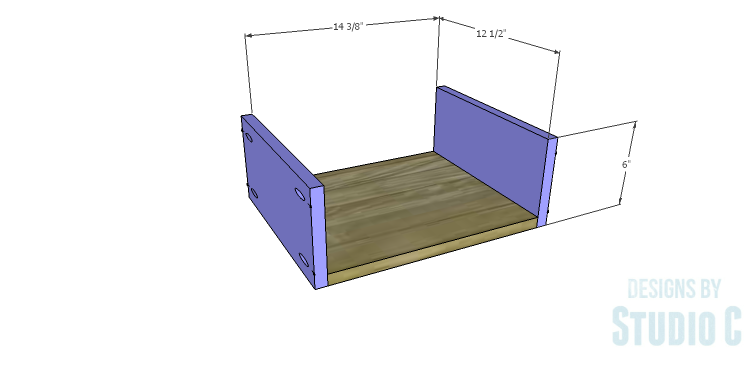
- 2 – 3/4″ plywood at 12-1/2″ x 14-3/8″ – Drawer Box Bottom
- 4 – 3/4″ plywood at 6″ x 12-1/2″ – Drawer Box Sides
- 4 – 3/4″ plywood at 6″ x 15-7/8″ – Drawer Box Front & Back
Step One
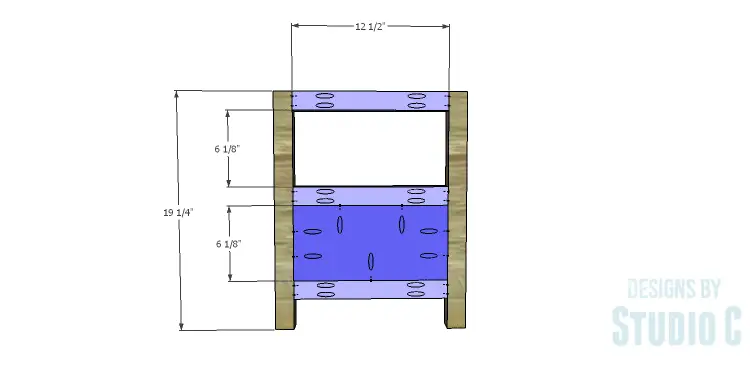
Cut the pieces for the legs, the side framing, and the side panels. With the pocket hole jig set for 1-1/2″ material, drill pocket holes in each end of the side framing pieces. Secure the framing pieces to the legs using glue and 2-1/2″ pocket hole screws.
Set the pocket hole jig for 3/4″ material and drill pocket holes in the long edges of the side panels. Secure the panels to the side framing as shown using glue and 1-1/4″ pocket hole screws. The back face of the panels will be flush with the back face of the framing.
Step Two
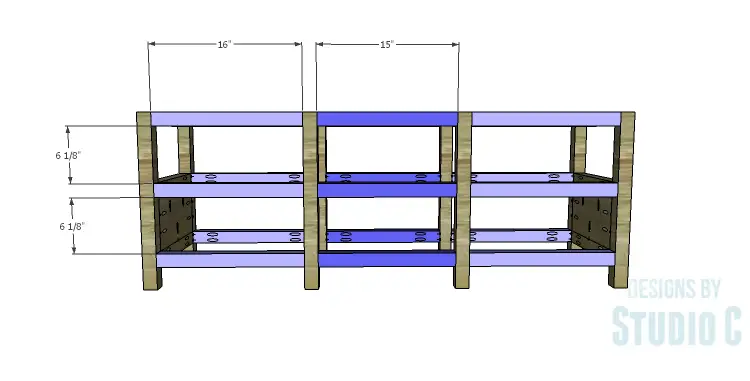
Cut the pieces for the stretchers. Note that the center stretchers are narrower than the outer stretcher. Set the pocket hole jig for 1-1/2″ material and drill pocket holes in each end of the stretcher pieces. Secure the stretchers to the legs using glue and 2-1/2″ pocket hole screws.
Step Three
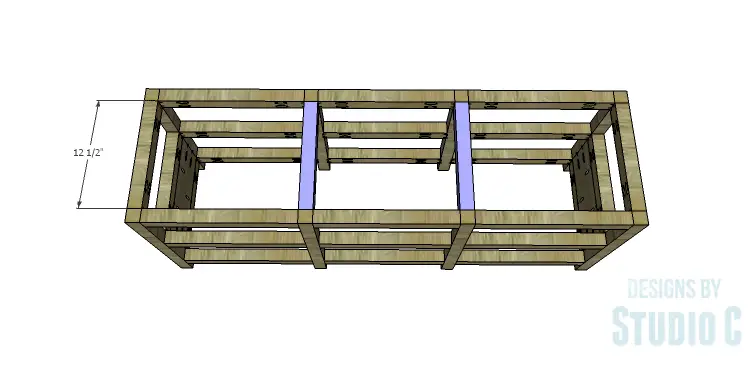
Cut the pieces for the top supports and drill pocket holes in each end. Secure the supports to the framing using glue and 2-1/2″ pocket hole screws.
Step Four
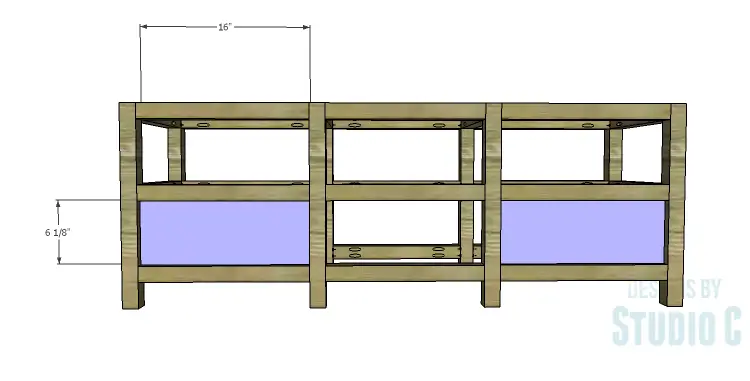
Cut the pieces for the back panels. Set the pocket hole jig for 3/4″ material and drill pocket holes in the long edges of the back panels. Secure the panels to the outer stretchers as shown using glue and 1-1/4″ pocket hole screws. The back face of the panels will be flush with the back face of the stretchers.
Step Five
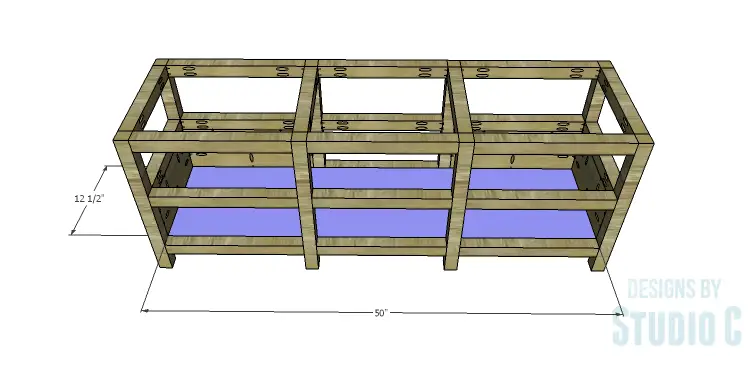
Cut the pieces for the upper and lower shelves, and drill pocket holes in all four edges. Secure the lower shelf to the side framing and stretchers using glue and 1-1/4″ pocket hole screws. Set the other shelf aside.
Step Six
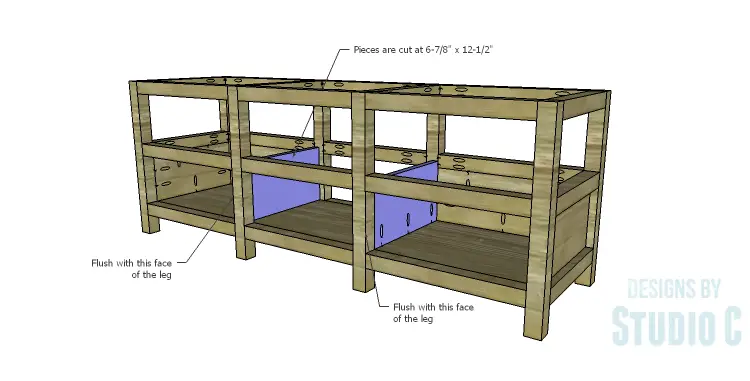
Cut the pieces for the lower shelf dividers and drill pocket holes along one longer edge. Position the dividers so that the face with the pocket holes is flush with the inside of the middle legs, facing the side panels. (This is to keep the drawers in line!) Secure in place using glue and 1-1/4″ pocket hole screws.
Step Seven
Secure the upper shelf to the middle stretchers and framing using glue and 1-1/4″ pocket hole screws. Add a few brad nails through the shelf into the dividers below.
Step Eight
Cut the piece for the top. Apply edge banding to hide the exposed edges, if desired. The top will overhang the sides and front by 1/2″. Secure the top using glue and 1-1/4″ brad nails.
Step Nine
Cut the pieces for the drawers. Drill pocket holes in each end of the side pieces as will as all four edges of the bottom. If using edge banding, apply it to the exposed edges of the sides, front, and back prior to assembly. Secure the sides to the bottom, using glue and 1-1/4″ pocket hole screws. Secure the front and back pieces using glue and 1-1/4″ pocket hole screws. Mark the position for the cabinet pulls and drill the holes.
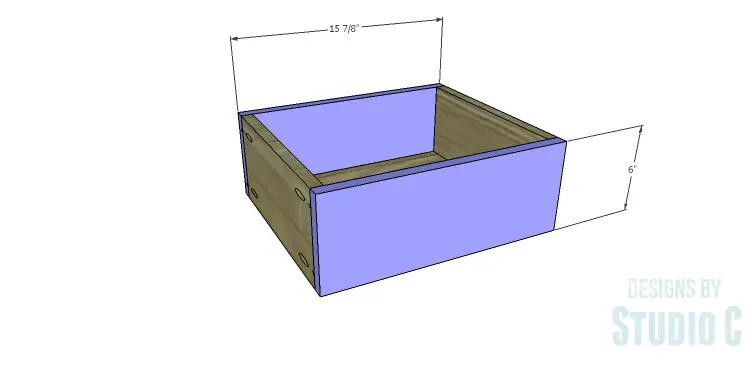
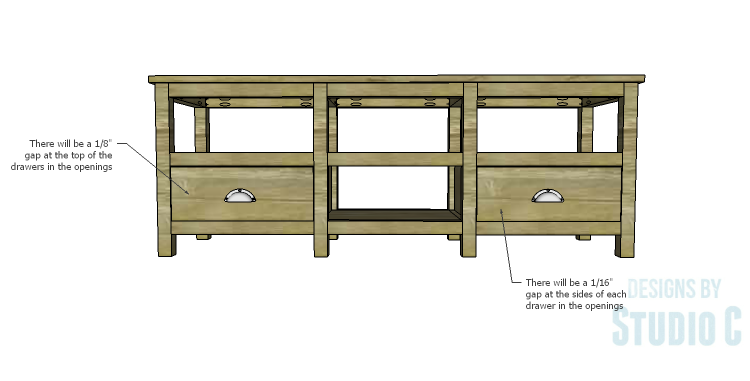
Finish as desired. Install the cabinet pulls, then apply a coat of paste wax to the bottom of each drawer to help it slide smoothly in the openings.
The DIY plans to build a Delvigne Media Cabinet are suitable for those new to woodworking. This is a piece that will look great in any finish, in any room! Have any questions about the plans? Leave a comment below!


[…] Build a Delvigne Media Stand […]