
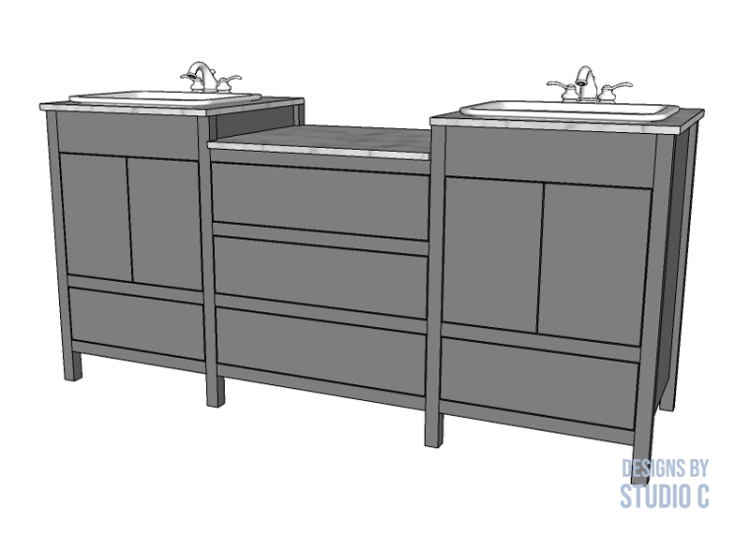
A Fabulous Bath Vanity with Plenty of Storage
The easy to build Royal double sink bath vanity features a door and drawer located under each sink with three large, roomy drawers connecting the sink cabinets. The entire build uses off-the-shelf boards with straight cuts, as well as plywood for the panels, and can be easily customized for a larger or smaller space!

Materials:
- 1-1/4″ pocket hole screws
- 1-1/4″ brad nails
- 1-1/4″ screws
- Edge banding
- Five sets of 20” Drawer Slides (<– affiliate link!)
- Four sets of Concealed Hinges (<– affiliate link!)
- Wood Glue
- Sandpaper (80, 120, 220 grits)
- Finishing Supplies
Lumber:
- 4 – 1×2 at 8′
- 2 – 1×4 at 6′
- 5 – 1×6 at 8′
- 2 – 2×2 at 6′
- 1 – 4′ x 8′ sheet of 1/4″ plywood
- 2 – 4′ x 8′ sheets of 3/4″ plywood
Cut List:
- 8 – 2×2 at 34-1/4″ – Legs
- 4 – 3/4″ plywood at 20″ x 30-1/4″ – Side Panels
- 4 – 1×4 at 20″ – Rear Stretchers
- 2 – 1×2 at 20″ – Rear Stretchers
- 2 – 1×6 (ripped to 5″ wide) at 20″ – Front Stretchers
- 4 – 1×2 at 20″ – Front Stretchers
- 2 – 3/4″ plywood at 20″ x 21-1/2″ – Shelf
- 8 – 1×2 at 20″ – Counter Supports and Drawer Slide Spacers
- 6 – 1×2 at 26″ – Center Front and Back Stretchers
- 10 – 1×6 at 20″ – Drawer Box Sides
- 4 – 1×6 at 17-1/2″ – Lower Drawer Boxes
- 6 – 1×6 at 23-1/2″ – Center Drawer Boxes
- 2 – 1/4″ plywood at 19″ x 20″ – Lower Drawer Box Bottom
- 3 – 1/4″ plywood at 20″ x 25″ – Center Drawer Box Bottom
- 2 – 3/4″ plywood at 6-5/8″ x 25-3/4″ – Center Drawer Fronts
- 1 – 3/4″ plywood at 6-3/4″ x 25-3/4″ – Center Drawer Front (Bottom Drawer)
- 2 – 3/4″ plywood at 6-3/4″ x 19-3/4″ – Lower Drawer Fronts
- 4 – 3/4″ plywood at 9-13/16″ x 15″ – Doors
Notes About the Project:
- Apply edge banding to the exposed edges of the plywood prior to assembly
- Sand all pieces before assembly
- I have a great tutorial on how to install drawer slides, and another on how to install drawer fronts. Both will be extremely helpful in this project!
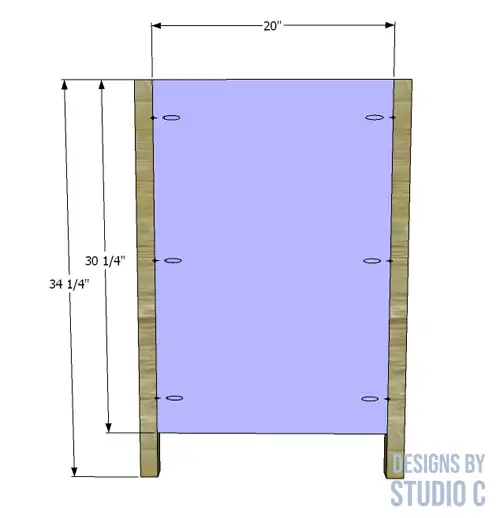
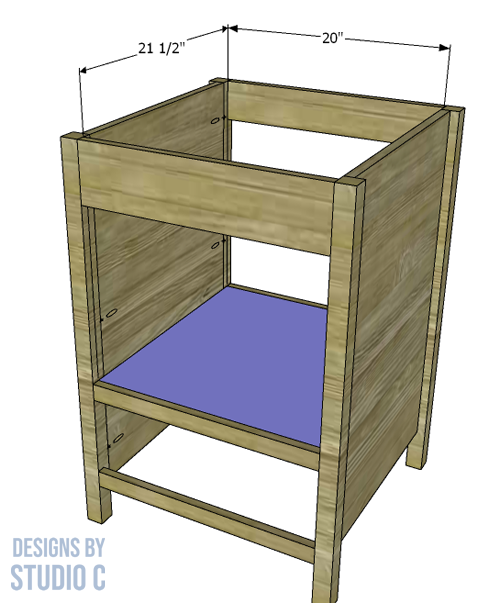
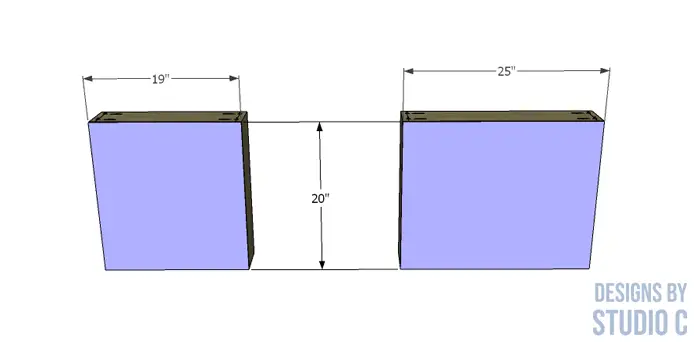
Step One
Cut the pieces for the legs and the side panels. With the pocket hole jig set for 3/4″ material, drill pocket holes in each of the long edges on the side panels. Secure the panels to the legs using glue and 1-1/4″ pocket hole screws. The inside faces of the panels (with the pocket holes) will be flush with the inside faces of the legs.
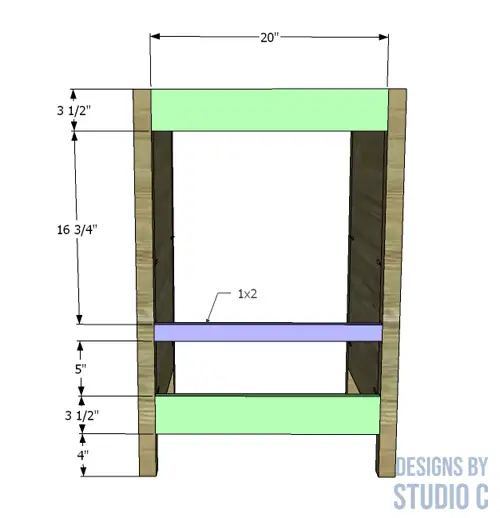
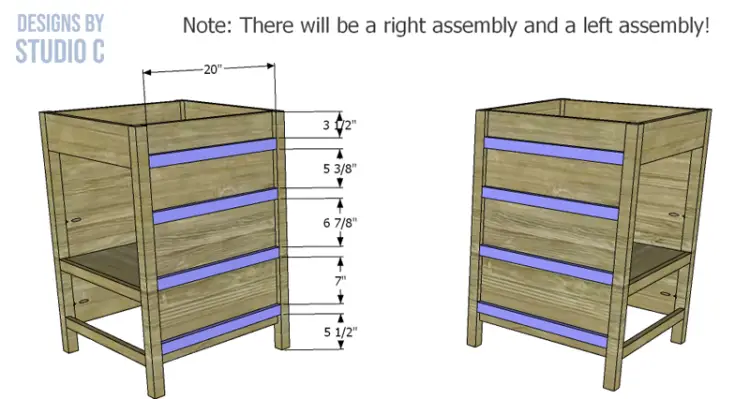
Step Two
Cut the pieces for the rear and front stretchers, and drill pocket holes in each end. Secure the stretchers to the legs, as shown in the drawings, using glue and 1-1/4″ pocket hole screws.
Step Three
Cut the pieces for the shelves and drill pocket holes in the side edges. Secure the shelves to the sides of each cabinet using glue and 1-1/4″ pocket hole screws. Use a few brad nails to secure the front edge of the shelf to the corresponding front stretcher.
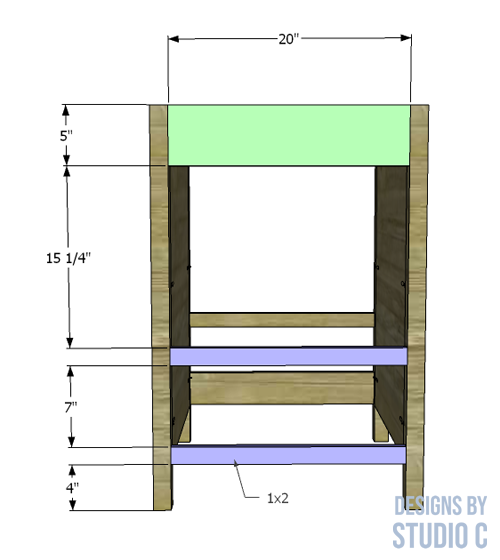
Step Four
Cut the pieces for the counter supports and drawer slide spacers. Position them on the sides of each cabinet (note: there is a right cabinet and a left cabinet!) between the legs using glue and 1-1/4″ brad nails.
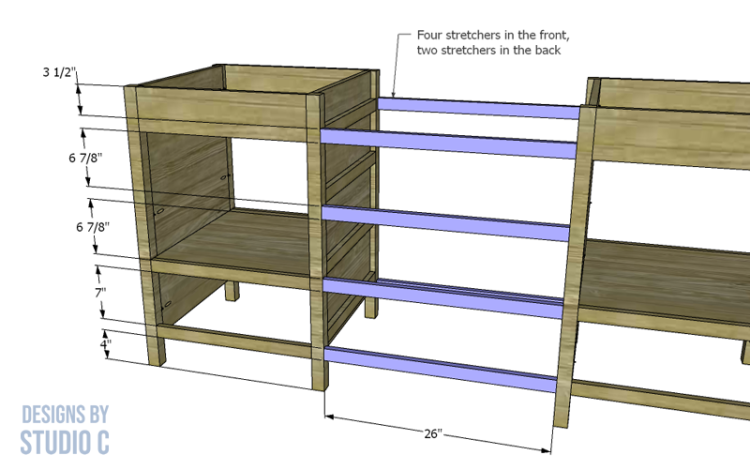
Step Five
Cut the pieces for the rear and front center stretchers, and drill pocket holes in each end. Secure the stretchers to the cabinets as shown using glue and 1-1/4″ pocket hole screws.
Step Six
Cut the pieces for the drawer boxes. Drill pocket holes in each end of the front and back pieces (the 17-1/2″ and 23-1/2″ pieces), then assemble the drawer boxes as shown.
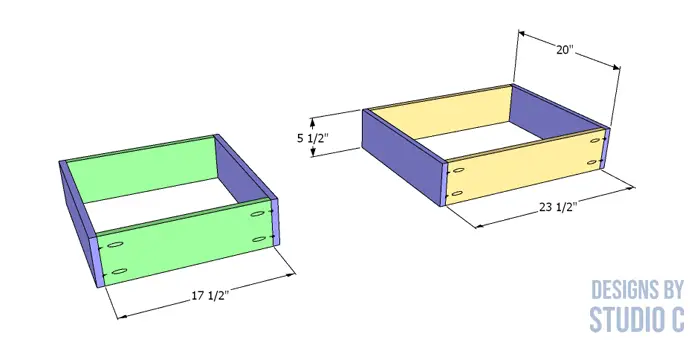
Step Seven
Cut the pieces for the drawer box bottoms. Secure the bottoms using glue and 1-1/4″ brad nails.
Install the drawer slides according to the manufacturer’s installation instructions (see the Notes section for a tutorial).
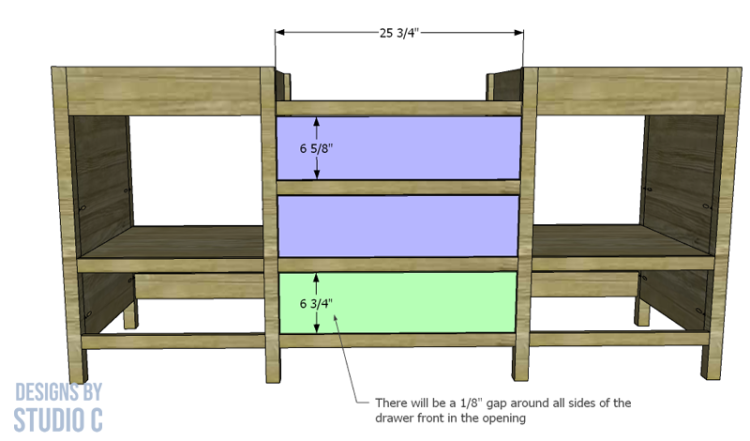
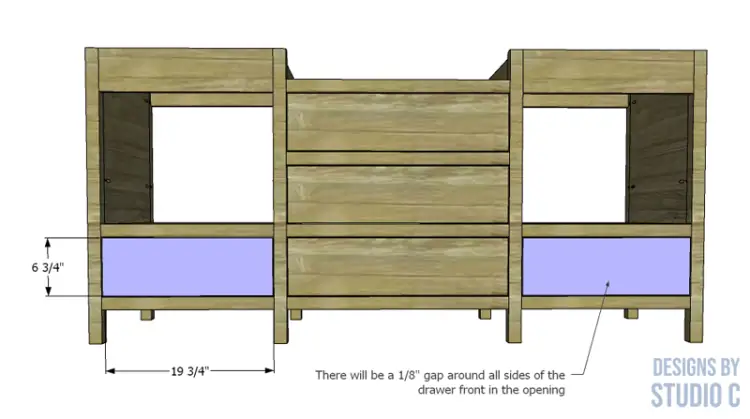
Step Eight
Cut the pieces for the center and lower drawer fronts. Install the drawer fronts by marking the position for the drawer pulls and drilling the holes. Shim the drawer front in the opening – there will be a 1/8” gap around all sides – then drive screws through the holes for the drawer pulls into the drawer box. Open the drawer, and secure the drawer front using countersunk 1-1/4” screws from the inside. Remove the screws from the holes for the drawer pull then finish drilling the holes. Install the drawer pull. (See the Notes section for another tutorial!)
Note that the bottom center drawer front is slightly taller than the two above.
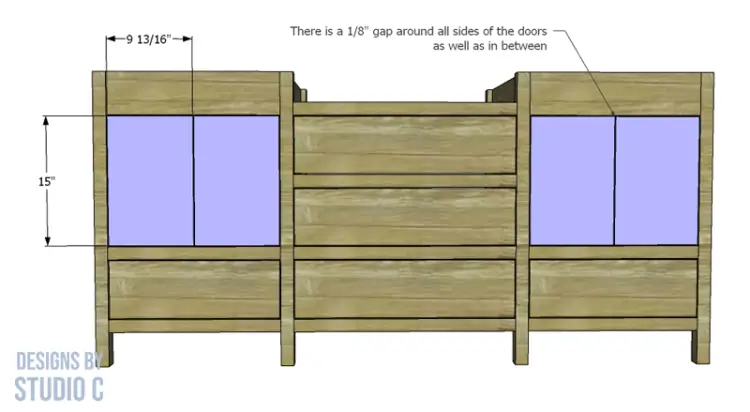
Step Nine
Cut the pieces for the doors. Install the hinges on the doors, then install the doors in the openings with a 1/8″ gap around all sides. A cabinet hinge jig (<– affiliate link!) is very helpful for this project!
Finish as desired!
Have questions about the plans to build a Royal double sink bath vanity? Leave a comment below!


Comments are closed.